FS726T User Manual
Page 3
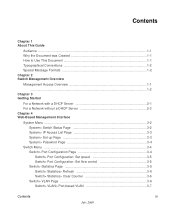
... 2-1 For a Network without a DHCP Server 2-3 Chapter 4 Web-Based Management Interface System Menu ...3-2 System> Switch Status Page 3-2 System> IP Access List Page 3-3 System> Set-up Page 3-3 System> Password Page 3-4 Switch Menu ...3-4 Switch> Port Configuration Page 3-4 Switch> Port Configuration: Set speed 3-5 Switch> Port Configuration: Set flow control 3-5 Switch> Statistics Page 3-5 Switch> Statistics> Refresh 3-6 Switch> Statistics> Clear Counter 3-6 Switch> VLAN Page 3-6 Switch> VLAN> Port-based VLAN 3-7 Contents iii July 2005
... 2-1 For a Network without a DHCP Server 2-3 Chapter 4 Web-Based Management Interface System Menu ...3-2 System> Switch Status Page 3-2 System> IP Access List Page 3-3 System> Set-up Page 3-3 System> Password Page 3-4 Switch Menu ...3-4 Switch> Port Configuration Page 3-4 Switch> Port Configuration: Set speed 3-5 Switch> Port Configuration: Set flow control 3-5 Switch> Statistics Page 3-5 Switch> Statistics> Refresh 3-6 Switch> Statistics> Clear Counter 3-6 Switch> VLAN Page 3-6 Switch> VLAN> Port-based VLAN 3-7 Contents iii July 2005

FS726T User Manual
Page 4
...> Jumbo Frame 3-10 Switch> Advanced> Spanning Tree Page 3-11 Switch> Advanced> SNMP 3-11 Firmware Menu ...3-12 Firmware> Configuration Backup Page 3-12 Firmware> Factory Reset Page 3-12 Logout ...3-13 Chapter 5 Software Upgrade Appendix A Default Settings Appendix B IEEE 802.1Q Virtual Local Area Network (VLAN) IEEE 802.1Q VLANs ...A-2 Appendix C Port-Based VLAN Port-based VLANs ...A-1 Example...
...> Jumbo Frame 3-10 Switch> Advanced> Spanning Tree Page 3-11 Switch> Advanced> SNMP 3-11 Firmware Menu ...3-12 Firmware> Configuration Backup Page 3-12 Firmware> Factory Reset Page 3-12 Logout ...3-13 Chapter 5 Software Upgrade Appendix A Default Settings Appendix B IEEE 802.1Q Virtual Local Area Network (VLAN) IEEE 802.1Q VLANs ...A-2 Appendix C Port-Based VLAN Port-based VLANs ...A-1 Example...
FS726T User Manual
Page 7
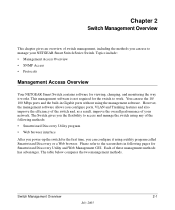
However, the management software allows you configure ports, VLAN and Trunking features and also improve the efficiency of the switch and, as a result, improve the overall performance of your NETGEAR Smart Switch Series Switch. The table below compares the two management methods. Each of these management methods has advantages. This management software is not required for the...
However, the management software allows you configure ports, VLAN and Trunking features and also improve the efficiency of the switch and, as a result, improve the overall performance of your NETGEAR Smart Switch Series Switch. The table below compares the two management methods. Each of these management methods has advantages. This management software is not required for the...
FS726T User Manual
Page 16
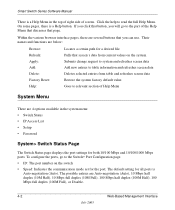
...4 options available in the top of right side of the Help Menu that discusses that you will go to the Switch> Port Configuration page. • ID: The port number on the system Submits change request to system and refreshes screen data Add new entries to read the full Help ...Software Manual There is a Help Menu in the system menu: • Switch Status • IP Access List • Setup • Password System> Switch Status Page The Switch Status page displays the port settings for the port. To configure the ports, go to the part of screen. If you click that screen's data...
...4 options available in the top of right side of the Help Menu that discusses that you will go to the Switch> Port Configuration page. • ID: The port number on the system Submits change request to system and refreshes screen data Add new entries to read the full Help ...Software Manual There is a Help Menu in the system menu: • Switch Status • IP Access List • Setup • Password System> Switch Status Page The Switch Status page displays the port settings for the port. To configure the ports, go to the part of screen. If you click that screen's data...

FS726T User Manual
Page 17
... the port. Note: Once this new IP access is enabled, you are allowed to the Switch> Trunking page. The default setting is all groups disabled. By using this Switch. Smart Switch Series Software Manual • Flow Control: Indicates whether Flow Control support is set for on the same switch into separate broadcast domains. To configure user...
... the port. Note: Once this new IP access is enabled, you are allowed to the Switch> Trunking page. The default setting is all groups disabled. By using this Switch. Smart Switch Series Software Manual • Flow Control: Indicates whether Flow Control support is set for on the same switch into separate broadcast domains. To configure user...
FS726T User Manual
Page 18
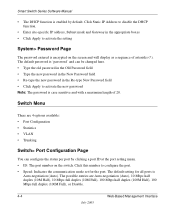
...-type New Password field • Click Apply to activate the new password Note: The password is encrypted on the switch. The possible entries are 4 options available: • Port Configuration • Statistics • VLAN • Trunking Switch> Port Configuration Page You can be changed here. • Type the old password in the Old Password field • Type...
...-type New Password field • Click Apply to activate the new password Note: The password is encrypted on the switch. The possible entries are 4 options available: • Port Configuration • Statistics • VLAN • Trunking Switch> Port Configuration Page You can be changed here. • Type the old password in the Old Password field • Type...
FS726T User Manual
Page 19
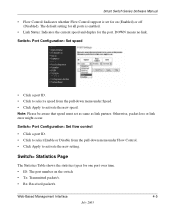
Otherwise, packet loss or link error might occur. Switch> Statistics Page The Statistics Table shows the statistics types for one port over time. • ID: The port number on (Enabled) or off (Disabled). Switch> Port Configuration: Set speed • Click a port ID. • Click to select a speed from the ...Note: Please be aware that speed must set for the port. The default setting for all ports is set as same as link partner. Web-Based Management Interface 4-5 July 2005 Switch> Port Configuration: Set flow control • Click a port ID. • Click to select Enable or Disable ...
Otherwise, packet loss or link error might occur. Switch> Statistics Page The Statistics Table shows the statistics types for one port over time. • ID: The port number on (Enabled) or off (Disabled). Switch> Port Configuration: Set speed • Click a port ID. • Click to select a speed from the ...Note: Please be aware that speed must set for the port. The default setting for all ports is set as same as link partner. Web-Based Management Interface 4-5 July 2005 Switch> Port Configuration: Set flow control • Click a port ID. • Click to select Enable or Disable ...
FS726T User Manual
Page 25
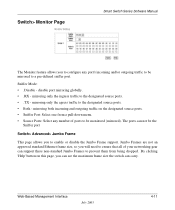
... outgoing traffic on this page, you can see the maximum frame size the switch can carry. Switch> Monitor Page Smart Switch Series Software Manual The Monitor feature allows you to configure any number of your networking gear can not be the Sniffer port Switch> Advanced> Jumbo Frame This page allows you to enable or disable the...
... outgoing traffic on this page, you can see the maximum frame size the switch can carry. Switch> Monitor Page Smart Switch Series Software Manual The Monitor feature allows you to configure any number of your networking gear can not be the Sniffer port Switch> Advanced> Jumbo Frame This page allows you to enable or disable the...
FS726T User Manual
Page 26
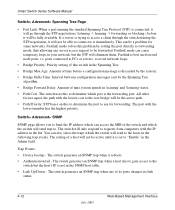
...: Amount of time system spends in 'learning' and 'listening' states. • Path Cost: The switch uses this to the switch but the STP will eliminate them. ports connected to PCs or servers, to avoid network loops. • Bridge Priority: Priority setting of this to... through the STP negotiation ( listening -> learning -> forwarding or blocking ) before a configuration message is discarded by the system. • Bridge Hello Time: Interval between configuration messages sent by setting the port directly to forwarding mode, thus allowing any server access request to be active until it...
...: Amount of time system spends in 'learning' and 'listening' states. • Path Cost: The switch uses this to the switch but the STP will eliminate them. ports connected to PCs or servers, to avoid network loops. • Bridge Priority: Priority setting of this to... through the STP negotiation ( listening -> learning -> forwarding or blocking ) before a configuration message is discarded by the system. • Bridge Hello Time: Interval between configuration messages sent by setting the port directly to forwarding mode, thus allowing any server access request to be active until it...

FS726T User Manual
Page 32
... ID tag number. • If the port in which it will handle Tagged and Untagged traffic. 1. Configure the VLAN membership. Be sure to set all possible scenarios for a given port means that packets leaving the switch from that port will be Untagged. Each port has a default VLAN ID setting that port's VLAN membership properties. The example given...
... ID tag number. • If the port in which it will handle Tagged and Untagged traffic. 1. Configure the VLAN membership. Be sure to set all possible scenarios for a given port means that packets leaving the switch from that port will be Untagged. Each port has a default VLAN ID setting that port's VLAN membership properties. The example given...
FS726T User Manual
Page 35
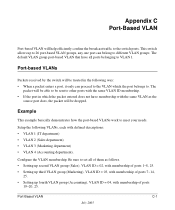
... help efficiently confine the broadcast traffic to VLAN 1. Be sure to set all ports belonging to the switch ports. Configure the VLAN membership. Appendix C Port-Based VLAN Port-based VLAN will be dropped. This switch allows up fourth VLAN group (Accounting), VLAN ID = 04, with defined descriptions: • VLAN 1 (IT department) • VLAN 2 (Sales department) • VLAN...
... help efficiently confine the broadcast traffic to VLAN 1. Be sure to set all ports belonging to the switch ports. Configure the VLAN membership. Appendix C Port-Based VLAN Port-based VLAN will be dropped. This switch allows up fourth VLAN group (Accounting), VLAN ID = 04, with defined descriptions: • VLAN 1 (IT department) • VLAN 2 (Sales department) • VLAN...

FS726T User Manual
Page 39
... implemented internally as media-dependent interfaces with built-in the device. Smart Switch Series Software Manual Table-D-1. Most repeaters and switch ports are usually media-dependent interface ports, called MDI-X or normal ports. Electrical Requirements of Category 5 Cable SPECIFICATIONS Number of pairs Impedance Mutual ...device must be connected to the receiver of the circuitry in crossover ports, called MDI or uplink ports. The crossover function is needed and makes the right connection. Computers and workstation adapter cards are configured as part of the other device.
... implemented internally as media-dependent interfaces with built-in the device. Smart Switch Series Software Manual Table-D-1. Most repeaters and switch ports are usually media-dependent interface ports, called MDI-X or normal ports. Electrical Requirements of Category 5 Cable SPECIFICATIONS Number of pairs Impedance Mutual ...device must be connected to the receiver of the circuitry in crossover ports, called MDI or uplink ports. The crossover function is needed and makes the right connection. Computers and workstation adapter cards are configured as part of the other device.
FS726T User Manual
Page 45
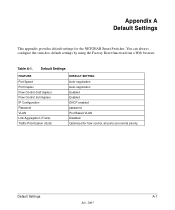
... Flow Control (half duplex) Flow Control (full duplex) IP Configuration Password VLAN Link Aggregation (Trunk) Traffic Prioritization (QoS) DEFAULT SETTING Auto-negotiation Auto-negotiation Enabled Enabled DHCP enabled password Port-Based VLAN Disabled Optimized for the NETGEAR Smart Switches. You can always configure the switch to default settings by using the Factory Reset function from a Web...
... Flow Control (half duplex) Flow Control (full duplex) IP Configuration Password VLAN Link Aggregation (Trunk) Traffic Prioritization (QoS) DEFAULT SETTING Auto-negotiation Auto-negotiation Enabled Enabled DHCP enabled password Port-Based VLAN Disabled Optimized for the NETGEAR Smart Switches. You can always configure the switch to default settings by using the Factory Reset function from a Web...
FS726T User Manual
Page 47
....1x Port-Based Authentication 3-16, 4-25 A Address Aging 3-26 Admin field 3-9 Advanced Security 3-16, 4-20, 4-25 Advanced Tools 4-21 Advanced> Spanning Tree 4-35 Advanced Options 4-19 Advantages of VLANs A-1 Auto MDI/MDI-X D-2 Auto Uplink D-2 B Bridge Priority 3-24 Broadcast Control 3-21, 4-21 C Cat5 cable D-2 Class of Service 4-21 CLI Configure 5-13 CLI Configure Aging...
....1x Port-Based Authentication 3-16, 4-25 A Address Aging 3-26 Admin field 3-9 Advanced Security 3-16, 4-20, 4-25 Advanced Tools 4-21 Advanced> Spanning Tree 4-35 Advanced Options 4-19 Advantages of VLANs A-1 Auto MDI/MDI-X D-2 Auto Uplink D-2 B Bridge Priority 3-24 Broadcast Control 3-21, 4-21 C Cat5 cable D-2 Class of Service 4-21 CLI Configure 5-13 CLI Configure Aging...
FS726T User Manual
Page 48
... Restore 5-30 CLI Configure System Save 5-30 CLI Configure System Stat-Reset 5-34 CLI Configure System Username 5-31 CLI Configure System Web 5-30 CLI Configure Trap 5-25 CLI Exit 5-3 CLI Help 5-2 CLI Manual Syntax 5-1 CLI Ping 5-2 CLI Show 5-3 CLI Show DiffServ 5-4 CLI ...CLI Show VLAN 5-11, 5-12, 5-34 CLI Show VLAN Brief 5-11 CLI Show VLAN COS-PVID 5-12 CMI 3-3 COM Port Selection 3-2 Command Menu Interface 3-3 Configuration Manager 4-30 console port 3-1 conventions typography 1-2 Cost 3-25, 4-37 crossover cable D-2 2 D Device Reset 4-18 Differentiated Service 3-20 Differentiated Service Code ...
... Restore 5-30 CLI Configure System Save 5-30 CLI Configure System Stat-Reset 5-34 CLI Configure System Username 5-31 CLI Configure System Web 5-30 CLI Configure Trap 5-25 CLI Exit 5-3 CLI Help 5-2 CLI Manual Syntax 5-1 CLI Ping 5-2 CLI Show 5-3 CLI Show DiffServ 5-4 CLI ...CLI Show VLAN 5-11, 5-12, 5-34 CLI Show VLAN Brief 5-11 CLI Show VLAN COS-PVID 5-12 CMI 3-3 COM Port Selection 3-2 Command Menu Interface 3-3 Configuration Manager 4-30 console port 3-1 conventions typography 1-2 Cost 3-25, 4-37 crossover cable D-2 2 D Device Reset 4-18 Differentiated Service 3-20 Differentiated Service Code ...
FS726T User Manual
Page 49
... 4-6 Outbound Non-unicast Packets 4-6 Outbound Octet Rate 4-5 Outbound Octets 4-6 Outbound Unicast Packet Rate 4-5 Outbound Unicast Packets 4-6 P Passwords 4-18 Port Configuration 3-9, 4-14 Port Mirroring 3-14, 4-20, 4-22 Port Priority 3-20 Port Selection 4-8 Port Settings 4-10 Port Trunking 3-15, 4-20 Port Trunking 4-23 Primary VLAN 4-33 Priority 3-25, 4-37 Product updates 1-2 R RADIUS 4-20 Rate/Duplex field 3-9 Refresh Rate 4-8 Restore Factory...
... 4-6 Outbound Non-unicast Packets 4-6 Outbound Octet Rate 4-5 Outbound Octets 4-6 Outbound Unicast Packet Rate 4-5 Outbound Unicast Packets 4-6 P Passwords 4-18 Port Configuration 3-9, 4-14 Port Mirroring 3-14, 4-20, 4-22 Port Priority 3-20 Port Selection 4-8 Port Settings 4-10 Port Trunking 3-15, 4-20 Port Trunking 4-23 Primary VLAN 4-33 Priority 3-25, 4-37 Product updates 1-2 R RADIUS 4-20 Rate/Duplex field 3-9 Refresh Rate 4-8 Restore Factory...

FS726T User Manual
Page 50
... 3-5, 4-8 Statistics Rest 3-6 STP 4-21 Support for Standard MIBs 3-29, 4-40 Switch Statistics 4-5 System Configuration 4-12 system tools 3-11 T TIP 3-2 Tools Menu 4-16 Traffic Management 3-19, 4-21, 4-31 typographical conventions 1-2 V Virtual Cable Tester 3-15, 4-20, 4-23 Virtual Terminal Protocols 1-3 VLAN 4-21, A-1 VLAN Port 4-34 VLAN Ports 3-22 VLANS 4-32 W Web Based Management 4-2 Web site 1-2 4 Why...
... 3-5, 4-8 Statistics Rest 3-6 STP 4-21 Support for Standard MIBs 3-29, 4-40 Switch Statistics 4-5 System Configuration 4-12 system tools 3-11 T TIP 3-2 Tools Menu 4-16 Traffic Management 3-19, 4-21, 4-31 typographical conventions 1-2 V Virtual Cable Tester 3-15, 4-20, 4-23 Virtual Terminal Protocols 1-3 VLAN 4-21, A-1 VLAN Port 4-34 VLAN Ports 3-22 VLANS 4-32 W Web Based Management 4-2 Web site 1-2 4 Why...

GS716Tv2/GS724Tv3 Hardware manual
Page 3
... History ...vi Chapter 1 Introduction Overview ...1-1 Features ...1-2 Package Contents ...1-3 Chapter 2 Physical Description GS716T Front and Back Panel Configuration 2-5 GS724T Front and Back Panel Configuration 2-6 LED Designations ...2-7 Port LEDs ...2-7 System LEDs ...2-8 Device Hardware Interfaces 2-8 RJ-45 Ports ...2-8 SFP GBIC Module ...2-9 Factory Defaults Button 2-9 Chapter 3 Applications Desktop Switching ...3-11 Chapter 4 Installation Step 1: Preparing the Site 4-13 Step 2: Installing the...
... History ...vi Chapter 1 Introduction Overview ...1-1 Features ...1-2 Package Contents ...1-3 Chapter 2 Physical Description GS716T Front and Back Panel Configuration 2-5 GS724T Front and Back Panel Configuration 2-6 LED Designations ...2-7 Port LEDs ...2-7 System LEDs ...2-8 Device Hardware Interfaces 2-8 RJ-45 Ports ...2-8 SFP GBIC Module ...2-9 Factory Defaults Button 2-9 Chapter 3 Applications Desktop Switching ...3-11 Chapter 4 Installation Step 1: Preparing the Site 4-13 Step 2: Installing the...

GS716Tv2/GS724Tv3 Hardware manual
Page 15
...accommodate standard SFP GBIC modules, such as when connecting the port to a router, switch, or hub). • Configures the RJ-45 port to enable communications with an RJ-45 port. The module bay is a combo port, sharing a connection with the attached device, without requiring ...configuration and return the device to its factory settings. GS716T/GS724T Hardware Installation Guide • Determines whether the link to the attached device requires a "normal" connection (such as when connecting the port to a PC) or an "uplink" connection (such as the AGM731F, AGM732F, or AGM733 from NETGEAR...
...accommodate standard SFP GBIC modules, such as when connecting the port to a router, switch, or hub). • Configures the RJ-45 port to enable communications with an RJ-45 port. The module bay is a combo port, sharing a connection with the attached device, without requiring ...configuration and return the device to its factory settings. GS716T/GS724T Hardware Installation Guide • Determines whether the link to the attached device requires a "normal" connection (such as when connecting the port to a PC) or an "uplink" connection (such as the AGM731F, AGM732F, or AGM733 from NETGEAR...
GS724Tv2 Hardware manual
Page 10
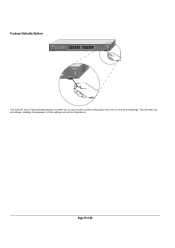
This will clear out all settings, including the password, VLAN settings and port configurations. Factory Defaults Button The GS724T has a Factory Default Button to enable you to clear out the current configuration and return to the factory settings. Page 10 of 20
This will clear out all settings, including the password, VLAN settings and port configurations. Factory Defaults Button The GS724T has a Factory Default Button to enable you to clear out the current configuration and return to the factory settings. Page 10 of 20


