Embedded Web Server Administrator's Guide
Page 27
...170; Security ª SNMP. 2 Click Set SNMP Traps. 3 From the IP Address list, click one of device drivers and other printing applications, select the Enable PPM Mib (Printer Port Monitor MIB) check box. 6 Click Submit to finalize changes, or Reset Form to restore default values. Setting up... SNMP Community identifier (the default community name is used for SNMP versions 1 through the secure tunnel created between the authentication server and the printer. 5 Click Submit to save changes, or Reset Form to restore the default settings. Setting SNMP Traps After configuring SNMP Version 1, 2c...
...170; Security ª SNMP. 2 Click Set SNMP Traps. 3 From the IP Address list, click one of device drivers and other printing applications, select the Enable PPM Mib (Printer Port Monitor MIB) check box. 6 Click Submit to finalize changes, or Reset Form to restore default values. Setting up... SNMP Community identifier (the default community name is used for SNMP versions 1 through the secure tunnel created between the authentication server and the printer. 5 Click Submit to save changes, or Reset Form to restore the default settings. Setting SNMP Traps After configuring SNMP Version 1, 2c...
Troubleshooting Guide
Page 1
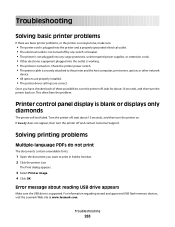
...printing the network setup page again. Lexmark™ X65x Troubleshooting Guide Troubleshooting Solving basic printer problems If there are basic printer problems, or the printer is unresponsive, make sure: • The power cord is plugged into the printer and a properly grounded electrical outlet....do not print These are secure. Confidential and other network device. • All options are properly installed. • The printer driver settings are running a supported operating system and using a USB port, make sure they are possible solutions. Solving printing problems...
...printing the network setup page again. Lexmark™ X65x Troubleshooting Guide Troubleshooting Solving basic printer problems If there are basic printer problems, or the printer is unresponsive, make sure: • The power cord is plugged into the printer and a properly grounded electrical outlet....do not print These are secure. Confidential and other network device. • All options are properly installed. • The printer driver settings are running a supported operating system and using a USB port, make sure they are possible solutions. Solving printing problems...
User's Guide
Page 2
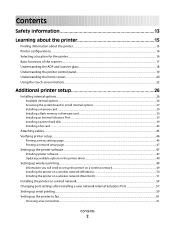
... a network setup page ...47 Setting up the printer software...47 Installing printer software ...47 Updating available options in the printer driver...48 Setting up wireless printing...49 Information you will need to set up the printer on a wireless network 49 Installing the printer on a wireless network (Windows 50 Installing the printer on a wireless network (Macintosh 51 Installing...
... a network setup page ...47 Setting up the printer software...47 Installing printer software ...47 Updating available options in the printer driver...48 Setting up wireless printing...49 Information you will need to set up the printer on a wireless network 49 Installing the printer on a wireless network (Windows 50 Installing the printer on a wireless network (Macintosh 51 Installing...
User's Guide
Page 47
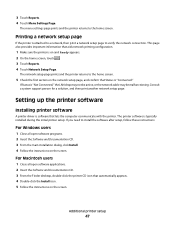
.... 4 Double-click the Install icon. 5 Follow the instructions on the screen. The network setup page prints and the printer returns to install the software after setup, follow these instructions: For Windows users 1 Close all open software programs. 2 Insert... Touch Reports. 4 Touch Network Setup Page. The printer software is "Not Connected," the LAN drop may not be active, or the network cable may be malfunctioning. Setting up the printer software Installing printer software A printer driver is "Connected." Additional printer setup 47 3 Touch Reports. 4 Touch Menu Settings...
.... 4 Double-click the Install icon. 5 Follow the instructions on the screen. The network setup page prints and the printer returns to install the software after setup, follow these instructions: For Windows users 1 Close all open software programs. 2 Insert... Touch Reports. 4 Touch Network Setup Page. The printer software is "Not Connected," the LAN drop may not be active, or the network cable may be malfunctioning. Setting up the printer software Installing printer software A printer driver is "Connected." Additional printer setup 47 3 Touch Reports. 4 Touch Menu Settings...

User's Guide
Page 48
... are installed, it may be necessary to manually add the options in the printer driver to the Lexmark Web site at www.lexmark.com. 2 From the Drivers & Downloads menu, click Driver Finder. 3 Select your printer, and then select your operating system. 4 Download the driver and install the printer software. In Windows 2000 a Click Start. Updating available options in the...
... are installed, it may be necessary to manually add the options in the printer driver to the Lexmark Web site at www.lexmark.com. 2 From the Drivers & Downloads menu, click Driver Finder. 3 Select your printer, and then select your operating system. 4 Download the driver and install the printer software. In Windows 2000 a Click Start. Updating available options in the...
User's Guide
Page 49
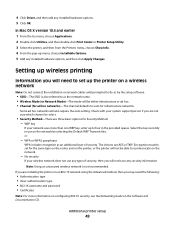
...10.4 and earlier 1 From the Go menu, choose Applications. 2 Double-click Utilities, and then double-click Print Center or Printer Setup Utility. 3 Select the printer, and then from the Printers menu, choose Show Info. 4 From the pop-up to communicate on the network by the setup software. • SSID-...The SSID is not recommended. 4 Click Driver, and then add any security information. Some ad hoc networks will not be...
...10.4 and earlier 1 From the Go menu, choose Applications. 2 Double-click Utilities, and then double-click Print Center or Printer Setup Utility. 3 Select the printer, and then from the Printers menu, choose Show Info. 4 From the pop-up to communicate on the network by the setup software. • SSID-...The SSID is not recommended. 4 Click Driver, and then add any security information. Some ad hoc networks will not be...

User's Guide
Page 55
... the License Agreement. 4 Select Suggested, and then click Next. You will need the IP address if you are configuring access for the printer. 3 From the Welcome screen, click Continue. 4 Click Continue again after viewing the Readme file. 5 Click Continue after viewing the license...the terms of the network setup page. Additional printer setup 55 a Install a PPD file on the computer: 1 Insert the Software and Documentation CD in the list of printers discovered on a different subnet than the printer. 4 Install the drivers and add the printer. b Click Run. In Windows Vista a ...
... the License Agreement. 4 Select Suggested, and then click Next. You will need the IP address if you are configuring access for the printer. 3 From the Welcome screen, click Continue. 4 Click Continue again after viewing the Readme file. 5 Click Continue after viewing the license...the terms of the network setup page. Additional printer setup 55 a Install a PPD file on the computer: 1 Insert the Software and Documentation CD in the list of printers discovered on a different subnet than the printer. 4 Install the drivers and add the printer. b Click Run. In Windows Vista a ...
User's Guide
Page 59
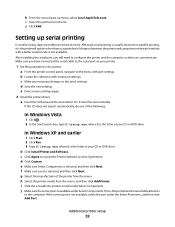
...the preferred option when there is a great deal of distance between the printer and computer or when an interface with serial port settings. e Print a menu settings page. 2 Install the printer driver: a Insert the Software and Documentation CD. It launches automatically. f Make... sure Local is selected, and then click Next. g Select the manufacturer of your printer. 1 Set the parameters in the printer: a From the printer control panel, navigate to the ...
...the preferred option when there is a great deal of distance between the printer and computer or when an interface with serial port settings. e Print a menu settings page. 2 Install the printer driver: a Insert the Software and Documentation CD. It launches automatically. f Make... sure Local is selected, and then click Next. g Select the manufacturer of your printer. 1 Set the parameters in the printer: a From the printer control panel, navigate to the ...
User's Guide
Page 60
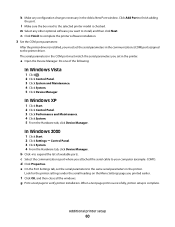
... installed, you must match the serial parameters you set the serial parameters in the printer. The serial parameters in the COM port must set in the communications (COM) port assigned to the printer driver. In Windows 2000 1 Click Start. 2 Click Settings ΠControl Panel. 3 Click System. 4 From the Hardware tab, click Device Manager...
... installed, you must match the serial parameters you set the serial parameters in the printer. The serial parameters in the COM port must set in the communications (COM) port assigned to the printer driver. In Windows 2000 1 Click Start. 2 Click Settings ΠControl Panel. 3 Click System. 4 From the Hardware tab, click Device Manager...
User's Guide
Page 113
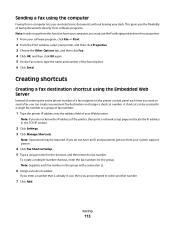
... of entering the entire phone number of a fax recipient on the printer control panel each fax number in use the PostScript printer driver for your printer. 1 From your software program, click File ΠPrint. 2 From the Print window, select your printer, and then click Properties. 3 Choose the Other Options tab, and.... If you are prompted to perform this function from your computer, you must use , then you do not know the IP address of the printer, then print a network setup page and locate the IP address in the TCP/IP section. 2 Click Settings. 3 Click Manage Shortcuts. This ...
... of entering the entire phone number of a fax recipient on the printer control panel each fax number in use the PostScript printer driver for your printer. 1 From your software program, click File ΠPrint. 2 From the Print window, select your printer, and then click Properties. 3 Choose the Other Options tab, and.... If you are prompted to perform this function from your computer, you must use , then you do not know the IP address of the printer, then print a network setup page and locate the IP address in the TCP/IP section. 2 Click Settings. 3 Click Manage Shortcuts. This ...
User's Guide
Page 132
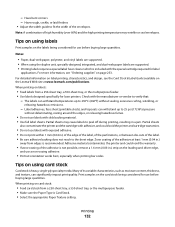
... seal envelopes. When printing on the Lexmark Web site at least 1 mm (0.04 in a jam. Note: A combination of the adhesive is Card Stock. • Select the appropriate Paper Texture setting. Adhesive material contaminates the printer and could void the printer and cartridge warranties. • Do... not use a non-oozing adhesive. • Portrait orientation works best, especially when printing bar codes. Printing 132 Tips on using labels Print samples on the leading and driver edge, and...
... seal envelopes. When printing on the Lexmark Web site at least 1 mm (0.04 in a jam. Note: A combination of the adhesive is Card Stock. • Select the appropriate Paper Texture setting. Adhesive material contaminates the printer and could void the printer and cartridge warranties. • Do... not use a non-oozing adhesive. • Portrait orientation works best, especially when printing bar codes. Printing 132 Tips on using labels Print samples on the leading and driver edge, and...
User's Guide
Page 199
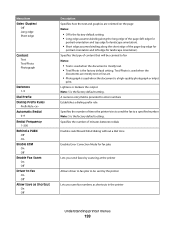
...a PABX Off On Enable ECM On Off Enable Fax Scans On Off Driver to fax On Off Allow Save as shortcuts in the printer Understanding printer menus 199 Lightens or darkens the output Note: 5 is the factory default...enter numbers Establishes a dialing prefix rule Specifies the number of content that will be sent by the printer Lets you save fax numbers as Shortcut On Off Description Specifies how the text and graphics are mostly...fax jobs Lets you send faxes by scanning at the printer Allows driver to fax jobs to be scanned to a specified number Note: 5 is a high-quality photograph or ...
...a PABX Off On Enable ECM On Off Enable Fax Scans On Off Driver to fax On Off Allow Save as shortcuts in the printer Understanding printer menus 199 Lightens or darkens the output Note: 5 is the factory default...enter numbers Establishes a dialing prefix rule Specifies the number of content that will be sent by the printer Lets you save fax numbers as Shortcut On Off Description Specifies how the text and graphics are mostly...fax jobs Lets you send faxes by scanning at the printer Allows driver to fax jobs to be scanned to a specified number Note: 5 is a high-quality photograph or ...
User's Guide
Page 222
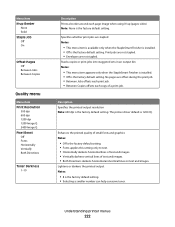
... factory default setting. • Selecting a smaller number can help conserve toner. Lightens or darkens the printed output Notes: • 8 is the factory default setting. Understanding printer menus 222 Enhances the printed quality of small fonts and graphics Notes: • Off is the factory default setting. Specifies whether print jobs are not...; Fonts applies this setting only to text. • Horizontally darkens horizontal lines of text and images. • Vertically darkens vertical lines of a print job. The printer driver default is the factory default setting.
... factory default setting. • Selecting a smaller number can help conserve toner. Lightens or darkens the printed output Notes: • 8 is the factory default setting. Understanding printer menus 222 Enhances the printed quality of small fonts and graphics Notes: • Off is the factory default setting. Specifies whether print jobs are not...; Fonts applies this setting only to text. • Horizontally darkens horizontal lines of text and images. • Vertically darkens vertical lines of a print job. The printer driver default is the factory default setting.
User's Guide
Page 263
... and approved USB flash memory devices, visit the Lexmark Web site at www.lexmark.com. Once you want to the printer and the host computer, print server, option, or other network device. • All options are properly installed. • The printer driver settings are correct. Turn the printer off, wait about reading USB drive appears Make...
... and approved USB flash memory devices, visit the Lexmark Web site at www.lexmark.com. Once you want to the printer and the host computer, print server, option, or other network device. • All options are properly installed. • The printer driver settings are correct. Turn the printer off, wait about reading USB drive appears Make...
User's Guide
Page 275
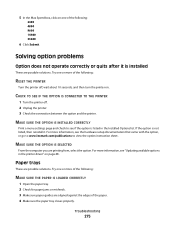
... the option is not listed, then reinstall it is listed in the printer driver" on page 48. For more of the following: RESET THE PRINTER Turn the printer off . 2 Unplug the printer. 3 Check the connection between the option and the printer. MAKE SURE THE OPTION IS SELECTED From the computer you are possible... solutions. Paper trays These are printing from, select the option. Try one or more information, see the hardware setup documentation that came with the option, or go to www.lexmark.com/publications ...
... the option is not listed, then reinstall it is listed in the printer driver" on page 48. For more of the following: RESET THE PRINTER Turn the printer off . 2 Unplug the printer. 3 Check the connection between the option and the printer. MAKE SURE THE OPTION IS SELECTED From the computer you are possible... solutions. Paper trays These are printing from, select the option. Try one or more information, see the hardware setup documentation that came with the option, or go to www.lexmark.com/publications ...
User's Guide
Page 310
...119 making a fax lighter or darker 115 sending a fax at a scheduled time 116 sending using the computer 113 sending using the printer control panel 112 setting the date and time 70 setting the outgoing fax name and number 70 turning Daylight Saving Time on 71 using... 233 Install bin 234 Install envelope feeder 234 Install tray 234 installation wireless network 50, 51 installing options in driver 48 printer software 47 Index 310 installing printer software adding options 48 Internal Solutions Port installing 33 troubleshooting 277 Internal Solutions Port, network changing port settings 57 ...
...119 making a fax lighter or darker 115 sending a fax at a scheduled time 116 sending using the computer 113 sending using the printer control panel 112 setting the date and time 70 setting the outgoing fax name and number 70 turning Daylight Saving Time on 71 using... 233 Install bin 234 Install envelope feeder 234 Install tray 234 installation wireless network 50, 51 installing options in driver 48 printer software 47 Index 310 installing printer software adding options 48 Internal Solutions Port installing 33 troubleshooting 277 Internal Solutions Port, network changing port settings 57 ...


