User's Guide
Page 78
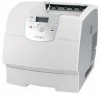
... the printer stops printing, and the Load staples message appears. Recycling Lexmark products To return Lexmark products to properly feed from the tray. Maintaining the printer See the following table for the maintenance kit part number for your Lexmark representative. Ordering pick rollers Order Lexmark part number... site at www.lexmark.com, or contact your specific printer. For information on clearing a staple jam, see the StapleSmart™ Reference that came with your finisher. If Staple Alarm is set per input tray excluding the multipurpose feeder. Install a new staple ...
... the printer stops printing, and the Load staples message appears. Recycling Lexmark products To return Lexmark products to properly feed from the tray. Maintaining the printer See the following table for the maintenance kit part number for your Lexmark representative. Ordering pick rollers Order Lexmark part number... site at www.lexmark.com, or contact your specific printer. For information on clearing a staple jam, see the StapleSmart™ Reference that came with your finisher. If Staple Alarm is set per input tray excluding the multipurpose feeder. Install a new staple ...

Service Manual
Page 82
...Disk Full This error code displays when there is marked as a maintenance kit. The parts are not allowed until the disk is formatted. 80 .xx Scheduled Maintenance The operator panel displays this interval to be downloaded. 2-42 ...printer detects a defective disk. Further disk operations are available as bad and normal operation continues. The microcode data is discarded and must be programmed in the SIMM does not function with a defective disk. For more information, go to "Scheduled maintenance" on or during disk format and write operations. Note: If the user installed...
...Disk Full This error code displays when there is marked as a maintenance kit. The parts are not allowed until the disk is formatted. 80 .xx Scheduled Maintenance The operator panel displays this interval to be downloaded. 2-42 ...printer detects a defective disk. Further disk operations are available as bad and normal operation continues. The microcode data is discarded and must be programmed in the SIMM does not function with a defective disk. For more information, go to "Scheduled maintenance" on or during disk format and write operations. Note: If the user installed...

Service Manual
Page 193
...by one and a duplex page by the servicer after a 80 Scheduled Maintenance message displays and a maintenance kit is reset by two. See "Maintenance kit" on the top line of the printer. 4061-xx0 Configuration menu (CONFIG MENU) Entering Configuration Menu 1. Turn off the printer. 2. Available menus Maint Cnt Value Reset Maint Cnt Prt Quality Pgs SIZE... Sharpening" on page 3-29 See "LCD Brightness" on page 3-29 See "LCD Contrast" on page 3-29 Some menus are not available, depending on the printer. 4. Turn on the configuration of the operator panel. This counter is installed.
...by one and a duplex page by the servicer after a 80 Scheduled Maintenance message displays and a maintenance kit is reset by two. See "Maintenance kit" on the top line of the printer. 4061-xx0 Configuration menu (CONFIG MENU) Entering Configuration Menu 1. Turn off the printer. 2. Available menus Maint Cnt Value Reset Maint Cnt Prt Quality Pgs SIZE... Sharpening" on page 3-29 See "LCD Brightness" on page 3-29 See "LCD Contrast" on page 3-29 Some menus are not available, depending on the printer. 4. Turn on the configuration of the operator panel. This counter is installed.
Service Manual
Page 405
... 7-45 service check 2-102 5-bin mailbox output sensor test 3-16 parts catalog 7-54, 7-56 service check 2-72 80 scheduled maintenance 6-1 900.xx error code service check 2-75 927.xx fan service check 2-76 950.00 through 950.29 EPROM mismatch failure ... automatic tray linking 8-17 B bevel gear installation 4-22 removal 4-21 bezel, operator panel 4-14 blower duct 7-9 Button Test 3-7 buttons accessing service menus 3-1 Button Test 3-7 description function 2-2 operator panel button removal 4-67 upper front cover including buttons 7-3 upper front panel button kit 7-3 C cable diagrams 7-34, 7-35,...
... 7-45 service check 2-102 5-bin mailbox output sensor test 3-16 parts catalog 7-54, 7-56 service check 2-72 80 scheduled maintenance 6-1 900.xx error code service check 2-75 927.xx fan service check 2-76 950.00 through 950.29 EPROM mismatch failure ... automatic tray linking 8-17 B bevel gear installation 4-22 removal 4-21 bezel, operator panel 4-14 blower duct 7-9 Button Test 3-7 buttons accessing service menus 3-1 Button Test 3-7 description function 2-2 operator panel button removal 4-67 upper front cover including buttons 7-3 upper front panel button kit 7-3 C cable diagrams 7-34, 7-35,...

Service Manual
Page 408
...tray tests 3-13 input source tests 3-6 input tray feed test 3-13 installation bevel gear 4-22 fuser assembly 4-27 fuser exit sensor 4-29 fuser... and horizontal paper adapters 7-64 L labels, guidelines 1-17 lamp, fuser 4-32 laser cover removal 4-19 left cover handle holder removal 4-16 left door removal 4-6 linking...22 removal 4-57 service check 2-105 main fan removal 4-56 maintenance ESD-sensitive parts 4-1 lubrication 6-1 maintenance kit 6-1 preventive 6-1 safety inspection guide 6-1 maintenance approach 1-1 maintenance kits 6-1 menus accessing service menus 3-1 description 2-3 printing menu page...
...tray tests 3-13 input source tests 3-6 input tray feed test 3-13 installation bevel gear 4-22 fuser assembly 4-27 fuser exit sensor 4-29 fuser... and horizontal paper adapters 7-64 L labels, guidelines 1-17 lamp, fuser 4-32 laser cover removal 4-19 left cover handle holder removal 4-16 left door removal 4-6 linking...22 removal 4-57 service check 2-105 main fan removal 4-56 maintenance ESD-sensitive parts 4-1 lubrication 6-1 maintenance kit 6-1 preventive 6-1 safety inspection guide 6-1 maintenance approach 1-1 maintenance kits 6-1 menus accessing service menus 3-1 description 2-3 printing menu page...


