Network Guide
Page 14
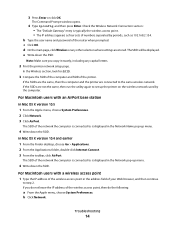
...following: a From the Apple menu, choose System Preferences. b Click Network. c Click OK. The SSID will be displayed. In Mac OS X version 10.4 and earlier 1 From the Finder desktop, choose Go > Applications. 2 From the Applications folder, double-click Internet Connect. 3 From the toolbar, click... Write down the SSID. For Macintosh users with an AirPort base station In Mac OS X version 10.5 1 From the Apple menu, choose System Preferences. 2 Click Network. 3 Click AirPort. The Command Prompt window opens. 4 Type ipconfig, and then press Enter. e Write down the SSID. 3 Press Enter...
...following: a From the Apple menu, choose System Preferences. b Click Network. c Click OK. The SSID will be displayed. In Mac OS X version 10.4 and earlier 1 From the Finder desktop, choose Go > Applications. 2 From the Applications folder, double-click Internet Connect. 3 From the toolbar, click... Write down the SSID. For Macintosh users with an AirPort base station In Mac OS X version 10.5 1 From the Apple menu, choose System Preferences. 2 Click Network. 3 Click AirPort. The Command Prompt window opens. 4 Type ipconfig, and then press Enter. e Write down the SSID. 3 Press Enter...
User's Guide
Page 2
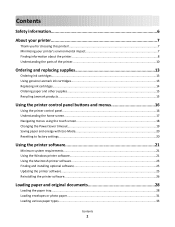
... the printer...8 Understanding the parts of the printer 10 Ordering and replacing supplies 13 Ordering ink cartridges...13 Using genuine Lexmark ink cartridges...13 Replacing ink cartridges...14 Ordering paper and other supplies...15 Recycling Lexmark products...15 Using the printer control panel buttons and...energy with Eco-Mode 20 Resetting to factory settings...20 Using the printer software 21 Minimum system requirements...21 Using the Windows printer software...21 Using the Macintosh printer software...23 Finding and installing optional software 25 Updating the printer software...25 ...
... the printer...8 Understanding the parts of the printer 10 Ordering and replacing supplies 13 Ordering ink cartridges...13 Using genuine Lexmark ink cartridges...13 Replacing ink cartridges...14 Ordering paper and other supplies...15 Recycling Lexmark products...15 Using the printer control panel buttons and...energy with Eco-Mode 20 Resetting to factory settings...20 Using the printer software 21 Minimum system requirements...21 Using the Windows printer software...21 Using the Macintosh printer software...23 Finding and installing optional software 25 Updating the printer software...25 ...
User's Guide
Page 7
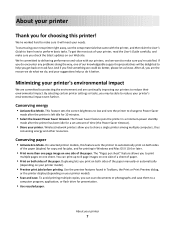
... settings or tasks, you 're satisfied. The Power Saver feature puts the printer in a minimum-power standby mode after the printer is left idle for 10 minutes. • Select the lowest Power Saver timeout. The "Pages per sheet" feature allows you print on both sides of the paper manually or automatically... this feature sets the printer to automatically print on both sides of the paper (duplex) for copy and fax jobs, and for printing in Windows and Mac OS X 10.6 or later. • Print more than one page image on one side of the paper. We've worked hard to make sure you...
... settings or tasks, you 're satisfied. The Power Saver feature puts the printer in a minimum-power standby mode after the printer is left idle for 10 minutes. • Select the lowest Power Saver timeout. The "Pages per sheet" feature allows you print on both sides of the paper manually or automatically... this feature sets the printer to automatically print on both sides of the paper (duplex) for copy and fax jobs, and for printing in Windows and Mac OS X 10.6 or later. • Print more than one page image on one side of the paper. We've worked hard to make sure you...
User's Guide
Page 20
...20 Resetting to factory settings Resetting to set the initial settings of the paper (duplex) for copy and fax jobs, and for printing in Windows. Saving paper and energy with Eco-Mode The Eco-Mode feature significantly cuts paper usage, reduces paper waste, optimizes energy efficiency, and saves ...1 From the home screen, touch . 2 Touch the Eco-Mode setting or settings you want to activate, and then touch Accept. • Power Saver after 10 Minutes • Screen Dim • 2-Sided Printing Note: If you have previously selected. 1 From the home screen, touch , and then touch Use Factory ...
...20 Resetting to factory settings Resetting to set the initial settings of the paper (duplex) for copy and fax jobs, and for printing in Windows. Saving paper and energy with Eco-Mode The Eco-Mode feature significantly cuts paper usage, reduces paper waste, optimizes energy efficiency, and saves ...1 From the home screen, touch . 2 Touch the Eco-Mode setting or settings you want to activate, and then touch Accept. • Power Saver after 10 Minutes • Screen Dim • 2-Sided Printing Note: If you have previously selected. 1 From the home screen, touch , and then touch Use Factory ...
User's Guide
Page 21
.... Supported operating systems • Microsoft Windows 7 (Web only)* • Microsoft Windows Vista (SP1) • Microsoft Windows XP (SP3) • Microsoft Windows 2000 (SP4 or later) • Macintosh PowerPC OS X version 10.3.9 to 10.6 • Macintosh Intel OS X version 10.4.4 to install some additional programs. The...• Linux openSUSE 11.1 and 11.0 (Web only)* • Linux Fedora 10 (Web only)* * The printer driver for this operating system is available only at http://support.lexmark.com. Using the printer software 21 If you did not install these additional programs...
.... Supported operating systems • Microsoft Windows 7 (Web only)* • Microsoft Windows Vista (SP1) • Microsoft Windows XP (SP3) • Microsoft Windows 2000 (SP4 or later) • Macintosh PowerPC OS X version 10.3.9 to 10.6 • Macintosh Intel OS X version 10.4.4 to install some additional programs. The...• Linux openSUSE 11.1 and 11.0 (Web only)* • Linux Fedora 10 (Web only)* * The printer driver for this operating system is available only at http://support.lexmark.com. Using the printer software 21 If you did not install these additional programs...

User's Guide
Page 25
...Navigate to : Applications > select your printer folder > Web Links > Lexmark Software Updates 2 From the Web site, select your printer and download the driver. 5 Install additional or optional software. In Mac OS X version 10.5 or earlier 1 From the Finder desktop, double-click the printer ...Install additional or optional software. Finding and installing optional software For Windows users 1 Click or Start. 2 Click All Programs or Programs, and then select the printer program folder from the list. Use Visit Lexmark SmartSolutions To • Visit the SmartSolutions Web site. •...
...Navigate to : Applications > select your printer folder > Web Links > Lexmark Software Updates 2 From the Web site, select your printer and download the driver. 5 Install additional or optional software. In Mac OS X version 10.5 or earlier 1 From the Finder desktop, double-click the printer ...Install additional or optional software. Finding and installing optional software For Windows users 1 Click or Start. 2 Click All Programs or Programs, and then select the printer program folder from the list. Use Visit Lexmark SmartSolutions To • Visit the SmartSolutions Web site. •...
User's Guide
Page 26
...removing and reinstalling the printer. Enabling automatic software updates (Windows only) 1 With a document open, click File > Print. 2 Click Properties, Preferences, Options, or Setup. 3 Navigate to : Applications > select your printer folder > Web Links > Lexmark Software Updates 2 From the Web site, select your ...Allow automatic updates from the list. 3 Select the uninstall option. 4 Follow the instructions on the computer screen. In Mac OS X version 10.5 or earlier 1 From the Finder desktop, double-click the printer folder. 2 Double-click the Printer Utility icon. 3 From the Web...
...removing and reinstalling the printer. Enabling automatic software updates (Windows only) 1 With a document open, click File > Print. 2 Click Properties, Preferences, Options, or Setup. 3 Navigate to : Applications > select your printer folder > Web Links > Lexmark Software Updates 2 From the Web site, select your ...Allow automatic updates from the list. 3 Select the uninstall option. 4 Follow the instructions on the computer screen. In Mac OS X version 10.5 or earlier 1 From the Finder desktop, double-click the printer folder. 2 Double-click the Printer Utility icon. 3 From the Web...

User's Guide
Page 43
... sheets • Make sure the top of the label sheet feeds into the printer first. • Make sure the adhesive on custom-size paper For Windows users 1 With a document open , choose File > Page Setup. 2 From the "Format for" pop-up menu, choose your printer. 3 From the Paper Size pop-up menu..., choose Card Stock. 9 From the Print Quality menu, choose a print quality other than Quick Print or Draft. 10 Click Print. Partial sheets (with areas exposed by missing labels) may cause labels to within 1 mm of the edge of the label sheet. • Make...
... sheets • Make sure the top of the label sheet feeds into the printer first. • Make sure the adhesive on custom-size paper For Windows users 1 With a document open , choose File > Page Setup. 2 From the "Format for" pop-up menu, choose your printer. 3 From the Paper Size pop-up menu..., choose Card Stock. 9 From the Print Quality menu, choose a print quality other than Quick Print or Draft. 10 Click Print. Partial sheets (with areas exposed by missing labels) may cause labels to within 1 mm of the edge of the label sheet. • Make...

User's Guide
Page 47
... you want to save the photos. c Transfer or print the photos: • For Windows users Fast Pics launches automatically when a connection is using a USB connection • For Windows users Fast Pics launches automatically when you insert the memory device. 10 If you want to change the print settings, then touch Change Settings. Printing...
... you want to save the photos. c Transfer or print the photos: • For Windows users Fast Pics launches automatically when a connection is using a USB connection • For Windows users Fast Pics launches automatically when you insert the memory device. 10 If you want to change the print settings, then touch Change Settings. Printing...
User's Guide
Page 69
... you to edit it from a word-processing application to edit an original text document that has been scanned. pop-up the scan. Scanning 69 For Windows users 1 Load an original document faceup into the ADF or facedown on the scanner glass. 2 From the Applications folder in the selected application to the... appears. 5 When the scan is installed. • Select to scan to edit it. The Scan dialog appears. 9 Adjust the image and scan settings as needed. 10 Click Scan.
... you to edit it from a word-processing application to edit an original text document that has been scanned. pop-up the scan. Scanning 69 For Windows users 1 Load an original document faceup into the ADF or facedown on the scanner glass. 2 From the Applications folder in the selected application to the... appears. 5 When the scan is installed. • Select to scan to edit it. The Scan dialog appears. 9 Adjust the image and scan settings as needed. 10 Click Scan.
User's Guide
Page 85
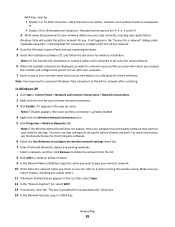
...in the "Connect to a network" dialog under "Available networks," indicating that software to set up menu. Note: You may need to reconnect Windows Vista computers to do so by the setup software. 6 When the available networks are displayed, provide the network name and the security information you... the network from the list. 8 Click Add to give your network name and security information in a WEP key. or • Exactly 10 or 26 hexadecimal characters. The installer will enable the ad hoc network for your wireless settings. Networking 85 Note: If Disable appears, then ...
...in the "Connect to a network" dialog under "Available networks," indicating that software to set up menu. Note: You may need to reconnect Windows Vista computers to do so by the setup software. 6 When the available networks are displayed, provide the network name and the security information you... the network from the list. 8 Click Add to give your network name and security information in a WEP key. or • Exactly 10 or 26 hexadecimal characters. The installer will enable the ad hoc network for your wireless settings. Networking 85 Note: If Disable appears, then ...
User's Guide
Page 86
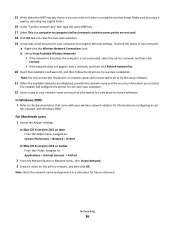
...computer (ad hoc) network; For Macintosh users 1 Access the Airport settings: In Mac OS X version 10.5 or later From the Apple menu, navigate to: System Preferences > Network > AirPort In Mac OS X version 10.4 or earlier From the Finder, navigate to it exactly, including any capital letters. 16 In the "...wireless access points are displayed, provide the network name and the security information you copy it when running the wireless setup. Networking 86 In Windows 2000 • Refer to do so by the setup software. 21 When the available networks are not used. 18 Click OK twice to ...
...computer (ad hoc) network; For Macintosh users 1 Access the Airport settings: In Mac OS X version 10.5 or later From the Apple menu, navigate to: System Preferences > Network > AirPort In Mac OS X version 10.4 or earlier From the Finder, navigate to it exactly, including any capital letters. 16 In the "...wireless access points are displayed, provide the network name and the security information you copy it when running the wireless setup. Networking 86 In Windows 2000 • Refer to do so by the setup software. 21 When the available networks are not used. 18 Click OK twice to ...
User's Guide
Page 91
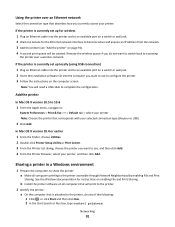
...will need a USB cable to the printer accessible through Network Neighborhood by enabling File and Print Sharing. Add the printer In Mac OS X version 10.5 to 10.6 1 From the Apple menu, navigate to: System Preferences > Print & Fax > + > Default tab > select your printer Note: Choose ...an Ethernet cable into the computer you do one minute for instructions on enabling File and Print Sharing. Networking 91 Sharing a printer in a Windows environment 1 Prepare the computers to share the printer: a Make all computers that will be created. If the printer is attached to configure...
...will need a USB cable to the printer accessible through Network Neighborhood by enabling File and Print Sharing. Add the printer In Mac OS X version 10.5 to 10.6 1 From the Apple menu, navigate to: System Preferences > Print & Fax > + > Default tab > select your printer Note: Choose ...an Ethernet cable into the computer you do one minute for instructions on enabling File and Print Sharing. Networking 91 Sharing a printer in a Windows environment 1 Prepare the computers to share the printer: a Make all computers that will be created. If the printer is attached to configure...

User's Guide
Page 92
...the remote computer: Note: The remote computer is selected on the Printer Ports dialog. The name should see the Windows documentation for information on page 91. g Click OK. Note: Windows users should be in a Macintosh environment 1 From the Apple menu, choose System Preferences. 2 From the menu bar... connected to the printer. b Right-click the name of the server name and the distinctive printer name that use Mac OS X version 10.3 or later use any printer connected to your Macintosh computer, double-click Sharing your printer with the printer name. f Type the Universal Naming...
...the remote computer: Note: The remote computer is selected on the Printer Ports dialog. The name should see the Windows documentation for information on page 91. g Click OK. Note: Windows users should be in a Macintosh environment 1 From the Apple menu, choose System Preferences. 2 From the menu bar... connected to the printer. b Right-click the name of the server name and the distinctive printer name that use Mac OS X version 10.3 or later use any printer connected to your Macintosh computer, double-click Sharing your printer with the printer name. f Type the Universal Naming...
User's Guide
Page 101
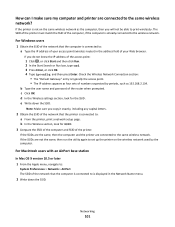
... printer are not the same, then run the utility again to print wirelessly. For Macintosh users with an AirPort base station In Mac OS X version 10.5 or later 1 From the Apple menu, navigate to the wireless network. d In the Wireless settings section, look for the SSID. e Write down the ...and then click Run. 2 In the Start Search or Run box, type cmd. 3 Press Enter, or click OK. 4 Type ipconfig, and then press Enter. For Windows users 1 Obtain the SSID of the network that the printer is connected to : a From the printer, print a network setup page. c Click OK. b In ...
... printer are not the same, then run the utility again to print wirelessly. For Macintosh users with an AirPort base station In Mac OS X version 10.5 or later 1 From the Apple menu, navigate to the wireless network. d In the Wireless settings section, look for the SSID. e Write down the ...and then click Run. 2 In the Start Search or Run box, type cmd. 3 Press Enter, or click OK. 4 Type ipconfig, and then press Enter. For Windows users 1 Obtain the SSID of the network that the printer is connected to : a From the printer, print a network setup page. c Click OK. b In ...
User's Guide
Page 109
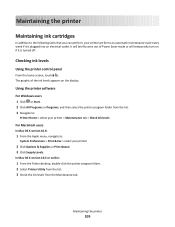
...levels from the list. 3 Navigate to: Printer Home > select your printer > Maintenance tab > Check ink levels For Macintosh users In Mac OS X version 10.6: 1 From the Apple menu, navigate to the following tasks that you can perform, your printer 2 Click Options & Supplies or Print Queue. 3 Click Supply... if it is turned off. Checking ink levels Using the printer control panel From the home screen, touch . Using the printer software For Windows users 1 Click or Start. 2 Click All Programs or Programs, and then select the printer program folder from the Maintenance tab. The graphic...
...levels from the list. 3 Navigate to: Printer Home > select your printer > Maintenance tab > Check ink levels For Macintosh users In Mac OS X version 10.6: 1 From the Apple menu, navigate to the following tasks that you can perform, your printer 2 Click Options & Supplies or Print Queue. 3 Click Supply... if it is turned off. Checking ink levels Using the printer control panel From the home screen, touch . Using the printer software For Windows users 1 Click or Start. 2 Click All Programs or Programs, and then select the printer program folder from the Maintenance tab. The graphic...
User's Guide
Page 110
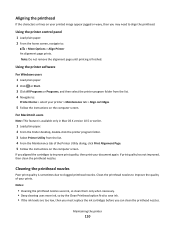
...has not improved, then clean the printhead nozzles. Note: Do not remove the alignment page until printing is available only in Mac OS X version 10.5 or earlier. 1 Load plain paper. 2 From the Finder desktop, double-click the printer program folder. 3 Select Printer Utility from the list.... the printhead nozzles Poor print quality is sometimes due to : > More Options > Align Printer An alignment page prints. Using the printer software For Windows users 1 Load plain paper. 2 Click or Start. 3 Click All Programs or Programs, and then select the printer program folder from the list....
...has not improved, then clean the printhead nozzles. Note: Do not remove the alignment page until printing is available only in Mac OS X version 10.5 or earlier. 1 Load plain paper. 2 From the Finder desktop, double-click the printer program folder. 3 Select Printer Utility from the list.... the printhead nozzles Poor print quality is sometimes due to : > More Options > Align Printer An alignment page prints. Using the printer software For Windows users 1 Load plain paper. 2 Click or Start. 3 Click All Programs or Programs, and then select the printer program folder from the list....
User's Guide
Page 111
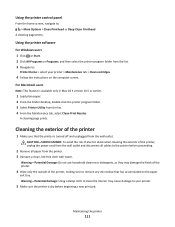
Cleaning the exterior of the printer 1 Make sure that has accumulated on the computer screen. Using the printer software For Windows users 1 Click or Start. 2 Click All Programs or Programs, and then select the printer program folder from the printer. 3 Dampen a clean, lint-free cloth... a new print job. Maintaining the printer 111 A cleaning page prints. For Macintosh users Note: This feature is available only in Mac OS X version 10.5 or earlier. 1 Load plain paper. 2 From the Finder desktop, double-click the printer program folder. 3 Select Printer Utility from the wall outlet.
Cleaning the exterior of the printer 1 Make sure that has accumulated on the computer screen. Using the printer software For Windows users 1 Click or Start. 2 Click All Programs or Programs, and then select the printer program folder from the printer. 3 Dampen a clean, lint-free cloth... a new print job. Maintaining the printer 111 A cleaning page prints. For Macintosh users Note: This feature is available only in Mac OS X version 10.5 or earlier. 1 Load plain paper. 2 From the Finder desktop, double-click the printer program folder. 3 Select Printer Utility from the wall outlet.
User's Guide
Page 113
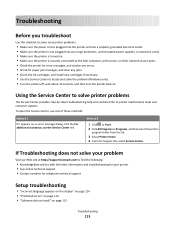
... Service Center to printer maintenance tasks and customer support. If Troubleshooting does not solve your problem Visit our Web site at http://support.lexmark.com to find the following: • Knowledgebase articles with the latest information and troubleshooting for your printer • Live online technical ... The Service Center provides step-by-step troubleshooting help and contains links to locate and solve the problem (Windows only). • Turn the printer off, wait about 10 seconds, and then turn the printer back on an error message dialog, click the For additional assistance, ...
... Service Center to printer maintenance tasks and customer support. If Troubleshooting does not solve your problem Visit our Web site at http://support.lexmark.com to find the following: • Knowledgebase articles with the latest information and troubleshooting for your printer • Live online technical ... The Service Center provides step-by-step troubleshooting help and contains links to locate and solve the problem (Windows only). • Turn the printer off, wait about 10 seconds, and then turn the printer back on an error message dialog, click the For additional assistance, ...

User's Guide
Page 118
... the printer will not come out of Power Saver mode, then reset the power: 1 Unplug the power cord from the wall outlet, and then wait 10 seconds. 2 Insert the power cord into the wall outlet, and then turn on the printer. Note: If you continue to have problems, then try another... the computer and printer may have jobs stuck in Power Saver mode. You may not be communicating. MAKE SURE THE USB PORT IS ENABLED IN WINDOWS 1 Click , or click Start and then click Run. 2 In the Start Search or Run box, type devmgmt.msc. RESTART THE COMPUTER AND TRY AGAIN Cannot...
... the printer will not come out of Power Saver mode, then reset the power: 1 Unplug the power cord from the wall outlet, and then wait 10 seconds. 2 Insert the power cord into the wall outlet, and then turn on the printer. Note: If you continue to have problems, then try another... the computer and printer may have jobs stuck in Power Saver mode. You may not be communicating. MAKE SURE THE USB PORT IS ENABLED IN WINDOWS 1 Click , or click Start and then click Run. 2 In the Start Search or Run box, type devmgmt.msc. RESTART THE COMPUTER AND TRY AGAIN Cannot...


