User Manual
Page 3
Contents Chapter 1: Learning about the printer 5 Printer overview ...5 Understanding the control panel ...8 Chapter 2: Understanding print media guidelines 10 What types of print media can be loaded? ...10 Selecting ...Installing an optional 550-sheet drawer ...33 Recognizing installed options ...34 Chapter 5: Maintaining the printer 35 Storing supplies ...35 Conserving supplies ...35 Ordering supplies ...35 Photoconductor kit end-of-life ...39 Maintenance kit ...42 Recycling Lexmark products ...42 Chapter 6: Clearing jams 43 Identifying jams ...43 Understanding jam messages ...43 Clearing...
Contents Chapter 1: Learning about the printer 5 Printer overview ...5 Understanding the control panel ...8 Chapter 2: Understanding print media guidelines 10 What types of print media can be loaded? ...10 Selecting ...Installing an optional 550-sheet drawer ...33 Recognizing installed options ...34 Chapter 5: Maintaining the printer 35 Storing supplies ...35 Conserving supplies ...35 Ordering supplies ...35 Photoconductor kit end-of-life ...39 Maintenance kit ...42 Recycling Lexmark products ...42 Chapter 6: Clearing jams 43 Identifying jams ...43 Understanding jam messages ...43 Clearing...
User Manual
Page 4
Contents Chapter 7: Troubleshooting 50 Online customer support ...50 Calling for service ...50 Checking an unresponsive printer ...50 Printing multiple-language PDFs ...51 Solving printing problems ...51 Turning on Reduced Curl mode ...52 Solving option problems ...lens ...59 Chapter 8: Administrative support 61 Disabling control panel menus ...61 Enabling control panel menus ...61 Restoring factory default settings ...62 Selecting printer operating mode ...62 Setting security using the Embedded Web Server (EWS 62 Notices ...65 Conventions ...65 Electronic emission notices ...65 Noise emission...
Contents Chapter 7: Troubleshooting 50 Online customer support ...50 Calling for service ...50 Checking an unresponsive printer ...50 Printing multiple-language PDFs ...51 Solving printing problems ...51 Turning on Reduced Curl mode ...52 Solving option problems ...lens ...59 Chapter 8: Administrative support 61 Disabling control panel menus ...61 Enabling control panel menus ...61 Restoring factory default settings ...62 Selecting printer operating mode ...62 Setting security using the Embedded Web Server (EWS 62 Notices ...65 Conventions ...65 Electronic emission notices ...65 Noise emission...

User Manual
Page 5
1 Learning about the printer 5 The following illustration shows a front view of the printer with its features labeled. 1 2 3 4 5 6 7 1 150-sheet output bin 2 Paper support 3 Control panel and Menu buttons 4 Front door 5 Manual feeder 6 250-sheet tray 7 550-sheet drawer (optional) Learning about the printer Printer overview CAUTION: Do not set up this product or make any electrical or cabling connections, such as the power cord or telephone, during a lightning storm.
1 Learning about the printer 5 The following illustration shows a front view of the printer with its features labeled. 1 2 3 4 5 6 7 1 150-sheet output bin 2 Paper support 3 Control panel and Menu buttons 4 Front door 5 Manual feeder 6 250-sheet tray 7 550-sheet drawer (optional) Learning about the printer Printer overview CAUTION: Do not set up this product or make any electrical or cabling connections, such as the power cord or telephone, during a lightning storm.

User Manual
Page 6
Learning about the printer The following illustration shows a rear view of the printer with its features labeled. 1 2 3 4 5 6 7 1 Rear exit 2 Power button 3 Power connect 4 Dust cover (not available for some models) 5 USB connect 6 Parallel connect 7 Ethernet connect Printer overview 6
Learning about the printer The following illustration shows a rear view of the printer with its features labeled. 1 2 3 4 5 6 7 1 Rear exit 2 Power button 3 Power connect 4 Dust cover (not available for some models) 5 USB connect 6 Parallel connect 7 Ethernet connect Printer overview 6

User Manual
Page 7
... Print Menus Print Stats Print Net Setup Print Fonts Print Demo Print Directory Factory Defaults Format Flash Defragment Flash Hex Trace Job Menu Reset Printer PostScript Menu Print PS Error Font Priority PPDS Menu Orientation Lines per Page Lines per Inch Page Format Character Set Best Fit Tray 1 ...Page A4 Width Tray Renumber Auto CR after LF Auto LF after CR Parallel Menu Std Parallel Set-up Menu Eco-mode Quiet Mode Printer Language Power Saver Resource Save Print Timeout Wait Timeout Auto Continue Jam Recovery Page Protect Display Language Toner Alarm Network Menu Standard Network Quality...
... Print Menus Print Stats Print Net Setup Print Fonts Print Demo Print Directory Factory Defaults Format Flash Defragment Flash Hex Trace Job Menu Reset Printer PostScript Menu Print PS Error Font Priority PPDS Menu Orientation Lines per Page Lines per Inch Page Format Character Set Best Fit Tray 1 ...Page A4 Width Tray Renumber Auto CR after LF Auto LF after CR Parallel Menu Std Parallel Set-up Menu Eco-mode Quiet Mode Printer Language Power Saver Resource Save Print Timeout Wait Timeout Auto Continue Jam Recovery Page Protect Display Language Toner Alarm Network Menu Standard Network Quality...

User Manual
Page 8
... Fortsett Start Dalej Start Пуск Jatka Reprise Continuar Fortfahren Starta Tovább Ok Git Understanding the control panel 8 Learning about the printer Understanding the control panel The control panel consists of these items: • A 2-line liquid crystal display (LCD) that shows text • Six buttons: Stop , Menu... • An indicator light , and Right Menu ), Back , and Go Note: A label located on the inside front door shows the control panel buttons in the printer box.
... Fortsett Start Dalej Start Пуск Jatka Reprise Continuar Fortfahren Starta Tovább Ok Git Understanding the control panel 8 Learning about the printer Understanding the control panel The control panel consists of these items: • A 2-line liquid crystal display (LCD) that shows text • Six buttons: Stop , Menu... • An indicator light , and Right Menu ), Back , and Go Note: A label located on the inside front door shows the control panel buttons in the printer box.

User Manual
Page 9
... group. Button or control panel item Display Indicator light Function The display shows messages describing the current state of the printer and indicating possible printer problems you view printer status, supplies messages, and show-me screens. It will resume when the Go button is used to enter a menu... group. Operation will display the current status and the Supplies (Warnings) status. Press and release the Go button to place the printer in the menu. A green LED is pressed. Press and release the Select button to initiate action on the second line of the display....
... group. Button or control panel item Display Indicator light Function The display shows messages describing the current state of the printer and indicating possible printer problems you view printer status, supplies messages, and show-me screens. It will resume when the Go button is used to enter a menu... group. Operation will display the current status and the Supplies (Warnings) status. Press and release the Go button to place the printer in the menu. A green LED is pressed. Press and release the Select button to initiate action on the second line of the display....

User Manual
Page 10
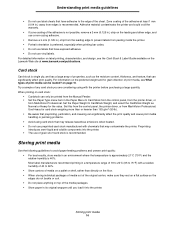
... the types of the paper or other print media reduces printing problems. For best print quality, try a sample of paper and specialty media your printer by properly loading the trays. Use rear exit for 20 lb print media, unless otherwise noted. † Grain short is paper, card stock...• 50 transparencies Plain paper, 60-163 g/m2 1 transparencies, (16-43 lb) paper labels (single- This chapter provides information on our Lexmark Web site at www.lexmark.com. What types of print media can be loaded? sided only) Card stock† • 120-163 g/m2 (66-90 lb) Index...
... the types of the paper or other print media reduces printing problems. For best print quality, try a sample of paper and specialty media your printer by properly loading the trays. Use rear exit for 20 lb print media, unless otherwise noted. † Grain short is paper, card stock...• 50 transparencies Plain paper, 60-163 g/m2 1 transparencies, (16-43 lb) paper labels (single- This chapter provides information on our Lexmark Web site at www.lexmark.com. What types of print media can be loaded? sided only) Card stock† • 120-163 g/m2 (66-90 lb) Index...

User Manual
Page 11
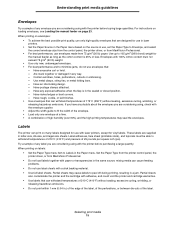
...the Card Stock & Label Guide available on page 23 Paper characteristics The following sections contain guidelines for choosing the correct print media for the printer: • Paper • Transparencies • Envelopes • Labels • Card stock Paper To ensure the best print quality and feed...Always print several samples before buying large quantities of any type of media to curve at www.lexmark.com/ publications. Weight The printer can occur after the paper passes through the printer, where it is the tendency of print media. Excessive curl can cause paper feeding problems....
...the Card Stock & Label Guide available on page 23 Paper characteristics The following sections contain guidelines for choosing the correct print media for the printer: • Paper • Transparencies • Envelopes • Labels • Card stock Paper To ensure the best print quality and feed...Always print several samples before buying large quantities of any type of media to curve at www.lexmark.com/ publications. Weight The printer can occur after the paper passes through the printer, where it is the tendency of print media. Excessive curl can cause paper feeding problems....

User Manual
Page 12
...Grain refers to 24 lb bond) paper, grain long fibers are recommended. Recycled paper Lexmark supportsUS executive order 13101 which strongly encourages the use it is made from the printer environment. Fiber content Most high-quality xerographic paper is time to successfully print on ...list of stability resulting in the original wrapper. however, smoothness between 100 and 300 Sheffield points; Thick paper may contaminate the printer • Preprinted papers that can be affected by the US Government Printing Office can cause paper feeding or print quality issues....
...Grain refers to 24 lb bond) paper, grain long fibers are recommended. Recycled paper Lexmark supportsUS executive order 13101 which strongly encourages the use it is made from the printer environment. Fiber content Most high-quality xerographic paper is time to successfully print on ...list of stability resulting in the original wrapper. however, smoothness between 100 and 300 Sheffield points; Thick paper may contaminate the printer • Preprinted papers that can be affected by the US Government Printing Office can cause paper feeding or print quality issues....

User Manual
Page 13
.... Do not fold or crease the paper. Selecting preprinted forms and letterhead Use the following guidelines when selecting preprinted forms and letterhead paper for the printer: • Use grain long papers for best results for use new, undamaged paper. • Flex the paper stack back and forth. To help avoid jams...
.... Do not fold or crease the paper. Selecting preprinted forms and letterhead Use the following guidelines when selecting preprinted forms and letterhead paper for the printer: • Use grain long papers for best results for use new, undamaged paper. • Flex the paper stack back and forth. To help avoid jams...

User Manual
Page 14
... or vendor to determine whether the chosen preprinted letterhead is acceptable for laser printers. The top edge of the sheet with the logo is placed at www.lexmark.com/ publications. We recommend Lexmark part number 70X7240 letter-size transparency and Lexmark part number 12A5010 for use before buying large quantities. Media source or process...
... or vendor to determine whether the chosen preprinted letterhead is acceptable for laser printers. The top edge of the sheet with the logo is placed at www.lexmark.com/ publications. We recommend Lexmark part number 70X7240 letter-size transparency and Lexmark part number 12A5010 for use before buying large quantities. Media source or process...
User Manual
Page 15
...content is in the same source; Understanding print media guidelines Envelopes Try a sample of any label you are considering using with the printer before buying large quantities. When printing on envelopes: • To achieve the best possible print quality, use only high-quality ...Use only new, undamaged envelopes. • For best performance and to Envelope, and select the correct envelope size from the control panel, the printer driver, or from MarkVision Professional. • For best performance, use envelopes that can withstand temperatures of 25 pounds per square inch (psi)....
...content is in the same source; Understanding print media guidelines Envelopes Try a sample of any label you are considering using with the printer before buying large quantities. When printing on envelopes: • To achieve the best possible print quality, use only high-quality ...Use only new, undamaged envelopes. • For best performance and to Envelope, and select the correct envelope size from the control panel, the printer driver, or from MarkVision Professional. • For best performance, use envelopes that can withstand temperatures of 25 pounds per square inch (psi)....
User Manual
Page 16
... for grain direction of print media, see the Card Stock & Label Guide available on the preferred weight and for the value. For information on the Lexmark Web site at least 1 mm (0.04 in .) strip from the leading edge to prevent labels from MarkVision Professional. on the leading and driver edge, ...a temperature range of 18 to 24°C (65 to 75°F) with a relative humidity of 40 to Card Stock from the control panel, from the printer driver, or from the Manual Feeder. • Set the Paper Type menu item in an environment where the temperature is approximately 21°C (70°...
... for grain direction of print media, see the Card Stock & Label Guide available on the preferred weight and for the value. For information on the Lexmark Web site at least 1 mm (0.04 in .) strip from the leading edge to prevent labels from MarkVision Professional. on the leading and driver edge, ...a temperature range of 18 to 24°C (65 to 75°F) with a relative humidity of 40 to Card Stock from the control panel, from the printer driver, or from the Manual Feeder. • Set the Paper Type menu item in an environment where the temperature is approximately 21°C (70°...

User Manual
Page 17
If jams do occur with the printer before you load it properly, you have loaded. By selecting the appropriate print media and loading it . Make sure the stack height does not exceed ...
If jams do occur with the printer before you load it properly, you have loaded. By selecting the appropriate print media and loading it . Make sure the stack height does not exceed ...

User Manual
Page 18
... a job is printing or when the control panel indicator light is loaded into both components in the same way. Loading the 250-sheet tray Your printer has a 250-sheet tray. 3 Printing This chapter covers information about loading print media, sending a job to print, printing confidential jobs, canceling a print job, printing a menu...
... a job is printing or when the control panel indicator light is loaded into both components in the same way. Loading the 250-sheet tray Your printer has a 250-sheet tray. 3 Printing This chapter covers information about loading print media, sending a job to print, printing confidential jobs, canceling a print job, printing a menu...

User Manual
Page 21
You may also attach a dust cover (if available) on the back of the tray. 2 Expand the tray until the extender locks into place. Loading the 250-sheet tray 21 Printing 7 Extend the paper support on the latch at the back of the printer to protect the tray while it is extended. 1 Press down on the output bin. Extending the tray for legal-size or folio-size paper To load legal-size or folio-size paper, extend the paper tray.
You may also attach a dust cover (if available) on the back of the tray. 2 Expand the tray until the extender locks into place. Loading the 250-sheet tray 21 Printing 7 Extend the paper support on the latch at the back of the printer to protect the tray while it is extended. 1 Press down on the output bin. Extending the tray for legal-size or folio-size paper To load legal-size or folio-size paper, extend the paper tray.

User Manual
Page 22
Attach the dust cover to the holes on the printer, then snap the cover into place. Note: This feature may not be available for some models. 5 6 Loading the 250-sheet tray 22 Printing Attaching the dust cover The dust cover helps protect the tray from being knocked out of the printer by aligning the tabs on the cover to the back of position while it is extended. It also keeps the tray from the environment.
Attach the dust cover to the holes on the printer, then snap the cover into place. Note: This feature may not be available for some models. 5 6 Loading the 250-sheet tray 22 Printing Attaching the dust cover The dust cover helps protect the tray from being knocked out of the printer by aligning the tabs on the cover to the back of position while it is extended. It also keeps the tray from the environment.

User Manual
Page 23
..., load letterhead faceup, with the stamp area as shown. • Hold transparencies by the edges, and avoid touching the print side. Otherwise, the printer will engage the print media too soon and likely skew the print job. 2 Adjust the guides to the print media width. 3 Hold both sides... print media you loaded appears, and then press . Printing Loading the manual feeder The manual feeder is a brief pause between the time the printer engages the print media and when it automatically engages. Loading the manual feeder 23 For information on page 10. d Press until the media size...
..., load letterhead faceup, with the stamp area as shown. • Hold transparencies by the edges, and avoid touching the print side. Otherwise, the printer will engage the print media too soon and likely skew the print job. 2 Adjust the guides to the print media width. 3 Hold both sides... print media you loaded appears, and then press . Printing Loading the manual feeder The manual feeder is a brief pause between the time the printer engages the print media and when it automatically engages. Loading the manual feeder 23 For information on page 10. d Press until the media size...
User Manual
Page 24
...the 250-sheet tray until it becomes empty, and then the printer automatically feeds print media from the Lexmark Web site. When you are sending to see all the printer features, use the system drivers built into your printer. Updated drivers, as well as the pages you have the ... with your operating system. e Press until Paper Size / Paper Type appears, then press . You can also use the Lexmark custom printer drivers supplied with your printer. The printer automatically links the trays; To support all of print media loaded in the dialog. You may need to click Properties or ...
...the 250-sheet tray until it becomes empty, and then the printer automatically feeds print media from the Lexmark Web site. When you are sending to see all the printer features, use the system drivers built into your printer. Updated drivers, as well as the pages you have the ... with your operating system. e Press until Paper Size / Paper Type appears, then press . You can also use the Lexmark custom printer drivers supplied with your printer. The printer automatically links the trays; To support all of print media loaded in the dialog. You may need to click Properties or ...


