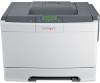

User Guide
Page 2
Contents Safety information 5 Learning about the printer 7 Thank you for choosing this printer!...7 Finding information about the printer...7 Selecting a location for the printer...8 Printer configurations...9 Understanding the printer control panel 12 Additional printer setup 13 Installing internal options...13 Installing hardware options...21 Attaching cables...23 Verifying printer setup...23 Setting up the printer software...24 Setting up wireless printing...
Contents Safety information 5 Learning about the printer 7 Thank you for choosing this printer!...7 Finding information about the printer...7 Selecting a location for the printer...8 Printer configurations...9 Understanding the printer control panel 12 Additional printer setup 13 Installing internal options...13 Installing hardware options...21 Attaching cables...23 Verifying printer setup...23 Setting up the printer software...24 Setting up wireless printing...

User Guide
Page 3
...from a flash drive...60 Printing photos from a PictBridge-enabled digital camera 61 Printing information pages...61 Canceling a print job...62 Understanding printer menus 64 Menus list...64 Supplies menu...64 Paper menu...65 Reports...73 Network/Ports...75 Settings...81 Maintaining the...the factory default settings 116 Using the Embedded Web Server...116 Setting up e-mail alerts...117 Configuring supply notifications...117 Copying printer settings to other printers 117 Clearing jams 119 Avoiding jams...119 Understanding jam numbers and locations 120 200-202 and 230 paper jams...121 231 and...
...from a flash drive...60 Printing photos from a PictBridge-enabled digital camera 61 Printing information pages...61 Canceling a print job...62 Understanding printer menus 64 Menus list...64 Supplies menu...64 Paper menu...65 Reports...73 Network/Ports...75 Settings...81 Maintaining the...the factory default settings 116 Using the Embedded Web Server...116 Setting up e-mail alerts...117 Configuring supply notifications...117 Copying printer settings to other printers 117 Clearing jams 119 Avoiding jams...119 Understanding jam numbers and locations 120 200-202 and 230 paper jams...121 231 and...

User Guide
Page 4
24x paper jam...124 250 paper jam...124 Troubleshooting 125 Understanding printer messages...125 Solving basic printer problems...131 Solving printing problems...131 Solving option problems...135 Solving paper feed problems...137 Solving print quality problems...138 Solving color quality problems...148 Contacting Customer Support...152 Notices...153 Product information...153 Edition notice...153 Power consumption...157 Index...167 Contents 4
24x paper jam...124 250 paper jam...124 Troubleshooting 125 Understanding printer messages...125 Solving basic printer problems...131 Solving printing problems...131 Solving option problems...135 Solving paper feed problems...137 Solving print quality problems...138 Solving color quality problems...148 Contacting Customer Support...152 Notices...153 Product information...153 Edition notice...153 Power consumption...157 Index...167 Contents 4

User Guide
Page 5
... the power cord from a hot component, allow the surface to abrasion or stress. To reduce the risk of the printer to the printer, then turn the printer off the optional drawer, and set it aside instead of trying to a properly grounded electrical outlet that all cords and...replacement parts. Safety information CAUTION-POTENTIAL INJURY: See the enclosed Safety Sheet before proceeding. Connect the power cord to lift the drawer and printer at the same time. CAUTION-POTENTIAL INJURY: This product uses a laser. This product uses a printing process that discusses the guidelines for ...
... the power cord from a hot component, allow the surface to abrasion or stress. To reduce the risk of the printer to the printer, then turn the printer off the optional drawer, and set it aside instead of trying to a properly grounded electrical outlet that all cords and...replacement parts. Safety information CAUTION-POTENTIAL INJURY: See the enclosed Safety Sheet before proceeding. Connect the power cord to lift the drawer and printer at the same time. CAUTION-POTENTIAL INJURY: This product uses a laser. This product uses a printing process that discusses the guidelines for ...

User Guide
Page 7
...Setting up and using printer software • Setting up and configuring the printer on a network, depending on your printer model • Caring for ? Notes: • The Help installs automatically with the printer and is also available on the Lexmark Web site at http://support.lexmark.com. We're committed... to delivering performance and value with the printer, and then skim the User's Guide to learn how to view ...
...Setting up and using printer software • Setting up and configuring the printer on a network, depending on your printer model • Caring for ? Notes: • The Help installs automatically with the printer and is also available on the Lexmark Web site at http://support.lexmark.com. We're committed... to delivering performance and value with the printer, and then skim the User's Guide to learn how to view ...

User Guide
Page 8
... • In the US-See the Statement of Limited Warranty included with this printer, or at http://support.lexmark.com. • Rest of the printer), and have it here Lexmark Support Web site- Record the following recommended amount of operation for proper ventilation: Learning... about the printer 8 Away from direct sunlight, humidity extremes, or temperature fluctuations - http://support.lexmark.com Note: Select your region, and then select your printer. It is important to: • Make sure airflow in...
... • In the US-See the Statement of Limited Warranty included with this printer, or at http://support.lexmark.com. • Rest of the printer), and have it here Lexmark Support Web site- Record the following recommended amount of operation for proper ventilation: Learning... about the printer 8 Away from direct sunlight, humidity extremes, or temperature fluctuations - http://support.lexmark.com Note: Select your region, and then select your printer. It is important to: • Make sure airflow in...

User Guide
Page 9
5 4 1 102 mm (4 in.) 2 508 mm (20 in.) 3 152 mm (6 in.) 4 76 mm (3 in.) 5 254 mm (10 in.) 1 2 3 Printer configurations Basic model Note: Your printer model may have come with a 650-sheet duo drawer. Learning about the printer 9
5 4 1 102 mm (4 in.) 2 508 mm (20 in.) 3 152 mm (6 in.) 4 76 mm (3 in.) 5 254 mm (10 in.) 1 2 3 Printer configurations Basic model Note: Your printer model may have come with a 650-sheet duo drawer. Learning about the printer 9

User Guide
Page 10
Learning about the printer 10 1 4 3 2 1 Standard exit bin 2 Standard 250-sheet tray (Tray 1) 3 Manual feeder 4 Printer control panel Fully configured model The following illustration shows a fully configured printer model with a 650-sheet duo drawer and an optional 550-sheet tray: Note: Some printer models may not support the optional 550-sheet tray.
Learning about the printer 10 1 4 3 2 1 Standard exit bin 2 Standard 250-sheet tray (Tray 1) 3 Manual feeder 4 Printer control panel Fully configured model The following illustration shows a fully configured printer model with a 650-sheet duo drawer and an optional 550-sheet tray: Note: Some printer models may not support the optional 550-sheet tray.

User Guide
Page 11
1 3 2 1 Standard 250-sheet tray (Tray 1) 2 650-sheet duo drawer with integrated multipurpose feeder (Tray 2) 3 Optional 550-sheet tray Learning about the printer 11
1 3 2 1 Standard 250-sheet tray (Tray 1) 2 650-sheet duo drawer with integrated multipurpose feeder (Tray 2) 3 Optional 550-sheet tray Learning about the printer 11

User Guide
Page 12
... the status of options is offered once Stopped appears on , but idle. • Blinking red-Operator intervention is in the Ready state. Stops all printer activity A list of the printer Press to the previous screen Opens the menu index Note: The menus are available only when the... printer is needed. Learning about the printer 12 Scrolls through menus, submenus, or settings on the display 6 Back 7 Menu Returns the display to initiate action on a menu item. 3 Indicator light 4 Stop/Cancel ...
... the status of options is offered once Stopped appears on , but idle. • Blinking red-Operator intervention is in the Ready state. Stops all printer activity A list of the printer Press to the previous screen Opens the menu index Note: The menus are available only when the... printer is needed. Learning about the printer 12 Scrolls through menus, submenus, or settings on the display 6 Back 7 Menu Returns the display to initiate action on a menu item. 3 Indicator light 4 Stop/Cancel ...
User Guide
Page 13
...memory devices sometime after setting up the printer, then turn them to the printer, then turn the printer off as well, and unplug any other devices attached to locate a card for some printer models. you can customize your printer connectivity and memory capacity by adding optional ...cards. Available options Note: Certain options are not available on selected printer models. The instructions in this section explain how to ...
...memory devices sometime after setting up the printer, then turn them to the printer, then turn the printer off as well, and unplug any other devices attached to locate a card for some printer models. you can customize your printer connectivity and memory capacity by adding optional ...cards. Available options Note: Certain options are not available on selected printer models. The instructions in this section explain how to ...

User Guide
Page 14
... them off , and unplug the power cord from the wall outlet before continuing. Accessing the system board to the printer, then turn the printer off as well, and unplug any cables going into the printer. Note: This operation requires a #2 Phillips screwdriver. 1 Remove the cover. If you have any other devices attached to install...
... them off , and unplug the power cord from the wall outlet before continuing. Accessing the system board to the printer, then turn the printer off as well, and unplug any cables going into the printer. Note: This operation requires a #2 Phillips screwdriver. 1 Remove the cover. If you have any other devices attached to install...

User Guide
Page 15
Additional printer setup 15 Touch something metal on the printer before touching any system board electronic components or connectors. Warning-Potential Damage: System board electrical components are easily damaged by static electricity. b Gently pull the cover away from the printer, and then remove it. 2 Use the illustration below to locate the appropriate connector.
Additional printer setup 15 Touch something metal on the printer before touching any system board electronic components or connectors. Warning-Potential Damage: System board electrical components are easily damaged by static electricity. b Gently pull the cover away from the printer, and then remove it. 2 Use the illustration below to locate the appropriate connector.

User Guide
Page 16
1 Flash memory card connector 2 Memory card connector 1 2 Additional printer setup 16
1 Flash memory card connector 2 Memory card connector 1 2 Additional printer setup 16

User Guide
Page 17
Additional printer setup 17 Installing a memory card The system board has one connector for an optional memory card. CAUTION-SHOCK HAZARD: If you have any other devices attached to the printer, then turn the printer off as well, and unplug any cables going into the printer. 1 Access the system board. If you are accessing the system board or installing optional hardware or memory devices sometime after setting up the printer, then turn them off , and unplug the power cord from the wall outlet before continuing.
Additional printer setup 17 Installing a memory card The system board has one connector for an optional memory card. CAUTION-SHOCK HAZARD: If you have any other devices attached to the printer, then turn the printer off as well, and unplug any cables going into the printer. 1 Access the system board. If you are accessing the system board or installing optional hardware or memory devices sometime after setting up the printer, then turn them off , and unplug the power cord from the wall outlet before continuing.

User Guide
Page 18
2 Open both latches on the connector. 5 Push the memory card straight into the connector until it snaps into place. Note: Avoid touching the connection points along the edge of the memory card. 1 Notch 2 Latch 2 1 Additional printer setup 18 Make sure each latch fits over the notch located on either side of the card. 4 Align the notches on the memory card with the ridges on the connector completely. 3 Unpack the memory card.
2 Open both latches on the connector. 5 Push the memory card straight into the connector until it snaps into place. Note: Avoid touching the connection points along the edge of the memory card. 1 Notch 2 Latch 2 1 Additional printer setup 18 Make sure each latch fits over the notch located on either side of the card. 4 Align the notches on the memory card with the ridges on the connector completely. 3 Unpack the memory card.

User Guide
Page 19
Additional printer setup 19 6 Reinstall the system board access cover. If you are accessing the system board or installing optional hardware or memory devices sometime after setting up the printer, then turn the printer off as well, and unplug any other devices attached to the printer, then turn them off , and unplug the power cord from the wall outlet before continuing. Installing a flash memory card CAUTION-SHOCK HAZARD: If you have any cables going into the printer. 1 Access the system board.
Additional printer setup 19 6 Reinstall the system board access cover. If you are accessing the system board or installing optional hardware or memory devices sometime after setting up the printer, then turn the printer off as well, and unplug any other devices attached to the printer, then turn them off , and unplug the power cord from the wall outlet before continuing. Installing a flash memory card CAUTION-SHOCK HAZARD: If you have any cables going into the printer. 1 Access the system board.

User Guide
Page 20
Note: Avoid touching the connection points along the edge of the connector on the system board. Notes: • The entire length of the card. 3 Holding the card by its sides, align the plastic pins on the card with the holes on the card must touch and be flush against the system board. • Be careful not to damage the connectors. 2 Unpack the memory card. Additional printer setup 20 This ensures the metal pins line up correctly as well. 11 22 1 Plastic pins 2 Metal pins 4 Push the card firmly into place.
Note: Avoid touching the connection points along the edge of the connector on the system board. Notes: • The entire length of the card. 3 Holding the card by its sides, align the plastic pins on the card with the holes on the card must touch and be flush against the system board. • Be careful not to damage the connectors. 2 Unpack the memory card. Additional printer setup 20 This ensures the metal pins line up correctly as well. 11 22 1 Plastic pins 2 Metal pins 4 Push the card firmly into place.

User Guide
Page 21
...continuing. CAUTION-SHOCK HAZARD: If you have any other devices attached to lift it safely. Installing hardware options Installing an optional tray or drawer The printer supports two additional input sources: an optional 550-sheet tray and a 650-sheet duo drawer (Tray 2) with an integrated multipurpose feeder. 5 Reinstall... and the 650-sheet duo drawer, the optional 550-sheet tray must always be installed as well, and unplug any cables going into the printer. 1 Unpack the optional 550-sheet tray, and then remove all packing material and the dust cover. 2 Place the tray in the location...
...continuing. CAUTION-SHOCK HAZARD: If you have any other devices attached to lift it safely. Installing hardware options Installing an optional tray or drawer The printer supports two additional input sources: an optional 550-sheet tray and a 650-sheet duo drawer (Tray 2) with an integrated multipurpose feeder. 5 Reinstall... and the 650-sheet duo drawer, the optional 550-sheet tray must always be installed as well, and unplug any cables going into the printer. 1 Unpack the optional 550-sheet tray, and then remove all packing material and the dust cover. 2 Place the tray in the location...

User Guide
Page 22
Note: Once the printer software and any options are installed, it into place. 4 Align the printer with the optional 550-sheet tray, and then lower it may be necessary to make them available for print jobs. For more information, see "Updating available options in the printer driver to manually add the options in the printer driver" on page 25. 3 Align a 650-sheet duo drawer with the 650-sheet duo drawer, and then lower the printer into place. 5 Install the dust covers. Additional printer setup 22
Note: Once the printer software and any options are installed, it into place. 4 Align the printer with the optional 550-sheet tray, and then lower it may be necessary to make them available for print jobs. For more information, see "Updating available options in the printer driver to manually add the options in the printer driver" on page 25. 3 Align a 650-sheet duo drawer with the 650-sheet duo drawer, and then lower the printer into place. 5 Install the dust covers. Additional printer setup 22


