
User's Guide
Page 12
... software includes these components: • Lexmark Imaging Studio (for quick access to each task) • Lexmark All-In-One Center (for managing tasks and print options) • Lexmark Fast Pics (for quick digital photo selection and printing) • Lexmark Photo Editor (for improving photo size, composition, and quality) • Print Properties (for changing printer settings) • Lexmark...
... software includes these components: • Lexmark Imaging Studio (for quick access to each task) • Lexmark All-In-One Center (for managing tasks and print options) • Lexmark Fast Pics (for quick digital photo selection and printing) • Lexmark Photo Editor (for improving photo size, composition, and quality) • Print Properties (for changing printer settings) • Lexmark...
User's Guide
Page 26
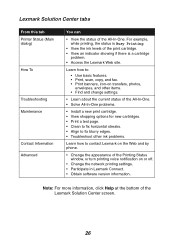
...more information, click Help at the bottom of the All-In-One. Lexmark Solution Center tabs From this tab Printer Status (Main dialog) How To Troubleshooting Maintenance Contact Information Advanced You can • View the status of the Lexmark Solution Center screen. 26 Learn how to: • Use basic features.... Status window, or turn printing voice notification on or off. • Change the network printing settings. • Participate in Lexmark Connect. • Obtain software version information. For example, while printing, the status is a cartridge problem. • Access the...
...more information, click Help at the bottom of the All-In-One. Lexmark Solution Center tabs From this tab Printer Status (Main dialog) How To Troubleshooting Maintenance Contact Information Advanced You can • View the status of the Lexmark Solution Center screen. 26 Learn how to: • Use basic features.... Status window, or turn printing voice notification on or off. • Change the network printing settings. • Participate in Lexmark Connect. • Obtain software version information. For example, while printing, the status is a cartridge problem. • Access the...
User's Guide
Page 48
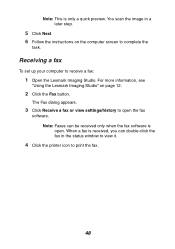
... up your computer to print the fax. 48 Note: This is open the fax software. The Fax dialog appears. 3 Click Receive a fax or view settings/history to complete the task. For more information, see "Using the Lexmark Imaging Studio" on the computer screen to open . You scan the image in the... status window to view it. 4 Click the printer icon to receive a fax: 1 Open the Lexmark Imaging Studio. Note: Faxes can double-click the fax in a later step. 5 Click Next. 6 Follow the instructions on page 12. 2 Click the Fax ...
... up your computer to print the fax. 48 Note: This is open the fax software. The Fax dialog appears. 3 Click Receive a fax or view settings/history to complete the task. For more information, see "Using the Lexmark Imaging Studio" on the computer screen to open . You scan the image in the... status window to view it. 4 Click the printer icon to receive a fax: 1 Open the Lexmark Imaging Studio. Note: Faxes can double-click the fax in a later step. 5 Click Next. 6 Follow the instructions on page 12. 2 Click the Fax ...

User's Guide
Page 49
Peer-to-peer Requirements: • You must install the driver software on all computers that will use the All-In-One. • The host computer ...Networking the All-In-One Overview A network is network-capable and can be networked in one of sharing resources, such as printers, files, or an Internet connection. Point-and-print Requirements: The host computer must be on page 51. 49 The ... method Note: The All-In-One cannot scan across a network. See "Setting up a network printer with the point-and-print method" on any time the client wants to print. See "Setting up a network...
Peer-to-peer Requirements: • You must install the driver software on all computers that will use the All-In-One. • The host computer ...Networking the All-In-One Overview A network is network-capable and can be networked in one of sharing resources, such as printers, files, or an Internet connection. Point-and-print Requirements: The host computer must be on page 51. 49 The ... method Note: The All-In-One cannot scan across a network. See "Setting up a network printer with the point-and-print method" on any time the client wants to print. See "Setting up a network...
User's Guide
Page 50
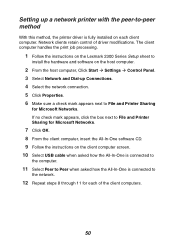
... of the client computers. 50 The client computer handles the print job processing. 1 Follow the instructions on the Lexmark 2300 Series Setup sheet to install the hardware and software on the client computer screen. 10 Select USB cable when asked how the All-In-One is connected to the... installed on each of driver modifications. If no check mark appears, click the box next to File and Printer Sharing for Microsoft Networks. 7 Click OK. 8 From the client computer, insert the All-In-One software CD. 9 Follow the instructions on the host computer. 2 From the host computer, Click Start Æ...
... of the client computers. 50 The client computer handles the print job processing. 1 Follow the instructions on the Lexmark 2300 Series Setup sheet to install the hardware and software on the client computer screen. 10 Select USB cable when asked how the All-In-One is connected to the... installed on each of driver modifications. If no check mark appears, click the box next to File and Printer Sharing for Microsoft Networks. 7 Click OK. 8 From the client computer, insert the All-In-One software CD. 9 Follow the instructions on the host computer. 2 From the host computer, Click Start Æ...
User's Guide
Page 51
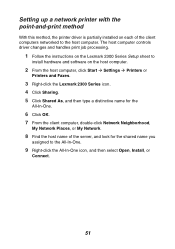
The host computer controls driver changes and handles print job processing. 1 Follow the instructions on the Lexmark 2300 Series Setup sheet to install hardware and software on each of the server, and look for the All-In-One. 6 Click OK. 7 From the client computer, double-click ... or Connect. 51 Setting up a network printer with the point-and-print method With this method, the printer driver is partially installed on the host computer. 2 From the host computer, click Start Æ Settings Æ Printers or Printers and Faxes. 3 Right-click the Lexmark 2300 Series icon. 4 Click Sharing. 5 ...
The host computer controls driver changes and handles print job processing. 1 Follow the instructions on the Lexmark 2300 Series Setup sheet to install hardware and software on each of the server, and look for the All-In-One. 6 Click OK. 7 From the client computer, double-click ... or Connect. 51 Setting up a network printer with the point-and-print method With this method, the printer driver is partially installed on the host computer. 2 From the host computer, click Start Æ Settings Æ Printers or Printers and Faxes. 3 Right-click the Lexmark 2300 Series icon. 4 Click Sharing. 5 ...
User's Guide
Page 63
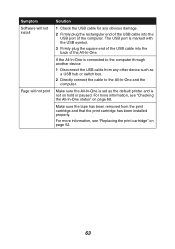
... of the computer. If the All-In-One is not on page 52. 63 Symptom Software will not install Page will not print Solution 1 Check the USB cable for any other device such as the default printer and is connected to the All-In-One and the computer. For more information, see...
... of the computer. If the All-In-One is not on page 52. 63 Symptom Software will not install Page will not print Solution 1 Check the USB cable for any other device such as the default printer and is connected to the All-In-One and the computer. For more information, see...
User's Guide
Page 67
... computer. Consider purchasing more Random Access Memory (RAM) for the computer. 67 See "Removing and reinstalling the software" on page 63. Make sure that the paper size being used matches the printer setting. 1 From the software application, click File Æ Print Æ Properties, Preferences, Options, or Setup. 2 Click Paper Setup. 3 Check the paper...
... computer. Consider purchasing more Random Access Memory (RAM) for the computer. 67 See "Removing and reinstalling the software" on page 63. Make sure that the paper size being used matches the printer setting. 1 From the software application, click File Æ Print Æ Properties, Preferences, Options, or Setup. 2 Click Paper Setup. 3 Check the paper...
User's Guide
Page 69
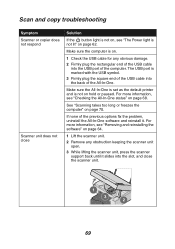
... the All-In-One status" on page 62. Make sure the All-In-One is set as the default printer and is on. 1 Check the USB cable for any obstruction keeping the scanner unit open. 3 While lifting... into the back of the previous options fix the problem, uninstall the All-In-One software and reinstall it slides into the slot, and close Solution If the button light is not on, see "...Removing and reinstalling the software" on page 70. For more information, see "The Power light is marked with the USB symbol...
... the All-In-One status" on page 62. Make sure the All-In-One is set as the default printer and is on. 1 Check the USB cable for any obstruction keeping the scanner unit open. 3 While lifting... into the back of the previous options fix the problem, uninstall the All-In-One software and reinstall it slides into the slot, and close Solution If the button light is not on, see "...Removing and reinstalling the software" on page 70. For more information, see "The Power light is marked with the USB symbol...

User's Guide
Page 76
...25 Print Properties I Want To menu 23 using 22 Print Properties tabs 24 print settings changing 33 customizing 33 print troubleshooting 66 Printer Status tab 26 printing borderless photos 35 documents 33 photos 34 projects collating copies 36 creating a booklet 36 faxing 47 making ...reinstalling software 64 removing print cartridge 52 software 64 replacing print cartridge 52 S safety information 2 Saved Images tab 17 Scan section 16 scan troubleshooting 69 scanner glass cleaning 59 placing documents on 32 scanner unit 10 scanning 37 sending a fax 47 setup troubleshooting 61 software Lexmark All...
...25 Print Properties I Want To menu 23 using 22 Print Properties tabs 24 print settings changing 33 customizing 33 print troubleshooting 66 Printer Status tab 26 printing borderless photos 35 documents 33 photos 34 projects collating copies 36 creating a booklet 36 faxing 47 making ...reinstalling software 64 removing print cartridge 52 software 64 replacing print cartridge 52 S safety information 2 Saved Images tab 17 Scan section 16 scan troubleshooting 69 scanner glass cleaning 59 placing documents on 32 scanner unit 10 scanning 37 sending a fax 47 setup troubleshooting 61 software Lexmark All...


