
Getting Started
Page 3
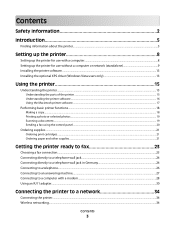
... Setting up the printer 8 Setting up the printer for use with a computer...8 Setting up the printer for use without a computer or network (standalone 9 Installing the printer software...13 Installing the optional XPS driver (Windows Vista users only 13 Using the printer 15 Understanding the printer...15 Understanding the parts of the printer ...15 Understanding the printer software...16 Using the Macintosh printer software...17 Performing basic printer functions...18 Making a copy...18 Printing a photo or selected photos...19 Scanning a document ...19 Sending a fax using the control panel...
... Setting up the printer 8 Setting up the printer for use with a computer...8 Setting up the printer for use without a computer or network (standalone 9 Installing the printer software...13 Installing the optional XPS driver (Windows Vista users only 13 Using the printer 15 Understanding the printer...15 Understanding the parts of the printer ...15 Understanding the printer software...16 Using the Macintosh printer software...17 Performing basic printer functions...18 Making a copy...18 Printing a photo or selected photos...19 Scanning a document ...19 Sending a fax using the control panel...

Getting Started
Page 4
... set up the printer on a wireless network 34 Installing the printer on a wireless network...35 Interpreting the colors of the Wi-Fi indicator light...36 Finding the signal strength...36 Wired networking...36 Installing the printer on a wired (Ethernet) network ...36 Connecting the printer directly to the computer with a USB cable 37 Troubleshooting 38 Setup troubleshooting...38 Power button is not lit ...38 Software does not install...38 Page does not print...40 Wireless troubleshooting...41 Check your security keys...41 Wireless setup program...
... set up the printer on a wireless network 34 Installing the printer on a wireless network...35 Interpreting the colors of the Wi-Fi indicator light...36 Finding the signal strength...36 Wired networking...36 Installing the printer on a wired (Ethernet) network ...36 Connecting the printer directly to the computer with a USB cable 37 Troubleshooting 38 Setup troubleshooting...38 Power button is not lit ...38 Software does not install...38 Page does not print...40 Wireless troubleshooting...41 Check your security keys...41 Wireless setup program...
Getting Started
Page 9
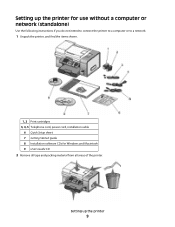
Setting up the printer 9 Setting up the printer for use without a computer or network (standalone) Use the following instructions if you do not intend to connect the printer to a computer or to a network. 1 Unpack the printer, and find the items shown. 1, 2 Print cartridges 3, 4, 5 Telephone cord, power cord, installation cable 6 Quick Setup sheet 7 Getting Started guide 8 Installation software CDs for Windows and Macintosh 9 User's Guide CD 2 Remove all tape and packing material from all areas of the printer.
Setting up the printer 9 Setting up the printer for use without a computer or network (standalone) Use the following instructions if you do not intend to connect the printer to a computer or to a network. 1 Unpack the printer, and find the items shown. 1, 2 Print cartridges 3, 4, 5 Telephone cord, power cord, installation cable 6 Quick Setup sheet 7 Getting Started guide 8 Installation software CDs for Windows and Macintosh 9 User's Guide CD 2 Remove all tape and packing material from all areas of the printer.
Getting Started
Page 13
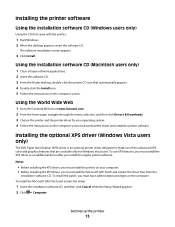
... Lexmark Web site at www.lexmark.com. 2 From the home page, navigate through the menu selection, and then click Drivers & Downloads. 3 Choose the printer and the printer driver for Windows Vista users. Installing the optional XPS driver (Windows Vista users only) The XML Paper Specification (XPS) driver is an optional printer driver designed to download the driver and install the printer software. To install the patch, you must install the Microsoft QFE Patch and extract the driver files from the installation software CD. To install...
... Lexmark Web site at www.lexmark.com. 2 From the home page, navigate through the menu selection, and then click Drivers & Downloads. 3 Choose the printer and the printer driver for Windows Vista users. Installing the optional XPS driver (Windows Vista users only) The XML Paper Specification (XPS) driver is an optional printer driver designed to download the driver and install the printer software. To install the patch, you must install the Microsoft QFE Patch and extract the driver files from the installation software CD. To install...
Getting Started
Page 14
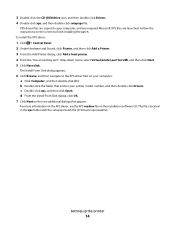
... driver: 1 Click ª Control Panel. 2 Under Hardware and Sound, click Printer, and then click Add a Printer. 3 From the Add Printer dialog, click Add a local printer. 4 From the "Use an existing port" drop-down menu, select Virtual printer port for USB, and then click Next. 5 Click Have disk. b Double-click the folder that appear. The file is located in your computer: a Click Computer, and then double-click (C:). c Double-click xps, and then click Open. Setting...
... driver: 1 Click ª Control Panel. 2 Under Hardware and Sound, click Printer, and then click Add a Printer. 3 From the Add Printer dialog, click Add a local printer. 4 From the "Use an existing port" drop-down menu, select Virtual printer port for USB, and then click Next. 5 Click Have disk. b Double-click the folder that appear. The file is located in your computer: a Click Computer, and then double-click (C:). c Double-click xps, and then click Open. Setting...
Getting Started
Page 15
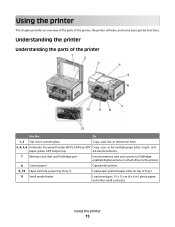
...Top cover, scanner glass Copy, scan, fax, or remove an item. 3, 4, 5, 6 Automatic Document Feeder (ADF), ADF tray, ADF Copy, scan, or fax multiple-page letter-, legal-, and paper guide, ADF output tray A4-size documents. 7 Memory card slots and PictBridge port Insert a memory card and connect a PictBridgeenabled digital camera or a flash drive to the printer. 8 Control panel Operate the printer. 9, 10 Paper exit tray, paper tray (Tray 1) Load paper; Understanding the printer Understanding the parts of the printer, the printer software, and some basic printer functions. printed paper...
...Top cover, scanner glass Copy, scan, fax, or remove an item. 3, 4, 5, 6 Automatic Document Feeder (ADF), ADF tray, ADF Copy, scan, or fax multiple-page letter-, legal-, and paper guide, ADF output tray A4-size documents. 7 Memory card slots and PictBridge port Insert a memory card and connect a PictBridgeenabled digital camera or a flash drive to the printer. 8 Control panel Operate the printer. 9, 10 Paper exit tray, paper tray (Tray 1) Load paper; Understanding the printer Understanding the parts of the printer, the printer software, and some basic printer functions. printed paper...
Getting Started
Page 16
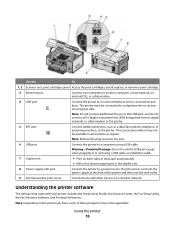
... 1, 2 Scanner unit, print cartridge carrier Access the print cartridges; Warning-Potential Damage: Do not touch the USB port except when plugging in or removing a USB cable or installation cable. 7 Duplex unit • Print on both sides of the printer and then into the power supply at the back of the paper automatically. • Pull out to send and receive faxes. Note: Do not connect additional devices to the LINE port, and do not connect a DSL (digital subscriber line), ISDN (integrated services...
... 1, 2 Scanner unit, print cartridge carrier Access the print cartridges; Warning-Potential Damage: Do not touch the USB port except when plugging in or removing a USB cable or installation cable. 7 Duplex unit • Print on both sides of the printer and then into the power supply at the back of the paper automatically. • Pull out to send and receive faxes. Note: Do not connect additional devices to the LINE port, and do not connect a DSL (digital subscriber line), ISDN (integrated services...
Getting Started
Page 17
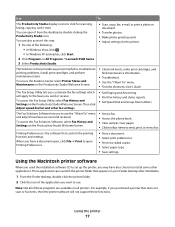
...; Make photo greeting cards. • Adjust settings for scanning, faxing, copying, and e-mail. When you purchased a printer that does not scan or fax items, then the printer software will apply to print photos, troubleshoot printing problems, install print cartridges, and perform maintenance tasks. Note: Not all printers. For example, if you have also chosen to send, print, or view a fax. You can open Printing Preferences. • Print a document. • Select print preferences. • Print two-sided copies. • Select paper type. • Save settings. To access...
...; Make photo greeting cards. • Adjust settings for scanning, faxing, copying, and e-mail. When you purchased a printer that does not scan or fax items, then the printer software will apply to print photos, troubleshoot printing problems, install print cartridges, and perform maintenance tasks. Note: Not all printers. For example, if you have also chosen to send, print, or view a fax. You can open Printing Preferences. • Print a document. • Select print preferences. • Print two-sided copies. • Select paper type. • Save settings. To access...
Getting Started
Page 18
... the scanner glass. The number of the paper (duplex). Use the Page Setup dialog Print dialog Printer Services To Choose a paper size, orientation, and scaling value. • Adjust print settings and schedule print jobs. • Print on a wireless network. Access helpful Web links and information. Network Card Reader • View photos from any program that allows you to 1. 5 Press . The following dialogs are available from a memory device inserted into the Automatic Document Feeder (ADF). Use the scanner glass for fax jobs. • Create and edit the Speed Dial list...
... the scanner glass. The number of the paper (duplex). Use the Page Setup dialog Print dialog Printer Services To Choose a paper size, orientation, and scaling value. • Adjust print settings and schedule print jobs. • Print on a wireless network. Access helpful Web links and information. Network Card Reader • View photos from any program that allows you to 1. 5 Press . The following dialogs are available from a memory device inserted into the Automatic Document Feeder (ADF). Use the scanner glass for fax jobs. • Create and edit the Speed Dial list...
Getting Started
Page 20
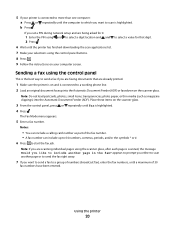
... a group of numbers (broadcast fax), enter the fax numbers, until Fax is connected to a working phone line. 2 Load an original document faceup into the Automatic Document Feeder (ADF). 5 If your computer screen. b Press . Note: Do not load postcards, photos, small items, transparencies, photo paper, or thin media (such as part of the fax number. • A fax number can include a calling card number as magazine clippings) into the Automatic Document Feeder (ADF) or facedown on the scanner glass. 3 From the control panel, press or...
... a group of numbers (broadcast fax), enter the fax numbers, until Fax is connected to a working phone line. 2 Load an original document faceup into the Automatic Document Feeder (ADF). 5 If your computer screen. b Press . Note: Do not load postcards, photos, small items, transparencies, photo paper, or thin media (such as part of the fax number. • A fax number can include a calling card number as magazine clippings) into the Automatic Document Feeder (ADF) or facedown on the scanner glass. 3 From the control panel, press or...
Getting Started
Page 34
... printer on a network lets users at different computers print to a common printer. Connecting the printer Installing and configuring the printer for wireless printing, you will reside. There are A-F, a-f, and 0-9. - If you will be : - Exactly 10 or 26 hexadecimal characters. This is using Wired Equivalent Privacy (WEP) security, the WEP key should be using a USB cable. If your wireless network. • Know the password that came with a USB cable" on a wireless network To set up the printer...
... printer on a network lets users at different computers print to a common printer. Connecting the printer Installing and configuring the printer for wireless printing, you will reside. There are A-F, a-f, and 0-9. - If you will be : - Exactly 10 or 26 hexadecimal characters. This is using Wired Equivalent Privacy (WEP) security, the WEP key should be using a USB cable. If your wireless network. • Know the password that came with a USB cable" on a wireless network To set up the printer...
Getting Started
Page 36
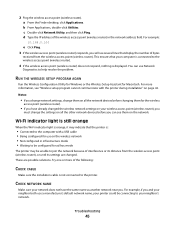
... that: - The printer is connected to communicate with the wireless access point (wireless router), but the wireless access point (wireless router) may no longer be turned off and back on a wired network, make sure that transmit and receive radio signals. The printer is therefore trying to a router using an Ethernet cable. • Orange may indicate that: - The configured printer has been powered off or not working properly. • Your...
... that: - The printer is connected to communicate with the wireless access point (wireless router), but the wireless access point (wireless router) may no longer be turned off and back on a wired network, make sure that transmit and receive radio signals. The printer is therefore trying to a router using an Ethernet cable. • Orange may indicate that: - The configured printer has been powered off or not working properly. • Your...
Getting Started
Page 39
... PROGRAMS (FOR WINDOWS USERS ONLY) 1 Close all open software applications. 2 Disable any obvious damage. 2 Firmly plug the square end of the USB cable into the back of the printer. 3 Firmly plug the rectangular end of the computer. In Windows XP, click Start to access the My Computer icon. 4 Double-click the CD-ROM drive icon. 5 If necessary, double-click setup.exe. 6 Follow the instructions on the computer screen...
... PROGRAMS (FOR WINDOWS USERS ONLY) 1 Close all open software applications. 2 Disable any obvious damage. 2 Firmly plug the square end of the USB cable into the back of the printer. 3 Firmly plug the rectangular end of the computer. In Windows XP, click Start to access the My Computer icon. 4 Double-click the CD-ROM drive icon. 5 If necessary, double-click setup.exe. 6 Follow the instructions on the computer screen...
Getting Started
Page 40
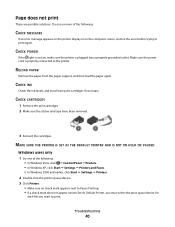
... grounded outlet. CHECK CARTRIDGES 1 Remove the print cartridges. 2 Make sure the sticker and tape have been removed. 3 Reinsert the cartridges. Troubleshooting 40 MAKE SURE THE PRINTER IS SET AS THE DEFAULT PRINTER AND IS NOT ON HOLD OR PAUSED Windows users only 1 Do one or more of the following : CHECK MESSAGES If an error message appears on the printer display or on , make sure the printer is properly connected to print. CHECK INK Check the ink levels, and install new print cartridges if necessary...
... grounded outlet. CHECK CARTRIDGES 1 Remove the print cartridges. 2 Make sure the sticker and tape have been removed. 3 Reinsert the cartridges. Troubleshooting 40 MAKE SURE THE PRINTER IS SET AS THE DEFAULT PRINTER AND IS NOT ON HOLD OR PAUSED Windows users only 1 Do one or more of the following : CHECK MESSAGES If an error message appears on the printer display or on , make sure the printer is properly connected to print. CHECK INK Check the ink levels, and install new print cartridges if necessary...
Getting Started
Page 41
.... Wireless troubleshooting Check your security keys A security key is like a password. RECONNECT POWER SUPPLY 1 Press to turn the printer off. 2 Disconnect the power cord from the wall outlet. 3 Gently remove the power supply from the printer. 4 Reconnect the power supply to the printer. 5 Plug the power cord into the wall outlet. 6 Press to resume a particular print job, select the document name, and then click Resume. Mac users only To set printer as default: 1 From...
.... Wireless troubleshooting Check your security keys A security key is like a password. RECONNECT POWER SUPPLY 1 Press to turn the printer off. 2 Disconnect the power cord from the wall outlet. 3 Gently remove the power supply from the printer. 4 Reconnect the power supply to the printer. 5 Plug the power cord into the wall outlet. 6 Press to resume a particular print job, select the document name, and then click Resume. Mac users only To set printer as default: 1 From...
Getting Started
Page 45
... "Wireless setup program cannot communicate with a USB cable • Being configured for ad hoc mode The printer may indicate that your neighbor's network. For example, if you can use a manufacturer's default network name, your printer could be unable to your computer is displayed. You can see several lines that display the number of the wireless access point (wireless router) in infrastructure mode • Waiting to be configured for use on the network. Wi-Fi indicator light...
... "Wireless setup program cannot communicate with a USB cable • Being configured for ad hoc mode The printer may indicate that your neighbor's network. For example, if you can use a manufacturer's default network name, your printer could be unable to your computer is displayed. You can see several lines that display the number of the wireless access point (wireless router) in infrastructure mode • Waiting to be configured for use on the network. Wi-Fi indicator light...
Getting Started
Page 47
... wireless access point (wireless router). 2 Enter your wireless access point (wireless router) into the Web address field of numbers separated by running the Wireless Configuration Utility (on a Windows operating system) or the Wireless Setup Assistant (on a Macintosh operating system) to set up menu, select Airport. If you copy them down the SSID, security type, and the security keys if they are stored. Note: Make sure you do not know the IP address of the wireless network...
... wireless access point (wireless router). 2 Enter your wireless access point (wireless router) into the Web address field of numbers separated by running the Wireless Configuration Utility (on a Windows operating system) or the Wireless Setup Assistant (on a Macintosh operating system) to set up menu, select Airport. If you copy them down the SSID, security type, and the security keys if they are stored. Note: Make sure you do not know the IP address of the wireless network...
Getting Started
Page 48
... you set your wireless access point (wireless router) to issue a limited number of IP addresses, you must change this so that came with the wireless network, or contact the person who set up your computer. 3 Follow the instructions on the computer screen. Wireless network printer does not print These are shown. CHECK CABLE • Make sure the power cable is connected to the printer and to make these changes, see the documentation that the printer can be displayed...
... you set your wireless access point (wireless router) to issue a limited number of IP addresses, you must change this so that came with the wireless network, or contact the person who set up your computer. 3 Follow the instructions on the computer screen. Wireless network printer does not print These are shown. CHECK CABLE • Make sure the power cable is connected to the printer and to make these changes, see the documentation that the printer can be displayed...
Getting Started
Page 49
... was accidentally deleted: a Go to see if "Status: Connected" appears under Network Card. Note: You must install the printer driver on the Finder desktop. CHECK IF PRINTER IS CONNECTED TO THE WIRELESS NETWORK 1 Print a network setup page. REBOOT THE COMPUTER Turn off and restart the computer. Windows users only 1 Do one of the following: • In Windows Vista, click ª Control Panel ª Printers. • In Windows XP, click Start ª Settings ª Printers and Faxes. • In Windows 2000...
... was accidentally deleted: a Go to see if "Status: Connected" appears under Network Card. Note: You must install the printer driver on the Finder desktop. CHECK IF PRINTER IS CONNECTED TO THE WIRELESS NETWORK 1 Print a network setup page. REBOOT THE COMPUTER Turn off and restart the computer. Windows users only 1 Do one of the following: • In Windows Vista, click ª Control Panel ª Printers. • In Windows XP, click Start ª Settings ª Printers and Faxes. • In Windows 2000...
Getting Started
Page 50
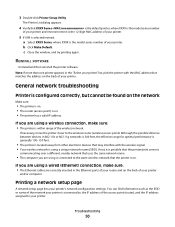
... network troubleshooting Printer is configured correctly, but cannot be found on the network Make sure: • The printer is on. • The router (access point) is on the back of your printer" list, pick the printer with the wireless signal. • Your wireless network is using is the model series number of the access point (router), and the IP address assigned to the same wireless network that matches the address on . 3 Double-click Printer Setup Utility. Printing a network setup page A network setup page lists...
... network troubleshooting Printer is configured correctly, but cannot be found on the network Make sure: • The printer is on. • The router (access point) is on the back of your printer" list, pick the printer with the wireless signal. • Your wireless network is using is the model series number of the access point (router), and the IP address assigned to the same wireless network that matches the address on . 3 Double-click Printer Setup Utility. Printing a network setup page A network setup page lists...

