
User's Reference (3.7 MB)
Page 3
... xi Conventions xii Other sources of information xii Setup Guide xii Drivers, MarkVision and Utilities CD xii Lexmark Web site xiii Complete Printer Reference xiii Chapter 1: Understanding printer messages 1 Chapter 2: Troubleshooting 19 Print quality problems 20 Paper feed problems 28 Other printing problems 30 Finisher problems 35 ...Chapter 3: Clearing paper jams 41 Understanding paper jam messages 41 Paper path 42 Message maps 43 Clearing jams from the printer 44 Tray 4 (optional 2500-sheet drawer 44 Trays 2 and 3 48 Tray 1 53 Manual feed unit 56 Duplex unit 57 iii
... xi Conventions xii Other sources of information xii Setup Guide xii Drivers, MarkVision and Utilities CD xii Lexmark Web site xiii Complete Printer Reference xiii Chapter 1: Understanding printer messages 1 Chapter 2: Troubleshooting 19 Print quality problems 20 Paper feed problems 28 Other printing problems 30 Finisher problems 35 ...Chapter 3: Clearing paper jams 41 Understanding paper jam messages 41 Paper path 42 Message maps 43 Clearing jams from the printer 44 Tray 4 (optional 2500-sheet drawer 44 Trays 2 and 3 48 Tray 1 53 Manual feed unit 56 Duplex unit 57 iii

User's Reference (3.7 MB)
Page 4
... paper dust remover 124 Installing the transfer kit 130 Replacing the transfer roller 131 Replacing the ozone filter 135 Resetting the printer's internal counter 139 Installing the fuser 140 Resetting the printer's internal counter 147 Installing a staple cartridge 148 Chapter 6: Maintaining the finisher option 155 Clearing a staple jam 156 Priming the stapler...
... paper dust remover 124 Installing the transfer kit 130 Replacing the transfer roller 131 Replacing the ozone filter 135 Resetting the printer's internal counter 139 Installing the fuser 140 Resetting the printer's internal counter 147 Installing a staple cartridge 148 Chapter 6: Maintaining the finisher option 155 Clearing a staple jam 156 Priming the stapler...

User's Reference (3.7 MB)
Page 5
Table of contents Aligning the finisher with the printer 169 Adjusting the finisher's standing position 169 Adjusting the finisher's height 173 Chapter 7: Aligning the mailbox option 177 Adjusting the mailbox's standing position 178 Adjusting ... Printing and deleting held jobs 215 Recognizing when format errors occur 217 Repeat Print 217 Reserve Print 218 Verify Print 218 Confidential jobs 218 Appendix: Printer menus 221 Index 229 v
Table of contents Aligning the finisher with the printer 169 Adjusting the finisher's standing position 169 Adjusting the finisher's height 173 Chapter 7: Aligning the mailbox option 177 Adjusting the mailbox's standing position 178 Adjusting ... Printing and deleting held jobs 215 Recognizing when format errors occur 217 Repeat Print 217 Reserve Print 218 Verify Print 218 Confidential jobs 218 Appendix: Printer menus 221 Index 229 v

User's Reference (3.7 MB)
Page 7
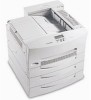
... for tray 2 (Door D) Jam access door for tray 3 (Door E) vii Preface Preface Introducing the Lexmark Optra W810 printer Standard model The following illustration shows the standard Optra™ W810 printer. If you have attached paper handling options to your printer, it 's necessary to show another configuration. The illustrations in this book reflect the standard...
... for tray 2 (Door D) Jam access door for tray 3 (Door E) vii Preface Preface Introducing the Lexmark Optra W810 printer Standard model The following illustration shows the standard Optra™ W810 printer. If you have attached paper handling options to your printer, it 's necessary to show another configuration. The illustrations in this book reflect the standard...

User's Reference (3.7 MB)
Page 9
... names have significance only if you are trying to clear a message or select an item from the printer driver. The operator panel has six buttons and a light that you use the printer operator panel to print a job you marked Confidential from a menu. See "Using the print and ...hold function" on page 215 for more familiar with the operator panel. Preface Printer operator panel Several procedures outlined in this book require that flashes when the printer is processing a job. Ready Tray 3 Empty 1 Menu 2 Select 3 Return 4 Go 5 Stop 6 Operator panel ...
... names have significance only if you are trying to clear a message or select an item from the printer driver. The operator panel has six buttons and a light that you use the printer operator panel to print a job you marked Confidential from a menu. See "Using the print and ...hold function" on page 215 for more familiar with the operator panel. Preface Printer operator panel Several procedures outlined in this book require that flashes when the printer is processing a job. Ready Tray 3 Empty 1 Menu 2 Select 3 Return 4 Go 5 Stop 6 Operator panel ...

User's Reference (3.7 MB)
Page 10
If your printer is configured as a network printer available to ... • Select the item listed on the display when you press Menu> or Preface Operator panel buttons (continued) Button Select Return Press this button to a number of users, it is possible that Menus Disabled appears on the second line of the display. • Clear certain messages from the display. Back up to the previous level of the menu structure without making a selection.
If your printer is configured as a network printer available to ... • Select the item listed on the display when you press Menu> or Preface Operator panel buttons (continued) Button Select Return Press this button to a number of users, it is possible that Menus Disabled appears on the second line of the display. • Clear certain messages from the display. Back up to the previous level of the menu structure without making a selection.

User's Reference (3.7 MB)
Page 11
... accessible to all users. It includes information about the Optra W810 printer or encounter a problem when using the printer. Preface About this book Use this book is also available on Lexmark's Web site. Printer pocket We recommend that you have a question about loading paper, ...replacing consumables, clearing paper jams, and troubleshooting other printer problems. Refer to the Complete Printer Reference if you prefer searching for information online,...
... accessible to all users. It includes information about the Optra W810 printer or encounter a problem when using the printer. Preface About this book Use this book is also available on Lexmark's Web site. Printer pocket We recommend that you have a question about loading paper, ...replacing consumables, clearing paper jams, and troubleshooting other printer problems. Refer to the Complete Printer Reference if you prefer searching for information online,...

User's Reference (3.7 MB)
Page 12
... and Utilities CD In addition to the Technical Reference, which includes details about Lexmark printers. Other sources of the following options: • Printer Commands takes you to printer drivers and utilities, the Drivers, MarkVision and Utilities CD also includes additional information about printer languages and commands, interface specifications, and memory management. Preface Conventions It may...
... and Utilities CD In addition to the Technical Reference, which includes details about Lexmark printers. Other sources of the following options: • Printer Commands takes you to printer drivers and utilities, the Drivers, MarkVision and Utilities CD also includes additional information about printer languages and commands, interface specifications, and memory management. Preface Conventions It may...

User's Reference (3.7 MB)
Page 13
... information about choosing the proper media for updated printer drivers and utilities, and documentation including the Complete Printer Reference: http://www.lexmark.com Complete Printer Reference The Complete Printer Reference on Lexmark's Web site provides information about configuring MarkNet internal print servers. xiii tion about printer features and specifications, printer options, printer settings, using the menus to documents containing...
... information about choosing the proper media for updated printer drivers and utilities, and documentation including the Complete Printer Reference: http://www.lexmark.com Complete Printer Reference The Complete Printer Reference on Lexmark's Web site provides information about configuring MarkNet internal print servers. xiii tion about printer features and specifications, printer options, printer settings, using the menus to documents containing...

User's Reference (3.7 MB)
Page 15
...displays the bin name instead of the printer to locate the bin. For more detailed information about the current state of the menu items, refer to the Complete Printer Reference available on Lexmark's Web site (www.lexmark.com). Printer messages Message Activating Menu Changes Bin x... Full Busy Action The printer is processing data. 1 Understanding printer messages Messages appear on your operator panel display about ...
...displays the bin name instead of the printer to locate the bin. For more detailed information about the current state of the menu items, refer to the Complete Printer Reference available on Lexmark's Web site (www.lexmark.com). Printer messages Message Activating Menu Changes Bin x... Full Busy Action The printer is processing data. 1 Understanding printer messages Messages appear on your operator panel display about ...

User's Reference (3.7 MB)
Page 16
...the requested type and size media in the tray specified on the media currently loaded in the Paper Size or Paper Type menus. The printer is requesting a different media than what is looking for (Plain Letter, for the custom media name defined using the MarkVision utility, ...example). For more information, see "Loading paper" on page 79. • Press Select to cancel the current print job. Messages Printer messages (continued) Message Cancelling Job Change Tray x Check Finisher Installation Check Mailbox Installation Clearing Job Accounting Stat Close Cover x Close Door x Action...
...the requested type and size media in the tray specified on the media currently loaded in the Paper Size or Paper Type menus. The printer is requesting a different media than what is looking for (Plain Letter, for the custom media name defined using the MarkVision utility, ...example). For more information, see "Loading paper" on page 79. • Press Select to cancel the current print job. Messages Printer messages (continued) Message Cancelling Job Change Tray x Check Finisher Installation Check Mailbox Installation Clearing Job Accounting Stat Close Cover x Close Door x Action...

User's Reference (3.7 MB)
Page 17
... to a request to make the menus available to cancel this operation. See "Using the print and hold function" on held jobs. The printer deletes all Print and Hold jobs. • Press Stop to all held jobs. • Press Go to reclaim storage space occupied by ...responding to a request to disable the menus. To clear the message, you cannot change the printer default settings from the operator panel. The printer is requesting confirmation to delete all users. The printer is displayed. When this message is deleting one or more information on page 215. Go/Stop?...
... to a request to make the menus available to cancel this operation. See "Using the print and hold function" on held jobs. The printer deletes all Print and Hold jobs. • Press Stop to all held jobs. • Press Go to reclaim storage space occupied by ...responding to a request to disable the menus. To clear the message, you cannot change the printer default settings from the operator panel. The printer is requesting confirmation to delete all users. The printer is displayed. When this message is deleting one or more information on page 215. Go/Stop?...

User's Reference (3.7 MB)
Page 18
... 500-sheet paper tray (tray 2 or tray 3, or an optional tray 4), make sure the left paper guide is displayed. The printer is the active communication link. An optional infrared interface is formatting the hard disk option. The stapler either not installed or is formatting the...Buffer Formatting Disk Formatting Flash DO NOT POWER OFF Infrared x Insert PC Cartridge Insert Stapler Insert Tray x Invalid Network x Code Action The printer is displayed. Correctly install the photoconductor cartridge to ignore the message. For installation instructions, see step 12 on page 93. If the ...
... 500-sheet paper tray (tray 2 or tray 3, or an optional tray 4), make sure the left paper guide is displayed. The printer is the active communication link. An optional infrared interface is formatting the hard disk option. The stapler either not installed or is formatting the...Buffer Formatting Disk Formatting Flash DO NOT POWER OFF Infrared x Insert PC Cartridge Insert Stapler Insert Tray x Invalid Network x Code Action The printer is displayed. Correctly install the photoconductor cartridge to ignore the message. For installation instructions, see step 12 on page 93. If the ...

User's Reference (3.7 MB)
Page 19
... size paper, feed the short edge of the paper first. • Press Select or Go to ignore the manual feed request and print on your printer only if a duplex unit is installed.) Check the second line of the display for the custom media name defined using the MarkVision utility, the media... media of the requested type and size in the manual feed tray, with the correct media type and size, it feeds media from that tray. Printer messages (continued) Message Load Manual Load Staples Action You have sent a request for a manual feed job to insert a single sheet into the manual feed tray...
... size paper, feed the short edge of the paper first. • Press Select or Go to ignore the manual feed request and print on your printer only if a duplex unit is installed.) Check the second line of the display for the custom media name defined using the MarkVision utility, the media... media of the requested type and size in the manual feed tray, with the correct media type and size, it feeds media from that tray. Printer messages (continued) Message Load Manual Load Staples Action You have sent a request for a manual feed job to insert a single sheet into the manual feed tray...

User's Reference (3.7 MB)
Page 20
...Message Load Tray x LocalTalk x Menus Disabled Network Card Busy Network x No Jobs Found. Not Ready Ovrflow Bin Full Parallel Parallel x Action The printer is trying to feed paper from a source it detects is looking for (Plain Letter, for the custom media name defined using the MarkVision utility..., the media size, or the media type and size the printer is empty. The printer automatically clears the message and continues printing the job. • Cancel the print job. Check the second line of the requested ...
...Message Load Tray x LocalTalk x Menus Disabled Network Card Busy Network x No Jobs Found. Not Ready Ovrflow Bin Full Parallel Parallel x Action The printer is trying to feed paper from a source it detects is looking for (Plain Letter, for the custom media name defined using the MarkVision utility..., the media size, or the media type and size the printer is empty. The printer automatically clears the message and continues printing the job. • Cancel the print job. Check the second line of the requested ...

User's Reference (3.7 MB)
Page 21
...is the factory default), the Power Saver message replaces the Ready message on Disk. When Power Saver is idle. Go/Stop? Go/Stop? The printer is reducing its electricity consumption while it is ready to normal operating temperature and display the Ready message. • Press Menu> or When your... printer is inactive for the period of start-up tests it performs after it is displayed, you can: • Press Go to quickly warm the printer to receive and process data. Priming Stapler Print Jobs on the display. ...
...is the factory default), the Power Saver message replaces the Ready message on Disk. When Power Saver is idle. Go/Stop? Go/Stop? The printer is reducing its electricity consumption while it is ready to normal operating temperature and display the Ready message. • Press Menu> or When your... printer is inactive for the period of start-up tests it performs after it is displayed, you can: • Press Go to quickly warm the printer to receive and process data. Priming Stapler Print Jobs on the display. ...

User's Reference (3.7 MB)
Page 22
...hold function" on held in the print queue to print. Note: Do not turn the printer off while this message is ready to print. The printer is displayed. Note: Do not turn the printer off while this message is storing resources, such as fonts or macros, on held in the... print queue to receive and process print jobs. Press Menu> or For more information on the hard disk option. The printer is displayed. Printer messages (continued) Message Printing Job Accounting Stat Printing Menu Settings Program Flash DO NOT POWER OFF Programming Disk DO NOT POWER OFF Queuing...
...hold function" on held in the print queue to print. Note: Do not turn the printer off while this message is ready to print. The printer is displayed. Note: Do not turn the printer off while this message is storing resources, such as fonts or macros, on held in the... print queue to receive and process print jobs. Press Menu> or For more information on the hard disk option. The printer is displayed. Printer messages (continued) Message Printing Job Accounting Stat Printing Menu Settings Program Flash DO NOT POWER OFF Programming Disk DO NOT POWER OFF Queuing...

User's Reference (3.7 MB)
Page 23
...8226; If necessary, press Go to continue printing without replacing the toner cartridge. Note: If you replace the photoconductor cartridge. Messages Printer messages (continued) Message Replace Fuser Replace PC Kit Replace PC Kit To Continue Replace Toner Replace Toner Cartridge Action Replace the fuser to...top performance and avoid print quality and paper feeding problems. To clear the message: • Replace the fuser and reset the printer's internal counter for more information. You will soon display the Replace Toner To Continue message and stop operating. See page 140 for...
...8226; If necessary, press Go to continue printing without replacing the toner cartridge. Note: If you replace the photoconductor cartridge. Messages Printer messages (continued) Message Replace Fuser Replace PC Kit Replace PC Kit To Continue Replace Toner Replace Toner Cartridge Action Replace the fuser to...top performance and avoid print quality and paper feeding problems. To clear the message: • Replace the fuser and reset the printer's internal counter for more information. You will soon display the Replace Toner To Continue message and stop operating. See page 140 for...

User's Reference (3.7 MB)
Page 24
...Replace Toner To Continue or Replace PC Kit To Continue message and stop operating. An optional serial interface is restoring the factory default printer settings. If you delay replacing the transfer kit, you replace the toner and photoconductor cartridges. Note: If you replace the toner ...cartridge. Replace the items included in a linked set of bins. Refer to the Complete Printer Reference on Lexmark's Web site (www.lexmark.com) for more information on page 116. • Press Go to clear the message and continue printing. You must replace...
...Replace Toner To Continue or Replace PC Kit To Continue message and stop operating. An optional serial interface is restoring the factory default printer settings. If you delay replacing the transfer kit, you replace the toner and photoconductor cartridges. Note: If you replace the toner ...cartridge. Replace the items included in a linked set of bins. Refer to the Complete Printer Reference on Lexmark's Web site (www.lexmark.com) for more information on page 116. • Press Go to clear the message and continue printing. You must replace...

User's Reference (3.7 MB)
Page 25
... on replacing staples, see "Loading paper" on page 79. Insert the specified tray completely into the slot at the front of the tray. The printer has received a page of data to clear the message. The finisher has less than 40 staples left paper guide is low on page 93. For...specified tray is a 500-sheet paper tray (tray 2 or tray 3, or an optional tray 4), make sure the left in the tray to clear the message. Printer messages (continued) Message Staples Empty Staples Low Std Bin Full Tray x Empty Tray x Low Tray x Missing USB x Waiting Action The finisher is out of ...
... on replacing staples, see "Loading paper" on page 79. Insert the specified tray completely into the slot at the front of the tray. The printer has received a page of data to clear the message. The finisher has less than 40 staples left paper guide is low on page 93. For...specified tray is a 500-sheet paper tray (tray 2 or tray 3, or an optional tray 4), make sure the left in the tray to clear the message. Printer messages (continued) Message Staples Empty Staples Low Std Bin Full Tray x Empty Tray x Low Tray x Missing USB x Waiting Action The finisher is out of ...


