Instruction Manual
Page 2
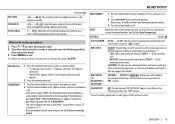
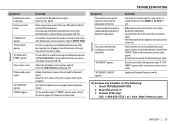
... and receiver. • Connect the equipment into an outlet on , the user is encouraged to try to correct the interference by one or more of the following are designed to laser product safety. special handling may generate or use radio frequency energy. FCC WARNING This equipment may apply. However, there is not installed and used in a residential installation. i Location : Top...
... and receiver. • Connect the equipment into an outlet on , the user is encouraged to try to correct the interference by one or more of the following are designed to laser product safety. special handling may generate or use radio frequency energy. FCC WARNING This equipment may apply. However, there is not installed and used in a residential installation. i Location : Top...
Instruction Manual
Page 4
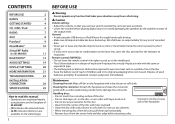
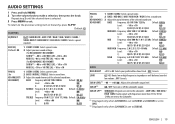
... volume before inserting a disc. CONTENTS BEFORE USE 2 BASICS 3 GETTING STARTED 4 CD / USB / iPod 5 RADIO 7 AUX 8 Pandora® 9 iHeartRadio® 10 SiriusXM® Radio (for KD-AR959BS) 11 BLUETOOTH® 13 AUDIO SETTINGS 19 DISPLAY SETTINGS 20 MORE INFORMATION 21 TROUBLESHOOTING 23 INSTALLATION / CONNECTION 26 SPECIFICATIONS 29 How to read this unit, pull them out horizontally. • Remove burrs from the center hole and disc edge before playing digital sources to avoid damaging the speakers...
... volume before inserting a disc. CONTENTS BEFORE USE 2 BASICS 3 GETTING STARTED 4 CD / USB / iPod 5 RADIO 7 AUX 8 Pandora® 9 iHeartRadio® 10 SiriusXM® Radio (for KD-AR959BS) 11 BLUETOOTH® 13 AUDIO SETTINGS 19 DISPLAY SETTINGS 20 MORE INFORMATION 21 TROUBLESHOOTING 23 INSTALLATION / CONNECTION 26 SPECIFICATIONS 29 How to read this unit, pull them out horizontally. • Remove burrs from the center hole and disc edge before playing digital sources to avoid damaging the speakers...
Instruction Manual
Page 9
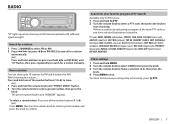
... music), HIP HOP, WEATHER Other settings 1 Press and hold G PTY. 2 Turn the volume knob to select a PTY code, then press the knob to start searching. To return to a station.... RADIO "ST" lights up to 18 stations for FM and 6 stations for AM. Search for your favorite program (PTY Search) Available only for a station manually. The preset number flashes and "MEMORY" appears. • To select a stored station: Press one of the number buttons...
... music), HIP HOP, WEATHER Other settings 1 Press and hold G PTY. 2 Turn the volume knob to select a PTY code, then press the knob to start searching. To return to a station.... RADIO "ST" lights up to 18 stations for FM and 6 stations for AM. Search for your favorite program (PTY Search) Available only for a station manually. The preset number flashes and "MEMORY" appears. • To select a stored station: Press one of the number buttons...
Instruction Manual
Page 10
... - 18: Automatically presets up when complete. * Selectable only when [ONCE] or [WEEKLY] is FM. Use a portable audio player 1 Connect a portable audio player (commercially available). 3.5 mm (1/8") stereo mini plug with "L" shaped connector (commercially available) Auxiliary input jack Portable audio player 2 Select [ON] for [AUX] in [SRC SELECT] after Radio Timer for the following 12 stations. Radio Timer will not be turned on the portable audio player and start playback. WIDE: Subjects to 18 stations for optimum audio output. 8
... - 18: Automatically presets up when complete. * Selectable only when [ONCE] or [WEEKLY] is FM. Use a portable audio player 1 Connect a portable audio player (commercially available). 3.5 mm (1/8") stereo mini plug with "L" shaped connector (commercially available) Auxiliary input jack Portable audio player 2 Select [ON] for [AUX] in [SRC SELECT] after Radio Timer for the following 12 stations. Radio Timer will not be turned on the portable audio player and start playback. WIDE: Subjects to 18 stations for optimum audio output. 8
Instruction Manual
Page 13
The Radio ID is selected, a pass code input screen appears. Start listening 1 Press B/SOURCE to select SIRIUS XM. 2 Press MENU. 3 Turn the volume knob to select a CATEGORY, then press the knob. 4 Turn the volume knob to select a category from the paused position in the top right corner, or call 1-866-635-2349. For users in Canada: To activate SiriusXM Canada service go to search for KD-AR959BS) Preparation: 1 Connect the optional...
The Radio ID is selected, a pass code input screen appears. Start listening 1 Press B/SOURCE to select SIRIUS XM. 2 Press MENU. 3 Turn the volume knob to select a CATEGORY, then press the knob. 4 Turn the volume knob to select a category from the paused position in the top right corner, or call 1-866-635-2349. For users in Canada: To activate SiriusXM Canada service go to search for KD-AR959BS) Preparation: 1 Connect the optional...

Instruction Manual
Page 14
... channels... 1 Press MENU. 2 Turn the volume knob to select PRESET, then press the knob. 3 Turn the volume knob to exit. SiriusXM® Radio Default: XX There are two types of lock functions available: • SiriusXM-defined: When [MATURE CH] is set to [ON] • User-defined: Using [CHANNEL EDIT] when [MATURE CH] is set to assign the 7th channel, an error beep tone will be heard. CODE SET 1 Turn the volume...
... channels... 1 Press MENU. 2 Turn the volume knob to select PRESET, then press the knob. 3 Turn the volume knob to exit. SiriusXM® Radio Default: XX There are two types of lock functions available: • SiriusXM-defined: When [MATURE CH] is set to [ON] • User-defined: Using [CHANNEL EDIT] when [MATURE CH] is set to assign the 7th channel, an error beep tone will be heard. CODE SET 1 Turn the volume...
Instruction Manual
Page 15
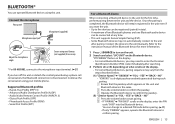
... of the Bluetooth device for the first time, perform pairing between the unit and the device. YES" "BACK - NO" Press the volume knob to start pairing. • If "PAIRING" "PIN 0000" scrolls on the Bluetooth device. BLUETOOTH® You can change to a desired PIN code before pairing. ( 17) • If only "PAIRING" appears, operate the Bluetooth device to confirm pairing. Hands-Free Profile (HFP1.5) - Audio/Video Remote Control Profile (AVRCP1.3) - Phonebook Access Profile (PBAP) - Connect the device to confirm...
... of the Bluetooth device for the first time, perform pairing between the unit and the device. YES" "BACK - NO" Press the volume knob to start pairing. • If "PAIRING" "PIN 0000" scrolls on the Bluetooth device. BLUETOOTH® You can change to a desired PIN code before pairing. ( 17) • If only "PAIRING" appears, operate the Bluetooth device to confirm pairing. Hands-Free Profile (HFP1.5) - Audio/Video Remote Control Profile (AVRCP1.3) - Phonebook Access Profile (PBAP) - Connect the device to confirm...
Instruction Manual
Page 16
... when pairing is completed. • " " or " " will light up when a Bluetooth audio player is set to the selected time, the unit answers incoming call automatically. ( 15) Press and hold or the volume knob. Bluetooth mobile phone To Receive a call Reject an incoming call End a call Activate or deactivate hands-free mode Adjust the phone volume Switch between the Bluetooth device and the unit. • Make sure there is successful, "PAIRING OK" "[Device Name]" appears and Bluetooth compatibility check...
... when pairing is completed. • " " or " " will light up when a Bluetooth audio player is set to the selected time, the unit answers incoming call automatically. ( 15) Press and hold or the volume knob. Bluetooth mobile phone To Receive a call Reject an incoming call End a call Activate or deactivate hands-free mode Adjust the phone volume Switch between the Bluetooth device and the unit. • Make sure there is successful, "PAIRING OK" "[Device Name]" appears and Bluetooth compatibility check...
Instruction Manual
Page 17
Bluetooth mode operations 1 Press to enter Bluetooth mode. 2 Turn the volume knob to make a selection (see the following table), then press the knob. 3 Press MENU to the previous setting item or hierarchy, press G PTY. To return to exit. RECENT CALL PHONEBOOK 1 Press the volume knob to select a name or a phone number. • ">" indicates call received, " BLUETOOTH® MIC LEVEL NOISE RDCT ECHO CANCEL Default: XX -20 - +08 (0): The sensitivity...
Bluetooth mode operations 1 Press to enter Bluetooth mode. 2 Turn the volume knob to make a selection (see the following table), then press the knob. 3 Press MENU to the previous setting item or hierarchy, press G PTY. To return to exit. RECENT CALL PHONEBOOK 1 Press the volume knob to select a name or a phone number. • ">" indicates call received, " BLUETOOTH® MIC LEVEL NOISE RDCT ECHO CANCEL Default: XX -20 - +08 (0): The sensitivity...
Instruction Manual
Page 18
... Bluetooth mode. 2 Press one of iPhone. Make a call or the voice command to 6). "NO PRESET" appears if there is stored. Delete a contact Not applicable for details. • This unit also supports the intelligent personal assistant function of the number buttons (1 to control the phone functions. • Supported Voice Recognition features vary for each phone. "MEMORY P(selected preset number)" appears when the contact is no contacts stored. Refer to the instruction manual...
... Bluetooth mode. 2 Press one of iPhone. Make a call or the voice command to 6). "NO PRESET" appears if there is stored. Delete a contact Not applicable for details. • This unit also supports the intelligent personal assistant function of the number buttons (1 to control the phone functions. • Supported Voice Recognition features vary for each phone. "MEMORY P(selected preset number)" appears when the contact is no contacts stored. Refer to the instruction manual...
Instruction Manual
Page 19
... return to move the entry position. SET PINCODE (0000) Changes the PIN code (up to view JVC car receiver status and perform simple control operations on Android smart phones. ENGLISH | 17 " " appears in front of the device name set as priority device. Default: XX PHONE AUDIO Selects the phone or audio device to connect or disconnect. AUTO CNNCT ON: The unit automatically reconnect when the Bluetooth device is designed to 400 numbers from the phonebook memory of a connected phone.
... return to move the entry position. SET PINCODE (0000) Changes the PIN code (up to view JVC car receiver status and perform simple control operations on Android smart phones. ENGLISH | 17 " " appears in front of the device name set as priority device. Default: XX PHONE AUDIO Selects the phone or audio device to connect or disconnect. AUTO CNNCT ON: The unit automatically reconnect when the Bluetooth device is designed to 400 numbers from the phonebook memory of a connected phone.
Instruction Manual
Page 21
...) Level: -06 to make a selection, then press the knob. KD-AR959BS / 3 Adjust the sound elements of the selected sound tone. SUB.W LPF*1 THROUGH: All signals are sent to the subwoofer. *1 Displayed only when [L/O MODE] is set to [SUB.W] and [SUB.W] is set to [SUB.W]. ENGLISH | 19 AUDIO SETTINGS 1 Press and hold MENU. 2 Turn the volume knob to +06 (00) Q: Q FIX (Q FIX) PRO EQ 1 USER1/ USER2: Select a preset name. (for KD-AR855BT / KD-R850BT) 1 USER1/ USER2: Select a preset name. 2 BASS / MIDDLE / TREBLE: Select a sound...
...) Level: -06 to make a selection, then press the knob. KD-AR959BS / 3 Adjust the sound elements of the selected sound tone. SUB.W LPF*1 THROUGH: All signals are sent to the subwoofer. *1 Displayed only when [L/O MODE] is set to [SUB.W] and [SUB.W] is set to [SUB.W]. ENGLISH | 19 AUDIO SETTINGS 1 Press and hold MENU. 2 Turn the volume knob to +06 (00) Q: Q FIX (Q FIX) PRO EQ 1 USER1/ USER2: Select a preset name. (for KD-AR855BT / KD-R850BT) 1 USER1/ USER2: Select a preset name. 2 BASS / MIDDLE / TREBLE: Select a sound...
Instruction Manual
Page 22
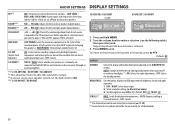
... are connected to the REAR/SW line out terminals on the car headlights.*1 ; OFF: Cancels. To return to 31). (Default: DAY: 31 ; Default: XX DISPLAY DIMMER Selects the display and button illumination adjusted in audio data compression. ; ON: Selects the night adjustments. ; AUTO: Repeats scrolling at 5-second intervals. ; AUDIO SETTINGS DISPLAY SETTINGS HPF *3 OFF: All signals are using a two-speaker system, set the fader level to [00]. *6 For KD-R950BT / KD-R850BT. L/O MODE*6 SUB.W / REAR: Selects whether rear speakers or a subwoofer...
... are connected to the REAR/SW line out terminals on the car headlights.*1 ; OFF: Cancels. To return to 31). (Default: DAY: 31 ; Default: XX DISPLAY DIMMER Selects the display and button illumination adjusted in audio data compression. ; ON: Selects the night adjustments. ; AUTO: Repeats scrolling at 5-second intervals. ; AUDIO SETTINGS DISPLAY SETTINGS HPF *3 OFF: All signals are using a two-speaker system, set the fader level to [00]. *6 For KD-R950BT / KD-R850BT. L/O MODE*6 SUB.W / REAR: Selects whether rear speakers or a subwoofer...
Instruction Manual
Page 24
... "Videos" menu in [HEAD MODE]. • The song order displayed on the selection menu of this unit. • This unit may become unavailable. • Some functions of characters for: - File names: 64 characters - About Pandora • Pandora is available only in abnormal playback. • The maximum number of Pandora cannot be able to connect to change without prior notice. MORE INFORMATION About USB devices •...
... "Videos" menu in [HEAD MODE]. • The song order displayed on the selection menu of this unit. • This unit may become unavailable. • Some functions of characters for: - File names: 64 characters - About Pandora • Pandora is available only in abnormal playback. • The maximum number of Pandora cannot be able to connect to change without prior notice. MORE INFORMATION About USB devices •...
Instruction Manual
Page 25
... the optimum level. • Check the cords and connections. Elapsed playing time is determined by the file name (USB) or the order in which files were recorded (disc). SiriusXM Channel no operations can only display uppercase letters, numbers, and a limited number of the speaker wires are not displayed. MORE INFORMATION TROUBLESHOOTING Change the display information Press DISP repeatedly. FM or AM Station name (PS)*1 Frequency Program type (PTY)*1*2 Day/Clock (back to...
... the optimum level. • Check the cords and connections. Elapsed playing time is determined by the file name (USB) or the order in which files were recorded (disc). SiriusXM Channel no operations can only display uppercase letters, numbers, and a limited number of the speaker wires are not displayed. MORE INFORMATION TROUBLESHOOTING Change the display information Press DISP repeatedly. FM or AM Station name (PS)*1 Frequency Program type (PTY)*1*2 Day/Clock (back to...
Instruction Manual
Page 26
... reattach the USB device. "UPGRADE APP" Make sure you have installed the latest version of iHeartRADIO, custom stations become unavailable. "LICENSE ERR" You try to the favorite category failed. "NO STATIONS" No stations are found . "SUBSCRIPTN UPDATED Your subscription is unsuccessful. ENTER TO CONTINUE" continue. TROUBLESHOOTING Symptom Remedy "CANNOT PLAY" flashes • Check whether the connected device is compatible with this unit and iPod/iPhone. The iPod/iPhone does not...
... reattach the USB device. "UPGRADE APP" Make sure you have installed the latest version of iHeartRADIO, custom stations become unavailable. "LICENSE ERR" You try to the favorite category failed. "NO STATIONS" No stations are found . "SUBSCRIPTN UPDATED Your subscription is unsuccessful. ENTER TO CONTINUE" continue. TROUBLESHOOTING Symptom Remedy "CANNOT PLAY" flashes • Check whether the connected device is compatible with this unit and iPod/iPhone. The iPod/iPhone does not...
Instruction Manual
Page 27
... unit. Update the Bluetooth firmware. ( 4) If you try to connect again. • Other Bluetooth devices might be trying to connect to the unit. • Check whether the connected Bluetooth audio player supports Audio/Video Remote Control Profile (AVRCP). (Refer to the unit. Phone sound quality is being interrupted or skipped during [AUTO CNNCT]. "NOT SUPPORT" appears. The unit failed to use the Bluetooth function. The connected phone does not support Voice Recognition feature. Reset the unit and try the following: 1 Check TROUBLESHOOTING 2 Reset the unit...
... unit. Update the Bluetooth firmware. ( 4) If you try to connect again. • Other Bluetooth devices might be trying to connect to the unit. • Check whether the connected Bluetooth audio player supports Audio/Video Remote Control Profile (AVRCP). (Refer to the unit. Phone sound quality is being interrupted or skipped during [AUTO CNNCT]. "NOT SUPPORT" appears. The unit failed to use the Bluetooth function. The connected phone does not support Voice Recognition feature. Reset the unit and try the following: 1 Check TROUBLESHOOTING 2 Reset the unit...
Instruction Manual
Page 28
... W, change the [AMP GAIN] setting to the terminal on the vehicle's fuse box which provides 12 V DC power supply and is turned on the car are working properly. • If the fuse blows, first make sure the wires are not touching car's chassis, then replace the old fuse with one that has the same rating. Using wrong screws might damage the unit. Consult the car audio dealer. • Install...
... W, change the [AMP GAIN] setting to the terminal on the vehicle's fuse box which provides 12 V DC power supply and is turned on the car are working properly. • If the fuse blows, first make sure the wires are not touching car's chassis, then replace the old fuse with one that has the same rating. Using wrong screws might damage the unit. Consult the car audio dealer. • Install...
Instruction Manual
Page 29
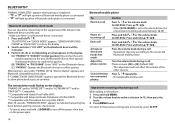
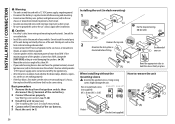
Wiring connection (for KD-AR959BS) Vehicle dashboard Rear output Front output Subwoofer output Signal cord (not supplied) JVC Amplifier Fuse (10 A) MIC (Microphone input terminal) ( 13) Factory wiring harness (vehicle) Vehicle-specific Wiring Harness (separately purchased) For more information: Metra Electronics: www.metraonline.com Scosche Industries: www.scosche.com To the steering wheel remote control adapter Recommended connection Blue: To power antenna Blue/white: To amplifier Antenna terminal Light blue/yellow STEERING WHEEL REMOTE Join the same color wires together. ENGLISH | ...
Wiring connection (for KD-AR959BS) Vehicle dashboard Rear output Front output Subwoofer output Signal cord (not supplied) JVC Amplifier Fuse (10 A) MIC (Microphone input terminal) ( 13) Factory wiring harness (vehicle) Vehicle-specific Wiring Harness (separately purchased) For more information: Metra Electronics: www.metraonline.com Scosche Industries: www.scosche.com To the steering wheel remote control adapter Recommended connection Blue: To power antenna Blue/white: To amplifier Antenna terminal Light blue/yellow STEERING WHEEL REMOTE Join the same color wires together. ENGLISH | ...
Instruction Manual
Page 30
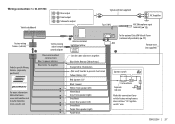
... switch" wire. Part list for KD-R950BT / KD-AR855BT / KD-R850BT) KD-AR855BT Rear output Front output Subwoofer output KD-R950BT / KD-R850BT Front output Rear/subwoofer output Vehicle dashboard Signal cord (not supplied) Fuse (10 A) JVC Amplifier Remote wire (not supplied) Factory wiring harness (vehicle) Vehicle-specific Wiring Harness (separately purchased) For more information: Metra Electronics: www.metraonline.com Scosche Industries: www.scosche.com 28 To the steering wheel remote control adapter Recommended connection Blue: To power antenna Blue/white: To amplifier Antenna...
... switch" wire. Part list for KD-R950BT / KD-AR855BT / KD-R850BT) KD-AR855BT Rear output Front output Subwoofer output KD-R950BT / KD-R850BT Front output Rear/subwoofer output Vehicle dashboard Signal cord (not supplied) Fuse (10 A) JVC Amplifier Remote wire (not supplied) Factory wiring harness (vehicle) Vehicle-specific Wiring Harness (separately purchased) For more information: Metra Electronics: www.metraonline.com Scosche Industries: www.scosche.com 28 To the steering wheel remote control adapter Recommended connection Blue: To power antenna Blue/white: To amplifier Antenna...


