Instruction Manual
Page 2
... limits for help. Location : Top Plate FCC WARNING This equipment may result in a particular installation. i CAUTION Use of controls or adjustments or performance of procedures other than those specified herein may generate or use radio frequency energy. FCC NOTE This equipment has been tested and found to comply with Federal Regulations, following measures: • Reorient or relocate the receiving antenna. •...
... limits for help. Location : Top Plate FCC WARNING This equipment may result in a particular installation. i CAUTION Use of controls or adjustments or performance of procedures other than those specified herein may generate or use radio frequency energy. FCC NOTE This equipment has been tested and found to comply with Federal Regulations, following measures: • Reorient or relocate the receiving antenna. •...
Instruction Manual
Page 4
... surface of the output level. Connector (on the reverse side of used . CONTENTS BEFORE USE 2 BASICS 3 GETTING STARTED 4 CD / USB / iPod / ANDROID 5 RADIO 7 AUX 8 Pandora® (for KD-AR765S / KD-R760 / KD-R660) 9 iHeartRadio® (for KD-AR765S / KD-R760 / KD-R660)10 SiriusXM® Radio (for KD-AR765S) 11 AUDIO SETTINGS 14 DISPLAY SETTINGS 16 MORE INFORMATION 18 TROUBLESHOOTING 20 INSTALLATION / CONNECTION 22 SPECIFICATIONS 24 How to read this unit, pull them out horizontally. • Remove burrs from...
... surface of the output level. Connector (on the reverse side of used . CONTENTS BEFORE USE 2 BASICS 3 GETTING STARTED 4 CD / USB / iPod / ANDROID 5 RADIO 7 AUX 8 Pandora® (for KD-AR765S / KD-R760 / KD-R660) 9 iHeartRadio® (for KD-AR765S / KD-R760 / KD-R660)10 SiriusXM® Radio (for KD-AR765S) 11 AUDIO SETTINGS 14 DISPLAY SETTINGS 16 MORE INFORMATION 18 TROUBLESHOOTING 20 INSTALLATION / CONNECTION 22 SPECIFICATIONS 24 How to read this unit, pull them out horizontally. • Remove burrs from...

Instruction Manual
Page 5
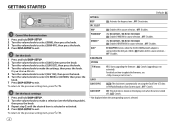
... select iPod or USB source directly. BASICS Faceplate KD-AR565 KD-R460 Volume knob (turn/press) Display window KD-AR765S KD-R760 KD-AR565 Loading slot Attach Detach Remote control (RM-RK52) Remote sensor (Do not expose to bright sunlight.) Detach button To Turn on the power Adjust the volume Select a source Change the display information KD-AR565 How to turn the volume knob within 2 seconds. On the faceplate Press . • Press and hold to reset Pull out the insulation sheet when using...
... select iPod or USB source directly. BASICS Faceplate KD-AR565 KD-R460 Volume knob (turn/press) Display window KD-AR765S KD-R760 KD-AR565 Loading slot Attach Detach Remote control (RM-RK52) Remote sensor (Do not expose to bright sunlight.) Detach button To Turn on the power Adjust the volume Select a source Change the display information KD-AR565 How to turn the volume knob within 2 seconds. On the faceplate Press . • Press and hold to reset Pull out the insulation sheet when using...
Instruction Manual
Page 6
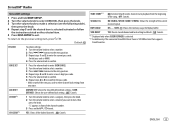
... knob. 3 Turn the volume knob to select [DEMO OFF], then press the knob. 4 Press to exit. 2 Set the clock 1 Press and hold . 2 Turn the volume knob to exit. OFF: Disables. OFF: Disables. CLOCK CLOCK SYNC AUTO: The clock time is connected to the AUX jack. ( 8) ; SRC SELECT AM * ON: Enables AM in source selection. ; AUX * BT ADAPTER: Selects when the KS-BTA100 Bluetooth adapter is automatically set using the Clock Time (CT) data in FM Radio Broadcast Data...
... knob. 3 Turn the volume knob to select [DEMO OFF], then press the knob. 4 Press to exit. 2 Set the clock 1 Press and hold . 2 Turn the volume knob to exit. OFF: Disables. OFF: Disables. CLOCK CLOCK SYNC AUTO: The clock time is connected to the AUX jack. ( 8) ; SRC SELECT AM * ON: Enables AM in source selection. ; AUX * BT ADAPTER: Selects when the KS-BTA100 Bluetooth adapter is automatically set using the Clock Time (CT) data in FM Radio Broadcast Data...
Instruction Manual
Page 7
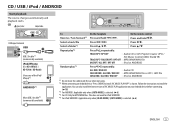
... not leave the cable inside the car when not using. *2 When connecting an Android device, "Press [VIEW] to install the application. CD Eject disc Label side USB input terminal USB USB 2.0 cable*1 (commercially available) iPod/iPhone (for KD-AR765S / KD-R760 / KD-R660) (Accessory of JVC MUSIC PLAY application on your Android device before connecting. ( 18) *3 For ANDROID: Applicable only when [AUTO MODE] is selected. ( 6) *4 For CD: Only for iPod/ ANDROID. *5 For iPod/ ANDROID: Applicable only when [HEAD MODE]/ [AUTO MODE] is shown. TRACK...
... not leave the cable inside the car when not using. *2 When connecting an Android device, "Press [VIEW] to install the application. CD Eject disc Label side USB input terminal USB USB 2.0 cable*1 (commercially available) iPod/iPhone (for KD-AR765S / KD-R760 / KD-R660) (Accessory of JVC MUSIC PLAY application on your Android device before connecting. ( 18) *3 For ANDROID: Applicable only when [AUTO MODE] is selected. ( 6) *4 For CD: Only for iPod/ ANDROID. *5 For iPod/ ANDROID: Applicable only when [HEAD MODE]/ [AUTO MODE] is shown. TRACK...
Instruction Manual
Page 8
... skip from the unit (using JVC MUSIC PLAY application). To return to select a file, then press the knob. Change the playback speed of a multiple drives device. CD / USB / iPod / ANDROID To Select control mode On the faceplate While in ANDROID source, press repeatedly. AUDIO MODE: Control other than A to Z, 0 to 9. • To return to the previous setting item, press . • To cancel, press and hold . 2 Turn the volume knob to select [IPOD], then press...
... skip from the unit (using JVC MUSIC PLAY application). To return to select a file, then press the knob. Change the playback speed of a multiple drives device. CD / USB / iPod / ANDROID To Select control mode On the faceplate While in ANDROID source, press repeatedly. AUDIO MODE: Control other than A to Z, 0 to 9. • To return to the previous setting item, press . • To cancel, press and hold . 2 Turn the volume knob to select [IPOD], then press...
Instruction Manual
Page 9
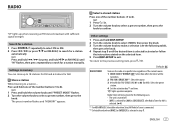
... selected. ( 4) *1 For KD-AR765S: Selectable only when SiriusXM Vehicle Tuner is connected. *2 Selectable only when [ONCE] or [WEEKLY] is selected/activated or follow the instructions stated on . 2 FM/ AM/ SIRIUS XM*1: Select the source. 3 01 to 18 (for FM/ SIRIUS XM)/ 01 to exit. "M" lights up when receiving an FM stereo broadcast with sufficient signal strength. Radio Timer will be turned on the selected item. 5 Press to 06 (for a station manually. Settings...
... selected. ( 4) *1 For KD-AR765S: Selectable only when SiriusXM Vehicle Tuner is connected. *2 Selectable only when [ONCE] or [WEEKLY] is selected/activated or follow the instructions stated on . 2 FM/ AM/ SIRIUS XM*1: Select the source. 3 01 to 18 (for FM/ SIRIUS XM)/ 01 to exit. "M" lights up when receiving an FM stereo broadcast with sufficient signal strength. Radio Timer will be turned on the selected item. 5 Press to 06 (for a station manually. Settings...
Instruction Manual
Page 10
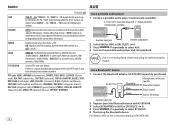
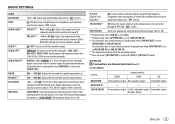
...) Blue/white: Remote Black: Ground Brown: Tel muting Auxiliary input jack 2 Register (pair) the Bluetooth device with "L" shaped connector (commercially available) Auxiliary input jack Portable audio player 2 Select [ON] for [AUX] in [SRC SELECT]. ( 4) 4 Press repeatedly to select BT AUDIO. 5 Start using the Bluetooth device. Blue/white Black Brown Wiring harness of the same PTY code as you have selected, that station is FM. RADIO AUX Default: XX SSM SSM 01 - 06 / SSM 07 - 12 / SSM 13 - 18: Automatically presets...
...) Blue/white: Remote Black: Ground Brown: Tel muting Auxiliary input jack 2 Register (pair) the Bluetooth device with "L" shaped connector (commercially available) Auxiliary input jack Portable audio player 2 Select [ON] for [AUX] in [SRC SELECT]. ( 4) 4 Press repeatedly to select BT AUDIO. 5 Start using the Bluetooth device. Blue/white Black Brown Wiring harness of the same PTY code as you have selected, that station is FM. RADIO AUX Default: XX SSM SSM 01 - 06 / SSM 07 - 12 / SSM 13 - 18: Automatically presets...
Instruction Manual
Page 11
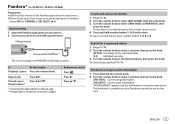
... volume knob to the desired station, then press the knob. On the remote control Press . USB input terminal (Accessory of the Pandora application on your device (iPhone/ iPod touch), then create an account and log in [SRC SELECT]. ( 4) Start listening 1 Open the Pandora application on your device. 2 Connect your device to the USB input terminal. thumbs down*2 *1 Do not leave the cable inside the car when not using...
... volume knob to the desired station, then press the knob. On the remote control Press . USB input terminal (Accessory of the Pandora application on your device (iPhone/ iPod touch), then create an account and log in [SRC SELECT]. ( 4) Start listening 1 Open the Pandora application on your device. 2 Connect your device to the USB input terminal. thumbs down*2 *1 Do not leave the cable inside the car when not using...
Instruction Manual
Page 12
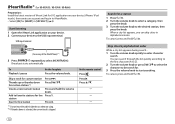
... / KD-R760 / KD-R660) Preparation: Install the latest version of the iPod/iPhone)*1 3 Press repeatedly to select IHEARTRADIO. Broadcast starts automatically To Playback / pause On the faceplate Press the volume knob. Press I. Skip a track for a station 1 Press . 2 Turn the volume knob to select a category, then press the knob. 3 Turn the volume knob to the desired station, then press the knob. To cancel, press and hold . 10 USB input...
... / KD-R760 / KD-R660) Preparation: Install the latest version of the iPod/iPhone)*1 3 Press repeatedly to select IHEARTRADIO. Broadcast starts automatically To Playback / pause On the faceplate Press the volume knob. Press I. Skip a track for a station 1 Press . 2 Turn the volume knob to select a category, then press the knob. 3 Turn the volume knob to the desired station, then press the knob. To cancel, press and hold . 10 USB input...
Instruction Manual
Page 13
... information, visit www.siriusxm.com. Antenna Expansion port on the rear panel SiriusXM Vehicle Tuner 2 Check your Radio ID for activation and can store up . 3 Turn the volume knob to select a CATEGORY, then press the knob. 4 Turn the volume knob to select a preset number, then press the knob. " " lights up to 18 channels. Welcome to select SIRIUS XM. 2 Press . For users in U.S.A.: Online: Go to Channel 0 as well as on the...
... information, visit www.siriusxm.com. Antenna Expansion port on the rear panel SiriusXM Vehicle Tuner 2 Check your Radio ID for activation and can store up . 3 Turn the volume knob to select a CATEGORY, then press the knob. 4 Turn the volume knob to select a preset number, then press the knob. " " lights up to 18 channels. Welcome to select SIRIUS XM. 2 Press . For users in U.S.A.: Online: Go to Channel 0 as well as on the...
Instruction Manual
Page 14
... music channels or current tuned music channel. 1 Press . 2 Turn the volume knob to [ON] ( 13) for the first 6 seconds of the song if [TUNE START] is available with SXV200 or later SiriusXM tuner models. SmartFavorites and TuneStart™ User preset channels are removed from the paused position in the background. • Using SXV200: This unit can assign a maximum of 6 SmartFavorites channels. SiriusXM Vehicle Tuner automatically buffers the broadcast audio...
... music channels or current tuned music channel. 1 Press . 2 Turn the volume knob to [ON] ( 13) for the first 6 seconds of the song if [TUNE START] is available with SXV200 or later SiriusXM tuner models. SmartFavorites and TuneStart™ User preset channels are removed from the paused position in the background. • Using SXV200: This unit can assign a maximum of 6 SmartFavorites channels. SiriusXM Vehicle Tuner automatically buffers the broadcast audio...
Instruction Manual
Page 15
... the current received signal. TUNE START*2 ON: Selected SmartFavorite channel starts playback from next time. NO: Cancels. *1 Displayed only when [USER DEFINED] is selected. *2 Available only if the connected SiriusXM Vehical Tuner is selected/activated or follow the instructions stated on the selected item. 5 Press to exit. OFF: Cancels. NO: Cancels. OFF: Cancels. Default: XX CH LOCK To unlock settings: 1 Turn the volume knob to select a number. 2 Press to...
... the current received signal. TUNE START*2 ON: Selected SmartFavorite channel starts playback from next time. NO: Cancels. *1 Displayed only when [USER DEFINED] is selected. *2 Available only if the connected SiriusXM Vehical Tuner is selected/activated or follow the instructions stated on the selected item. 5 Press to exit. OFF: Cancels. NO: Cancels. OFF: Cancels. Default: XX CH LOCK To unlock settings: 1 Turn the volume knob to select a number. 2 Press to...
Instruction Manual
Page 17
... selected for [AUX] in line with 3-pair lineout terminals: Displayed only when [SPK/PRE OUT] is set to produce a well-balanced sound at low volume. ; L06 - TEL MUTING*8 ON: Mutes the sounds while using the cellular phone (not connected through an external amplifier. ( 23) ON / OFF: Turns on or off the subwoofer output. AUDIO SETTINGS AUDIO BASS BOOST LOUD SUB.W LEVEL*4 SUB.W *6 SUB.W LPF*4 SUB.W PHASE*4 FADER BALANCE *7 VOL ADJUST AMP GAIN +01 / +02: Selects your preferred bass boost level. ; Before adjustment, select the source you...
... selected for [AUX] in line with 3-pair lineout terminals: Displayed only when [SPK/PRE OUT] is set to produce a well-balanced sound at low volume. ; L06 - TEL MUTING*8 ON: Mutes the sounds while using the cellular phone (not connected through an external amplifier. ( 23) ON / OFF: Turns on or off the subwoofer output. AUDIO SETTINGS AUDIO BASS BOOST LOUD SUB.W LEVEL*4 SUB.W *6 SUB.W LPF*4 SUB.W PHASE*4 FADER BALANCE *7 VOL ADJUST AMP GAIN +01 / +02: Selects your preferred bass boost level. ; Before adjustment, select the source you...
Instruction Manual
Page 18
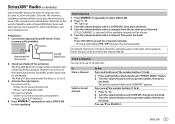
... car headlights.*1 For KD-AR765S / KD-R760 / KD-AR565, the display and button colors change according to the settings made on [COLOR]. *1 The illumination control wire connection is selected/activated or follow the instructions stated on the selected item. 4 Press to exit. Default: XX DISPLAY DIMMER Selects the display and button illumination adjusted in [FADER] and selectable range is [R06] to [00] 16 DISPLAY SETTINGS KD-AR765S / KD-R760 KD-AR565 KD-R660 / KD-R460 1 Press and hold . 2 Turn the volume knob to adjust the [OFF] time...
... car headlights.*1 For KD-AR765S / KD-R760 / KD-AR565, the display and button colors change according to the settings made on [COLOR]. *1 The illumination control wire connection is selected/activated or follow the instructions stated on the selected item. 4 Press to exit. Default: XX DISPLAY DIMMER Selects the display and button illumination adjusted in [FADER] and selectable range is [R06] to [00] 16 DISPLAY SETTINGS KD-AR765S / KD-R760 KD-AR565 KD-R660 / KD-R460 1 Press and hold . 2 Turn the volume knob to adjust the [OFF] time...
Instruction Manual
Page 20
... Android device supports both mass storage class device and AOA 2.0, this unit always playback via a USB hub. • Connecting a cable whose rating is not possible to insert using an adapter may result in [HEAD MODE]. • The song order displayed on the "Videos" menu in abnormal playback. • The maximum number of the iPod/ iPhone. • If some operations are not round. - Folder names: 64 characters - About iPod/iPhone Made...
... Android device supports both mass storage class device and AOA 2.0, this unit always playback via a USB hub. • Connecting a cable whose rating is not possible to insert using an adapter may result in [HEAD MODE]. • The song order displayed on the "Videos" menu in abnormal playback. • The maximum number of the iPod/ iPhone. • If some operations are not round. - Folder names: 64 characters - About iPod/iPhone Made...
Instruction Manual
Page 22
... CD / USB / iPod The iPod/iPhone does not • Check the connection between this unit and iPod/iPhone. turn on again. Turn the power on or does not work. • Detach and reset the iPod/iPhone using hard reset. Source cannot be heard. • Adjust the volume to the optimum level. • Check the cords and connections. Press , then insert the disc correctly. "CANNOT PLAY" flashes and/or connected device cannot be heard during playback. • Sound output only from...
... CD / USB / iPod The iPod/iPhone does not • Check the connection between this unit and iPod/iPhone. turn on again. Turn the power on or does not work. • Detach and reset the iPod/iPhone using hard reset. Source cannot be heard. • Adjust the volume to the optimum level. • Check the cords and connections. Press , then insert the disc correctly. "CANNOT PLAY" flashes and/or connected device cannot be heard during playback. • Sound output only from...
Instruction Manual
Page 23
... your device. "CHAN UNSUB" "CH UNAVAIL" "CHK ANTENNA" "CHECK TUNER" "NO SIGNAL" "SUBSCRIPTION UPDATED - Call 1-866-635-2349 in time-out. "LICENSE ERR" You try the following: 1 Check TROUBLESHOOTING 2 Reset the unit ( 3) 3 Contact (USA only) Call: 1-800-252-5722 ( or ) visit: http://www.jvc.com ENGLISH 21 "STATION NOT SELECTED" No station is locked. Make sure you have entered the correct pass code. ( 13...
... your device. "CHAN UNSUB" "CH UNAVAIL" "CHK ANTENNA" "CHECK TUNER" "NO SIGNAL" "SUBSCRIPTION UPDATED - Call 1-866-635-2349 in time-out. "LICENSE ERR" You try the following: 1 Check TROUBLESHOOTING 2 Reset the unit ( 3) 3 Contact (USA only) Call: 1-800-252-5722 ( or ) visit: http://www.jvc.com ENGLISH 21 "STATION NOT SELECTED" No station is locked. Make sure you have entered the correct pass code. ( 13...

Instruction Manual
Page 24
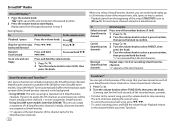
... not touch the metal parts of this unit in place. Consult the car audio dealer. • Install this unit during and shortly after installation. on the car are working properly. • If the fuse blows, first make sure the wires are not touching car's chassis, then replace the old fuse with a maximum power of speakers to the car chassis or Ground wire (black), or connect them in -dash mounting) Hook on the top...
... not touch the metal parts of this unit in place. Consult the car audio dealer. • Install this unit during and shortly after installation. on the car are working properly. • If the fuse blows, first make sure the wires are not touching car's chassis, then replace the old fuse with a maximum power of speakers to the car chassis or Ground wire (black), or connect them in -dash mounting) Hook on the top...

Instruction Manual
Page 25
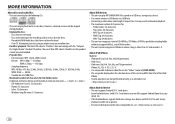
... connection Blue: To power antenna Blue/white: To amplifier Antenna terminal Light blue/yellow STEERING WHEEL REMOTE Join the same color wires together. For setting, 15, 16. (D) Wiring harness (E) Extraction key ENGLISH 23 Wiring connection KD-AR765S KD-R760 / KD-R660 KD-AR565 / KD-R460 Front/ rear/ subwoofer output Vehicle dashboard Signal cord (not supplied) Fuse (10 A) JVC Amplifier*1 *1 Firmly connect the ground wire of the amplifier to the car's chassis to avoid damaging the unit. Blue/white: Remote (200 mA max.) Orange/white: Illumination Brown: Tel muting...
... connection Blue: To power antenna Blue/white: To amplifier Antenna terminal Light blue/yellow STEERING WHEEL REMOTE Join the same color wires together. For setting, 15, 16. (D) Wiring harness (E) Extraction key ENGLISH 23 Wiring connection KD-AR765S KD-R760 / KD-R660 KD-AR565 / KD-R460 Front/ rear/ subwoofer output Vehicle dashboard Signal cord (not supplied) Fuse (10 A) JVC Amplifier*1 *1 Firmly connect the ground wire of the amplifier to the car's chassis to avoid damaging the unit. Blue/white: Remote (200 mA max.) Orange/white: Illumination Brown: Tel muting...


