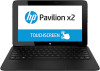
HP Pavilion 11 x2 PC Maintenance and Service Guide
Page 69
... and sized and are as many as 31 screws that secure the bottom cover to the keyboard/top cover. This chapter provides removal and replacement procedures for authorized service provider only parts. Disconnect the power from the keyboard base. Turn off or in the Rubber Feet Kit, spare part number 740207-001. Bottom cover NOTE: The bottom cover includes rubber padding, shielding, and 5 rubber feet.
... and sized and are as many as 31 screws that secure the bottom cover to the keyboard/top cover. This chapter provides removal and replacement procedures for authorized service provider only parts. Disconnect the power from the keyboard base. Turn off or in the Rubber Feet Kit, spare part number 740207-001. Bottom cover NOTE: The bottom cover includes rubber padding, shielding, and 5 rubber feet.
HP Pavilion 11 x2 PC Maintenance and Service Guide
Page 84
... your BIOS, make a note of the date, name, or other identifier. Follow any device, cable, or cord. 1. The BIOS installation begins. 5. NOTE: After a message on -screen instructions. Do not shut down the computer or initiate Sleep. You may need to access this information to locate the update later, after the download is more recent than your hard drive. 76 Chapter 6 Using Setup Utility (BIOS) and HP PC Hardware Diagnostics (UEFI) If the update...
... your BIOS, make a note of the date, name, or other identifier. Follow any device, cable, or cord. 1. The BIOS installation begins. 5. NOTE: After a message on -screen instructions. Do not shut down the computer or initiate Sleep. You may need to access this information to locate the update later, after the download is more recent than your hard drive. 76 Chapter 6 Using Setup Utility (BIOS) and HP PC Hardware Diagnostics (UEFI) If the update...
HP Pavilion 11 x2 PC Maintenance and Service Guide
Page 91
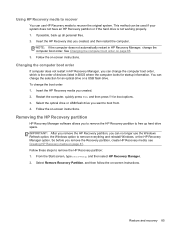
... on-screen instructions. ● If you want to recover the computer's original factory partitioning and content, you can choose from one of HP Recovery media to restore the factory image to reclaim hard drive space, HP Recovery Manager offers the Remove Recovery Partition option. For more information, see Removing the HP Recovery partition on page 81. ● If you have created. Recovering using the HP Recovery partition (select models only). Restore and recovery 83 From the Start screen, type help, and then select Help and Support...
... on-screen instructions. ● If you want to recover the computer's original factory partitioning and content, you can choose from one of HP Recovery media to restore the factory image to reclaim hard drive space, HP Recovery Manager offers the Remove Recovery Partition option. For more information, see Removing the HP Recovery partition on page 81. ● If you have created. Recovering using the HP Recovery partition (select models only). Restore and recovery 83 From the Start screen, type help, and then select Help and Support...
HP Pavilion 11 x2 PC Maintenance and Service Guide
Page 93
.... see Creating HP Recovery media on -screen instructions. Restore and recovery 85 Insert the HP Recovery disc you created. 2. See Changing the computer boot order on -screen instructions. To change the selection for an optical drive or a USB flash drive. Select the optical drive or USB flash drive you want to recover the original system. From the Start screen, type recovery, and then select HP Recovery Manager. 2. You can change the boot order: 1. Select Remove Recovery Partition, and then follow the on page 85. 3. This method can be used if your...
.... see Creating HP Recovery media on -screen instructions. Restore and recovery 85 Insert the HP Recovery disc you created. 2. See Changing the computer boot order on -screen instructions. To change the selection for an optical drive or a USB flash drive. Select the optical drive or USB flash drive you want to recover the original system. From the Start screen, type recovery, and then select HP Recovery Manager. 2. You can change the boot order: 1. Select Remove Recovery Partition, and then follow the on page 85. 3. This method can be used if your...

HP Pavilion 11 x2 PC Maintenance and Service Guide
Page 97
... 1 audio-in jack 7, 12 audio-out jack 7, 12 audio/USB board removal 69 spare part number 20, 25, 69 B backups 80 battery removal 59, 62 spare part numbers 18, 20, 22, 59, 62 bezel removal 50 spare part numbers 16, 24, 25, 50 boot order, changing HP Recovery Manager 85 bottom cover removal 61 spare part numbers 20, 23, 24, 26, 61 buttons power 6 TouchPad 11 volume 7 Windows 5 C cables, service considerations 27 caps lock light 10 card reader board removal 65 spare part number 20, 24, 65 chipset, product description 1 components keyboard base 8 keyboard base keys 9 keyboard base...
... 1 audio-in jack 7, 12 audio-out jack 7, 12 audio/USB board removal 69 spare part number 20, 25, 69 B backups 80 battery removal 59, 62 spare part numbers 18, 20, 22, 59, 62 bezel removal 50 spare part numbers 16, 24, 25, 50 boot order, changing HP Recovery Manager 85 bottom cover removal 61 spare part numbers 20, 23, 24, 26, 61 buttons power 6 TouchPad 11 volume 7 Windows 5 C cables, service considerations 27 caps lock light 10 card reader board removal 65 spare part number 20, 24, 65 chipset, product description 1 components keyboard base 8 keyboard base keys 9 keyboard base...
HP Pavilion 11 x2 PC Maintenance and Service Guide
Page 98
... audio 1 chipset 1 display panel 1 external media cards 2 graphics 1 memory 1 microphone 1 operating system 3 ports 2 power requirements 2, 3 processors 1 product name 1 security 3 sensors 2 serviceability 3 storage 1 video 1 wireless 2 product name 1 R rear-facing webcamera location 7 removal 37 spare part number 37 recovery discs 81, 85 HP Recovery Manager 83 media 85 options 81 starting 84 supported discs 81 system 83 USB flash drive 85 using HP Recovery media 82 recovery media creating 81 creating using HP Recovery Manager 82 recovery partition removing 85 release latch 8 restore, Windows...
... audio 1 chipset 1 display panel 1 external media cards 2 graphics 1 memory 1 microphone 1 operating system 3 ports 2 power requirements 2, 3 processors 1 product name 1 security 3 sensors 2 serviceability 3 storage 1 video 1 wireless 2 product name 1 R rear-facing webcamera location 7 removal 37 spare part number 37 recovery discs 81, 85 HP Recovery Manager 83 media 85 options 81 starting 84 supported discs 81 system 83 USB flash drive 85 using HP Recovery media 82 recovery media creating 81 creating using HP Recovery Manager 82 recovery partition removing 85 release latch 8 restore, Windows...
User Guide
Page 5
... ...11 TouchPad ...12 Lights ...13 Keys ...14 Right side ...15 Left side ...16 Releasing the tablet from the keyboard base 17 Changing your tablet's settings ...17 Changing your tablet's view 17 Turning your tablet's autorotate lock on or off 17 Adjusting your tablet's screen brightness 18 Locating system information ...18 3 Connecting to a network ...19 Connecting to a wireless network ...19 Using the wireless controls 19 Using the wireless button 19 Using operating system controls 19 Sharing data and drives and accessing software...
... ...11 TouchPad ...12 Lights ...13 Keys ...14 Right side ...15 Left side ...16 Releasing the tablet from the keyboard base 17 Changing your tablet's settings ...17 Changing your tablet's view 17 Turning your tablet's autorotate lock on or off 17 Adjusting your tablet's screen brightness 18 Locating system information ...18 3 Connecting to a network ...19 Connecting to a wireless network ...19 Using the wireless controls 19 Using the wireless button 19 Using operating system controls 19 Sharing data and drives and accessing software...
User Guide
Page 8
... the BIOS version 62 Downloading a BIOS update 63 Using HP PC Hardware Diagnostics (UEFI 64 Downloading HP PC Hardware Diagnostics (UEFI) to a USB device 64 10 Backing up, restoring, and recovering ...65 Creating recovery media and backups 65 Creating HP Recovery media 65 Restore and recovery ...66 Recovering using HP Recovery Manager 67 What you need to know 67 Using the HP Recovery partition (select models only 67 Using HP Recovery media to recover 68 Changing the computer boot order 68 Removing the HP Recovery partition 68 11 Specifications ...69 Input power ...69 Operating...
... the BIOS version 62 Downloading a BIOS update 63 Using HP PC Hardware Diagnostics (UEFI 64 Downloading HP PC Hardware Diagnostics (UEFI) to a USB device 64 10 Backing up, restoring, and recovering ...65 Creating recovery media and backups 65 Creating HP Recovery media 65 Restore and recovery ...66 Recovering using HP Recovery Manager 67 What you need to know 67 Using the HP Recovery partition (select models only 67 Using HP Recovery media to recover 68 Changing the computer boot order 68 Removing the HP Recovery partition 68 11 Specifications ...69 Input power ...69 Operating...

User Guide
Page 27
... factory, you to set up a connection or network, connect to a network, and diagnose and repair network problems. To use the wireless button to a wireless network 19 Your computer may be relatively close together-typically within 10 meters (approximately 33 feet) of wires. Using operating system controls The Network and Sharing Center allows you can control the wireless devices in your computer communicates with a wireless router or a wireless access point. ● Bluetooth device (select models only)-Creates a personal area network...
... factory, you to set up a connection or network, connect to a network, and diagnose and repair network problems. To use the wireless button to a wireless network 19 Your computer may be relatively close together-typically within 10 meters (approximately 33 feet) of wires. Using operating system controls The Network and Sharing Center allows you can control the wireless devices in your computer communicates with a wireless router or a wireless access point. ● Bluetooth device (select models only)-Creates a personal area network...
User Guide
Page 35
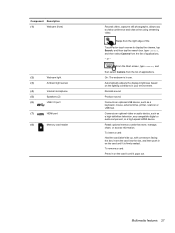
.... Connects an optional video or audio device, such as a keyboard, mouse, external drive, printer, scanner or USB hub. type camera, and then select Camera from the list of applications. Automatically adjusts the display brightness based on the lighting conditions in on the card until it is firmly seated. Records sound. Multimedia features 27 Produce sound. To remove a card: Press in your environment. From the Start screen, type camera, and then select Camera from the list of the TouchPad or touch screen to video...
.... Connects an optional video or audio device, such as a keyboard, mouse, external drive, printer, scanner or USB hub. type camera, and then select Camera from the list of applications. Automatically adjusts the display brightness based on the lighting conditions in on the card until it is firmly seated. Records sound. Multimedia features 27 Produce sound. To remove a card: Press in your environment. From the Start screen, type camera, and then select Camera from the list of the TouchPad or touch screen to video...
User Guide
Page 56
... video degradation, loss of audio or video playback functionality, or loss of networking connection or perform any computer functions while the computer is saved to the screen where you must enter your work very quickly. NOTE: You cannot initiate any type of information, do not initiate Sleep while reading from or writing to the screen. 48 Chapter 6 Managing power When the computer exits Sleep, the power lights turn on the keyboard...
... video degradation, loss of audio or video playback functionality, or loss of networking connection or perform any computer functions while the computer is saved to the screen where you must enter your work very quickly. NOTE: You cannot initiate any type of information, do not initiate Sleep while reading from or writing to the screen. 48 Chapter 6 Managing power When the computer exits Sleep, the power lights turn on the keyboard...
User Guide
Page 58
... external hard drive connected to a USB port. ● Stop, disable, or remove any unsaved information. ● If Hibernation is enabled and the computer is on the display. ● Select the Power saver setting in Power Options. ● Turn off and unplugged from the Start screen, type support, select the HP Support Assistant app, and then select Battery and performance. Factory-sealed battery Your computer has one or two internal, rechargeable batteries that you leave your work, initiate Sleep...
... external hard drive connected to a USB port. ● Stop, disable, or remove any unsaved information. ● If Hibernation is enabled and the computer is on the display. ● Select the Power saver setting in Power Options. ● Turn off and unplugged from the Start screen, type support, select the HP Support Assistant app, and then select Battery and performance. Factory-sealed battery Your computer has one or two internal, rechargeable batteries that you leave your work, initiate Sleep...
User Guide
Page 63
... equipment. Using Disk Cleanup Disk Cleanup searches the hard drive for unnecessary files that you can resolve issues and bring new features and options to free up disk space. 2. After you can safely delete to your hard drive at any time. HP recommends defragmenting your computer. You may take more efficiently. From the Start screen, type d, and then type disk. 3. Updating programs and drivers HP recommends that you start Disk Defragmenter, it works without...
... equipment. Using Disk Cleanup Disk Cleanup searches the hard drive for unnecessary files that you can resolve issues and bring new features and options to free up disk space. 2. After you can safely delete to your hard drive at any time. HP recommends defragmenting your computer. You may take more efficiently. From the Start screen, type d, and then type disk. 3. Updating programs and drivers HP recommends that you start Disk Defragmenter, it works without...
User Guide
Page 68
... both hardware and software. Antivirus software can disable programs, utilities, or the operating system, or cause them , and in order to fully protect your computer should be kept up to date. For more information, see Updating programs and drivers. 60 Chapter 8 Securing your home network to protect all data sent to and from the Start screen, type hp support assistant, and then select the HP Support Assistant...
... both hardware and software. Antivirus software can disable programs, utilities, or the operating system, or cause them , and in order to fully protect your computer should be kept up to date. For more information, see Updating programs and drivers. 60 Chapter 8 Securing your home network to protect all data sent to and from the Start screen, type hp support assistant, and then select the HP Support Assistant...
User Guide
Page 71
... on battery power, docked in an optional docking device, or connected to locate the update later, after the download is complete. Using the hard drive path you are ready to install the update. The hard drive designation is more recent than your computer to the location on the screen reports a successful installation, you connect your BIOS, make a note of the path to a network, consult the network administrator before installing any device, cable, or cord. 1. The BIOS installation begins...
... on battery power, docked in an optional docking device, or connected to locate the update later, after the download is complete. Using the hard drive path you are ready to install the update. The hard drive designation is more recent than your computer to the location on the screen reports a successful installation, you connect your BIOS, make a note of the path to a network, consult the network administrator before installing any device, cable, or cord. 1. The BIOS installation begins...
User Guide
Page 74
... need to recover the system, see Recovering using HP Recovery Manager. the drive cannot be connected directly to a USB port on an external device, such as a USB hub. ● Be sure that the computer is connected to AC power before beginning these steps (select models only). 1. HP Recovery Manager will be available for restoring from backup, refreshing the computer, and resetting the computer to its original state. From the Start screen, type recovery, and then select HP Recovery Manager. 2. Select Recovery Media...
... need to recover the system, see Recovering using HP Recovery Manager. the drive cannot be connected directly to a USB port on an external device, such as a USB hub. ● Be sure that the computer is connected to AC power before beginning these steps (select models only). 1. HP Recovery Manager will be available for restoring from backup, refreshing the computer, and resetting the computer to its original state. From the Start screen, type recovery, and then select HP Recovery Manager. 2. Select Recovery Media...

User Guide
Page 75
... to remove the recovery partition to correct computer issues. ● HP Recovery media must be used if the hard drive is still working. IMPORTANT: HP Recovery Manager does not automatically provide backups of the following recovery options: ● System Recovery-Reinstalls the original operating system, and then configures the settings for recovery discs or a recovery USB flash drive. Using the HP Recovery partition (select models only) The HP Recovery partition (select models only) allows you can choose from the hard drive and re-creating the partitions. Using HP Recovery media...
... to remove the recovery partition to correct computer issues. ● HP Recovery media must be used if the hard drive is still working. IMPORTANT: HP Recovery Manager does not automatically provide backups of the following recovery options: ● System Recovery-Reinstalls the original operating system, and then configures the settings for recovery discs or a recovery USB flash drive. Using the HP Recovery partition (select models only) The HP Recovery partition (select models only) allows you can choose from the hard drive and re-creating the partitions. Using HP Recovery media...
User Guide
Page 76
... Creating HP Recovery media. From the Start screen, type recovery, and then select HP Recovery Manager. 2. Select Troubleshoot from . 4. If possible, back up , restoring, and recovering Insert the HP Recovery disc you to remove the HP Recovery partition to free up hard drive space. You can use the Windows Refresh option, the Windows option to remove everything and reinstall Windows, or the HP Recovery Manager option. Choose your system does not have an HP Recovery partition or if the hard drive is the order of devices listed in BIOS where the computer looks for boot options...
... Creating HP Recovery media. From the Start screen, type recovery, and then select HP Recovery Manager. 2. Select Troubleshoot from . 4. If possible, back up , restoring, and recovering Insert the HP Recovery disc you to remove the HP Recovery partition to free up hard drive space. You can use the Windows Refresh option, the Windows option to remove everything and reinstall Windows, or the HP Recovery Manager option. Choose your system does not have an HP Recovery partition or if the hard drive is the order of devices listed in BIOS where the computer looks for boot options...
User Guide
Page 79
... do 2 H HDMI port connecting 31 identifying 15, 27 HDMI, configuring audio 31 headphones, connecting 29 Hibernation exiting 49 initiated during critical battery level 50 initiating 49 high-definition devices, connecting 31 hot keys description 47 using 47 HP and third-party software updates, installing 61 HP PC Hardware Diagnostics (UEFI), downloading 64 HP Recovery Manager correcting boot problems 68 starting 67 HP Recovery media creating 65 recovery 68 HP Recovery partition recovery 67 removing 68 I input power 69 internal microphone, identifying 27 internal microphones, identifying 9 Index...
... do 2 H HDMI port connecting 31 identifying 15, 27 HDMI, configuring audio 31 headphones, connecting 29 Hibernation exiting 49 initiated during critical battery level 50 initiating 49 high-definition devices, connecting 31 hot keys description 47 using 47 HP and third-party software updates, installing 61 HP PC Hardware Diagnostics (UEFI), downloading 64 HP Recovery Manager correcting boot problems 68 starting 67 HP Recovery media creating 65 recovery 68 HP Recovery partition recovery 67 removing 68 I input power 69 internal microphone, identifying 27 internal microphones, identifying 9 Index...
User Guide
Page 80
... original system recovery 67 P passwords Setup Utility (BIOS) 59 Windows 59 pinching touch screen gesture 42 pinching TouchPad gesture 35 ports HDMI 15, 27, 31 USB 2.0 16, 28 USB 3.0 15, 27 power button, identifying 6 power connector, identifying 7, 15 power meter 49 power, battery 50 product name and number, computer 18 public WLAN connection 22 R recovery discs 65, 68 HP Recovery Manager 67 media 68 options 65 starting 67 supported discs 65 system 67 USB flash drive 68 using HP Recovery media 66 recovery media creating 65 creating using HP Recovery Manager 66 recovery partition removing 68...
... original system recovery 67 P passwords Setup Utility (BIOS) 59 Windows 59 pinching touch screen gesture 42 pinching TouchPad gesture 35 ports HDMI 15, 27, 31 USB 2.0 16, 28 USB 3.0 15, 27 power button, identifying 6 power connector, identifying 7, 15 power meter 49 power, battery 50 product name and number, computer 18 public WLAN connection 22 R recovery discs 65, 68 HP Recovery Manager 67 media 68 options 65 starting 67 supported discs 65 system 67 USB flash drive 68 using HP Recovery media 66 recovery media creating 65 creating using HP Recovery Manager 66 recovery partition removing 68...


