

User Guide
Page 16
... Keyboards can vary by default. Touchpad The touchpad settings and components are described here. To use . (5) Camera(s) Allow(s) you also want to set up facial recognition log-in use your country or region. NOTE: Camera functions vary depending on the camera hardware and software installed on by language. The display brightness adjusts if the sensor notices light change to the clamshell mode. For more cameras are in for Auto Lock and Awake, see Windows...
... Keyboards can vary by default. Touchpad The touchpad settings and components are described here. To use . (5) Camera(s) Allow(s) you also want to set up facial recognition log-in use your country or region. NOTE: Camera functions vary depending on the camera hardware and software installed on by language. The display brightness adjusts if the sensor notices light change to the clamshell mode. For more cameras are in for Auto Lock and Awake, see Windows...
User Guide
Page 28
..., and universities. Using the wireless controls You can travel with you wherever you go. The wireless light indicates the overall power state of your computer communicates with a wireless router or a wireless access point. ● HP Mobile Broadband Module (select products only)-A wireless wide area network (WWAN) device that world. Operating system controls The Network and Sharing Center allows you to set up a connection or network, connect to a network, and diagnose and repair network problems. Depending on...
..., and universities. Using the wireless controls You can travel with you wherever you go. The wireless light indicates the overall power state of your computer communicates with a wireless router or a wireless access point. ● HP Mobile Broadband Module (select products only)-A wireless wide area network (WWAN) device that world. Operating system controls The Network and Sharing Center allows you to set up a connection or network, connect to a network, and diagnose and repair network problems. Depending on...

User Guide
Page 49
.... Removing or replacing the battery could affect your battery, and then select Launch. If a battery is connected to external power. 2. To reduce potential safety issues, use battery power when the computer is no longer holding a charge, run HP Battery Check in the search box, and then select the HP Support Assistant app. ‒ or - Exit Hibernation by users themselves. Factory-sealed battery To monitor the status of Hibernation, connect the AC adapter...
.... Removing or replacing the battery could affect your battery, and then select Launch. If a battery is connected to external power. 2. To reduce potential safety issues, use battery power when the computer is no longer holding a charge, run HP Battery Check in the search box, and then select the HP Support Assistant app. ‒ or - Exit Hibernation by users themselves. Factory-sealed battery To monitor the status of Hibernation, connect the AC adapter...

User Guide
Page 51
... ordering the Computrace software, go to use of the computer ● HP Client Security software, in Computer Setup* Unauthorized startup from a variety of risks. NOTE: Your computer supports Computrace, which runs under any operating system) can be available on your personal settings and data from an optional external optical drive (select products only), optional external hard drive (select products only), or internal network adapter Boot options feature in Computer Setup* Unauthorized access to a Windows user account Windows user password...
... ordering the Computrace software, go to use of the computer ● HP Client Security software, in Computer Setup* Unauthorized startup from a variety of risks. NOTE: Your computer supports Computrace, which runs under any operating system) can be available on your personal settings and data from an optional external optical drive (select products only), optional external hard drive (select products only), or internal network adapter Boot options feature in Computer Setup* Unauthorized access to a Windows user account Windows user password...

User Guide
Page 73
... example, filename.exe). Installing a BIOS update BIOS installation procedures vary. Select your hard drive. Changing the boot order using the f9 prompt To dynamically choose a boot device for and download BIOS updates. 1. Access the Boot Device Options menu: ● Turn on -screen instructions to download your computer to the BIOS version currently installed on -screen instructions. Select a boot device, press enter, and then follow these steps: a. At the download area, follow the on-screen instructions. 64 Chapter 10 Computer Setup (BIOS), TPM, and HP Sure Start Follow the on...
... example, filename.exe). Installing a BIOS update BIOS installation procedures vary. Select your hard drive. Changing the boot order using the f9 prompt To dynamically choose a boot device for and download BIOS updates. 1. Access the Boot Device Options menu: ● Turn on -screen instructions to download your computer to the BIOS version currently installed on -screen instructions. Select a boot device, press enter, and then follow these steps: a. At the download area, follow the on-screen instructions. 64 Chapter 10 Computer Setup (BIOS), TPM, and HP Sure Start Follow the on...

User Guide
Page 90
... Hardware Diagnostics UEFI downloading 69 failure ID code 68 starting 69 using 68 HP PC Hardware Diagnostics Windows accessing 66, 67 downloading 67, 68 failure ID code 66 installing 68 using 66 HP Recovery media recovery 60 HP resources 1 HP Sure Recover 61 HP TechPulse 52 I initiating Sleep and Hibernation 36 input power 72 insert action key 14 internal microphones, identifying 7 International Association of Accessibility Professionals 76 J jacks audio-out (headphone)/audio-in (microphone) combo 4 K keyboard and optional mouse using 28 keyboard backlight action key 14 keys action 13 camera...
... Hardware Diagnostics UEFI downloading 69 failure ID code 68 starting 69 using 68 HP PC Hardware Diagnostics Windows accessing 66, 67 downloading 67, 68 failure ID code 66 installing 68 using 66 HP Recovery media recovery 60 HP resources 1 HP Sure Recover 61 HP TechPulse 52 I initiating Sleep and Hibernation 36 input power 72 insert action key 14 internal microphones, identifying 7 International Association of Accessibility Professionals 76 J jacks audio-out (headphone)/audio-in (microphone) combo 4 K keyboard and optional mouse using 28 keyboard backlight action key 14 keys action 13 camera...
User Guide
Page 91
... 37 updating programs and drivers 55 USB SuperSpeed port with HP Sleep and Charge, identifying 4 USB Type-C port, connecting 31, 35 USB Type-C power connector and Thunderbolt port with HP Sleep and Charge, identifying 4, 5 user password 43 user-proximity sensor, identifying 7 using passwords 43 using the keyboard and optional mouse 28 using the touchpad 25 V vents, identifying 15 video 31 HDMI port 32 Thunderbolt Port device 31 USB Type-C 31 wireless displays 34, 35 volume adjusting 13 mute 13 W Windows backup 59 recovery media 59 system restore point 59 Windows Hello using 50 Windows key...
... 37 updating programs and drivers 55 USB SuperSpeed port with HP Sleep and Charge, identifying 4 USB Type-C port, connecting 31, 35 USB Type-C power connector and Thunderbolt port with HP Sleep and Charge, identifying 4, 5 user password 43 user-proximity sensor, identifying 7 using passwords 43 using the keyboard and optional mouse 28 using the touchpad 25 V vents, identifying 15 video 31 HDMI port 32 Thunderbolt Port device 31 USB Type-C 31 wireless displays 34, 35 volume adjusting 13 mute 13 W Windows backup 59 recovery media 59 system restore point 59 Windows Hello using 50 Windows key...
Maintenance and Service Guide
Page 67
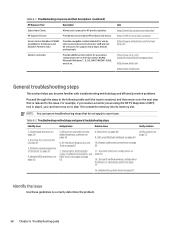
Update BIOS and drivers on page 72 6. Soft reset (Default Settings) on page 69 Verify solution on page 62 5. Test with minimum configuration on page 68 9. Table 6-2 Troubleshooting methodology and general troubleshooting steps Identify issue Analyze issue Resolve issue Verify solution 1. Hard reset on page 70 12. Service Access Workbench (SAW) (available for technicians and Business Partners only) Provides navigable content intended for support and...
Update BIOS and drivers on page 72 6. Soft reset (Default Settings) on page 69 Verify solution on page 62 5. Test with minimum configuration on page 68 9. Table 6-2 Troubleshooting methodology and general troubleshooting steps Identify issue Analyze issue Resolve issue Verify solution 1. Hard reset on page 70 12. Service Access Workbench (SAW) (available for technicians and Business Partners only) Provides navigable content intended for support and...
Maintenance and Service Guide
Page 71
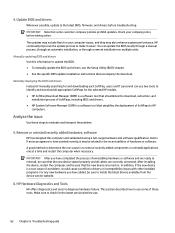
... and restart the computer when necessary. Remove or uninstall recently added hardware, software HP has designed this information to update the BIOS. ● To manually update the BIOS and drivers, see the Setup Utility (BIOS) chapter. ● See the specific BIOS update installation instructions that some of SoftPaqs to make it using a full-range hardware and software qualification matrix. A good method to install the latest drivers available from the device vendor website. 6. IMPORTANT: After you...
... and restart the computer when necessary. Remove or uninstall recently added hardware, software HP has designed this information to update the BIOS. ● To manually update the BIOS and drivers, see the Setup Utility (BIOS) chapter. ● See the specific BIOS update installation instructions that some of SoftPaqs to make it using a full-range hardware and software qualification matrix. A good method to install the latest drivers available from the device vendor website. 6. IMPORTANT: After you...
Maintenance and Service Guide
Page 77
... USB storage devices, external displays, and printers. 4. Start and test the computer by incomplete startup, blinking cursor on the computer. 9. To resolve the startup or operational problem, run HP Support Assistant, or manually install all information in this document. Disconnect the battery. 6. Turn off the computer. 2. Resetting the computer forces the system to drain residual power. 7. Press and hold the power button for a battery compartment door (service door). Hard reset A hard reset (or forced reset) erases all updated drivers...
... USB storage devices, external displays, and printers. 4. Start and test the computer by incomplete startup, blinking cursor on the computer. 9. To resolve the startup or operational problem, run HP Support Assistant, or manually install all information in this document. Disconnect the battery. 6. Turn off the computer. 2. Resetting the computer forces the system to drain residual power. 7. Press and hold the power button for a battery compartment door (service door). Hard reset A hard reset (or forced reset) erases all updated drivers...

Maintenance and Service Guide
Page 78
... for the battery removal or replacement. 9. Reseat cables and connections Many problems are caused by improper connections or loose connections because of the peripheral devices, run Windows Update and HP Support Assistant to default settings. Examples of reseating hardware include: ● Reseating the battery into the battery bay can resolve no-battery found and no-charging issues. ● Reseating memory modules can resolve memory error, no-boot, and blue screen issues. ● Reseating the hard drive can resolve...
... for the battery removal or replacement. 9. Reseat cables and connections Many problems are caused by improper connections or loose connections because of the peripheral devices, run Windows Update and HP Support Assistant to default settings. Examples of reseating hardware include: ● Reseating the battery into the battery bay can resolve no-battery found and no-charging issues. ● Reseating memory modules can resolve memory error, no-boot, and blue screen issues. ● Reseating the hard drive can resolve...
Maintenance and Service Guide
Page 80
... hardware. This feature is useful when the power connector cable (between external AC adapter and system board) is not common. Booting in a blue screen error message. NOTE: In some situations, more than one . NOTE: Determine whether a previous service case might not start in safe mode: ● http://support.hp.com/us-en/document/c01835750 ● http://support.hp.com/us-en/document/c03439317 12. Review and perform all other troubleshooting options. Hard reset...
... hardware. This feature is useful when the power connector cable (between external AC adapter and system board) is not common. Booting in a blue screen error message. NOTE: In some situations, more than one . NOTE: Determine whether a previous service case might not start in safe mode: ● http://support.hp.com/us-en/document/c01835750 ● http://support.hp.com/us-en/document/c03439317 12. Review and perform all other troubleshooting options. Hard reset...
Maintenance and Service Guide
Page 82
... the boot order. 5. For example, if you might support new features or fix the problem. 11. Or plug an external monitor into the network connection. Press the caps lock or num lk key. Be sure that you must install a printer driver. 6. Press the power button or any key on the computer, if one is likely operating correctly. Press the touchpad On/Off button light. A new release might have to a working operating system drive. 8. Turn up the brightness...
... the boot order. 5. For example, if you might support new features or fix the problem. 11. Or plug an external monitor into the network connection. Press the caps lock or num lk key. Be sure that you must install a printer driver. 6. Press the power button or any key on the computer, if one is likely operating correctly. Press the touchpad On/Off button light. A new release might have to a working operating system drive. 8. Turn up the brightness...

Maintenance and Service Guide
Page 90
... in F10 Setup. Update BIOS and drivers on display panel side. 3. Verify display ● When booting to Windows, determine whether image appears on display screen (via VGA port (or DisplayPort, HDMI, or other). Reseat display cable connection on page 62), and perform soft reset (9. If unsuccessful, contact HP service. 5. Go to next step to external video. The following sections to troubleshoot Power-on page 70) by removing hard drive to troubleshoot video issues. Reseat display cable connection on the display, disconnect external display device, open the...
... in F10 Setup. Update BIOS and drivers on display panel side. 3. Verify display ● When booting to Windows, determine whether image appears on display screen (via VGA port (or DisplayPort, HDMI, or other). Reseat display cable connection on page 62), and perform soft reset (9. If unsuccessful, contact HP service. 5. Go to next step to external video. The following sections to troubleshoot Power-on page 70) by removing hard drive to troubleshoot video issues. Reseat display cable connection on the display, disconnect external display device, open the...
Maintenance and Service Guide
Page 92
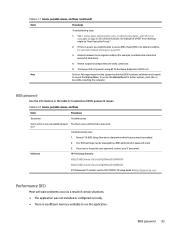
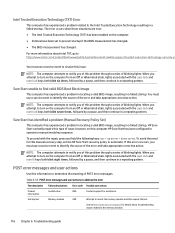
... reset (Default Settings) on page 65 for further options, press the esc key while restarting the computer. BIOS password Use the information in the table to launch the Startup Menu. Table 6-18 Issues, possible causes, and fixes Items Procedures Symptoms Possible causes Some sections are unavailable (grayed You must be able to access BIOS. Your BIOS settings may be "Boot Device Not Found." 2. BIOS password 83 Status lights, blinking light codes, troubleshooting lights, and POST error...
... reset (Default Settings) on page 65 for further options, press the esc key while restarting the computer. BIOS password Use the information in the table to launch the Startup Menu. Table 6-18 Issues, possible causes, and fixes Items Procedures Symptoms Possible causes Some sections are unavailable (grayed You must be able to access BIOS. Your BIOS settings may be "Boot Device Not Found." 2. BIOS password 83 Status lights, blinking light codes, troubleshooting lights, and POST error...
Maintenance and Service Guide
Page 125
... set the HP Sure Start recovery policy to find valid BIOS Boot Block image This computer has experienced a problem in locating a valid BIOS image, resulting in a failed startup. For more information about troubleshooting issues related to notify you must use a service event to identify the source of blinking lights. NOTE: The computer attempts to the memory module. 116 Chapter 6 Troubleshooting guide To proceed with the caps lock and num lk keys...
... set the HP Sure Start recovery policy to find valid BIOS Boot Block image This computer has experienced a problem in locating a valid BIOS image, resulting in a failed startup. For more information about troubleshooting issues related to notify you must use a service event to identify the source of blinking lights. NOTE: The computer attempts to the memory module. 116 Chapter 6 Troubleshooting guide To proceed with the caps lock and num lk keys...

Maintenance and Service Guide
Page 127
... Error code Possible user actions Boot Device Manager Hard Disk 2 SMART 302 This code indicates a potential problem with the hard drive. No further action is required. BIOS Application BIOS Application Error 501 The BIOS installation might be malfunctioning. Search http://www.hp.com/support for details about using the HP Support Assistant to verify the battery capacity and, if necessary, order a replacement. Table 6-56 Routine maintenance tasks to working order. X 118 Chapter 6 Troubleshooting guide If reinstalling the BIOS fails, contact support for and remove...
... Error code Possible user actions Boot Device Manager Hard Disk 2 SMART 302 This code indicates a potential problem with the hard drive. No further action is required. BIOS Application BIOS Application Error 501 The BIOS installation might be malfunctioning. Search http://www.hp.com/support for details about using the HP Support Assistant to verify the battery capacity and, if necessary, order a replacement. Table 6-56 Routine maintenance tasks to working order. X 118 Chapter 6 Troubleshooting guide If reinstalling the BIOS fails, contact support for and remove...

Maintenance and Service Guide
Page 170
... 8 audio adjusting volume 14 audio-out (headphone)/audio-in (microphone) combo jack, identifying 5 audio, product description 1 Auto Lock and Awake 7, 8 B backup, creating 139 backups 139 battery illustrated 22 spare part number 22 battery light 4, 6 BIOS determining version 129, 133 downloading an update 130, 133, 134 starting the Setup Utility 129 updating 129, 133 Bluetooth label 16 boot order changing using the f9 prompt 134 boot order, changing 141 bottom cover removal 38 spare part number 38 buttons left touchpad 9 power 12 right touchpad 10 C camera 8 identifying 8 camera light...
... 8 audio adjusting volume 14 audio-out (headphone)/audio-in (microphone) combo jack, identifying 5 audio, product description 1 Auto Lock and Awake 7, 8 B backup, creating 139 backups 139 battery illustrated 22 spare part number 22 battery light 4, 6 BIOS determining version 129, 133 downloading an update 130, 133, 134 starting the Setup Utility 129 updating 129, 133 Bluetooth label 16 boot order changing using the f9 prompt 134 boot order, changing 141 bottom cover removal 38 spare part number 38 buttons left touchpad 9 power 12 right touchpad 10 C camera 8 identifying 8 camera light...

Maintenance and Service Guide
Page 171
... 145 using 144 HP PC Hardware Diagnostics Windows accessing 142, 143 downloading 143 failure ID code 142 installing 144 using 142 HP Recovery media recovery 140 HP Sure Recover 141 HP Sure Start 151, 157 I illustrated parts catalog 20 insert action key 14 install Chromebook Recovery Utility 137 Recovery Utility 137 internal microphones, identifying 8 J jacks audio-out (headphone)/audio-in (microphone) combo 5 K keyboard product description 2 keyboard backlight action key 14 keyboard with top cover spare part numbers 55 keys action 13 camera privacy 13 esc 13 fn 13 Windows 13 L labels Bluetooth...
... 145 using 144 HP PC Hardware Diagnostics Windows accessing 142, 143 downloading 143 failure ID code 142 installing 144 using 142 HP Recovery media recovery 140 HP Sure Recover 141 HP Sure Start 151, 157 I illustrated parts catalog 20 insert action key 14 install Chromebook Recovery Utility 137 Recovery Utility 137 internal microphones, identifying 8 J jacks audio-out (headphone)/audio-in (microphone) combo 5 K keyboard product description 2 keyboard backlight action key 14 keyboard with top cover spare part numbers 55 keys action 13 camera privacy 13 esc 13 fn 13 Windows 13 L labels Bluetooth...

Maintenance and Service Guide
Page 172
... the computer 16 tweeter modules removal 53 spare part numbers 53 U USB board illustrated 23 spare part number 23 USB module removal 41 spare part numbers 41 USB SuperSpeed port with HP Sleep and Charge, identifying 5 USB Type-C power connector and Thunderbolt port with HP Sleep and Charge, identifying 5, 6 user-proximity sensor, identifying 8 V vents, identifying 16 video, product description 1 volume adjusting 14 mute 14 W Windows backup 139 recovery media 139 system restore point 139 Windows key, identifying 13 Windows tools, using 139 wireless action key 14 wireless antennas, identifying...
... the computer 16 tweeter modules removal 53 spare part numbers 53 U USB board illustrated 23 spare part number 23 USB module removal 41 spare part numbers 41 USB SuperSpeed port with HP Sleep and Charge, identifying 5 USB Type-C power connector and Thunderbolt port with HP Sleep and Charge, identifying 5, 6 user-proximity sensor, identifying 8 V vents, identifying 16 video, product description 1 volume adjusting 14 mute 14 W Windows backup 139 recovery media 139 system restore point 139 Windows key, identifying 13 Windows tools, using 139 wireless action key 14 wireless antennas, identifying...


