
User Guide
Page 5
... 4 Locating hardware ...4 Locating software ...4 Front ...4 Right side ...5 Left side ...7 Back ...8 Top ...8 Bottom ...9 Labels ...9 Identifying the labels ...9 3 Connecting to a network ...10 Connecting to a wireless network ...10 Using the wireless controls 10 Using an Internet service provider 10 Setting up a WLAN ...11 Configuring a wireless router 11 Protecting your WLAN ...11 Connecting to a WLAN ...12 Connecting to a wired network ...13 Connecting to a local area network (LAN 13 4 Enjoying entertainment features ...14 Volume control ...14 Using the webcam ...14 Using audio ...14...
... 4 Locating hardware ...4 Locating software ...4 Front ...4 Right side ...5 Left side ...7 Back ...8 Top ...8 Bottom ...9 Labels ...9 Identifying the labels ...9 3 Connecting to a network ...10 Connecting to a wireless network ...10 Using the wireless controls 10 Using an Internet service provider 10 Setting up a WLAN ...11 Configuring a wireless router 11 Protecting your WLAN ...11 Connecting to a WLAN ...12 Connecting to a wired network ...13 Connecting to a local area network (LAN 13 4 Enjoying entertainment features ...14 Volume control ...14 Using the webcam ...14 Using audio ...14...
User Guide
Page 6
... swipe 20 Using the keyboard ...21 Using the action keys ...22 Using Microsoft Windows 8 shortcut keys 23 Using the integrated numeric keypad 23 6 Managing power ...25 Initiating Sleep and Hibernation ...25 Intel Rapid Start Technology (select models only 25 Manually initiating and exiting Sleep 25 Manually initiating and exiting Hibernation 26 Setting password protection on wakeup 26 HP CoolSense (select models only 26 Refreshing your software content with Intel Smart Connect Technology (select models...
... swipe 20 Using the keyboard ...21 Using the action keys ...22 Using Microsoft Windows 8 shortcut keys 23 Using the integrated numeric keypad 23 6 Managing power ...25 Initiating Sleep and Hibernation ...25 Intel Rapid Start Technology (select models only 25 Manually initiating and exiting Sleep 25 Manually initiating and exiting Hibernation 26 Setting password protection on wakeup 26 HP CoolSense (select models only 26 Refreshing your software content with Intel Smart Connect Technology (select models...
User Guide
Page 7
...Downloading HP PC Hardware Diagnostics (UEFI) to a USB device 38 10 Backing up, restoring, and recovering ...39 Creating recovery media and backups 39 Creating HP Recovery media 40 Restore and recovery ...41 Using Windows Refresh for quick and easy recovery 42 Remove everything and reinstall Windows 42 Recovering using HP Recovery Manager 43 What you need to know 43 Using the HP Recovery partition (select models only 43 Using HP Recovery media to recover 44 Changing the computer boot order 44 Removing the HP Recovery partition 44 11 Troubleshooting ...46 Wireless connection problems...
...Downloading HP PC Hardware Diagnostics (UEFI) to a USB device 38 10 Backing up, restoring, and recovering ...39 Creating recovery media and backups 39 Creating HP Recovery media 40 Restore and recovery ...41 Using Windows Refresh for quick and easy recovery 42 Remove everything and reinstall Windows 42 Recovering using HP Recovery Manager 43 What you need to know 43 Using the HP Recovery partition (select models only 43 Using HP Recovery media to recover 44 Changing the computer boot order 44 Removing the HP Recovery partition 44 11 Troubleshooting ...46 Wireless connection problems...

User Guide
Page 8
... codes are unavailable 47 Cannot connect to the wireless router 47 Network status icon is not displayed 48 Power problems ...48 Computer will not turn on or start 48 Hard drive error ...48 Computer is not responding 49 Computer shuts down unexpectedly 49 Display problems ...49 The display is blank ...49 Images on the screen are too large or too small, or the images are fuzzy 49 Keyboard and mouse problems...
... codes are unavailable 47 Cannot connect to the wireless router 47 Network status icon is not displayed 48 Power problems ...48 Computer will not turn on or start 48 Hard drive error ...48 Computer is not responding 49 Computer shuts down unexpectedly 49 Display problems ...49 The display is blank ...49 Images on the screen are too large or too small, or the images are fuzzy 49 Keyboard and mouse problems...
User Guide
Page 11
...; Specific warranty information about this guide, select the HP Support Assistant app on the Start screen, select My computer, and then select Warranty and services, or go to the addresses above. Di Vittorio, 9, 20063, Cernusco s/Naviglio (MI), Italy ● Asia Pacific: Hewlett-Packard, POD, P.O. For U.S. Resource Limited Warranty* To access this computer. *You can find the expressly provided HP...
...; Specific warranty information about this guide, select the HP Support Assistant app on the Start screen, select My computer, and then select Warranty and services, or go to the addresses above. Di Vittorio, 9, 20063, Cernusco s/Naviglio (MI), Italy ● Asia Pacific: Hewlett-Packard, POD, P.O. For U.S. Resource Limited Warranty* To access this computer. *You can find the expressly provided HP...

User Guide
Page 12
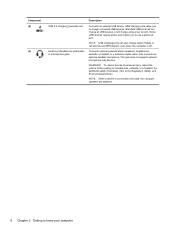
... the Start screen, right-click using the external wireless mouse. - A list reveals all the devices installed on . 4 Chapter 2 Getting to know your computer or - Record audio, automatically filtering out the noise around you and cancelling echoes. Locating software To find out what software is installed on your computer: 1. From the Start screen, type c, and then select Control Panel. 2. 2 Getting to know your computer Finding your hardware and software information Locating hardware To find...
... the Start screen, right-click using the external wireless mouse. - A list reveals all the devices installed on . 4 Chapter 2 Getting to know your computer or - Record audio, automatically filtering out the noise around you and cancelling echoes. Locating software To find out what software is installed on your computer: 1. From the Start screen, type c, and then select Control Panel. 2. 2 Getting to know your computer Finding your hardware and software information Locating hardware To find...
User Guide
Page 14
... Environmental Notices. This jack does not support optional microphone-only devices. For additional safety information, refer to know your computer Standard USB ports will not charge all USB devices or will charge using a low current. WARNING! Connects optional powered stereo speakers, headphones, earbuds, a headset, or a television audio cable. Component (2) (3) USB 3.0 charging (powered) port Audio-out (headphone) jack/Audioin (microphone) jack Description Connects an optional USB device. Some USB devices require power and require you to use a powered port.
... Environmental Notices. This jack does not support optional microphone-only devices. For additional safety information, refer to know your computer Standard USB ports will not charge all USB devices or will charge using a low current. WARNING! Connects optional powered stereo speakers, headphones, earbuds, a headset, or a television audio cable. Component (2) (3) USB 3.0 charging (powered) port Audio-out (headphone) jack/Audioin (microphone) jack Description Connects an optional USB device. Some USB devices require power and require you to use a powered port.
User Guide
Page 18
... computer and a wired or wireless network connection. Using an Internet service provider When you are setting up the modem, install a network cable to connect your computer communicates with an Internet service provider (ISP). In a WLAN, the mobile wireless device in a safe place. 10 Chapter 3 Connecting to a network You can explore the globe and access information from millions of wires. From the Start screen, type h, and then select Help and Support. From the Start screen, type h, and then...
... computer and a wired or wireless network connection. Using an Internet service provider When you are setting up the modem, install a network cable to connect your computer communicates with an Internet service provider (ISP). In a WLAN, the mobile wireless device in a safe place. 10 Chapter 3 Connecting to a network You can explore the globe and access information from millions of wires. From the Start screen, type h, and then select Help and Support. From the Start screen, type h, and then...
User Guide
Page 22
Select Settings, and then click the speaker icon. 3. Adjust the slider to a USB port on your computer. Connecting speakers You can stream video with friends and colleagues next door or on the external wireless keyboard or the volume control button. Volume control The integrated volume control button controls speaker volume on page 14 for more powerful entertainment center, connect external devices like speakers, headphones, or a gaming console. With the webcam, you can attach wired speakers to...
Select Settings, and then click the speaker icon. 3. Adjust the slider to a USB port on your computer. Connecting speakers You can stream video with friends and colleagues next door or on the external wireless keyboard or the volume control button. Volume control The integrated volume control button controls speaker volume on page 14 for more powerful entertainment center, connect external devices like speakers, headphones, or a gaming console. With the webcam, you can attach wired speakers to...
User Guide
Page 23
... your wireless device is a powerful video device that your computer without needing to connect to your receive/display device, such as HDTV, monitor, projector, game console, Blu-ray player, or DVR, by using the wireless display feature, be sure that enables you manage and edit your photo and video collections. ▲ To open Intel Wireless Display, from Start screen, type c, select Control Panel, select Hardware and Sound, and then select Beats Audio Control Panel. For details about using the wireless adapter, see...
... your wireless device is a powerful video device that your computer without needing to connect to your receive/display device, such as HDTV, monitor, projector, game console, Blu-ray player, or DVR, by using the wireless display feature, be sure that enables you manage and edit your photo and video collections. ▲ To open Intel Wireless Display, from Start screen, type c, select Control Panel, select Hardware and Sound, and then select Beats Audio Control Panel. For details about using the wireless adapter, see...
User Guide
Page 33
... your open documents and programs on and your power-saving options as follows: ● Sleep-Rapid Start Technology allows you must enable user-initiated Hibernation using Power Options. Rapid Start Technology manages your work . If you want to be disabled in Setup Utility (BIOS). When the computer exits Sleep, the power lights turn on your hard drive, and then turns off your work returns to display the charms. Click Settings, click the Power icon, and then select Sleep. See Manually...
... your open documents and programs on and your power-saving options as follows: ● Sleep-Rapid Start Technology allows you must enable user-initiated Hibernation using Power Options. Rapid Start Technology manages your work . If you want to be disabled in Setup Utility (BIOS). When the computer exits Sleep, the power lights turn on your hard drive, and then turns off your work returns to display the charms. Click Settings, click the Power icon, and then select Sleep. See Manually...
User Guide
Page 34
... the Start screen, type cool, select Settings, and then select HP CoolSense. 26 Chapter 6 Managing power Click Save changes. Setting password protection on wakeup, you must enter your Windows password before your computer at the optimum level of the computer is not in Control Panel. 1. If you need to create or change your work will return to prompt for a password when the computer exits Sleep or Hibernation, follow the onscreen instructions. HP...
... the Start screen, type cool, select Settings, and then select HP CoolSense. 26 Chapter 6 Managing power Click Save changes. Setting password protection on wakeup, you must enter your Windows password before your computer at the optimum level of the computer is not in Control Panel. 1. If you need to create or change your work will return to prompt for a password when the computer exits Sleep or Hibernation, follow the onscreen instructions. HP...
User Guide
Page 42
..., install all critical updates from Internet threats, go to the operating system and other online threats. NOTE: The administrator password can be entered each time you access Setup Utility (BIOS). ● If you forget your administrator password, you expose your computer, Internet security software that includes antivirus and firewall features is preinstalled on -screen instructions. To set, change, or delete an administrator or power-on password. Setting Setup Utility (BIOS) passwords Password Administrator password Power-on password is...
..., install all critical updates from Internet threats, go to the operating system and other online threats. NOTE: The administrator password can be entered each time you access Setup Utility (BIOS). ● If you forget your administrator password, you expose your computer, Internet security software that includes antivirus and firewall features is preinstalled on -screen instructions. To set, change, or delete an administrator or power-on password. Setting Setup Utility (BIOS) passwords Password Administrator password Power-on password is...
User Guide
Page 45
... Sleep. Using HP PC Hardware Diagnostics (UEFI) 37 If the update is functioning properly. Using the hard drive path you are caused by following the on -screen instructions to download your hard drive designation. During the download and installation, follow these steps: a. Follow the on battery power, docked in an optional docking device, or connected to locate the update later, after the download is running on -screen instructions. 4. BIOS installation procedures vary. You may need to access this information to an optional power...
... Sleep. Using HP PC Hardware Diagnostics (UEFI) 37 If the update is functioning properly. Using the hard drive path you are caused by following the on -screen instructions to download your hard drive designation. During the download and installation, follow these steps: a. Follow the on battery power, docked in an optional docking device, or connected to locate the update later, after the download is running on -screen instructions. 4. BIOS installation procedures vary. You may need to access this information to an optional power...

User Guide
Page 49
... use the Factory Reset option of HP Recovery media to restore the factory image to remove all personal data, apps, and settings, and reinstall Windows. See Using Windows Refresh for installation through the Drivers and Applications Reinstall option in the image continue to be available for quick and easy recovery on page 42. ● If you want to reset your information from the HP Recovery partition (select models only) or use the HP Recovery media that you have replaced the hard drive...
... use the Factory Reset option of HP Recovery media to restore the factory image to remove all personal data, apps, and settings, and reinstall Windows. See Using Windows Refresh for installation through the Drivers and Applications Reinstall option in the image continue to be available for quick and easy recovery on page 42. ● If you want to reset your information from the HP Recovery partition (select models only) or use the HP Recovery media that you have replaced the hard drive...
User Guide
Page 52
... the optical drive or USB flash drive you press the power button. 2. Removing the HP Recovery partition HP Recovery Manager software allows you created. 2. Choose your system does not have an HP Recovery partition or if the hard drive is the order of devices listed in HP Recovery Manager, you can change the boot order: 1. Select Troubleshoot from the HP Recovery partition: 1. If possible, back up , restoring, and recovering or - See Changing the computer boot order on -screen instructions. Insert the HP Recovery media you to remove the HP Recovery partition to recover...
... the optical drive or USB flash drive you press the power button. 2. Removing the HP Recovery partition HP Recovery Manager software allows you created. 2. Choose your system does not have an HP Recovery partition or if the hard drive is the order of devices listed in HP Recovery Manager, you can change the boot order: 1. Select Troubleshoot from the HP Recovery partition: 1. If possible, back up , restoring, and recovering or - See Changing the computer boot order on -screen instructions. Insert the HP Recovery media you to remove the HP Recovery partition to recover...
User Guide
Page 54
... and Support. Cannot connect to a WLAN, confirm that the wireless device is turned on . ● Wireless device is not installed correctly or has been disabled. ● Wireless device encountered interference from the Network adapters list. From the Start screen, type c, and then select Control Panel. 2. The listing for a WLAN device may not be able to connect to a WLAN If you are still unable to the WLAN again. 11 Troubleshooting Wireless connection problems Some possible causes for wireless connection problems...
... and Support. Cannot connect to a WLAN, confirm that the wireless device is turned on . ● Wireless device is not installed correctly or has been disabled. ● Wireless device encountered interference from the Network adapters list. From the Start screen, type c, and then select Control Panel. 2. The listing for a WLAN device may not be able to connect to a WLAN If you are still unable to the WLAN again. 11 Troubleshooting Wireless connection problems Some possible causes for wireless connection problems...

User Guide
Page 59
... the Sleep state, exit Sleep by briefly pressing the power button. ● Check the audio functions. When the Sound window opens, click the Sounds tab. From the Start screen, type s, and then select Sound Recorder. 2. Select Hardware and Sound, and then select Sound. To check the audio functions on the receiver lights up or stops flashing. NOTE: To confirm or change the audio settings on your computer, from the Start screen, type c, and then select Control Panel. Open...
... the Sleep state, exit Sleep by briefly pressing the power button. ● Check the audio functions. When the Sound window opens, click the Sounds tab. From the Start screen, type s, and then select Sound Recorder. 2. Select Hardware and Sound, and then select Sound. To check the audio functions on the receiver lights up or stops flashing. NOTE: To confirm or change the audio settings on your computer, from the Start screen, type c, and then select Control Panel. Open...
User Guide
Page 63
...-definition devices, connecting 15 HP PC Hardware Diagnostics (UEFI) downloading 38 HP Recovery Manager correcting boot problems 44 starting 44 HP Recovery media creating 40 recovery 44 HP Recovery partition recovery 43 removing 44 hubs 28 I input power 53 installing, critical updates 34 integrated numeric keypad, identifying 21, 24 integrated webcam, identifying 5 Intel Wireless Display 15 Intel Wireless Music 15 internal microphones, identifying 4 Internet connection setup 11 Internet security software, using 34 ISP 10 J jacks audio-out (headphone) 6 K keys fn 21 Sleep 21 volume 21 Windows...
...-definition devices, connecting 15 HP PC Hardware Diagnostics (UEFI) downloading 38 HP Recovery Manager correcting boot problems 44 starting 44 HP Recovery media creating 40 recovery 44 HP Recovery partition recovery 43 removing 44 hubs 28 I input power 53 installing, critical updates 34 integrated numeric keypad, identifying 21, 24 integrated webcam, identifying 5 Intel Wireless Display 15 Intel Wireless Music 15 internal microphones, identifying 4 Internet connection setup 11 Internet security software, using 34 ISP 10 J jacks audio-out (headphone) 6 K keys fn 21 Sleep 21 volume 21 Windows...

User Guide
Page 64
... minimized image recovery 43 N num lock key, identifying 24 O operating specifications 53 original system recovery 43 P passwords Setup Utility (BIOS) 34 Windows 33 pinching touch screen gesture 18 ports Intel Wireless Display 15 Intel Wireless Music 15 USB 3.0 7 power button, identifying 8 power connector, identifying 7 product name and number, computer 9 programs, updating 31 public WLAN connection 12 R re-pair, keyboard and mouse 50 recovery discs 40, 44 HP Recovery Manager 43 media 44 options 39 refresh 42 starting 44 supported discs 40 system 43 USB flash drive 44 using HP Recovery media...
... minimized image recovery 43 N num lock key, identifying 24 O operating specifications 53 original system recovery 43 P passwords Setup Utility (BIOS) 34 Windows 33 pinching touch screen gesture 18 ports Intel Wireless Display 15 Intel Wireless Music 15 USB 3.0 7 power button, identifying 8 power connector, identifying 7 product name and number, computer 9 programs, updating 31 public WLAN connection 12 R re-pair, keyboard and mouse 50 recovery discs 40, 44 HP Recovery Manager 43 media 44 options 39 refresh 42 starting 44 supported discs 40 system 43 USB flash drive 44 using HP Recovery media...


