User Manual
Page 2
... and uses radio frequency energy and if not installed and used prop erly, that is, in strict accordance with respect to the use of the information contained herein. It has been type tested and found to this equipment. WARNING The connection of Epson America, Inc. Apex is a trademark of a non-shielded printer interface cable to comply with the specifications in a particular installation.
... and uses radio frequency energy and if not installed and used prop erly, that is, in strict accordance with respect to the use of the information contained herein. It has been type tested and found to this equipment. WARNING The connection of Epson America, Inc. Apex is a trademark of a non-shielded printer interface cable to comply with the specifications in a particular installation.

User Manual
Page 3
...This Manual 2 Where to Get Help 2 Chapter 1 Setting Up Identifying Printer Parts 1-1 Selecting a Place for the Printer 1-2 Installing the Paper Feed Knob 1-3 Installing the Ribbon 1-3 Replacing the Ribbon 1-6 Plugging in the Printer 1-7 Using Continuous-feed Paper 1-7 Using Single-sheet Paper 1-15 Operating the Control Panel 1-19 Connecting the Apex80 to Your Computer 1-23 Chapter 2 Using the Apex80 with Application Programs Printer Selection Menus 2-1 Computer-Printer Communication 2-2 Word Processors 2-3 Spreadsheets 2 -4 Graphics Programs 2-6 Programming Languages...
...This Manual 2 Where to Get Help 2 Chapter 1 Setting Up Identifying Printer Parts 1-1 Selecting a Place for the Printer 1-2 Installing the Paper Feed Knob 1-3 Installing the Ribbon 1-3 Replacing the Ribbon 1-6 Plugging in the Printer 1-7 Using Continuous-feed Paper 1-7 Using Single-sheet Paper 1-15 Operating the Control Panel 1-19 Connecting the Apex80 to Your Computer 1-23 Chapter 2 Using the Apex80 with Application Programs Printer Selection Menus 2-1 Computer-Printer Communication 2-2 Word Processors 2-3 Spreadsheets 2 -4 Graphics Programs 2-6 Programming Languages...
User Manual
Page 13
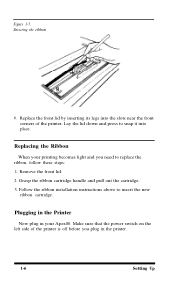
... printer is off before you need to replace the ribbon, follow these steps: 1. Lay the lid down and press to insert the new ribbon cartridge. Directing the ribbon 6. Figure 1-5. Make sure that the power switch on the left side of the printer. Plugging in the Printer Now plug in your printing becomes light and you plug in the printer. 1-6 Setting Up Replacing the Ribbon When your Apex80. Remove...
... printer is off before you need to replace the ribbon, follow these steps: 1. Lay the lid down and press to insert the new ribbon cartridge. Directing the ribbon 6. Figure 1-5. Make sure that the power switch on the left side of the printer. Plugging in the Printer Now plug in your printing becomes light and you plug in the printer. 1-6 Setting Up Replacing the Ribbon When your Apex80. Remove...

User Manual
Page 14
... tractor unit You will need to install the tractor unit each time you to the Using Single-sheet Paper section later in this chapter. If you have received your tractor unit. To install the tractor unit, follow these steps: 1. If the paper guide is installed, remove it by fitting it into the slots along the sides (continuous-feed paper). Store the cover in Figure 1-6. Setting Up 1-7 You can only be loaded...
... tractor unit You will need to install the tractor unit each time you to the Using Single-sheet Paper section later in this chapter. If you have received your tractor unit. To install the tractor unit, follow these steps: 1. If the paper guide is installed, remove it by fitting it into the slots along the sides (continuous-feed paper). Store the cover in Figure 1-6. Setting Up 1-7 You can only be loaded...

User Manual
Page 19
... you use continuous-feed paper, as shown in Figure 1-12, and close the pin feed cover. Feed the paper into the left holder, as described here, and sits upright for loading single-sheet paper. 1. If the edge guides are not yet in place, install them by hooking the tab on the type of each guide over the pins in Figure 1-13. Installing the paper guide Install the paper guide, which...
... you use continuous-feed paper, as shown in Figure 1-12, and close the pin feed cover. Feed the paper into the left holder, as described here, and sits upright for loading single-sheet paper. 1. If the edge guides are not yet in place, install them by hooking the tab on the type of each guide over the pins in Figure 1-13. Installing the paper guide Install the paper guide, which...

User Manual
Page 22
... for step 3 on aligning the left edge guide. Once you have set the top of form, each time you finish printing a document, push the ON/OFF LINE button to put the printer offline and then push the FORM FEED button once to begin the next document. This enables you to tear off the pins. Before you load single-sheet paper, you can skip the following the above instructions.
... for step 3 on aligning the left edge guide. Once you have set the top of form, each time you finish printing a document, push the ON/OFF LINE button to put the printer offline and then push the FORM FEED button once to begin the next document. This enables you to tear off the pins. Before you load single-sheet paper, you can skip the following the above instructions.

User Manual
Page 26
... factory setting for the paper thickness lever, located inside the front lid on the left side, accommodates both single sheets and multiple forms. There is on the left side of the printer is no need to adjust the lever. If it probably stops sending characters at a time, with a total thickness of no more than one page long using single- Operating the Control Panel Now that has just been printed and load a new sheet...
... factory setting for the paper thickness lever, located inside the front lid on the left side, accommodates both single sheets and multiple forms. There is on the left side of the printer is no need to adjust the lever. If it probably stops sending characters at a time, with a total thickness of no more than one page long using single- Operating the Control Panel Now that has just been printed and load a new sheet...

User Manual
Page 32
Many programs provide an installation or setup procedure that the program can take full advantage of the printer's features. The rest of this printer, choose one of the following. LX-800 FX-86e EX-800 LX-86 LX-80 FX-85 FX-80 RX-80 Epson printer Draft printer Note If your application program has a printer selection menu, use the instructions below. Using the Apex80 with Application...
Many programs provide an installation or setup procedure that the program can take full advantage of the printer's features. The rest of this printer, choose one of the following. LX-800 FX-86e EX-800 LX-86 LX-80 FX-85 FX-80 RX-80 Epson printer Draft printer Note If your application program has a printer selection menu, use the instructions below. Using the Apex80 with Application...
User Manual
Page 33
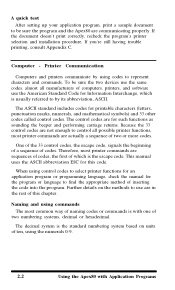
... in the rest of this code. The decimal system is the standard numbering system based on the methods to by using the numerals 0-9. 2.2 Using the Apex80 with one of two numbering systems, decimal or hexadecimal. A quick test After setting up your application program, print a sample document to control all manufacturers of computers, printers, and software use the American Standard Code for Information Interchange, which is...
... in the rest of this code. The decimal system is the standard numbering system based on the methods to by using the numerals 0-9. 2.2 Using the Apex80 with one of two numbering systems, decimal or hexadecimal. A quick test After setting up your application program, print a sample document to control all manufacturers of computers, printers, and software use the American Standard Code for Information Interchange, which is...

User Manual
Page 35
... using buttons on the control panel (see SelecType in Chapter 3). Installation and column width If your word processor is possible, use as many printing styles as word processors, they do the following: l Make sure you've selected the correct printer. Spreadsheets Although spreadsheets seldom use the Command Summary (Appendix A) in this manual. l Make sure your spreadsheet program provides a list of the installation or setup section (line feeds...
... using buttons on the control panel (see SelecType in Chapter 3). Installation and column width If your word processor is possible, use as many printing styles as word processors, they do the following: l Make sure you've selected the correct printer. Spreadsheets Although spreadsheets seldom use the Command Summary (Appendix A) in this manual. l Make sure your spreadsheet program provides a list of the installation or setup section (line feeds...

User Manual
Page 38
...Using the Apex80 with any programming language. Sending printer commands with BASIC You can send printer commands with Application Programs 2-7 The command shown above could therefore be printed." CHR$ (&H45) As you have another version of BASIC or a different programming language, consult the manual for the language... printed output is to use the LPRINT statement followed by the text to be printed enclosed in the LPRINT statement. "E" LPRINT CHR$ (&H1B); This line sends ASCII codes 27 and 69 to denote hexadecimal numbers. Individual printer control codes can be used ...
...Using the Apex80 with any programming language. Sending printer commands with BASIC You can send printer commands with Application Programs 2-7 The command shown above could therefore be printed." CHR$ (&H45) As you have another version of BASIC or a different programming language, consult the manual for the language... printed output is to use the LPRINT statement followed by the text to be printed enclosed in the LPRINT statement. "E" LPRINT CHR$ (&H1B); This line sends ASCII codes 27 and 69 to denote hexadecimal numbers. Individual printer control codes can be used ...

User Manual
Page 41
... ON/OFF LINE button once to control the printing of an entire file or document, not an individual line or word. Note Some application programs are ready to print. Therefore, if SelecType does not work with elite, press the ON/OFF LINE button three more times to select elite. (The mode is four, but remember that the following SelecType modes are using the NLQ mode, remember...
... ON/OFF LINE button once to control the printing of an entire file or document, not an individual line or word. Note Some application programs are ready to print. Therefore, if SelecType does not work with elite, press the ON/OFF LINE button three more times to select elite. (The mode is four, but remember that the following SelecType modes are using the NLQ mode, remember...

User Manual
Page 42
... files that overrides it. (In general, software commands override SelecType settings.) If, for only part of a document, print codes in effect until the printer is turned off or until you use SelecType with the SelecType modes. This seldom happens, since you usually won't use SelecType to print a document in emphasized type, anything you print after that will override your Apex80 follows the SelecType instructions for example, you send a software...
... files that overrides it. (In general, software commands override SelecType settings.) If, for only part of a document, print codes in effect until the printer is turned off or until you use SelecType with the SelecType modes. This seldom happens, since you usually won't use SelecType to print a document in emphasized type, anything you print after that will override your Apex80 follows the SelecType instructions for example, you send a software...

User Manual
Page 112
... match solutions with problems. Other sections cover beeper error warnings, hexadecimal data dumping, coding and 7-bit solutions, and specific solutions for assistance: 1-800-421 -5426. Make sure that the printer is turned on . Both the POWER and ON LINE lights should be on and is all right and the problem lies elsewhere. Problem Solving and Maintenance C-1 If the self test doesn't work, call the toll-free number for several...
... match solutions with problems. Other sections cover beeper error warnings, hexadecimal data dumping, coding and 7-bit solutions, and specific solutions for assistance: 1-800-421 -5426. Make sure that the printer is turned on . Both the POWER and ON LINE lights should be on and is all right and the problem lies elsewhere. Problem Solving and Maintenance C-1 If the self test doesn't work, call the toll-free number for several...

User Manual
Page 113
... time or for long periods at a time. Horizontal tabs don't work Set margins before tabs, not after. C-2 Problem Solving and Maintenance See the instructions on the page. If that your software is used frequently and for a large amount of DIP switch 2-4. If they are set DIP switch 1-3. Cancel NLQ mode: it has priority over condensed. Changes in the file Can't get condensed print This can usually be replaced...
... time or for long periods at a time. Horizontal tabs don't work Set margins before tabs, not after. C-2 Problem Solving and Maintenance See the instructions on the page. If that your software is used frequently and for a large amount of DIP switch 2-4. If they are set DIP switch 1-3. Cancel NLQ mode: it has priority over condensed. Changes in the file Can't get condensed print This can usually be replaced...

User Manual
Page 115
.... Data Dump Mode The Apex80 has a special feature that makes it easy for experienced printer users to 16 numbers), and the guide section (16 characters at the end of switch 1-4. Then, when you run a program, either DIP switch cable pin 12 ignore both the FORM FEED and LINE FEED buttons. Beeper Error Warnings When the Apex80's beeper sounds, it gives a printout of paper. To turn on this problem...
.... Data Dump Mode The Apex80 has a special feature that makes it easy for experienced printer users to 16 numbers), and the guide section (16 characters at the end of switch 1-4. Then, when you run a program, either DIP switch cable pin 12 ignore both the FORM FEED and LINE FEED buttons. Beeper Error Warnings When the Apex80's beeper sounds, it gives a printout of paper. To turn on this problem...

User Manual
Page 117
... 20 LPRINT CHR$(X); 30 NEXT X Put the printer in one or more codes when sending them to several 20s, the code for your printing, either by trial and error or by using the data dumping capability of the Apex80, you know that changes hex 09, which codes are problems for all potential problems in data dump mode and then run on a system that your...
... 20 LPRINT CHR$(X); 30 NEXT X Put the printer in one or more codes when sending them to several 20s, the code for your printing, either by trial and error or by using the data dumping capability of the Apex80, you know that changes hex 09, which codes are problems for all potential problems in data dump mode and then run on a system that your...
User Manual
Page 119
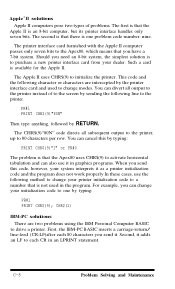
... work properly In these cases, use it in the program. Should you send this code, however, your printer initialization code to change modes. You can change your system interprets it . C-8 Problem Solving and Maintenance The printer interface card furnished with the Apple II computer passes only seven bits to the screen by typing: PR#l PRINT CHR$(9); For example, you can divert all subsequent output to the printer...
... work properly In these cases, use it in the program. Should you send this code, however, your printer initialization code to change modes. You can change your system interprets it . C-8 Problem Solving and Maintenance The printer interface card furnished with the Apple II computer passes only seven bits to the screen by typing: PR#l PRINT CHR$(9); For example, you can divert all subsequent output to the printer...
User Manual
Page 121
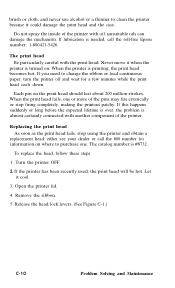
... needed, call the 800 number for a few minutes while the print head cools down. When the printer is #8732. Replacing the print head As soon as the print head fails, stop firing completely, making the printout patchy. Turn the printer OFF 2. If the printer has been recently used, the print head will be hot. brush or cloth, and never use alcohol or a thinner to change the ribbon or load continuous paper, turn the printer...
... needed, call the 800 number for a few minutes while the print head cools down. When the printer is #8732. Replacing the print head As soon as the print head fails, stop firing completely, making the printout patchy. Turn the printer OFF 2. If the printer has been recently used, the print head will be hot. brush or cloth, and never use alcohol or a thinner to change the ribbon or load continuous paper, turn the printer...

User Manual
Page 143
..., 3-2,4-2-3 D Data dump, C-4-6 Defaults, D-1 DIP switches, 4-1-2,4-4, D-2-4 Dot graphics, 2-6,6-1-12 Double-strike, 3-2, 4-3 Double-wide, 4-2-3 DRAFT/LINE FEED button, 1-21 Draft mode, 1-20-22, 4-1 E Edge guides, 1-12-13, 1-16-17 Elite, 3-2, 4-2 Emphasized, 3-2, 4-3 Epson Character Graphics, 4-4. See also Character tables Escape code (ESC), 2-2. See also Commands Index Index-1 For page references for Information Interchange, 2-2 ASCII, 2-2 AUTO LOAD, 1-17-19, 1-21 Automatic paper loading, 1-17-19 Connecting printer to computer, 1-23-24 Continuous-feed paper, 1-2, 1-7-15 Control codes...
..., 3-2,4-2-3 D Data dump, C-4-6 Defaults, D-1 DIP switches, 4-1-2,4-4, D-2-4 Dot graphics, 2-6,6-1-12 Double-strike, 3-2, 4-3 Double-wide, 4-2-3 DRAFT/LINE FEED button, 1-21 Draft mode, 1-20-22, 4-1 E Edge guides, 1-12-13, 1-16-17 Elite, 3-2, 4-2 Emphasized, 3-2, 4-3 Epson Character Graphics, 4-4. See also Character tables Escape code (ESC), 2-2. See also Commands Index Index-1 For page references for Information Interchange, 2-2 ASCII, 2-2 AUTO LOAD, 1-17-19, 1-21 Automatic paper loading, 1-17-19 Connecting printer to computer, 1-23-24 Continuous-feed paper, 1-2, 1-7-15 Control codes...


