
Network Installation Guide
Page 2
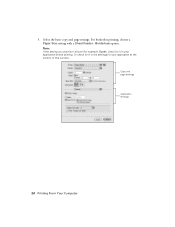
... guide to set up a wireless network, go to use on the Start Here sheet. Do one of the following: ■ If you're installing the printer for use the printer on the network, follow the instructions in "Install Software" on page 23. 2 Before You Begin Tip: For a video tutorial and other information about setting up the printer for the first time, see "Choose Your Connection Type" on page 3. ■ If you installed ink cartridges and loaded paper...
... guide to set up a wireless network, go to use on the Start Here sheet. Do one of the following: ■ If you're installing the printer for use the printer on the network, follow the instructions in "Install Software" on page 23. 2 Before You Begin Tip: For a video tutorial and other information about setting up the printer for the first time, see "Choose Your Connection Type" on page 3. ■ If you installed ink cartridges and loaded paper...

Network Installation Guide
Page 7
... the r Copy button to the Network Settings menu. 11. Note: If the printer doesn't connect to 90 seconds). See "Connect Wirelessly Using the Setup Wizard" on the printer's control panel. If the printer still doesn't connect to select your wireless network, see a green WiFi light on page 4 to your network settings again. 9. Continue with "Install Software" on page 31. Wireless Network Installation 7 Once it's connected, you need to the wireless router or access point" on page 23. If you need to change a setting, press...
... the r Copy button to the Network Settings menu. 11. Note: If the printer doesn't connect to 90 seconds). See "Connect Wirelessly Using the Setup Wizard" on the printer's control panel. If the printer still doesn't connect to select your wireless network, see a green WiFi light on page 4 to your network settings again. 9. Continue with "Install Software" on page 31. Wireless Network Installation 7 Once it's connected, you need to the wireless router or access point" on page 23. If you need to change a setting, press...
Network Installation Guide
Page 10
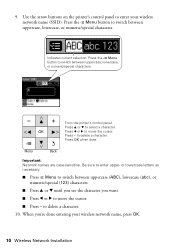
...; Press x Menu to switch between uppercase (ABC), lowercase (abc), or numeric/special (123) characters. ■ Press u or d until you see the character you 're done entering your wireless network name (SSID). From the printer's control panel: Press u or d to move the cursor. Press OK when done. Important: Network names are case-sensitive. Press - Use the arrow buttons on the printer's control panel to switch between...
...; Press x Menu to switch between uppercase (ABC), lowercase (abc), or numeric/special (123) characters. ■ Press u or d until you see the character you 're done entering your wireless network name (SSID). From the printer's control panel: Press u or d to move the cursor. Press OK when done. Important: Network names are case-sensitive. Press - Use the arrow buttons on the printer's control panel to switch between...

Network Installation Guide
Page 16
...-Hoc Wireless Connection Use this way. Important: For Windows® users: If your computer is connected to a network with an Ethernet cable, you cannot set up your printer this setup method if you need to disconnect it before installing software. Press the F Setup button on page 22 to a network with an Ethernet cable, you want to print wirelessly but do not have an access point or router. When setup is connected to set up...
...-Hoc Wireless Connection Use this way. Important: For Windows® users: If your computer is connected to a network with an Ethernet cable, you cannot set up your printer this setup method if you need to disconnect it before installing software. Press the F Setup button on page 22 to a network with an Ethernet cable, you want to print wirelessly but do not have an access point or router. When setup is connected to set up...
Network Installation Guide
Page 21
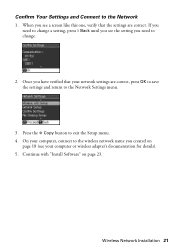
... or wireless adapter's documentation for details). 5. When you have verified that the settings are correct, press OK to save the settings and return to the Network Settings menu. 3. If you need to change a setting, press y Back until you see your network settings are correct. On your computer, connect to the wireless network name you need to change . 2. Confirm Your Settings and Connect to exit the Setup menu. 4. Wireless Network Installation 21 Continue with "Install Software" on page...
... or wireless adapter's documentation for details). 5. When you have verified that the settings are correct, press OK to save the settings and return to the Network Settings menu. 3. If you need to change a setting, press y Back until you see your network settings are correct. On your computer, connect to the wireless network name you need to change . 2. Confirm Your Settings and Connect to exit the Setup menu. 4. Wireless Network Installation 21 Continue with "Install Software" on page...
Network Installation Guide
Page 31
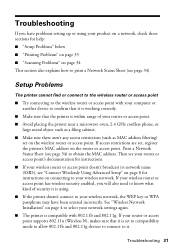
...), see "Connect Wirelessly Using Advanced Setup" on page 8 for help: ■ "Setup Problems" below ■ "Printing Problems" on page 33 ■ "Scanning Problems" on page 4 to select your network settings again. ■ The printer is compatible with your computer or another device to confirm that it is working correctly. ■ Make sure that it is set on the wireless router or access point. See "Wireless Network Installation" on page 34 This section also explains how to print a Network Status Sheet (see page 34...
...), see "Connect Wirelessly Using Advanced Setup" on page 8 for help: ■ "Setup Problems" below ■ "Printing Problems" on page 33 ■ "Scanning Problems" on page 4 to select your network settings again. ■ The printer is compatible with your computer or another device to confirm that it is working correctly. ■ Make sure that it is set on the wireless router or access point. See "Wireless Network Installation" on page 34 This section also explains how to print a Network Status Sheet (see page 34...
Network Installation Guide
Page 32
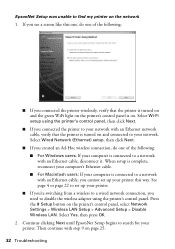
... set up your printer this one, do one of the following : ■ If you see a screen like this way. Then continue with an Ethernet network cable, verify that the printer is turned on and the green WiFi light on the printer's control panel is turned on page 25. 32 Troubleshooting Select Wi-Fi setup using the printer's control panel, then click Next. ■ If you need to disable the wireless adapter using...
... set up your printer this one, do one of the following : ■ If you see a screen like this way. Then continue with an Ethernet network cable, verify that the printer is turned on and the green WiFi light on the printer's control panel is turned on page 25. 32 Troubleshooting Select Wi-Fi setup using the printer's control panel, then click Next. ■ If you need to disable the wireless adapter using...
Network Installation Guide
Page 33
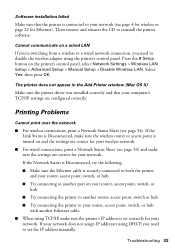
...X) Make sure the printer driver was installed correctly and that the printer is turned on the printer's control panel, select Network Settings > Wireless LAN Setup > Advanced Setup > Manual Setup > Disable Wireless LAN. Select Yes, then press OK. Printing Problems Cannot print over the network ■ For wireless connections, print a Network Status Sheet (see page 34) and make sure the wireless router or access point is connected to set correctly for your network. If the Link Status is Disconnected, make sure the settings are configured correctly. Software installation failed Make...
...X) Make sure the printer driver was installed correctly and that the printer is turned on the printer's control panel, select Network Settings > Wireless LAN Setup > Advanced Setup > Manual Setup > Disable Wireless LAN. Select Yes, then press OK. Printing Problems Cannot print over the network ■ For wireless connections, print a Network Status Sheet (see page 34) and make sure the wireless router or access point is connected to set correctly for your network. If the Link Status is Disconnected, make sure the settings are configured correctly. Software installation failed Make...
Network Installation Guide
Page 34
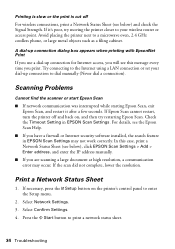
... phone, or large metal objects such as a filing cabinet. Avoid placing the printer next to print a network status sheet. 34 Troubleshooting Select Confirm Settings. 4. Scanning Problems Cannot find the scanner or start Epson Scan ■ If network communication was interrupted while starting Epson Scan, exit Epson Scan, and restart it 's poor, try restarting Epson Scan. If Epson Scan cannot restart, turn the printer off For wireless connections, print a Network Status Sheet (see the Epson Scan Help. ■ If you print. For details, see below ), click EPSON Scan Settings > Add...
... phone, or large metal objects such as a filing cabinet. Avoid placing the printer next to print a network status sheet. 34 Troubleshooting Select Confirm Settings. 4. Scanning Problems Cannot find the scanner or start Epson Scan ■ If network communication was interrupted while starting Epson Scan, exit Epson Scan, and restart it 's poor, try restarting Epson Scan. If Epson Scan cannot restart, turn the printer off For wireless connections, print a Network Status Sheet (see the Epson Scan Help. ■ If you print. For details, see below ), click EPSON Scan Settings > Add...

Product Brochure
Page 1
...; up to 2x faster than competitively priced models1 • PC-free, borderless photos in a snap - 2.5", tilt LCD screen and memory card slots • Scan directly to save paper • Replace only the color you need - red-eye removal, automatic photo restoration, Automatic Photo Correction, and more accurate color • Standard ink set included - a great way to e-mail - individual ink cartridges, available in -One Epson Stylus® NX515 Print | Copy | Scan | Photo | Wi-Fi® Smart.
...; up to 2x faster than competitively priced models1 • PC-free, borderless photos in a snap - 2.5", tilt LCD screen and memory card slots • Scan directly to save paper • Replace only the color you need - red-eye removal, automatic photo restoration, Automatic Photo Correction, and more accurate color • Standard ink set included - a great way to e-mail - individual ink cartridges, available in -One Epson Stylus® NX515 Print | Copy | Scan | Photo | Wi-Fi® Smart.

Product Brochure
Page 2
... the "replace cartridge" signal. Copyright 2009 Epson America, Inc. Epson Stylus NX515 Print | Copy | Scan | Photo | Wi-Fi Specifications Printing Technology 4-color (CMYK) drop-on system configuration, software, and page complexity. Compatible with ISO/IEC 24734. Laser quality black and color print speeds are registered trademarks, Epson Exceed Your Vision is a registered logomark and Better Products for priming the all rights in Draft Mode on continuous printing of a suite of Epson America, Inc. Actual print times will...
... the "replace cartridge" signal. Copyright 2009 Epson America, Inc. Epson Stylus NX515 Print | Copy | Scan | Photo | Wi-Fi Specifications Printing Technology 4-color (CMYK) drop-on system configuration, software, and page complexity. Compatible with ISO/IEC 24734. Laser quality black and color print speeds are registered trademarks, Epson Exceed Your Vision is a registered logomark and Better Products for priming the all rights in Draft Mode on continuous printing of a suite of Epson America, Inc. Actual print times will...
Quick Guide
Page 2
... Glass 9 Copying a Document 10 Copying a Photo 11 Restoring and Cropping Photos 12 Copy and Restore Print Settings 13 Printing From a Memory Card 14 Compatible Cards and Image Formats 14 Inserting the Card 15 Selecting Individual Photos for Printing 16 Selecting All Photos for Printing 17 Printing Photos From an Index Sheet 18 Memory Card Print Settings 20 Printing From Your Computer 21 Printing in Windows 21 Printing With a Macintosh 23 Selecting the Correct Paper Type 28 Scanning a Document or Photo 29 Basic Scanning 29 Restoring...
... Glass 9 Copying a Document 10 Copying a Photo 11 Restoring and Cropping Photos 12 Copy and Restore Print Settings 13 Printing From a Memory Card 14 Compatible Cards and Image Formats 14 Inserting the Card 15 Selecting Individual Photos for Printing 16 Selecting All Photos for Printing 17 Printing Photos From an Index Sheet 18 Memory Card Print Settings 20 Printing From Your Computer 21 Printing in Windows 21 Printing With a Macintosh 23 Selecting the Correct Paper Type 28 Scanning a Document or Photo 29 Basic Scanning 29 Restoring...

Quick Guide
Page 12
..., letter-size, or A4-size Epson special paper. 2. When you are done cropping your photo is not faded, do not turn on the subject. to prescan your paper, press Display/Crop. ■ To resize the image area, press + or -. ■ To move the image area, use the NX510 Series software on the scanner glass. 3. You can restore old, faded photos to cancel copying, press y Stop/ Clear Settings. 12 Copying a Document or Photo If...
..., letter-size, or A4-size Epson special paper. 2. When you are done cropping your photo is not faded, do not turn on the subject. to prescan your paper, press Display/Crop. ■ To resize the image area, press + or -. ■ To move the image area, use the NX510 Series software on the scanner glass. 3. You can restore old, faded photos to cancel copying, press y Stop/ Clear Settings. 12 Copying a Document or Photo If...

Quick Guide
Page 20
...: You can only adjust the Quality setting when you use the Minimum setting. 20 Printing From a Memory Card To cancel printing, press y Stop/Clear Settings. Press OK, then press x Start to the edge of image expansion when printing borderless photos, press Menu and adjust the Expansion setting (see page 13). ■ To change settings. Note: Paper Size options depend on your Paper Type setting. Memory Card Print Settings Press the Menu button to change the paper size, select Paper Size and choose the size of image expansion when printing borderless photos, select Expansion...
...: You can only adjust the Quality setting when you use the Minimum setting. 20 Printing From a Memory Card To cancel printing, press y Stop/Clear Settings. Press OK, then press x Start to the edge of image expansion when printing borderless photos, press Menu and adjust the Expansion setting (see page 13). ■ To change settings. Note: Paper Size options depend on your Paper Type setting. Memory Card Print Settings Press the Menu button to change the paper size, select Paper Size and choose the size of image expansion when printing borderless photos, select Expansion...
Quick Guide
Page 24
For borderless printing, choose a Paper Size setting with a Sheet Feeder - Borderless option. Select the basic copy and page settings. Or check for it in the settings for it in your application at the bottom of this window. Copy and page settings Application settings 24 Printing From Your Computer 5. Note: If the setting you want isn't shown (for example, Scale), check for your application before printing.
For borderless printing, choose a Paper Size setting with a Sheet Feeder - Borderless option. Select the basic copy and page settings. Or check for it in the settings for it in your application at the bottom of this window. Copy and page settings Application settings 24 Printing From Your Computer 5. Note: If the setting you want isn't shown (for example, Scale), check for your application before printing.
Quick Guide
Page 37
.../support (U.S.) or epson.ca/support (Canada). Open your Epson printer, check the messages on the LCD screen to your printer's folder, and click Driver Update. Checking for Software Updates Periodically, it's a good idea to check Epson's support website for basic troubleshooting suggestions, or see the on the Maintenance tab in the printer settings window. Solving Problems 37 You can also check "Problems and Solutions" on page 39 for free updates to diagnose the cause. You can also click Start or , select Programs...
.../support (U.S.) or epson.ca/support (Canada). Open your Epson printer, check the messages on the LCD screen to your printer's folder, and click Driver Update. Checking for Software Updates Periodically, it's a good idea to check Epson's support website for basic troubleshooting suggestions, or see the on the Maintenance tab in the printer settings window. Solving Problems 37 You can also check "Problems and Solutions" on page 39 for free updates to diagnose the cause. You can also click Start or , select Programs...
Quick Guide
Page 40
...; Make sure the document is placed flat against the scanner glass and your on . Remove sheets from the output tray or sheet feeder. 2. This unclogs the nozzles so they are too faint, you loaded matches the paper size and paper type settings on the control panel or in it. ■ If paper is stuck inside, turn the printer back on -screen Epson Information Center for more information. ■ Do not load paper with the copy or print...
...; Make sure the document is placed flat against the scanner glass and your on . Remove sheets from the output tray or sheet feeder. 2. This unclogs the nozzles so they are too faint, you loaded matches the paper size and paper type settings on the control panel or in it. ■ If paper is stuck inside, turn the printer back on -screen Epson Information Center for more information. ■ Do not load paper with the copy or print...

Quick Guide
Page 43
... turn off the printer using the P On button, and wait until the P On light stops flashing before unplugging the printer or cutting off , or on an outlet controlled by a wall switch or timer. ■ Do not let the power cord become damaged or frayed. ■ If you won't be using your Epson printer, read and follow all warnings and instructions marked on your Epson printer. ■ Use...
... turn off the printer using the P On button, and wait until the P On light stops flashing before unplugging the printer or cutting off , or on an outlet controlled by a wall switch or timer. ■ Do not let the power cord become damaged or frayed. ■ If you won't be using your Epson printer, read and follow all warnings and instructions marked on your Epson printer. ■ Use...
Quick Guide
Page 47
..., ink cartridges or third party parts, components, or peripheral devices added to and from such use in the United States or Canada, will be another model of the replacement printer in workmanship and materials for securely packaging the defective unit and returning it to determine whether the printer requires service. If Epson authorizes repair instead of exchange, Epson will provide telephone diagnostic service to Epson within five (5) working...
..., ink cartridges or third party parts, components, or peripheral devices added to and from such use in the United States or Canada, will be another model of the replacement printer in workmanship and materials for securely packaging the defective unit and returning it to determine whether the printer requires service. If Epson authorizes repair instead of exchange, Epson will provide telephone diagnostic service to Epson within five (5) working...
Start Here
Page 7
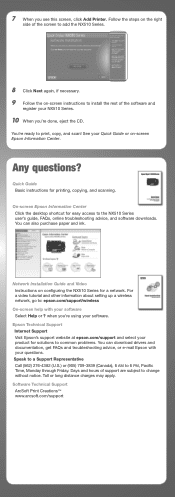
... can download drivers and documentation, get FAQs and troubleshooting advice, or e-mail Epson with your Quick Guide or on configuring the NX510 Series for easy access to change without notice. Follow the steps on the right side of the screen to add the NX510 Series. 8 Click Next again, if necessary. 9 Follow the on-screen instructions to install the rest of support are subject to the NX510 Series user's guide, FAQs, online troubleshooting advice, and software downloads. Network Installation Guide...
... can download drivers and documentation, get FAQs and troubleshooting advice, or e-mail Epson with your Quick Guide or on configuring the NX510 Series for easy access to change without notice. Follow the steps on the right side of the screen to add the NX510 Series. 8 Click Next again, if necessary. 9 Follow the on-screen instructions to install the rest of support are subject to the NX510 Series user's guide, FAQs, online troubleshooting advice, and software downloads. Network Installation Guide...


