Basics
Page 51
...; Place the Epson Stylus CX7800 on a flat, stable surface that extends beyond its base in the Epson Stylus CX7800 case or insert objects through the slots. ■ Make sure the back of the Epson Stylus CX7800 is copying, printing, or scanning. ■ Do not spill liquid on the Epson Stylus CX7800 label. ■ Use only the power cord that comes with the Epson Stylus CX7800, make sure...
...; Place the Epson Stylus CX7800 on a flat, stable surface that extends beyond its base in the Epson Stylus CX7800 case or insert objects through the slots. ■ Make sure the back of the Epson Stylus CX7800 is copying, printing, or scanning. ■ Do not spill liquid on the Epson Stylus CX7800 label. ■ Use only the power cord that comes with the Epson Stylus CX7800, make sure...
Basics
Page 52
.... ■ This product includes a lamp component that are covered by the operating instructions. ■ When storing or transporting the Epson Stylus CX7800, do not drink the ink. ■ Be careful when you remove an ink cartridge for later use liquid or chemical cleansers....9632; If you handle used ink cartridges; ■ Unplug the Epson Stylus CX7800 and refer servicing to qualified service personnel under the following conditions: if the power cord or plug is damaged, contact Epson as the Epson Stylus CX7800. if the product does not operate normally or exhibits a distinct change...
.... ■ This product includes a lamp component that are covered by the operating instructions. ■ When storing or transporting the Epson Stylus CX7800, do not drink the ink. ■ Be careful when you remove an ink cartridge for later use liquid or chemical cleansers....9632; If you handle used ink cartridges; ■ Unplug the Epson Stylus CX7800 and refer servicing to qualified service personnel under the following conditions: if the power cord or plug is damaged, contact Epson as the Epson Stylus CX7800. if the product does not operate normally or exhibits a distinct change...
Product Information Guide
Page 17
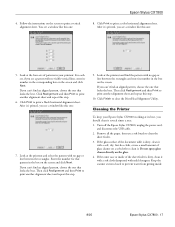
...screen and click Next. If the glass surface of patterns in the box on the screen and click Next. Turn off the Epson Stylus CX7800, unplug the power cord, and disconnect the USB cable. 2. Follow the instructions on a soft cloth to print another alignment sheet and repeat this ...one that pattern in your printout. Click Realignment and then Print to print a color horizontal alignment sheet. Click Print to prevent water from ...
...screen and click Next. If the glass surface of patterns in the box on the screen and click Next. Turn off the Epson Stylus CX7800, unplug the power cord, and disconnect the USB cable. 2. Follow the instructions on a soft cloth to print another alignment sheet and repeat this ...one that pattern in your printout. Click Realignment and then Print to print a color horizontal alignment sheet. Click Print to prevent water from ...
Product Information Guide
Page 18
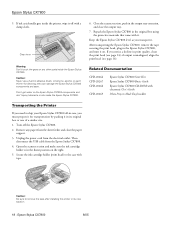
... in the output tray extension, and close the paper support. 3. Remove any other parts inside the Epson Stylus CX7800. 6. Epson Stylus CX7800 8/05 Repack the Epson Stylus CX7800 in its original box or one , you must prepare it . Unplug the power cord from the Epson Stylus CX7800. 4. Caution: Be sure to remove the tape after installing the printer in the original box using the...
... in the output tray extension, and close the paper support. 3. Remove any other parts inside the Epson Stylus CX7800. 6. Epson Stylus CX7800 8/05 Repack the Epson Stylus CX7800 in its original box or one , you must prepare it . Unplug the power cord from the Epson Stylus CX7800. 4. Caution: Be sure to remove the tape after installing the printer in the original box using the...

Start Here Card
Page 1
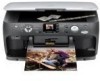
Start Here Epson Stylus® CX7800 1 Unpack Remove all the tape. Power cord Basics Guide Epson Stylus CX7800 4 ink cartridges Film holder (see the Basics Guide for storage instructions) Software CD-ROM Photo Projects Made Easy If any of these parts are missing, contact Epson® as described on the back of this sheet. 2 Unlock the Printer 1 Lift up the scanner. 2 Remove the tape from the ink cartridge holder. 3 Close the scanner.
Start Here Epson Stylus® CX7800 1 Unpack Remove all the tape. Power cord Basics Guide Epson Stylus CX7800 4 ink cartridges Film holder (see the Basics Guide for storage instructions) Software CD-ROM Photo Projects Made Easy If any of these parts are missing, contact Epson® as described on the back of this sheet. 2 Unlock the Printer 1 Lift up the scanner. 2 Remove the tape from the ink cartridge holder. 3 Close the scanner.


