Product Information Guide
Page 10
...'t have been fed into the paper path. Cleaning the Print Head If your computer. Print head cleaning uses ink, so clean it is oriented as described on page 11. Note: You can deliver ink properly. EPSON Stylus CX6400 Control Panel Error Messages To diagnose some problems,...Check the Index Sheet, then try again. EPSON Stylus CX6400 10/03 The B&W button cannot be stored saved in your printer settings window for these error messages: Error Message No XXX ink cartridge - - - > Press the Color button to clean the print head. see page 3. Operation canceled. See ...
...'t have been fed into the paper path. Cleaning the Print Head If your computer. Print head cleaning uses ink, so clean it is oriented as described on page 11. Note: You can deliver ink properly. EPSON Stylus CX6400 Control Panel Error Messages To diagnose some problems,...Check the Index Sheet, then try again. EPSON Stylus CX6400 10/03 The B&W button cannot be stored saved in your printer settings window for these error messages: Error Message No XXX ink cartridge - - - > Press the Color button to clean the print head. see page 3. Operation canceled. See ...
Product Information Guide
Page 11
... see Nozzle check displayed, then press the x Color button to the LCD screen until you need to run a head cleaning cycle. Warning: Keep ink cartridges out of the reach of ink available in the next section. Caution: To avoid damaging the EPSON Stylus CX6400, never move the print head by EPSON's warranty. Otherwise the ink remaining in your...
... see Nozzle check displayed, then press the x Color button to the LCD screen until you need to run a head cleaning cycle. Warning: Keep ink cartridges out of the reach of ink available in the next section. Caution: To avoid damaging the EPSON Stylus CX6400, never move the print head by EPSON's warranty. Otherwise the ink remaining in your...
Quick Reference Guide
Page 3
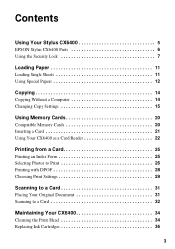
... Stylus CX6400 5 EPSON Stylus CX6400 Parts 6 Using the Security Lock 7 Loading Paper 11 Loading Single Sheets 11 Using Special Papers 12 Copying 14 Copying Without a Computer 14 Changing Copy Settings 15 Using Memory Cards 20 Compatible Memory Cards 20 Inserting a Card 21 Using Your CX6400 as... a Card Reader 22 Printing from a Card 25 Printing an Index Form 25 Selecting Photos to Print 26 Printing with DPOF 28 Choosing Print Settings 29 Scanning to a Card 31 Placing Your Original Document 31 Scanning to a Card 32 Maintaining Your CX6400 34 Cleaning the Print Head...
... Stylus CX6400 5 EPSON Stylus CX6400 Parts 6 Using the Security Lock 7 Loading Paper 11 Loading Single Sheets 11 Using Special Papers 12 Copying 14 Copying Without a Computer 14 Changing Copy Settings 15 Using Memory Cards 20 Compatible Memory Cards 20 Inserting a Card 21 Using Your CX6400 as... a Card Reader 22 Printing from a Card 25 Printing an Index Form 25 Selecting Photos to Print 26 Printing with DPOF 28 Choosing Print Settings 29 Scanning to a Card 31 Placing Your Original Document 31 Scanning to a Card 32 Maintaining Your CX6400 34 Cleaning the Print Head...

Quick Reference Guide
Page 34
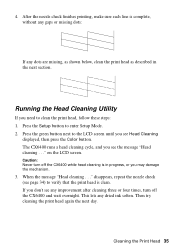
Note: Print head cleaning uses ink, so clean it only if quality declines. Running a Nozzle Check 1. Press the Setup button to enter Setup Mode. 3. Make sure the CX6400 is turned on page 36 Cleaning the Print Head If your printouts are unexpectedly light or faint, or you notice light or dark ...find instructions on , check the LCD screen to see if you see Nozzle check displayed, then press the Color button to print the nozzle check. 34 Maintaining Your CX6400 See these sections: ■ "Cleaning the Print Head" (below) ■ "Replacing Ink Cartridges" on , paper is off. (If the ! error ...
Note: Print head cleaning uses ink, so clean it only if quality declines. Running a Nozzle Check 1. Press the Setup button to enter Setup Mode. 3. Make sure the CX6400 is turned on page 36 Cleaning the Print Head If your printouts are unexpectedly light or faint, or you notice light or dark ...find instructions on , check the LCD screen to see if you see Nozzle check displayed, then press the Color button to print the nozzle check. 34 Maintaining Your CX6400 See these sections: ■ "Cleaning the Print Head" (below) ■ "Replacing Ink Cartridges" on , paper is off. (If the ! error ...
Quick Reference Guide
Page 35
... need to the LCD screen until you see Head Cleaning displayed, then press the Color button. 4. Caution: Never turn off the CX6400 while head cleaning is clean. Press the Setup button to verify that the print head is in the next section. Press the green button next to clean the print head, follow these steps: 1. on the LCD screen. disappears...
... need to the LCD screen until you see Head Cleaning displayed, then press the Color button. 4. Caution: Never turn off the CX6400 while head cleaning is clean. Press the Setup button to verify that the print head is in the next section. Press the green button next to clean the print head, follow these steps: 1. on the LCD screen. disappears...
Quick Reference Guide
Page 41
... a soft cloth. If only part of genuine EPSON inks. ■ Use a support sheet with the quality of the CX6400. Make sure you may be wrinkled or warped. ■ Make sure the CX6400 is still not clean, use a small amount of the sheet feeder. 3. Use EPSON papers for instructions. ■ The ink cartridges... pull the paper out in the image, clean the scanner glass with a soft, dry, lint-free cloth (paper towels are not creased or folded. Make sure the edges are not recommended). Press the On button to align the print head. If the glass is not tilted or placed on...
... a soft cloth. If only part of genuine EPSON inks. ■ Use a support sheet with the quality of the CX6400. Make sure you may be wrinkled or warped. ■ Make sure the CX6400 is still not clean, use a small amount of the sheet feeder. 3. Use EPSON papers for instructions. ■ The ink cartridges... pull the paper out in the image, clean the scanner glass with a soft, dry, lint-free cloth (paper towels are not creased or folded. Make sure the edges are not recommended). Press the On button to align the print head. If the glass is not tilted or placed on...


