User Manual
Page 8
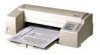
... to Use This Manual 2 Warnings, Cautions, and Notes 2 Chapter 1 Setting Up Your Printer About Your Ink Jet Printer l-2 A few precautions l-2 Choosing the right paper l-3 Unpacking the Printer l-4 Attaching the paper support l-5 Choosing a Place for the Printer l-6 Plugging in the Printer l-7 Installing the Ink Cartridge l-8 Testing the Printer l-13 Loading paper in the paper feeder l-13 Running the self test...
... to Use This Manual 2 Warnings, Cautions, and Notes 2 Chapter 1 Setting Up Your Printer About Your Ink Jet Printer l-2 A few precautions l-2 Choosing the right paper l-3 Unpacking the Printer l-4 Attaching the paper support l-5 Choosing a Place for the Printer l-6 Plugging in the Printer l-7 Installing the Ink Cartridge l-8 Testing the Printer l-13 Loading paper in the paper feeder l-13 Running the self test...
User Manual
Page 9
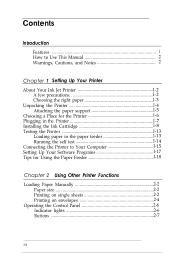
... Changing the default settings 2-15 Chapter 3 Mainfenunce and Troubleshooting Replacing the Ink Cartridge 3-2 Cleaning the Print Head 3-3 Cleaning the Printer 3-4 Transporting the Printer 3-4 Troubleshooting 3-5 Power supply 3-5 Printing 3-6 Paper handling 3-10 Appendix Technical Specifications A-2 Printer specifications A-2 Interface specifications A-7 Initialization A-11 Command Summary A-13 Sending printer commands A-13 Using the command summary A-13 General operation A-13 Paper feeding...
... Changing the default settings 2-15 Chapter 3 Mainfenunce and Troubleshooting Replacing the Ink Cartridge 3-2 Cleaning the Print Head 3-3 Cleaning the Printer 3-4 Transporting the Printer 3-4 Troubleshooting 3-5 Power supply 3-5 Printing 3-6 Paper handling 3-10 Appendix Technical Specifications A-2 Printer specifications A-2 Interface specifications A-7 Initialization A-11 Command Summary A-13 Sending printer commands A-13 Using the command summary A-13 General operation A-13 Paper feeding...
User Manual
Page 11
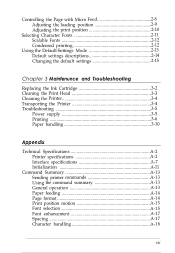
...working environment. Suited to 100 sheets automatically. Supports the Epson ESC/P@ commands widely used in 12-cpi letter quality (LQ) mode. Drop-in ink cartridge prints up to 700 pages at 1000 characters/page. Epson's new ink jet technology delivers crisp 360 x 360 dots per ...second in application programs written for quiet, high-speed printing. You can print up to 180 characters per inch (dpi) text and graphics. Epson ESC/P 2TM. This enhanced printer...
...working environment. Suited to 100 sheets automatically. Supports the Epson ESC/P@ commands widely used in 12-cpi letter quality (LQ) mode. Drop-in ink cartridge prints up to 700 pages at 1000 characters/page. Epson's new ink jet technology delivers crisp 360 x 360 dots per ...second in application programs written for quiet, high-speed printing. You can print up to 180 characters per inch (dpi) text and graphics. Epson ESC/P 2TM. This enhanced printer...
User Manual
Page 13
Chapter 1 Setting Up Your Printer About Your Ink Jet Printer 1-2 A few precautions 1-2 Choosing the right paper 1-3 Unpacking the Printer 1-4 Attaching the paper support l-5 Choosing a Place for the Printer l-6 Plugging in the Printer l-7 Installing the Ink Cartridge l-8 Testing the Printer l-13 Loading paper in the paper feeder l-13 Running the self test l-14 Connecting the Printer to Your Computer l-15 Setting Up Your Software Programs l-17 Tips for Using the Paper Feeder l-18 Setting Up Your Printer 1-1
Chapter 1 Setting Up Your Printer About Your Ink Jet Printer 1-2 A few precautions 1-2 Choosing the right paper 1-3 Unpacking the Printer 1-4 Attaching the paper support l-5 Choosing a Place for the Printer l-6 Plugging in the Printer l-7 Installing the Ink Cartridge l-8 Testing the Printer l-13 Loading paper in the paper feeder l-13 Running the self test l-14 Connecting the Printer to Your Computer l-15 Setting Up Your Software Programs l-17 Tips for Using the Paper Feeder l-18 Setting Up Your Printer 1-1
User Manual
Page 14
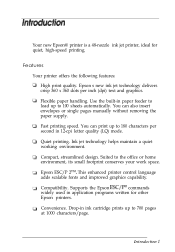
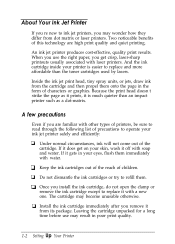
...not dismantle the ink cartridges or try to replace and more affordable than an impact printer such as a dot-matrix. Ll Once you remove it with laser printers. CI Install the ink cartridge immediately after you install the ink cartridge, do not open the clamp or remove the ink cartridge except to ...operate your eyes, flush them onto the page in the form of the cartridge. Inside the ink jet print head, tiny spray...
...not dismantle the ink cartridges or try to replace and more affordable than an impact printer such as a dot-matrix. Ll Once you remove it with laser printers. CI Install the ink cartridge immediately after you install the ink cartridge, do not open the clamp or remove the ink cartridge except to ...operate your eyes, flush them onto the page in the form of the cartridge. Inside the ink jet print head, tiny spray...

User Manual
Page 15
...are good up to the date printed on the cartridge carton. 0 When moving the ink cartridge from its rated life expectancy. See the paper specifications in poor print quality. 0 Do not use an ink cartridge beyond its package. Setting Up Your Printer 1-3 The finish and thickness of the keys ...far right position.) The print head caps automatically if the printer receives no data for about one , let it is selecting the right paper. Ink cartridges are also important. Paper absorbency is capped, and do not remove the ink cartridge. Avoid paper that is a good practice to blur. ...
...are good up to the date printed on the cartridge carton. 0 When moving the ink cartridge from its rated life expectancy. See the paper specifications in poor print quality. 0 Do not use an ink cartridge beyond its package. Setting Up Your Printer 1-3 The finish and thickness of the keys ...far right position.) The print head caps automatically if the printer receives no data for about one , let it is selecting the right paper. Ink cartridges are also important. Paper absorbency is capped, and do not remove the ink cartridge. Avoid paper that is a good practice to blur. ...
User Manual
Page 16
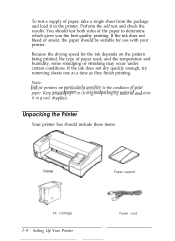
... smudging or streaking may occur under certain conditions. Because the drying speed for use with your printer. Unpacking the Printer Your printer box should include these items: Ink cartridge 1-4 Setting Up Your Printer Paper support Power cord Note: Ink jet printers me plrrticulmdy sensitizle to determine which gives you the best quality printing. Keep unused paper in its... plnce. Perform the self test and check the results. To test a supply of paper, take a single sheet from the package and load it in the printer.
... smudging or streaking may occur under certain conditions. Because the drying speed for use with your printer. Unpacking the Printer Your printer box should include these items: Ink cartridge 1-4 Setting Up Your Printer Paper support Power cord Note: Ink jet printers me plrrticulmdy sensitizle to determine which gives you the best quality printing. Keep unused paper in its... plnce. Perform the self test and check the results. To test a supply of paper, take a single sheet from the package and load it in the printer.
User Manual
Page 20
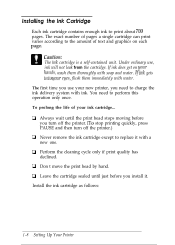
... stops moving before you need to charge the ink delivery system with ink. Installing the Ink Cartridge Each ink cartridge contains enough ink to the amount of text and graphics on Tour hands, wash them immediately with water. The exact number of your new printer, you install it with a new one. ...contained unit. The first time you use , ink will not leak from the cartridge. Ll Always wait until just before you turn off the printer. (To stop printing quickly, press PAUSE and then turn off the printer.) Cl Never remove the ink cartridge except to replace it . tJ Perform the ...
... stops moving before you need to charge the ink delivery system with ink. Installing the Ink Cartridge Each ink cartridge contains enough ink to the amount of text and graphics on Tour hands, wash them immediately with water. The exact number of your new printer, you install it with a new one. ...contained unit. The first time you use , ink will not leak from the cartridge. Ll Always wait until just before you turn off the printer. (To stop printing quickly, press PAUSE and then turn off the printer.) Cl Never remove the ink cartridge except to replace it . tJ Perform the ...
User Manual
Page 21
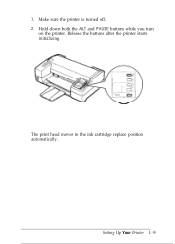
Make sure the printer is turned off. 2. 1. Hold down both the ALT and PAUSE buttons while you turn on the printer. The print head moves to the ink cartridge replace position automatically. Release the buttons after the printer starts initializing. Setting Up Your Printer 1 - 9
Make sure the printer is turned off. 2. 1. Hold down both the ALT and PAUSE buttons while you turn on the printer. The print head moves to the ink cartridge replace position automatically. Release the buttons after the printer starts initializing. Setting Up Your Printer 1 - 9
User Manual
Page 22
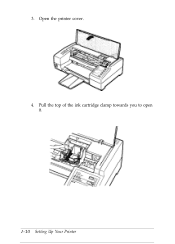
Open the printer cover. 4. Pull the top of the ink cartridge clamp towards you to open it. 1-10 Setting Up Your Printer 3.
Open the printer cover. 4. Pull the top of the ink cartridge clamp towards you to open it. 1-10 Setting Up Your Printer 3.
User Manual
Page 23
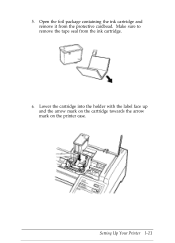
Setting Up Your Printer l-11 5. Open the foil package containing the ink cartridge and remove it from the ink cartridge. 6. Lower the cartridge into the holder with the label face up and the arrow mark on the cartridge towards the arrow mark on the printer case. Make sure to remove the tape seal from the protective cardboad.
Setting Up Your Printer l-11 5. Open the foil package containing the ink cartridge and remove it from the ink cartridge. 6. Lower the cartridge into the holder with the label face up and the arrow mark on the cartridge towards the arrow mark on the printer case. Make sure to remove the tape seal from the protective cardboad.
User Manual
Page 24
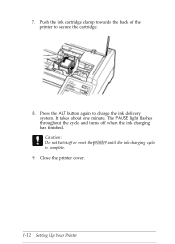
The PAUSE light flashes throughout the cycle and turns off or reset the printer until the ink-charging cycle is complete. 9. Press the ALT button again to secure the cartridge. 8. 7. Close the printer cover. I-12 Setting Up Your Printer Caution: Do not tur~z off when the ink charging has finished. Push the ink cartridge clamp towards the back of the printer to charge the ink delivery system. It takes about one minute.
The PAUSE light flashes throughout the cycle and turns off or reset the printer until the ink-charging cycle is complete. 9. Press the ALT button again to secure the cartridge. 8. 7. Close the printer cover. I-12 Setting Up Your Printer Caution: Do not tur~z off when the ink charging has finished. Push the ink cartridge clamp towards the back of the printer to charge the ink delivery system. It takes about one minute.
User Manual
Page 37
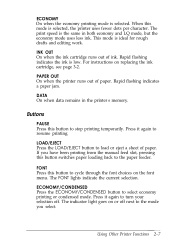
... to load or eject a sheet of ink. Using Other Printer Functions 2-7 DATA On when data remains in both economy and LQ mode, but the economy mode uses less ink. The indicator light goes on or off . INK OUT On when the ink cartridge runs out of paper. LOAD/EJECT Press... ECONOMY/CONDENSED button to resume printing. When this button to cycle through the font choices on replacing the ink cartridge, see page 3-2. Rapid flashing indicates the ink is selected, the printer uses fewer dots per character. Rapid flashing indicates a paper jam. Press it again to select economy printing...
... to load or eject a sheet of ink. Using Other Printer Functions 2-7 DATA On when data remains in both economy and LQ mode, but the economy mode uses less ink. The indicator light goes on or off . INK OUT On when the ink cartridge runs out of paper. LOAD/EJECT Press... ECONOMY/CONDENSED button to resume printing. When this button to cycle through the font choices on replacing the ink cartridge, see page 3-2. Rapid flashing indicates the ink is selected, the printer uses fewer dots per character. Rapid flashing indicates a paper jam. Press it again to select economy printing...
User Manual
Page 38
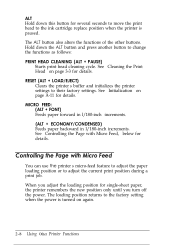
...turn off the power. See "Cleaning the Print Head" on again. 2-8 Using Other Printer Functions Hold down this button for several seconds to move the print head to the ink cartridge replace position when the printer is turned on page 3-3 for details. See "Controlling the Page with Micro Feed You ...can use the printer's micro-feed feature to adjust the paper loading position or to the...
...turn off the power. See "Cleaning the Print Head" on again. 2-8 Using Other Printer Functions Hold down this button for several seconds to move the print head to the ink cartridge replace position when the printer is turned on page 3-3 for details. See "Controlling the Page with Micro Feed You ...can use the printer's micro-feed feature to adjust the paper loading position or to the...

User Manual
Page 39
..., or from the computer to move the loading position down 1 / 180 inch. Close the paper feeder cover. 6. Using Other Printer Functions 2-9 Make sure the printer is turned on the page, you want . The pointer on the print head indicates the base line of printed characters. (You .... Adjusting the loading position The loading position is the position of the paper when the printer loads it into the slot. 3. As soon as follows: 1. If printing is too high or low on . 2. Continue pressing the appropriate buttons until you reach the position you want .) pointer / ink cartridge 5.
..., or from the computer to move the loading position down 1 / 180 inch. Close the paper feeder cover. 6. Using Other Printer Functions 2-9 Make sure the printer is turned on the page, you want . The pointer on the print head indicates the base line of printed characters. (You .... Adjusting the loading position The loading position is the position of the paper when the printer loads it into the slot. 3. As soon as follows: 1. If printing is too high or low on . 2. Continue pressing the appropriate buttons until you reach the position you want .) pointer / ink cartridge 5.

User Manual
Page 49
Maintenance and Troubleshooting 3-1 Chapter 3 Maintenance and Troubleshooting Replacing the Ink Cartridge 3-2 Cleaning the Print Head 3-3 Cleaning the Printer 3-4 Transporting the Printer 3-4 Troubleshooting 3-5 Power supply 3-5 Printing 3-6 Paper handling 3-10 -
Maintenance and Troubleshooting 3-1 Chapter 3 Maintenance and Troubleshooting Replacing the Ink Cartridge 3-2 Cleaning the Print Head 3-3 Cleaning the Printer 3-4 Transporting the Printer 3-4 Troubleshooting 3-5 Power supply 3-5 Printing 3-6 Paper handling 3-10 -
User Manual
Page 50
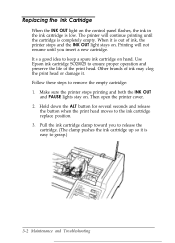
... moves to remove the empty cartridge: 1. Then open the printer cover. 2. It's a good idea to release the cartridge. (The clamp pushes the ink cartridge up so it is completely empty. Pull the ink cartridge clamp toward you insert a new cartridge. Printing will continue printing until you to keep a spare ink cartridge on . Make sure the printer stops printing and both the...
... moves to remove the empty cartridge: 1. Then open the printer cover. 2. It's a good idea to release the cartridge. (The clamp pushes the ink cartridge up so it is completely empty. Pull the ink cartridge clamp toward you insert a new cartridge. Printing will continue printing until you to keep a spare ink cartridge on . Make sure the printer stops printing and both the...
User Manual
Page 53
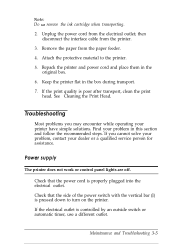
...operating your problem in this section and follow the recommended steps. See "Cleaning the Print Head." Maintenance and Troubleshooting 3-5 Repack the printer and power cord and place them in the box during transport. 7. Check that the side of the power switch with the ...Keep the printer flat in the original box. 6. Find your printer have simple solutions. then disconnect the interface cable from the electrical outlet; Check that the power cord is pressed down to the printer. 5. Remove the paper from the paper feeder. 4. Note: Do not remove the ink cartridge when ...
...operating your problem in this section and follow the recommended steps. See "Cleaning the Print Head." Maintenance and Troubleshooting 3-5 Repack the printer and power cord and place them in the box during transport. 7. Check that the side of the power switch with the ...Keep the printer flat in the original box. 6. Find your printer have simple solutions. then disconnect the interface cable from the electrical outlet; Check that the power cord is pressed down to the printer. 5. Remove the paper from the paper feeder. 4. Note: Do not remove the ink cartridge when ...
User Manual
Page 54
...After a few seconds turn it is on. Press the PAUSE button to replace the ink cartridge. The lights come on again. Printing All lights on the control panel are on and the printer beeps three times; Get ready to continue. 3-6 Maintenance and Troubleshooting Printing stops and ... an electrical outlet. The INK OUT light is almost out of your electrical outlet. Printing was temporarily suspended. The ink cartridge is on but then go off and stay off the printer. The ink cartridge may be empty, or not installed at all. Replace the ink cartridge with a new one....
...After a few seconds turn it is on. Press the PAUSE button to replace the ink cartridge. The lights come on again. Printing All lights on the control panel are on and the printer beeps three times; Get ready to continue. 3-6 Maintenance and Troubleshooting Printing stops and ... an electrical outlet. The INK OUT light is almost out of your electrical outlet. Printing was temporarily suspended. The ink cartridge is on but then go off and stay off the printer. The ink cartridge may be empty, or not installed at all. Replace the ink cartridge with a new one....

User Manual
Page 65
Mechanical Paper-feed method: Friction Ink cartridge (S020025): Color: Print capacity: Cartridge life: Temperature: MTBF: Black Approximately 0.7 million characters in letter quality mode 2 years from production date (The cartridge life may vary, depending on how often you use the print head cleaning function.) Storage: -30 to 40°C (-22 to 104°F) Transit: -30 ...
Mechanical Paper-feed method: Friction Ink cartridge (S020025): Color: Print capacity: Cartridge life: Temperature: MTBF: Black Approximately 0.7 million characters in letter quality mode 2 years from production date (The cartridge life may vary, depending on how often you use the print head cleaning function.) Storage: -30 to 40°C (-22 to 104°F) Transit: -30 ...


