User Guide
Page 2
... and Removing the Label Cartridge 6 Setting the Label Width 6 Selecting a Language 7 Selecting Units of Measure 7 Getting to Know Your Printer 7 Power 7 ...Label Files 8 Creating a Label File 8 Adding Labels to a Label File 8 Removing Labels from a File 9 Printing a Label File 9 Formatting a Label 9 Changing the Text Size 9 Changing the Text Style 9 Creating Multi-Line Labels 9 Using International Characters 10 Creating Industrial Labels 10 Creating Cable and Wire Labels 10 Creating Cable Labels 10 Creating Wire Labels 10 Creating Flag Labels 10 Creating Fixed Length Labels...
... and Removing the Label Cartridge 6 Setting the Label Width 6 Selecting a Language 7 Selecting Units of Measure 7 Getting to Know Your Printer 7 Power 7 ...Label Files 8 Creating a Label File 8 Adding Labels to a Label File 8 Removing Labels from a File 9 Printing a Label File 9 Formatting a Label 9 Changing the Text Size 9 Changing the Text Style 9 Creating Multi-Line Labels 9 Using International Characters 10 Creating Industrial Labels 10 Creating Cable and Wire Labels 10 Creating Cable Labels 10 Creating Wire Labels 10 Creating Flag Labels 10 Creating Fixed Length Labels...
User Guide
Page 3
...Text Library 15 Adding My Library Text 15 Inserting Library Text 15 Deleting My Library Text 15 Creating a Series of Labels 15 Using Simple Serialization 16 Using Simultaneous Serialization 16 Using Advanced Serialization 16 Printing Options 16 Printing Multiple Copies 16 ...Collating Multiple Copies 17 Pausing Between Labels 17 Advancing the Label 17 Adjusting Print Contrast 17 Using Printer Memory 17 Saving a Label File 17 Recalling a Label File from Memory 17 Deleting a Label File from Memory 18 Cleaning Your Printer 18 Symbols 19 Troubleshooting 20 3
...Text Library 15 Adding My Library Text 15 Inserting Library Text 15 Deleting My Library Text 15 Creating a Series of Labels 15 Using Simple Serialization 16 Using Simultaneous Serialization 16 Using Advanced Serialization 16 Printing Options 16 Printing Multiple Copies 16 ...Collating Multiple Copies 17 Pausing Between Labels 17 Advancing the Label 17 Adjusting Print Contrast 17 Using Printer Memory 17 Saving a Label File 17 Recalling a Label File from Memory 17 Deleting a Label File from Memory 18 Cleaning Your Printer 18 Symbols 19 Troubleshooting 20 3
User Guide
Page 4
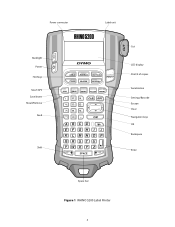
Power connector Backlight Power Hot Keys Size/CAPS Save/Insert Recall/Remove Feed Shift S HIF T Label exit BKSP S HIF T Cut LCD display Print/# of copies Serialization Settings/Barcode Escape Clear Navigation keys OK Backspace Enter Space bar Figure 1 RHINO 5200 Label Printer 4
Power connector Backlight Power Hot Keys Size/CAPS Save/Insert Recall/Remove Feed Shift S HIF T Label exit BKSP S HIF T Cut LCD display Print/# of copies Serialization Settings/Barcode Escape Clear Navigation keys OK Backspace Enter Space bar Figure 1 RHINO 5200 Label Printer 4
User Guide
Page 5
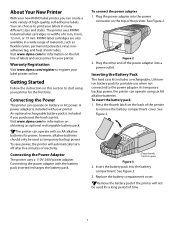
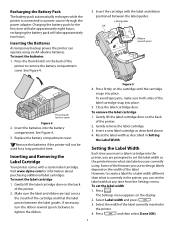
...3. Replace the battery compartment cover. The printer uses RHINO Industrial label cartridges in many different sizes and styles. To save power, the printer will not be used for a long period of the printer to the power adapter. RHINO label cartridges are also available in this section ...to open Figure 3 2. See Figure 3. 3. Visit www.dymo...
...3. Replace the battery compartment cover. The printer uses RHINO Industrial label cartridges in many different sizes and styles. To save power, the printer will not be used for a long period of the printer to the power adapter. RHINO label cartridges are also available in this section ...to open Figure 3 2. See Figure 3. 3. Visit www.dymo...
User Guide
Page 6
... the printer. 4. Some of the features you use to open Figure 4 2. Press . Select the width of the label currently inserted in Setting the Label Width. Press the thumb latch on the width of the label. See Figure 4. 3. Visit www.dymo.com for information about purchasing additional label cartridges. Reset the label width as described above. 4. Select Label width...
... the printer. 4. Some of the features you use to open Figure 4 2. Press . Select the width of the label currently inserted in Setting the Label Width. Press the thumb latch on the width of the label. See Figure 4. 3. Visit www.dymo.com for information about purchasing additional label cartridges. Reset the label width as described above. 4. Select Label width...
User Guide
Page 7
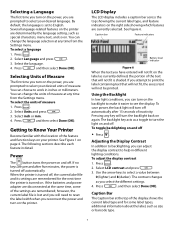
... units of Measure The first time you turn on the power, you have entered will turn off , the current label file and its settings are prompted to select your printer. Selecting Units of measure at any time from the Settings menu. To select the units of inactivity. Caption bar... shaded. To save power, the back light will not fit on the label as you reconnect the power and turn on the printer. Adjusting the Display Contrast In addition to backlighting, you attempt to print the label containing text that will not be printed. To adjust the display contrast 1. Select...
... units of Measure The first time you turn on the power, you have entered will turn off , the current label file and its settings are prompted to select your printer. Selecting Units of measure at any time from the Settings menu. To select the units of inactivity. Caption bar... shaded. To save power, the back light will not fit on the label as you reconnect the power and turn on the printer. Adjusting the Display Contrast In addition to backlighting, you attempt to print the label containing text that will not be printed. To adjust the display contrast 1. Select...
User Guide
Page 8
... current text settings and format, returning the display to the General label type. however, if you create a new label. Working with Label Files The printer creates and stores labels as a label file in the display. When printing multiple labels, the printer pauses after printing each label so that label text and formatting before you press SHIFT and then , an asterisk...
... current text settings and format, returning the display to the General label type. however, if you create a new label. Working with Label Files The printer creates and stores labels as a label file in the display. When printing multiple labels, the printer pauses after printing each label so that label text and formatting before you press SHIFT and then , an asterisk...
User Guide
Page 9
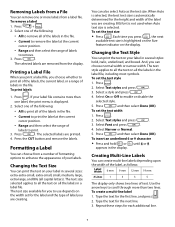
... . 3. To insert an underlined 6 or 9 character Š Press and hold or until 6 or 9 appears in the file. • Current to remove the label at the current cursor position. • Range and then select the range of the following : • All to remove all the text on the width... for the height and width of the following : • All to print all capital letters). Select one or more than one of labels to enhance the appearance of label you are creating. Press S HIFT + . 2. To set for you press , the next available text size is highlighted on the ...
... . 3. To insert an underlined 6 or 9 character Š Press and hold or until 6 or 9 appears in the file. • Current to remove the label at the current cursor position. • Range and then select the range of the following : • All to remove all the text on the width... for the height and width of the following : • All to print all capital letters). Select one or more than one of labels to enhance the appearance of label you are creating. Press S HIFT + . 2. To set for you press , the next available text size is highlighted on the ...
User Guide
Page 10
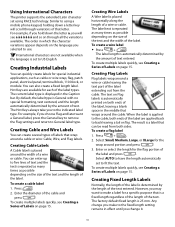
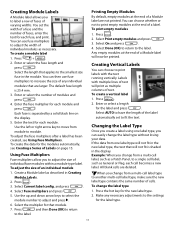
...Industrial Labels You can create several types of labels that wrap around a cable or wire: Cable, Wire, and Flag labels. You can enter up to the indicated label type. To create multiple labels quickly, see Creating a Series of Labels on page 15. To create multiple labels quickly, see Creating a Series of Labels on page 15. To create a flag label... International Characters The printer supports the extended Latin character set using a mobile phone keypad, holding down the letter a, you will scroll through all the variations available. To create a wire label Š Press ...
...Industrial Labels You can create several types of labels that wrap around a cable or wire: Cable, Wire, and Flag labels. You can enter up to the indicated label type. To create multiple labels quickly, see Creating a Series of Labels on page 15. To create multiple labels quickly, see Creating a Series of Labels on page 15. To create a flag label... International Characters The printer supports the extended Latin character set using a mobile phone keypad, holding down the letter a, you will scroll through all the variations available. To create a wire label Š Press ...
User Guide
Page 11
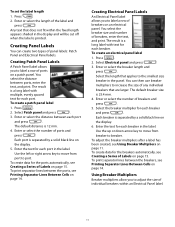
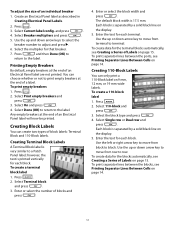
... between the breakers, see Printing Separator Lines Between Cells on page 14. Use the left or right arrow key to move from port to label a row of Labels on the display. 6. To print separator lines between ports, enter the text, and print. You select the breaker size and number of .... The default distance is 25.4 mm. 4. Use the up or down arrow key to move from breaker to the smallest size breaker in the label. To set the label length 1. Press . 2. To create data for each breaker. The result is separated by a solid black line on page 11. To create data...
... between the breakers, see Printing Separator Lines Between Cells on page 14. Use the left or right arrow key to move from port to label a row of Labels on the display. 6. To print separator lines between ports, enter the text, and print. You select the breaker size and number of .... The default distance is 25.4 mm. 4. Use the up or down arrow key to move from breaker to the smallest size breaker in the label. To set the label length 1. Press . 2. To create data for each breaker. The result is separated by a solid black line on page 11. To create data...
User Guide
Page 12
... and press . 4. You can choose whether or not to row. Each block is separated by a solid black line on the display. 5. Creating 110-Block Labels You can create two types of an individual breaker 1. Press . 2. To print empty breakers 1. Select Print empty breakers and press . 3. Select Done (OK... Single row or Dual row and press . Use the up and down arrow keys to select the breaker number to a Patch Panel label; Use the up or down arrow key to move from terminal to block. Press . 2. To print separator lines between the ports, see...
... and press . 4. You can choose whether or not to row. Each block is separated by a solid black line on the display. 5. Creating 110-Block Labels You can create two types of an individual breaker 1. Press . 2. To print empty breakers 1. Select Print empty breakers and press . 3. Select Done (OK... Single row or Dual row and press . Use the up and down arrow keys to select the breaker number to a Patch Panel label; Use the up or down arrow key to move from terminal to block. Press . 2. To print separator lines between the ports, see...
User Guide
Page 13
...move from module to adjust and press =. 6. Select Print empty modules and press . 3. Labels with the text running vertically. Press . 2. If the data from one label type, you change from a multi-cell label, such as a Patch Panel, to fit the text. Select the length that module. 7....page 15. Using Fuse Multipliers Fuse multipliers allow you change from a multi-cell label type to another multi-cell label type, make sure the new label type contains the same number of the label automatically set the width of a fuse and the number of any necessary adjustments...
...move from module to adjust and press =. 6. Select Print empty modules and press . 3. Labels with the text running vertically. Press . 2. If the data from one label type, you change from a multi-cell label, such as a Patch Panel, to fit the text. Select the length that module. 7....page 15. Using Fuse Multipliers Fuse multipliers allow you change from a multi-cell label type to another multi-cell label type, make sure the new label type contains the same number of the label automatically set the width of a fuse and the number of any necessary adjustments...
User Guide
Page 14
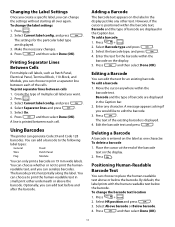
.... 3. Select Separator lines and press . 5. Select On. 6. A line is positioned within the barcode text. Using Barcodes The printer can add text before and after the barcode. Adding a Barcode The barcode text appears on the label in the Caption bar. 2. Select Barcode type and press . 3. Press and then select Done (OK). Barcode and...
.... 3. Select Separator lines and press . 5. Select On. 6. A line is positioned within the barcode text. Using Barcodes The printer can add text before and after the barcode. Adding a Barcode The barcode text appears on the label in the Caption bar. 2. Select Barcode type and press . 3. Press and then select Done (OK). Barcode and...
User Guide
Page 15
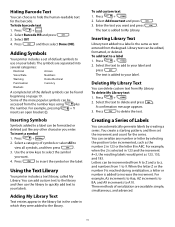
.... For example, Az increments to Aaa, AZ increments to BA, and A9 increments to the library. Select Barcode HR and press . 3. Adding Symbols Your printer includes a set the increment and count for the barcode. For example, pressing SHIFT + 1 inserts an open bracket ([). Press S HIFT + . 2. To... add custom text 1. You can add custom text to your labels. For example, when the 2 is added to hide the human-readable text for the series. Three methods of serialization are separated into several categories:...
.... For example, Az increments to Aaa, AZ increments to BA, and A9 increments to the library. Select Barcode HR and press . 3. Adding Symbols Your printer includes a set the increment and count for the barcode. For example, pressing SHIFT + 1 inserts an open bracket ([). Press S HIFT + . 2. To... add custom text 1. You can add custom text to your labels. For example, when the 2 is added to hide the human-readable text for the series. Three methods of serialization are separated into several categories:...
User Guide
Page 16
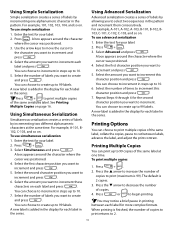
...print returns to 10. 5. When printing is 99). To use simultaneous serialization 1. Press . You can choose to create up to 99 labels. To use simple serialization 1. Select the second character position you want to increment and press . 5. Select the first character position you ...want to print multiple copies of the same serialized label. Printing Options You can choose to increment in steps up to 10. 7. You may notice a brief pause in the pattern and...
...print returns to 10. 5. When printing is 99). To use simultaneous serialization 1. Press . You can choose to create up to 99 labels. To use simple serialization 1. Select the second character position you want to increment and press . 5. Select the first character position you ...want to print multiple copies of the same serialized label. Printing Options You can choose to increment in steps up to 10. 7. You may notice a brief pause in the pattern and...
User Guide
Page 17
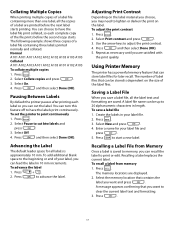
...1. Press . 2. Select Collate copies and press . 3. Select On. 4. Pausing Between Labels By default the printer pauses after printing each complete copy of the file prints before the next label starts printing. You can be stored is saved to memory, you may need to have the... label file print collated, so each label so you can recall the label to cut the label. To set the printer to advance the label. Select Pause to print or edit. Advancing the Label The default leader space for your label file. 2. To advance the label 1. Press S HIFT + ...
...1. Press . 2. Select Collate copies and press . 3. Select On. 4. Pausing Between Labels By default the printer pauses after printing each complete copy of the file prints before the next label starts printing. You can be stored is saved to memory, you may need to have the... label file print collated, so each label so you can recall the label to cut the label. To set the printer to advance the label. Select Pause to print or edit. Advancing the Label The default leader space for your label file. 2. To advance the label 1. Press S HIFT + ...
User Guide
Page 18
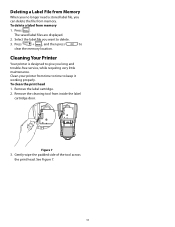
... then press to clear the memory location. To clean the print head 1. Figure 7 3. See Figure 7. 18 Press . Cleaning Your Printer Your printer is designed to give you want to delete. 3. Remove the label cartridge. 2. Remove the cleaning tool from memory 1. Gently wipe the padded side of the tool across the print head. Select...
... then press to clear the memory location. To clean the print head 1. Figure 7 3. See Figure 7. 18 Press . Cleaning Your Printer Your printer is designed to give you want to delete. 3. Remove the label cartridge. 2. Remove the cleaning tool from memory 1. Gently wipe the padded side of the tool across the print head. Select...
User Guide
Page 20
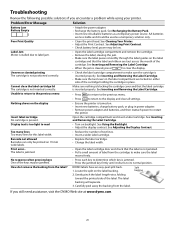
.... Carefully peel away the backing from the label? power may be printed on backlight. See Inserting and Removing the Label Cartridge. Troubleshooting Review the following possible solutions if you still need assistance, visit the DYMO Web site at www.dymo.com. 20 AA batteries are locked on...due to make sure the label moves freely. The label is jammed. • Open the label cartridge door and check that the label cartridge is present. RHINO labels have an easy-peel split back. 1. Locate the split on the display • Ensure the printer is cleared, press to ...
.... Carefully peel away the backing from the label? power may be printed on backlight. See Inserting and Removing the Label Cartridge. Troubleshooting Review the following possible solutions if you still need assistance, visit the DYMO Web site at www.dymo.com. 20 AA batteries are locked on...due to make sure the label moves freely. The label is jammed. • Open the label cartridge door and check that the label cartridge is present. RHINO labels have an easy-peel split back. 1. Locate the split on the display • Ensure the printer is cleared, press to ...


