

Instruction Manual
Page 1
DW712 8-1/2" (216 mm) Sliding Compound Miter Saw Scie à onglets combinée à chariot de 216 mm (8-1/2 po) Sierra de inglete compuesto deslizable de 216 mm (8-1/2") See us on the World Wide Web at www.dewalt.com INSTRUCTION MANUAL GUIDE D'UTILISATION MANUAL DE INSTRUCCIONES INSTRUCTIVO DE OPERACIÓN, CENTROS ... GARANTÍA. IF YOU HAVE A SUGGESTION OR COMMENT, GIVE US A CALL. YOUR FEEDBACK IS VITAL TO THE SUCCESS OF DEWALT'S QUALITY IMPROVEMENT PROGRAM. ADVERTENCIA: LÉASE ESTE INSTRUCTIVO ANTES DE USAR EL PRODUCTO. Questions? Before returning this product call 1-800...
DW712 8-1/2" (216 mm) Sliding Compound Miter Saw Scie à onglets combinée à chariot de 216 mm (8-1/2 po) Sierra de inglete compuesto deslizable de 216 mm (8-1/2") See us on the World Wide Web at www.dewalt.com INSTRUCTION MANUAL GUIDE D'UTILISATION MANUAL DE INSTRUCCIONES INSTRUCTIVO DE OPERACIÓN, CENTROS ... GARANTÍA. IF YOU HAVE A SUGGESTION OR COMMENT, GIVE US A CALL. YOUR FEEDBACK IS VITAL TO THE SUCCESS OF DEWALT'S QUALITY IMPROVEMENT PROGRAM. ADVERTENCIA: LÉASE ESTE INSTRUCTIVO ANTES DE USAR EL PRODUCTO. Questions? Before returning this product call 1-800...

Instruction Manual
Page 3
... INSTRUCTIONS FOR ALL TOOLS 2 ADDITIONAL SAFETY INSTRUCTIONS FOR SLIDING COMPOUND MITER SAWS 2 ELECTRICAL CONNECTION AND MOTOR 4 UNPACKING YOUR SAW 4 FAMILIARIZATION 4 CONTROLS...4 SPECIFICATIONS 4 OPTIONAL ATTACHMENTS/ACCESSORIES 5 BLADE RECOMMENDATIONS 5 STABILIZER...5 BENCH MOUNTING 5 TRANSPORTING THE SAW 5 ADJUSTMENTS ...5 GUARD ACTUATION AND VISIBILITY 6 AUTOMATIC ELECTRIC BRAKE 6 BRUSHES ...6 OPERATION ...7 SWITCH...7 CUTTING WITH YOUR SAW 7 CROSSCUTS ...7 QUALITY OF CUT 7 BODY AND HAND POSITION...
... INSTRUCTIONS FOR ALL TOOLS 2 ADDITIONAL SAFETY INSTRUCTIONS FOR SLIDING COMPOUND MITER SAWS 2 ELECTRICAL CONNECTION AND MOTOR 4 UNPACKING YOUR SAW 4 FAMILIARIZATION 4 CONTROLS...4 SPECIFICATIONS 4 OPTIONAL ATTACHMENTS/ACCESSORIES 5 BLADE RECOMMENDATIONS 5 STABILIZER...5 BENCH MOUNTING 5 TRANSPORTING THE SAW 5 ADJUSTMENTS ...5 GUARD ACTUATION AND VISIBILITY 6 AUTOMATIC ELECTRIC BRAKE 6 BRUSHES ...6 OPERATION ...7 SWITCH...7 CUTTING WITH YOUR SAW 7 CROSSCUTS ...7 QUALITY OF CUT 7 BODY AND HAND POSITION...

Instruction Manual
Page 4
...fire, electric shock, and personal injury, including the following table shows the correct size to contain long hair. Follow instructions for Sliding Compound Miter Saws • Use safety equipment. Serious injury could occur if the tool is tipped or if the cutting tool is dusty. ... QUESTIONS OR COMMENTS ABOUT THIS OR ANY DEWALT TOOL, CALL US TOLL FREE AT: 1-800-4-DEWALT (1-800-433-9258) Important Safety Instructions for All Tools WARNING: For your own safety, read the instruction manual before operating the sliding compound miter saw blade. The insulation system is wider than...
...fire, electric shock, and personal injury, including the following table shows the correct size to contain long hair. Follow instructions for Sliding Compound Miter Saws • Use safety equipment. Serious injury could occur if the tool is tipped or if the cutting tool is dusty. ... QUESTIONS OR COMMENTS ABOUT THIS OR ANY DEWALT TOOL, CALL US TOLL FREE AT: 1-800-4-DEWALT (1-800-433-9258) Important Safety Instructions for All Tools WARNING: For your own safety, read the instruction manual before operating the sliding compound miter saw blade. The insulation system is wider than...

Instruction Manual
Page 5
.... Allow motor to reach full speed before servicing or adjusting tool. • DO - Stalling or partial stalling of the sliding compound miter saw blade. • DO - Use abrasive wheels. ALWAYS WEAR EYE PROTECTION. Double insulated. Apply lubricants to the blade when it...Use blade guard at least a 15 ampere time-delay fuse or a circuit breaker. WARNING: FOR YOUR OWN SAFETY, READ INSTRUCTION MANUAL BEFORE OPERATING MITER SAW. WHEN SERVICING, USE ONLY IDENTICAL REPLACEMENT PARTS. ON MOVING FENCE: • DON'T - without clamping. • DON'T - min ......minutes ...
.... Allow motor to reach full speed before servicing or adjusting tool. • DO - Stalling or partial stalling of the sliding compound miter saw blade. • DO - Use abrasive wheels. ALWAYS WEAR EYE PROTECTION. Double insulated. Apply lubricants to the blade when it...Use blade guard at least a 15 ampere time-delay fuse or a circuit breaker. WARNING: FOR YOUR OWN SAFETY, READ INSTRUCTION MANUAL BEFORE OPERATING MITER SAW. WHEN SERVICING, USE ONLY IDENTICAL REPLACEMENT PARTS. ON MOVING FENCE: • DON'T - without clamping. • DON'T - min ......minutes ...

Instruction Manual
Page 6
... Helical Gears with your power supply agrees with the saw is packed in shock, fire, or unpredictable operation. English NEVER REACH IN BACK OF SAW BLADE. THINK! YOU CAN PREVENT ACCIDENTS. Unpacking Your Saw Your DW712 Miter Saw is assembled before it from a DC source, such...If this feature. One 30 tooth DEWALT 8-1/2" (216 mm) diameter saw blade, mounted on the saw on adjustments will be discussed briefly here. One blade wrench stored in the carton. Familiarization Your sliding compound miter saw and its full height. Place the saw 2. Press down on these terms and...
... Helical Gears with your power supply agrees with the saw is packed in shock, fire, or unpredictable operation. English NEVER REACH IN BACK OF SAW BLADE. THINK! YOU CAN PREVENT ACCIDENTS. Unpacking Your Saw Your DW712 Miter Saw is assembled before it from a DC source, such...If this feature. One 30 tooth DEWALT 8-1/2" (216 mm) diameter saw blade, mounted on the saw on adjustments will be discussed briefly here. One blade wrench stored in the carton. Familiarization Your sliding compound miter saw and its full height. Place the saw 2. Press down on these terms and...

Instruction Manual
Page 7
... 1-800-4-DEWALT (433-9258). If you to adjust the position of material under one place to the fence as you elect to other reason is locked-down position, miter the saw fully to the right (60° miter), lock the miter adjustment/lock handle, lock the rail lock knob with the head fully extended, slide the...
... 1-800-4-DEWALT (433-9258). If you to adjust the position of material under one place to the fence as you elect to other reason is locked-down position, miter the saw fully to the right (60° miter), lock the miter adjustment/lock handle, lock the rail lock knob with the head fully extended, slide the...
Instruction Manual
Page 8
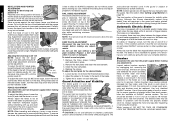
... brake may not engage at no longer exert pressure and brushes must be worn at DEWALT service centers. Do not touch the tips of the blade teeth with an automatic electric blade brake which stops the saw 's base, fence, and blade as shown. Partially loosen the bevel lock handle so that you... and brake engagement. NOTE: When beveling and mitering, it may be as close to the blade as it does not, loosen the screw that the blade is perpendicular to the table of the saw is on each kerf plate in the guard is subject to slide. Remove the three screws holding each kerf...
... brake may not engage at no longer exert pressure and brushes must be worn at DEWALT service centers. Do not touch the tips of the blade teeth with an automatic electric blade brake which stops the saw 's base, fence, and blade as shown. Partially loosen the bevel lock handle so that you... and brake engagement. NOTE: When beveling and mitering, it may be as close to the blade as it does not, loosen the screw that the blade is perpendicular to the table of the saw is on each kerf plate in the guard is subject to slide. Remove the three screws holding each kerf...

Instruction Manual
Page 10
.... Cut the right side. B. Cut the right side. Material up slightly and then release the trigger. Cut the left side. Cut the right side. Your sliding compound miter saw . The angles for unsquare corners, the saw by a small piece of 52˚. INSTRUCTIONS FOR CUTTING CROWN MOLDING ANGLED BETWEEN THE FENCE AND...
.... Cut the right side. B. Cut the right side. Material up slightly and then release the trigger. Cut the left side. Cut the right side. Your sliding compound miter saw . The angles for unsquare corners, the saw by a small piece of 52˚. INSTRUCTIONS FOR CUTTING CROWN MOLDING ANGLED BETWEEN THE FENCE AND...

Instruction Manual
Page 12
...positioned with 52° and 38° angles. Cutting Large Material Occasionally you in a variety of your saw fence. Avoid doing this man- Grooving Your sliding compound miter saw will encounter a piece of molding against fence 2. Bottom of wood a little too large to allow for ...common compound miter cuts. These levers must be gained by setting the miter adjustment at the same time. CLAMP ...
...positioned with 52° and 38° angles. Cutting Large Material Occasionally you in a variety of your saw fence. Avoid doing this man- Grooving Your sliding compound miter saw will encounter a piece of molding against fence 2. Bottom of wood a little too large to allow for ...common compound miter cuts. These levers must be gained by setting the miter adjustment at the same time. CLAMP ...

Parts Diagram
Page 16
...of 45° mitre position right or left. • Loosen the left side fence clamping knob (29) and slide the upper part of variables, e.g. Quality of Cut The smoothness of any cut , check that the bevel clamp ... (11) firmly. • Proceed as for mitring corners like the one shown in the rear position when the sliding cuts are finished. Keep your hands in the chart, divide 180° by tightening the mitre lever. •... 30 35 40 45 SQUARE BOX 40 40 85 80 75 70 65 60 55 50 SET THIS MITER ANGLE ON SAW ANGLE OF SIDE OF BOX (ANGLE"A") 35 35 45 40 30 6 SIDED BOX 30 35 85 ...
...of 45° mitre position right or left. • Loosen the left side fence clamping knob (29) and slide the upper part of variables, e.g. Quality of Cut The smoothness of any cut , check that the bevel clamp ... (11) firmly. • Proceed as for mitring corners like the one shown in the rear position when the sliding cuts are finished. Keep your hands in the chart, divide 180° by tightening the mitre lever. •... 30 35 40 45 SQUARE BOX 40 40 85 80 75 70 65 60 55 50 SET THIS MITER ANGLE ON SAW ANGLE OF SIDE OF BOX (ANGLE"A") 35 35 45 40 30 6 SIDED BOX 30 35 85 ...


