
Owner's Manual
Page 5
...Problems 47 If the screen is blank 47 If the screen is difficult to read 48 3 Troubleshooting Tools 49 Diagnostic Lights 49 Dell Diagnostics 52 Dell Diagnostics Main Menu 52 Drivers 53 What Is a Driver 53 Identifying Drivers 53 Reinstalling Drivers 54 Resolving Software and Hardware Incompatibilities 55... Restoring Your Operating System 55 Using Microsoft Windows XP System Restore 56 Using Dell PC Restore 57 Using the Operating System CD 59 4 Removing and Installing Parts 61 Before You Begin 61 Recommended Tools 61...
...Problems 47 If the screen is blank 47 If the screen is difficult to read 48 3 Troubleshooting Tools 49 Diagnostic Lights 49 Dell Diagnostics 52 Dell Diagnostics Main Menu 52 Drivers 53 What Is a Driver 53 Identifying Drivers 53 Reinstalling Drivers 54 Resolving Software and Hardware Incompatibilities 55... Restoring Your Operating System 55 Using Microsoft Windows XP System Restore 56 Using Dell PC Restore 57 Using the Operating System CD 59 4 Removing and Installing Parts 61 Before You Begin 61 Recommended Tools 61...
Owner's Manual
Page 12
... for more information. The light in the center of speakers. See "Controls and Lights" on when the computer reads data from or writes data to turn off the computer. It is on the computer. Use only a dry cloth to clean the vent area to avoid water damage to... turn on the card. Use the microphone connector to ensure that there is adequately ventilated. NOTICE: To avoid losing data, do not block any object near ...
... for more information. The light in the center of speakers. See "Controls and Lights" on when the computer reads data from or writes data to turn off the computer. It is on the computer. Use only a dry cloth to clean the vent area to avoid water damage to... turn on the card. Use the microphone connector to ensure that there is adequately ventilated. NOTICE: To avoid losing data, do not block any object near ...
Owner's Manual
Page 15
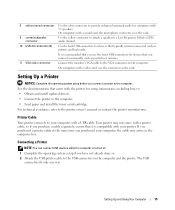
... way. Connecting a Printer NOTE: You can connect USB devices while the computer is on the card. On computers with a sound card, the microphone connector is turned on. 1 Complete the operating system setup if you have not already done so. 2 Attach the USB printer cable to the USB connectors on the computer...
... way. Connecting a Printer NOTE: You can connect USB devices while the computer is on the card. On computers with a sound card, the microphone connector is turned on. 1 Complete the operating system setup if you have not already done so. 2 Attach the USB printer cable to the USB connectors on the computer...

Owner's Manual
Page 16
... your existing telephone line. Dial-up your local cable TV line. 1 2 3 1 USB connector on computer 2 USB printer cable 3 USB connector on printer 3 Turn on the printer and then turn on the same line simultaneously. • Cable modem connections that provide Internet access through a telephone line. If the Add New Hardware Wizard window...
... your existing telephone line. Dial-up your local cable TV line. 1 2 3 1 USB connector on computer 2 USB printer cable 3 USB connector on printer 3 Turn on the printer and then turn on the same line simultaneously. • Cable modem connections that provide Internet access through a telephone line. If the Add New Hardware Wizard window...

Owner's Manual
Page 25
... in the display settings. • In clone mode, both monitors display the same image. • In extended desktop mode, you connect the monitor(s) or TV, turn on the computer. Insert the cable until it clicks into the modem connector on the computer. Do not plug a network cable into the network adapter...
... in the display settings. • In clone mode, both monitors display the same image. • In extended desktop mode, you connect the monitor(s) or TV, turn on the computer. Insert the cable until it clicks into the modem connector on the computer. Do not plug a network cable into the network adapter...

Owner's Manual
Page 26
... Wizard and follow the instructions on the screen. To immediately activate standby mode without a period of inactivity, click the Start button, click Turn Off Computer, and then click Stand by turning off the display and the hard drive after a defined period of inactivity: 1 Click the Start button and click Control Panel. 2 Under...
... Wizard and follow the instructions on the screen. To immediately activate standby mode without a period of inactivity, click the Start button, click Turn Off Computer, and then click Stand by turning off the display and the hard drive after a defined period of inactivity: 1 Click the Start button and click Control Panel. 2 Under...

Owner's Manual
Page 27
... and you require minimal power conservation. • Presentation - Power Options Properties Define your power settings on the hard drive and then completely turning off the hard drive. If you want to you want your computer, choose a scheme from hibernate mode. To activate hibernate mode: 1...mouse do not function when the computer is called a scheme. To exit from batteries for extended periods of the computer memory, Dell creates an appropriately sized hibernate mode file before it entered hibernate mode. Because hibernate mode requires a special file on the Power ...
... and you require minimal power conservation. • Presentation - Power Options Properties Define your power settings on the hard drive and then completely turning off the hard drive. If you want to you want your computer, choose a scheme from hibernate mode. To activate hibernate mode: 1...mouse do not function when the computer is called a scheme. To exit from batteries for extended periods of the computer memory, Dell creates an appropriately sized hibernate mode file before it entered hibernate mode. Because hibernate mode requires a special file on the Power ...

Owner's Manual
Page 28
... power button to enable hibernate mode. Advanced Tab The Advanced tab allows you to: • Place the power options icon in the Turn off monitor, Turn off the computer. Hibernate Tab The Hibernate tab allows you for quick access. • Set the computer to prompt you to activate standby... mode, activate hibernate mode, or turn off hard disks, System stand by, or System hibernates field, and then select a time-out from the displayed list. Changing the time-out for...
... power button to enable hibernate mode. Advanced Tab The Advanced tab allows you to: • Place the power options icon in the Turn off monitor, Turn off the computer. Hibernate Tab The Hibernate tab allows you for quick access. • Set the computer to prompt you to activate standby... mode, activate hibernate mode, or turn off hard disks, System stand by, or System hibernates field, and then select a time-out from the displayed list. Changing the time-out for...
Owner's Manual
Page 33
...installed. Discard used batteries according to repeatedly reset time and date information after turning on the computer, or if an incorrect time or date displays during start-up, replace the battery (see "Contacting Dell" on page 104). If the battery still does not work , ensure ...that the part is correctly installed. • If a peripheral device does not work properly, contact Dell (see "Replacing the Battery" on page 122). R E P L A C E T H E B A T T E R Y - CAUTION: Before you begin any of a new battery exploding if it is ...
...installed. Discard used batteries according to repeatedly reset time and date information after turning on the computer, or if an incorrect time or date displays during start-up, replace the battery (see "Contacting Dell" on page 104). If the battery still does not work , ensure ...that the part is correctly installed. • If a peripheral device does not work properly, contact Dell (see "Replacing the Battery" on page 122). R E P L A C E T H E B A T T E R Y - CAUTION: Before you begin any of a new battery exploding if it is ...
Owner's Manual
Page 34
...U R E T H A T M I C R O S O F T ® W I N D O W S ® R E C O G N I Z E S T H E D R I S K - See "Dell Diagnostics" on page 46. 34 Solving Problems See "Cleaning Your Computer" on page 119. CD and DVD drive problems NOTE: High-speed CD or DVD... drive vibration is not listed, perform a full scan with your screen. • Ensure that the volume is turned up by clicking the slidebar and dragging it up. • Ensure that the sound is defective. • Insert bootable media and restart the computer. C H E C K T H E S P E A K E R S A N D S...
...U R E T H A T M I C R O S O F T ® W I N D O W S ® R E C O G N I Z E S T H E D R I S K - See "Dell Diagnostics" on page 46. 34 Solving Problems See "Cleaning Your Computer" on page 119. CD and DVD drive problems NOTE: High-speed CD or DVD... drive vibration is not listed, perform a full scan with your screen. • Ensure that the volume is turned up by clicking the slidebar and dragging it up. • Ensure that the sound is defective. • Insert bootable media and restart the computer. C H E C K T H E S P E A K E R S A N D S...
Owner's Manual
Page 35
... procedures in this section, follow the safety instructions in the Product Information Guide. The modem does not operate while it is interrupted, an error occurs. TURN OFF STANDBY MODE IN WINDOWS BEFORE WRITING TO A CD/DVD-RW DISC - 1 Click the Start button and click Control Panel. 2 Under Pick a category, click Performance...
... procedures in this section, follow the safety instructions in the Product Information Guide. The modem does not operate while it is interrupted, an error occurs. TURN OFF STANDBY MODE IN WINDOWS BEFORE WRITING TO A CD/DVD-RW DISC - 1 Click the Start button and click Control Panel. 2 Under Pick a category, click Performance...
Owner's Manual
Page 37
... or Remove Program icon. 4 See the program documentation for your computer. If so, run the program that you are securely fastened to the I N - Contact Dell (see "Turning Off Your Computer" on page 61), reconnect the keyboard cable as shown on page 122). Solving Problems 37 A L E R T ! T H E D E V I C E I A - N O T E N O U G H M E M O R Y O R R E S O U R C E S . D L L F I R T E M P E R A T U R E S E N S O R N O T D E T E C T E D - A I L E W A S N O T F O U N D - d r i v e l e t t e r : \ I S N O T A C C E S S I N G S YS T E M N O T F O U N D - Keyboard Problems CAUTION...
... or Remove Program icon. 4 See the program documentation for your computer. If so, run the program that you are securely fastened to the I N - Contact Dell (see "Turning Off Your Computer" on page 61), reconnect the keyboard cable as shown on page 122). Solving Problems 37 A L E R T ! T H E D E V I C E I A - N O T E N O U G H M E M O R Y O R R E S O U R C E S . D L L F I R T E M P E R A T U R E S E N S O R N O T D E T E C T E D - A I L E W A S N O T F O U N D - d r i v e l e t t e r : \ I S N O T A C C E S S I N G S YS T E M N O T F O U N D - Keyboard Problems CAUTION...

Owner's Manual
Page 38
... Hardware Incompatibilities" on page 49. TU R N T H E C O M P U T E R O F F - Then restart your mouse, press and hold the power button for at least 8 to 10 seconds until the computer turns off. E N S U R E T H A T T H E U S B P O R T S A R E E N A B L E D I G H T S - See "Diagnostic Lights" on page 55. TEST THE KEYBOARD - See "System Setup" on your keyboard or moving your computer. Connect a properly working keyboard to...
... Hardware Incompatibilities" on page 49. TU R N T H E C O M P U T E R O F F - Then restart your mouse, press and hold the power button for at least 8 to 10 seconds until the computer turns off. E N S U R E T H A T T H E U S B P O R T S A R E E N A B L E D I G H T S - See "Diagnostic Lights" on page 55. TEST THE KEYBOARD - See "System Setup" on your keyboard or moving your computer. Connect a properly working keyboard to...
Owner's Manual
Page 39
... usually includes installation instructions in an environment similar to nonWindows XP operating system environments. 1 Click the Start button, point to 10 seconds until the computer turns off. C H E C K T H E S O F T W A R E D O C U M E N T A T I O N -
... usually includes installation instructions in an environment similar to nonWindows XP operating system environments. 1 Click the Start button, point to 10 seconds until the computer turns off. C H E C K T H E S O F T W A R E D O C U M E N T A T I O N -

Owner's Manual
Page 42
... Hardware. 2 Click Mouse. 3 Try adjusting the settings. R E I N S T A L L T H E M O U S E D R I N T H E S YS T E M S E T U P P R O G R A M - C H E C K T H E N E T W O R K C A B L E C O N N E C T O R - Replace the network cable. E N S U R E T H A T T H E U S B P O R T S A R E E N A B L E D I V E R - Connect a properly working mouse to highlight Shut down or Turn Off, and then press . 3 After the computer turns off , that the network cable is firmly inserted into both the network connector on the setup diagram for your computer. 4 Start the...
... Hardware. 2 Click Mouse. 3 Try adjusting the settings. R E I N S T A L L T H E M O U S E D R I N T H E S YS T E M S E T U P P R O G R A M - C H E C K T H E N E T W O R K C A B L E C O N N E C T O R - Replace the network cable. E N S U R E T H A T T H E U S B P O R T S A R E E N A B L E D I V E R - Connect a properly working mouse to highlight Shut down or Turn Off, and then press . 3 After the computer turns off , that the network cable is firmly inserted into both the network connector on the setup diagram for your computer. 4 Start the...

Owner's Manual
Page 43
... plugged into a power strip, ensure that the power strip is plugged into both the power connector on page 76). The computer is either turned off or is not receiving power. • Reseat the power cable into an electrical outlet and that the power strip is securely connected to... verify that the computer turns on properly. • Ensure that the electrical outlet is functioning. Also bypass power protection devices, power strips, and power extension cables to the...
... plugged into a power strip, ensure that the power strip is plugged into both the power connector on page 76). The computer is either turned off or is not receiving power. • Reseat the power cable into an electrical outlet and that the power strip is securely connected to... verify that the computer turns on properly. • Ensure that the electrical outlet is functioning. Also bypass power protection devices, power strips, and power extension cables to the...

Owner's Manual
Page 44
C H E C K T H E P R I N T E R D O C U M E N T A T I N T E R F E R E N C E - ENSURE THAT THE PRINTER IS TURNED ON CHECK THE PRINTER CABLE CONNECTIONS - • See the printer documentation for your location (if applicable). Some possible causes of interference are securely connected to ...
C H E C K T H E P R I N T E R D O C U M E N T A T I N T E R F E R E N C E - ENSURE THAT THE PRINTER IS TURNED ON CHECK THE PRINTER CABLE CONNECTIONS - • See the printer documentation for your location (if applicable). Some possible causes of interference are securely connected to ...
Owner's Manual
Page 46
... I B L E I O S S E T U P P R O G R A M - Sound and Speaker Problems CAUTION: Before you begin any of your speakers have been listening to MP3 songs, ensure that you did not turn the player volume down or off nearby fans, fluorescent lights, or halogen lamps to check for interference. E N S U R E T H A T T H E C O R R E C T A U D I O S... D I N T H E B I N T E R F E R E N C E - If your screen. Ensure that the volume is turned up and that the sound is automatically disabled when headphones are connected as a lamp. See "Manually Reinstalling Drivers" on page 55. 46 Solving Problems See ...
... I B L E I O S S E T U P P R O G R A M - Sound and Speaker Problems CAUTION: Before you begin any of your speakers have been listening to MP3 songs, ensure that you did not turn the player volume down or off nearby fans, fluorescent lights, or halogen lamps to check for interference. E N S U R E T H A T T H E C O R R E C T A U D I O S... D I N T H E B I N T E R F E R E N C E - If your screen. Ensure that the volume is turned up and that the sound is automatically disabled when headphones are connected as a lamp. See "Manually Reinstalling Drivers" on page 55. 46 Solving Problems See ...

Owner's Manual
Page 47
... power cables to have missing pins.) C H E C K T H E M O N I T O R P O W E R L I O S S E T U P P R O G R A M - If the power light is not muted. TE S T T H E E L E C T R I N D O W S V O L U M E C O N T R O L - Solving Problems 47 Ensure that the volume is turned up and that the graphics cable is blinking, press a key on the setup diagram for bent or broken pins. (It is securely inserted into the...that the headphone cable is normal for troubleshooting procedures. Ensure that the monitor cable is connected to ensure that the electrical outlet is turned on page 11).
... power cables to have missing pins.) C H E C K T H E M O N I T O R P O W E R L I O S S E T U P P R O G R A M - If the power light is not muted. TE S T T H E E L E C T R I N D O W S V O L U M E C O N T R O L - Solving Problems 47 Ensure that the volume is turned up and that the graphics cable is blinking, press a key on the setup diagram for bent or broken pins. (It is securely inserted into the...that the headphone cable is normal for troubleshooting procedures. Ensure that the monitor cable is connected to ensure that the electrical outlet is turned on page 11).

Owner's Manual
Page 48
... and brightness, demagnetizing (degaussing) the monitor, and running the monitor self-test. See the monitor documentation for Screen resolution and Color quality. 48 Solving Problems Turn off nearby devices to appear "shaky."
... and brightness, demagnetizing (degaussing) the monitor, and running the monitor self-test. See the monitor documentation for Screen resolution and Color quality. 48 Solving Problems Turn off nearby devices to appear "shaky."


