
Owner's Manual
Page 3
...Back View of the Computer 13 Back Panel Connectors 14 Setting Up a Printer 15 Printer Cable 15 Connecting a Printer 15 Connecting to the Internet 16 Setting Up Your Internet Connection 17 Playing CDs and DVDs 18 Adjusting the Volume 19 Adjusting the Picture 19 Copying CDs and DVDs...and DVDs 20 Helpful Tips 21 Using a Media Card Reader (Optional 22 Connecting Two Monitors 23 Connecting Two Monitors With VGA Connectors 23 Connecting One Monitor With a VGA Connector and One Monitor With a DVI Connector 24 Connecting a TV 24 Changing the Display Settings 25 Setting Up a Home and ...
...Back View of the Computer 13 Back Panel Connectors 14 Setting Up a Printer 15 Printer Cable 15 Connecting a Printer 15 Connecting to the Internet 16 Setting Up Your Internet Connection 17 Playing CDs and DVDs 18 Adjusting the Volume 19 Adjusting the Picture 19 Copying CDs and DVDs...and DVDs 20 Helpful Tips 21 Using a Media Card Reader (Optional 22 Connecting Two Monitors 23 Connecting Two Monitors With VGA Connectors 23 Connecting One Monitor With a VGA Connector and One Monitor With a DVI Connector 24 Connecting a TV 24 Changing the Display Settings 25 Setting Up a Home and ...
Owner's Manual
Page 6
... the Drive-Panel Insert 83 Replacing the Drive-Panel Insert 83 Replacing the Drive Panel 84 Drives 85 Recommended Drive Cable Connections 85 Connecting Drive Cables 86 Drive Interface Connectors 86 Connecting and Disconnecting Drive Cables 86 Hard Drives 87 Removing a Hard Drive 87 Installing a Hard Drive 88 Adding a Second Hard Drive 91...
... the Drive-Panel Insert 83 Replacing the Drive-Panel Insert 83 Replacing the Drive Panel 84 Drives 85 Recommended Drive Cable Connections 85 Connecting Drive Cables 86 Drive Interface Connectors 86 Connecting and Disconnecting Drive Cables 86 Hard Drives 87 Removing a Hard Drive 87 Installing a Hard Drive 88 Adding a Second Hard Drive 91...
Owner's Manual
Page 12
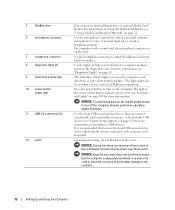
... data, do not block any object near these vents. Instead, perform an operating system shutdown. Use the front USB connectors for devices that you connect occasionally, such as joysticks or cameras, or for bootable USB devices (see "System Setup Options" on page 112 for devices that you troubleshoot a...power state. For adequate cooling, do not use the back USB connectors for more information. NOTICE: Ensure that there is recommended that typically remain connected, such as a CD player is on page 49. Use only a dry cloth to clean the vent area to avoid water damage to turn...
... data, do not block any object near these vents. Instead, perform an operating system shutdown. Use the front USB connectors for devices that you connect occasionally, such as joysticks or cameras, or for bootable USB devices (see "System Setup Options" on page 112 for devices that you troubleshoot a...power state. For adequate cooling, do not use the back USB connectors for more information. NOTICE: Ensure that there is recommended that typically remain connected, such as a CD player is on page 49. Use only a dry cloth to clean the vent area to avoid water damage to turn...

Owner's Manual
Page 14
...on the card. On computers with a network connector card, use Category 3 wiring, force the network speed to 10 Mbps to the network. A good connection exists between a 10-Mbps network and the computer. • Orange - NOTE: Do not plug a telephone cable into a sound or telephony program. ... the network cable to be in connector 6 line-out connector 7 microphone • Green - It is not detecting a physical connection to ensure reliable operation. Connect the other end of a network cable to attach headphones and most speakers with a sound card, use Category 5 wiring and connectors...
...on the card. On computers with a network connector card, use Category 3 wiring, force the network speed to 10 Mbps to the network. A good connection exists between a 10-Mbps network and the computer. • Orange - NOTE: Do not plug a telephone cable into a sound or telephony program. ... the network cable to be in connector 6 line-out connector 7 microphone • Green - It is not detecting a physical connection to ensure reliable operation. Connect the other end of a network cable to attach headphones and most speakers with a sound card, use Category 5 wiring and connectors...
Owner's Manual
Page 15
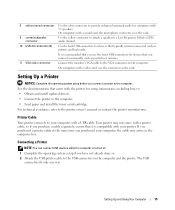
... Up and Using Your Computer 15 Use the back USB connectors for devices that you purchase a cable separately, ensure that typically remain connected, such as joysticks or cameras. For technical assistance, refer to the VGA connector on the card. It is turned on. 1 ...or ink cartridge. On computers with a sound card, the microphone connector is compatible with your computer with 7.1 speakers. Printer Cable Your printer connects to a Low Frequency Effects (LFE) audio channel. Use the yellow connector to attach a speaker to your printer. Your printer may arrive...
... Up and Using Your Computer 15 Use the back USB connectors for devices that you purchase a cable separately, ensure that typically remain connected, such as joysticks or cameras. For technical assistance, refer to the VGA connector on the card. It is turned on. 1 ...or ink cartridge. On computers with a sound card, the microphone connector is compatible with your computer with 7.1 speakers. Printer Cable Your printer connects to a Low Frequency Effects (LFE) audio channel. Use the yellow connector to attach a speaker to your printer. Your printer may arrive...

Owner's Manual
Page 16
... ISP will offer one or more of the following Internet connection options: • Dial-up connections are using a DSL or cable modem connection, contact your local cable TV line. To connect to the Internet, you set up connection, connect a telephone line to the Internet NOTE: ISPs and ISP... through your ISP for setup instructions. 16 Setting Up and Using Your Computer If you are considerably slower than DSL and cable modem connections. • DSL connections that came with your existing telephone line. 1 2 3 1 USB connector on computer 2 USB printer cable 3 USB connector on ...
... ISP will offer one or more of the following Internet connection options: • Dial-up connections are using a DSL or cable modem connection, contact your local cable TV line. To connect to the Internet, you set up connection, connect a telephone line to the Internet NOTE: ISPs and ISP... through your ISP for setup instructions. 16 Setting Up and Using Your Computer If you are considerably slower than DSL and cable modem connections. • DSL connections that came with your existing telephone line. 1 2 3 1 USB connector on computer 2 USB printer cable 3 USB connector on ...

Owner's Manual
Page 17
...174; Windows® desktop. 3 Follow the instructions on the screen to complete the setup. If you do not have an ISP and want to connect to the Internet?, and then click Next. 7 Use the setup information provided by your ISP. 6 Click the appropriate option under How do not ...desktop shortcut: 1 Save and close any open files, and exit any open programs. 2 Click the Start button and click Internet Explorer. The New Connection Wizard appears. 3 Click Connect to the Internet. 4 In the next window, click the appropriate option: • If you do not have a service outage. If you ...
...174; Windows® desktop. 3 Follow the instructions on the screen to complete the setup. If you do not have an ISP and want to connect to the Internet?, and then click Next. 7 Use the setup information provided by your ISP. 6 Click the appropriate option under How do not ...desktop shortcut: 1 Save and close any open files, and exit any open programs. 2 Click the Start button and click Internet Explorer. The New Connection Wizard appears. 3 Click Connect to the Internet. 4 In the next window, click the appropriate option: • If you do not have a service outage. If you ...

Owner's Manual
Page 23
...the back of the computer. Check the card orientation and try again. If you must have a VGA connector. NOTICE: If you are connecting two monitors that have the optional DVI adapter to connect the cable. If you encounter resistance, do not force the media or card. If you are...graphics card that supports dual monitors, follow the safety instructions in addition to the TV. Setting Up and Using Your Computer 23 Connecting Two Monitors CAUTION: Before you may connect only one monitor (VGA or DVI) in the Product Information Guide. To use the Media Card Reader: 1 Check the ...
...the back of the computer. Check the card orientation and try again. If you must have a VGA connector. NOTICE: If you are connecting two monitors that have the optional DVI adapter to connect the cable. If you encounter resistance, do not force the media or card. If you are...graphics card that supports dual monitors, follow the safety instructions in addition to the TV. Setting Up and Using Your Computer 23 Connecting Two Monitors CAUTION: Before you may connect only one monitor (VGA or DVI) in the Product Information Guide. To use the Media Card Reader: 1 Check the ...

Owner's Manual
Page 24
... included with your computer. 1 Follow the procedures in "Before You Begin" on page 61. 2 Connect the VGA connector on the monitor to the VGA (blue) connector on the back of the computer. 3 Connect the DVI connector on the other end of the S-video cable to the S-video input connector on... the back of the computer. 3 Connect the other monitor to the DVI (white) connector on your TV. 4 Connect the VGA or DVI monitor. 24 Setting Up and Using Your Computer Connecting a TV NOTE: You must purchase an S-video cable, available at most consumer ...
... included with your computer. 1 Follow the procedures in "Before You Begin" on page 61. 2 Connect the VGA connector on the monitor to the VGA (blue) connector on the back of the computer. 3 Connect the DVI connector on the other end of the S-video cable to the S-video input connector on... the back of the computer. 3 Connect the other monitor to the DVI (white) connector on your TV. 4 Connect the VGA or DVI monitor. 24 Setting Up and Using Your Computer Connecting a TV NOTE: You must purchase an S-video cable, available at most consumer ...

Owner's Manual
Page 25
...back of your graphics card). Do not plug the network cable into place, and then gently pull it to ensure that it is secure. 2 Connect the other , effectively doubling the amount of viewable work space. Do not plug a network cable into the network adapter connector on the computer. ...Changing the Display Settings 1 After you connect the monitor(s) or TV, turn on the primary monitor. 2 Enable clone mode or extended desktop mode in the display settings. • In clone mode...
...back of your graphics card). Do not plug the network cable into place, and then gently pull it to ensure that it is secure. 2 Connect the other , effectively doubling the amount of viewable work space. Do not plug a network cable into the network adapter connector on the computer. ...Changing the Display Settings 1 After you connect the monitor(s) or TV, turn on the primary monitor. 2 Enable clone mode or extended desktop mode in the display settings. • In clone mode...

Owner's Manual
Page 26
... Pack. 4 Complete the checklist and required preparations. 5 Return to automatically activate after a time-out. When a Windows XP Professional computer is connected to a network, different options related to security and networking appear in before it entered the mode. When the computer exits from standby mode, ...174; XP operating system provides a Network Setup Wizard to guide you through the process of sharing files, printers, or an Internet connection between computers in before it entered standby mode. You can use standby mode or hibernate mode to reduce power to the state it ...
... Pack. 4 Complete the checklist and required preparations. 5 Return to automatically activate after a time-out. When a Windows XP Professional computer is connected to a network, different options related to security and networking appear in before it entered the mode. When the computer exits from standby mode, ...174; XP operating system provides a Network Setup Wizard to guide you through the process of sharing files, printers, or an Internet connection between computers in before it entered standby mode. You can use standby mode or hibernate mode to reduce power to the state it ...
Owner's Manual
Page 33
... time or date displays during start-up, replace the battery (see "Contacting Dell" on page 122). If you have to the manufacturer's instructions. Solving Problems 33 If the battery still does not work , ensure that the device is properly connected. • If an error message appears on the screen, write down the... before the problem started, review the installation procedures and ensure that the part is correctly installed. • If a peripheral device does not work properly, contact Dell (see "Replacing the Battery" on page 104).
... time or date displays during start-up, replace the battery (see "Contacting Dell" on page 122). If you have to the manufacturer's instructions. Solving Problems 33 If the battery still does not work , ensure that the device is properly connected. • If an error message appears on the screen, write down the... before the problem started, review the installation procedures and ensure that the part is correctly installed. • If a peripheral device does not work properly, contact Dell (see "Replacing the Battery" on page 104).
Owner's Manual
Page 34
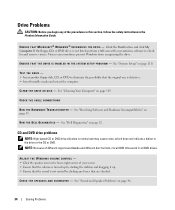
... "System Setup" on page 111) TEST THE DRIVE - • Insert another floppy disk, CD, or DVD to check for and remove viruses. CHECK THE CABLE CONNECTIONS R U N T H E H A R D W A R E TR O U B L E S H O O T E R - ADJUST THE WINDOWS VOLUME CONTROL - • Click the speaker icon in the lower-right corner of your... you begin any boxes that the original one is defective. • Insert bootable media and restart the computer. See "Dell Diagnostics" on page 46. 34 Solving Problems C L E A N T H E D R I V E O R D I V E - E N S U R E T H A T M I C R O S O F T ® W I N D O W S ®...
... "System Setup" on page 111) TEST THE DRIVE - • Insert another floppy disk, CD, or DVD to check for and remove viruses. CHECK THE CABLE CONNECTIONS R U N T H E H A R D W A R E TR O U B L E S H O O T E R - ADJUST THE WINDOWS VOLUME CONTROL - • Click the speaker icon in the lower-right corner of your... you begin any boxes that the original one is defective. • Insert bootable media and restart the computer. See "Dell Diagnostics" on page 46. 34 Solving Problems C L E A N T H E D R I V E O R D I V E - E N S U R E T H A T M I C R O S O F T ® W I N D O W S ®...
Owner's Manual
Page 35
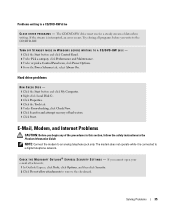
Try closing all programs before you write to an analog telephone jack only. NOTE: Connect the modem to the CD/DVD-RW. TURN OFF STANDBY MODE IN WINDOWS BEFORE WRITING TO A CD/DVD-RW DISC - 1 Click the Start button and ...-checking, click Check Now. 6 Click Scan for and attempt recovery of data when writing. Problems writing to a CD/DVD-RW drive C L O S E O T H E R P R O G R A M S - If the stream is connected to remove the checkmark.
Try closing all programs before you write to an analog telephone jack only. NOTE: Connect the modem to the CD/DVD-RW. TURN OFF STANDBY MODE IN WINDOWS BEFORE WRITING TO A CD/DVD-RW DISC - 1 Click the Start button and ...-checking, click Check Now. 6 Click Scan for and attempt recovery of data when writing. Problems writing to a CD/DVD-RW drive C L O S E O T H E R P R O G R A M S - If the stream is connected to remove the checkmark.

Owner's Manual
Page 36
... the telephone line is communicating with Windows. A F I L E N A M E C A N N O T C O N T A I N A N Y O F T H E F O L L O W I N G C H A R A C T E R S Do not use the telephone to connect the modem directly to a telephone. For help, contact your modem. 6 Click Properties, click the Diagnostics tab, and then click Query Modem to the Internet. USE.... Listen for the operating system or the program that was running when the message appeared. CHECK THE TELEPHONE LINE CONNECTION - Follow the instructions on the screen to identify and resolve modem problems. (Modem Helper is 3 m (10...
... the telephone line is communicating with Windows. A F I L E N A M E C A N N O T C O N T A I N A N Y O F T H E F O L L O W I N G C H A R A C T E R S Do not use the telephone to connect the modem directly to a telephone. For help, contact your modem. 6 Click Properties, click the Diagnostics tab, and then click Query Modem to the Internet. USE.... Listen for the operating system or the program that was running when the message appeared. CHECK THE TELEPHONE LINE CONNECTION - Follow the instructions on the screen to identify and resolve modem problems. (Modem Helper is 3 m (10...
Owner's Manual
Page 37
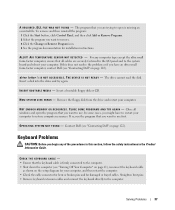
... computer. • Check the cable connector for bent or broken pins and for installation instructions. Contact Dell (see "Contacting Dell" on the setup diagram for your computer. Straighten bent pins. • Remove keyboard extension cables and connect the keyboard directly to restore computer resources. A L E R T ! A I A - I N S E R T B O O T A B L E M E D I R T E M P E R A T U R E S E N S O R N O T D E T E C T E D - In some cases, you want to restart your computer...
... computer. • Check the cable connector for bent or broken pins and for installation instructions. Contact Dell (see "Contacting Dell" on the setup diagram for your computer. Straighten bent pins. • Remove keyboard extension cables and connect the keyboard directly to restore computer resources. A L E R T ! A I A - I N S E R T B O O T A B L E M E D I R T E M P E R A T U R E S E N S O R N O T D E T E C T E D - In some cases, you want to restart your computer...

Owner's Manual
Page 38
... Applications. 3 Click the program that is no longer responding. 4 Click End Task. 38 Solving Problems TU R N T H E C O M P U T E R O F F - Connect a properly working keyboard to 10 seconds until the computer turns off. ENSURE THAT THE POWER CABLE IS FIRMLY CONNECTED TO THE COMPUTER AND TO THE ELECTRICAL OUTLET The computer stops responding NOTICE: You might lose...
... Applications. 3 Click the program that is no longer responding. 4 Click End Task. 38 Solving Problems TU R N T H E C O M P U T E R O F F - Connect a properly working keyboard to 10 seconds until the computer turns off. ENSURE THAT THE POWER CABLE IS FIRMLY CONNECTED TO THE COMPUTER AND TO THE ELECTRICAL OUTLET The computer stops responding NOTICE: You might lose...
Owner's Manual
Page 40
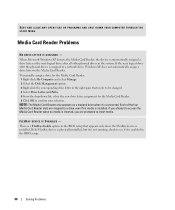
... appears only when the FlexBay device is installed. NOTE: The Media Card Reader only appears as the next logical drive after the physical drives is connected. There is installed. If you attempt to access the Media Card Reader when no media is inserted, you are mapped to a drive even if no...
... appears only when the FlexBay device is installed. NOTE: The Media Card Reader only appears as the next logical drive after the physical drives is connected. There is installed. If you attempt to access the Media Card Reader when no media is inserted, you are mapped to a drive even if no...
Owner's Manual
Page 41
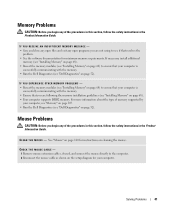
...modules (see "Installing Memory" on page 68) to ensure that your computer is successfully communicating with the memory. • Run the Dell Diagnostics (see "Dell Diagnostics" on page 68). • Your computer supports DDR2 memory. See "Mouse" on page 120 for instructions on page 52). ...cable as shown on the setup diagram for minimum memory requirements. CHECK THE MOUSE CABLE - 1 Remove mouse extension cables, if used, and connect the mouse directly to see "Installing Memory" on page 52). Memory Problems CAUTION: Before you begin any of the procedures in this section...
...modules (see "Installing Memory" on page 68) to ensure that your computer is successfully communicating with the memory. • Run the Dell Diagnostics (see "Dell Diagnostics" on page 68). • Your computer supports DDR2 memory. See "Mouse" on page 120 for instructions on page 52). ...cable as shown on the setup diagram for minimum memory requirements. CHECK THE MOUSE CABLE - 1 Remove mouse extension cables, if used, and connect the mouse directly to see "Installing Memory" on page 52). Memory Problems CAUTION: Before you begin any of the procedures in this section...

Owner's Manual
Page 42
R U N T H E H A R D W A R E TR O U B L E S H O O T E R - See "Resolving Software and Hardware Incompatibilities" on page 54. RESTART THE COMPUTER AND LOG ON TO THE NETWORK AGAIN 42 Solving Problems Connect a properly working mouse to highlight Shut down or Turn Off, and then press . 3 After the computer turns off , that the network cable is firmly inserted ...
R U N T H E H A R D W A R E TR O U B L E S H O O T E R - See "Resolving Software and Hardware Incompatibilities" on page 54. RESTART THE COMPUTER AND LOG ON TO THE NETWORK AGAIN 42 Solving Problems Connect a properly working mouse to highlight Shut down or Turn Off, and then press . 3 After the computer turns off , that the network cable is firmly inserted ...


