
User Guide
Page 31
c. Click Uninstall Dell Photo AIO Printer 966. 3. Restart your desktop. In Windows XP, click Start® My Computer. In Windows Vista, click ® Computer. b. c. For Windows Vista: a. Insert the Drivers and Utilities CD, and then follow the instructions on your printer, you can remove and reinstall the printer software. 1. When the printer software installation screen ...
c. Click Uninstall Dell Photo AIO Printer 966. 3. Restart your desktop. In Windows XP, click Start® My Computer. In Windows Vista, click ® Computer. b. c. For Windows Vista: a. Insert the Drivers and Utilities CD, and then follow the instructions on your printer, you can remove and reinstall the printer software. 1. When the printer software installation screen ...

User Guide
Page 80
... For more information. If you are sending a print job to your Windows Mobile/Pocket PC PDA, you call Dell customer support, see Restoring Factory Default Settings. You changed the USB Bluetooth...a USB Bluetooth adapter (sold separately) into the PictBridge port. 4. This All-In-One (AIO) printer is not listed as a trusted device. It supports Object Push Profile. To print ...device that came with a Bluetoothenabled device. Before you require additional third-party software and drivers. Ensure that you read the documentation that you will use the latest firmware on ...
... For more information. If you are sending a print job to your Windows Mobile/Pocket PC PDA, you call Dell customer support, see Restoring Factory Default Settings. You changed the USB Bluetooth...a USB Bluetooth adapter (sold separately) into the PictBridge port. 4. This All-In-One (AIO) printer is not listed as a trusted device. It supports Object Push Profile. To print ...device that came with a Bluetoothenabled device. Before you require additional third-party software and drivers. Ensure that you read the documentation that you will use the latest firmware on ...
User Guide
Page 121
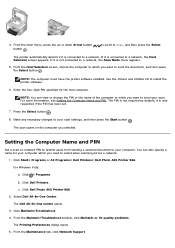
...not connected to your scan settings, and then press the Start button . Click Start® Programs or All Programs® Dell Printers® Dell Photo AIO Printer 966. For Windows Vista: a. c. to scroll to Scan, and then press the Select The printer automatically detects if it is not required by... problems. The Printing Preferences dialog opens. 5. Select Dell All-In-One Center. From the Host Selection screen, choose the computer to which you need to send the document, and then press the Select button . Use the Drivers and Utilities CD to which you selected. NOTE: ...
...not connected to your scan settings, and then press the Start button . Click Start® Programs or All Programs® Dell Printers® Dell Photo AIO Printer 966. For Windows Vista: a. c. to scroll to Scan, and then press the Select The printer automatically detects if it is not required by... problems. The Printing Preferences dialog opens. 5. Select Dell All-In-One Center. From the Host Selection screen, choose the computer to which you need to send the document, and then press the Select button . Use the Drivers and Utilities CD to which you selected. NOTE: ...
User Guide
Page 122
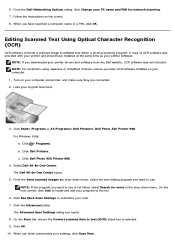
... dialog, click Change your settings, click Scan Now. Click Dell Photo AIO Printer 966. 4. A copy of OCR software was provided with your printer and should have installed at the same time as your printer drivers and software from the Dell website, OCR software was not included. NOTE: If you ...the drop-down menu, select the text-editing program you have specified a computer name or a PIN, click OK. For Windows Vista: a. Select Dell All-In-One Center. The Dell All-In-One Center opens. 5. Click See More Scan Settings to use . Click the Advanced button. The Advanced Scan...
... dialog, click Change your settings, click Scan Now. Click Dell Photo AIO Printer 966. 4. A copy of OCR software was provided with your printer and should have installed at the same time as your printer drivers and software from the Dell website, OCR software was not included. NOTE: If you ...the drop-down menu, select the text-editing program you have specified a computer name or a PIN, click OK. For Windows Vista: a. Select Dell All-In-One Center. The Dell All-In-One Center opens. 5. Click See More Scan Settings to use . Click the Advanced button. The Advanced Scan...


