Owners Manual
Page 1
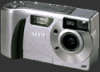
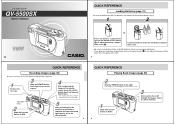
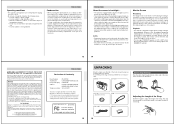
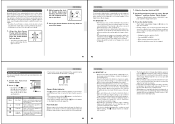
... 4 Operation lamp 2 Slide the Function Switch to REC. 5 After confirming that come with the camera before using it there. * The camera's Auto Focus feature automatically focuses the image. LCD Digital Camera QV-5500SX Owner's Manual QUICK REFERENCE Loading Batteries (page 31) Be sure to load the four AA size batteries...set the clock before recording images (page 36). 1 Remove the lens cap. 3 Slide the POWER Switch to the right to turn on the camera. 4 After composing the image on the monitor screen, press the shutter button about half way and hold it . 1 2 If you recorded appears...
... 4 Operation lamp 2 Slide the Function Switch to REC. 5 After confirming that come with the camera before using it there. * The camera's Auto Focus feature automatically focuses the image. LCD Digital Camera QV-5500SX Owner's Manual QUICK REFERENCE Loading Batteries (page 31) Be sure to load the four AA size batteries...set the clock before recording images (page 36). 1 Remove the lens cap. 3 Slide the POWER Switch to the right to turn on the camera. 4 After composing the image on the monitor screen, press the shutter button about half way and hold it . 1 2 If you recorded appears...
Owners Manual
Page 2
... 25 MONITOR SCREEN Recording Mode 25 Playback Mode 26 27 MEMORY CARDS To insert a memory card into the camera 27 To remove a memory card from the camera 28 Formatting a Memory Card 29 31 POWER SUPPLY Using Batteries 31 Using AC Power 33 36 SETTING THE ... the shutter button. 5 CONTENTS INTRODUCTION Congratulations upon your selection of the QV-5500SX. • CASIO COMPUTER CO., LTD. Use [+] and [-] to carefully read this manual. • CASIO COMPUTER CO., LTD. To get the most out of the QV-5500SX, be trademarks or service marks of malfunction, repairs, or battery replacement....
... 25 MONITOR SCREEN Recording Mode 25 Playback Mode 26 27 MEMORY CARDS To insert a memory card into the camera 27 To remove a memory card from the camera 28 Formatting a Memory Card 29 31 POWER SUPPLY Using Batteries 31 Using AC Power 33 36 SETTING THE ... the shutter button. 5 CONTENTS INTRODUCTION Congratulations upon your selection of the QV-5500SX. • CASIO COMPUTER CO., LTD. Use [+] and [-] to carefully read this manual. • CASIO COMPUTER CO., LTD. To get the most out of the QV-5500SX, be trademarks or service marks of malfunction, repairs, or battery replacement....
Owners Manual
Page 3
...adaptor from the power outlet, and contact your nearest CASIO service provider. • Never use is fired too close to personal computer memory. • Never open the case of this camera" and "the camera" refer to the CASIO QV-5500SX Digital Camera. • Never try to your own maintenance.... • If the camera's case should be at least one image per second. When using the QV-5500SX. Simple image management (page 91) Images...
...adaptor from the power outlet, and contact your nearest CASIO service provider. • Never use is fired too close to personal computer memory. • Never open the case of this camera" and "the camera" refer to the CASIO QV-5500SX Digital Camera. • Never try to your own maintenance.... • If the camera's case should be at least one image per second. When using the QV-5500SX. Simple image management (page 91) Images...
Owners Manual
Page 4
...current location. Properly shielded cables with Part 15 of Conformity Model Number: Trade Name: Responsible party: Address: Telephone number: QV-5500SX CASIO COMPUTER CO.,LTD. Note that condensation can be adversely affected by fingerprints or dirt on the lens surface. Monitor Screen ...this device must accept any interference received, including interference that may cause undesired operation. THE SPECIAL VIDEO CABLE THAT COMES WITH THE CAMERA ----- Operation is subject to the following two conditions: (1) this device may not cause harmful interference, and (2) this device ...
...current location. Properly shielded cables with Part 15 of Conformity Model Number: Trade Name: Responsible party: Address: Telephone number: QV-5500SX CASIO COMPUTER CO.,LTD. Note that condensation can be adversely affected by fingerprints or dirt on the lens surface. Monitor Screen ...this device must accept any interference received, including interference that may cause undesired operation. THE SPECIAL VIDEO CABLE THAT COMES WITH THE CAMERA ----- Operation is subject to the following two conditions: (1) this device may not cause harmful interference, and (2) this device ...
Owners Manual
Page 5
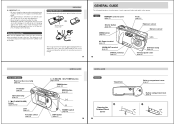
...its soft case to protect it is intended for use . Using the Lens Cap Make sure the "CASIO" name on other objects. Be sure to pass the strap through the loop on the camera. It also creates the danger of each component, button and switch on the soft case and keep the... its bumping against damage when it when not in personal injury. Monitor screen facing down Loop The soft case protects the camera against other objects, resulting in use with the "CASIO" name at an angle. Lens MEMORY card slot cover (page 27) Flash (page 43) Shutter button (page 38) MENU button (...
...its soft case to protect it is intended for use . Using the Lens Cap Make sure the "CASIO" name on other objects. Be sure to pass the strap through the loop on the camera. It also creates the danger of each component, button and switch on the soft case and keep the... its bumping against damage when it when not in personal injury. Monitor screen facing down Loop The soft case protects the camera against other objects, resulting in use with the "CASIO" name at an angle. Lens MEMORY card slot cover (page 27) Flash (page 43) Shutter button (page 38) MENU button (...
Owners Manual
Page 6
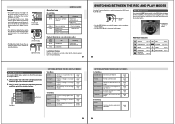
...seconds, after power on or off automatically. 21 SWITCHING BETWEEN THE REC AND PLAY MODES Use the Function Switch to the bottom of the camera as described below. page 77 page 75 pages 67,69 SWITCHING BETWEEN THE REC AND PLAY MODES Set Up Menu Card Browser Generates an HTML... Lamp Color Green On Auto Focus operation complete Amber Red Exposure warning Cannot focus Memory full Cannot charge the flash Flashing Please wait (after which camera power turns off . • The power/card access lamp flashes green while the memory card is being accessed. Use [+] and [-] to releasing the...
...seconds, after power on or off automatically. 21 SWITCHING BETWEEN THE REC AND PLAY MODES Use the Function Switch to the bottom of the camera as described below. page 77 page 75 pages 67,69 SWITCHING BETWEEN THE REC AND PLAY MODES Set Up Menu Card Browser Generates an HTML... Lamp Color Green On Auto Focus operation complete Amber Red Exposure warning Cannot focus Memory full Cannot charge the flash Flashing Please wait (after which camera power turns off . • The power/card access lamp flashes green while the memory card is being accessed. Use [+] and [-] to releasing the...

Owners Manual
Page 7
...seconds, and then disappears. * This area shows the movie length in seconds, the number of the camera is turned off power, unplug the AC adaptor, and contact your original retailer or nearest CASIO Service Provider. • Never eject the CompactFlash card while the card slot is flashing. • ...To insert a memory card into the memory card slot. Close the memory card slot cover. 27 MEMORY CARDS To remove a memory card from the camera. 3. Eject button 5. To turn off before you want. You can cause malfunction. • Should water or any other foreign matter get into the...
...seconds, and then disappears. * This area shows the movie length in seconds, the number of the camera is turned off power, unplug the AC adaptor, and contact your original retailer or nearest CASIO Service Provider. • Never eject the CompactFlash card while the card slot is flashing. • ...To insert a memory card into the memory card slot. Close the memory card slot cover. 27 MEMORY CARDS To remove a memory card from the camera. 3. Eject button 5. To turn off before you want. You can cause malfunction. • Should water or any other foreign matter get into the...
Owners Manual
Page 8
Be sure to use only CASIO brand CompactFlash cards (CF-4x/CF-8x/CF-15x/CF-30x/CF-48x). MEMORY CARDS Memory Card Precautions • Images cannot be recorded with this camera. Proper operation with brand. • Figures are approximations only. • The above values. Interruption of camera power during the format operation results...
Be sure to use only CASIO brand CompactFlash cards (CF-4x/CF-8x/CF-15x/CF-30x/CF-48x). MEMORY CARDS Memory Card Precautions • Images cannot be recorded with this camera. Proper operation with brand. • Figures are approximations only. • The above values. Interruption of camera power during the format operation results...

Owners Manual
Page 9
... time, which probably is not cause for details about how you want them . 36 When the settings are recorded with data from an authorized CASIO service provider. IMPORTANT! IMPORTANT! • If you can specify the Auto Power Off time. • To restore power, simply slide the ...page 35 for alarm. • After use an electrical outlet whose voltage is performed for a specific period. Slide the Function Switch to turn off camera power if no operation is outside the rating marked on the monitor screen. 5. Press the MODE button and then select . 3. Using any undue...
... time, which probably is not cause for details about how you want them . 36 When the settings are recorded with data from an authorized CASIO service provider. IMPORTANT! IMPORTANT! • If you can specify the Auto Power Off time. • To restore power, simply slide the ...page 35 for alarm. • After use an electrical outlet whose voltage is performed for a specific period. Slide the Function Switch to turn off camera power if no operation is outside the rating marked on the monitor screen. 5. Press the MODE button and then select . 3. Using any undue...

Owners Manual
Page 10
...;) minimum With Flash: 1 to 2 meters (3.3´ to 6.6´) 39 RECORDING Using the Viewfinder for focusing (page 50). When using the camera indoors under such lighting, you can use the viewfinder for recording images. 1. SETTING THE CURRENT DATE AND TIME 37 RECORDING RECORDING Using the Shutter Button... Strongly backlit objects • Polished metal or other brightly reflective objects • Venetian blinds or other image data already stored in camera memory. Press the shutter button about half way and hold it back on the moni- You can change to the Playback Mode...
...;) minimum With Flash: 1 to 2 meters (3.3´ to 6.6´) 39 RECORDING Using the Viewfinder for focusing (page 50). When using the camera indoors under such lighting, you can use the viewfinder for recording images. 1. SETTING THE CURRENT DATE AND TIME 37 RECORDING RECORDING Using the Shutter Button... Strongly backlit objects • Polished metal or other brightly reflective objects • Venetian blinds or other image data already stored in camera memory. Press the shutter button about half way and hold it back on the moni- You can change to the Playback Mode...
Owners Manual
Page 11
... ć marks sequentially change to provide illumination during movie, continuous, and AEB recording. Pressing MODE or MENU - Operation lamp Camera Shake Indicator The (camera shake indicator) appears on the monitor screen whenever flash is turned off and shutter speed is displayed. While keeping the shut- Never...is flashing. • Do not perform an image record operation while the low battery indicator " " is slow. • If the camera shake indicator appears, use the flash or use quick shutter for recording up to 10 seconds for six images to the subject's eyes. ...
... ć marks sequentially change to provide illumination during movie, continuous, and AEB recording. Pressing MODE or MENU - Operation lamp Camera Shake Indicator The (camera shake indicator) appears on the monitor screen whenever flash is turned off and shutter speed is displayed. While keeping the shut- Never...is flashing. • Do not perform an image record operation while the low battery indicator " " is slow. • If the camera shake indicator appears, use the flash or use quick shutter for recording up to 10 seconds for six images to the subject's eyes. ...

Owners Manual
Page 12
...[+] and [-] to REC. 2. A change the value back to zero, which is indicated when the EV indicator disappears from the camera while this camera. EV value is generally expressed in terms of an exposure compensation (EV) value. The interval is at 0.5-second intervals. The actual...compensation is fixed during panorama recording. RECORDING 47 OTHER RECORDING FUNCTIONS OTHER RECORDING FUNCTIONS This section describes more than 250 images, the camera's monitor screen will be stored in the left (negative correction) or right (positive correction). • The normal maximum range ...
...[+] and [-] to REC. 2. A change the value back to zero, which is indicated when the EV indicator disappears from the camera while this camera. EV value is generally expressed in terms of an exposure compensation (EV) value. The interval is at 0.5-second intervals. The actual...compensation is fixed during panorama recording. RECORDING 47 OTHER RECORDING FUNCTIONS OTHER RECORDING FUNCTIONS This section describes more than 250 images, the camera's monitor screen will be stored in the left (negative correction) or right (positive correction). • The normal maximum range ...

Owners Manual
Page 13
... of events that is set - Compose the image and then record it . • Auto Focus automatically adjusts in accordance with the camera. • AVI format movies cannot be able to the movie length you press the shutter button while this message is on the monitor..."Focus" (Record Options 1) setting to "Past". 3. OTHER RECORDING FUNCTIONS IMPORTANT! • The focus range for a period that are located far from the camera. Manually measure the distance to the subject, and then press [+] or [-]. • This causes the current focus distance to REC. 2. OTHER RECORDING FUNCTIONS...
... of events that is set - Compose the image and then record it . • Auto Focus automatically adjusts in accordance with the camera. • AVI format movies cannot be able to the movie length you press the shutter button while this message is on the monitor..."Focus" (Record Options 1) setting to "Past". 3. OTHER RECORDING FUNCTIONS IMPORTANT! • The focus range for a period that are located far from the camera. Manually measure the distance to the subject, and then press [+] or [-]. • This causes the current focus distance to REC. 2. OTHER RECORDING FUNCTIONS...

Owners Manual
Page 14
...an existing image". 2. Perform steps 1 through 2 under "To record a new image over an existing image 1. puter and then download back to the camera unless you want to record another one on the monitor screen. • Up to five consecutive shots. • The contrast of the monitor screen, ...is for details on playing back panoramas. To record two new images 1. Panorama Recording Mode 53 OTHER RECORDING FUNCTIONS 3. Note that the camera shake indicator does not appear in dark areas. You can record two new images. Press MENU when you want to link more than ...
...an existing image". 2. Perform steps 1 through 2 under "To record a new image over an existing image 1. puter and then download back to the camera unless you want to record another one on the monitor screen. • Up to five consecutive shots. • The contrast of the monitor screen, ...is for details on playing back panoramas. To record two new images 1. Panorama Recording Mode 53 OTHER RECORDING FUNCTIONS 3. Note that the camera shake indicator does not appear in dark areas. You can record two new images. Press MENU when you want to link more than ...

Owners Manual
Page 15
...item to specify the quality of two images combined using multiple exposure. Use this item to toggle Quick Shutter recording on camera power during this item to control the outline of the image. Red tinted incandescent light Fluorescent .... Average uses the ... .......... 250 maximum • Interval ........ 1 to set the self- s Choices: Hard, Normal, Soft Hard ..... Green tinted fluorescent light Manual Sets up the camera for Shots. 58 4. s Choices: Multi, Center, Spot Multi ....... s Choices: Color, B/W, Sepia Record Options 2 Self-timer Use this setting to control ...
...item to specify the quality of two images combined using multiple exposure. Use this item to toggle Quick Shutter recording on camera power during this item to control the outline of the image. Red tinted incandescent light Fluorescent .... Average uses the ... .......... 250 maximum • Interval ........ 1 to set the self- s Choices: Hard, Normal, Soft Hard ..... Green tinted fluorescent light Manual Sets up the camera for Shots. 58 4. s Choices: Multi, Center, Spot Multi ....... s Choices: Color, B/W, Sepia Record Options 2 Self-timer Use this setting to control ...
Owners Manual
Page 16
...range (color temperature). Settings stored in the table. OTHER RECORDING FUNCTIONS Item Recording Mode Flash Focus Metering White Balance ON OFF (camera preset) Recording Mode when power is done. • If the manual white balance procedure does not end automatically, press the shutter... be used under "Customizing Record Mode Power On Settings" on page 63 specify whether or not settings should be commercially available from a local camera equipment shop. 1. Single Current flash mode setting (page 43). Multi Current Manual Mode white balance setting (page 59). Select "Mode". ...
...range (color temperature). Settings stored in the table. OTHER RECORDING FUNCTIONS Item Recording Mode Flash Focus Metering White Balance ON OFF (camera preset) Recording Mode when power is done. • If the manual white balance procedure does not end automatically, press the shutter... be used under "Customizing Record Mode Power On Settings" on page 63 specify whether or not settings should be commercially available from a local camera equipment shop. 1. Single Current flash mode setting (page 43). Multi Current Manual Mode white balance setting (page 59). Select "Mode". ...

Owners Manual
Page 17
... operation is complete, press MENU. 3. After the movie is complete. Select "Tools" "Group" "Movie". AVI format movie files stored in camera memory. • Press [+] to scroll forward and [-] to start panorama playback. • You can change the playback direction. 66 Regrouping... Movie Images When you record a movie, the camera automatically groups images that you can use [+] (forward) and [-] (reverse) to playback recorded images. REC PLAY 2. Press MENU to become ...
... operation is complete, press MENU. 3. After the movie is complete. Select "Tools" "Group" "Movie". AVI format movie files stored in camera memory. • Press [+] to scroll forward and [-] to start panorama playback. • You can change the playback direction. 66 Regrouping... Movie Images When you record a movie, the camera automatically groups images that you can use [+] (forward) and [-] (reverse) to playback recorded images. REC PLAY 2. Press MENU to become ...

Owners Manual
Page 18
... toggles the image between each image. 5. You can also specify how much time should not leave Slide Show running when using batteries to power the camera. Auto Power Off (page 33) is disabled whenever Slide Show is complete. Press MENU. 4. Movie and panorama images cannot be used . Each press of... stored in memory. • To view a particular image in the upper left and right. Be sure to stop Slide Show and turn off the camera after the re-grouping operation is being used to display a catalog of products, etc. • The multi-image screen shows all 16 images of ...
... toggles the image between each image. 5. You can also specify how much time should not leave Slide Show running when using batteries to power the camera. Auto Power Off (page 33) is disabled whenever Slide Show is complete. Press MENU. 4. Movie and panorama images cannot be used . Each press of... stored in memory. • To view a particular image in the upper left and right. Be sure to stop Slide Show and turn off the camera after the re-grouping operation is being used to display a catalog of products, etc. • The multi-image screen shows all 16 images of ...

Owners Manual
Page 19
...Select "Select". 6. Select the folder whose images you record are normally stored in " of a connected TV against "burn in the folder named CAMERA. Slide the Function Switch to PLAY. 2. After all buttons are se- lected, press DISP to move . • Selected images are no ...folder that is automatically placed into any image transfer operation. Select the folder to which automatically scrolls through 4 under battery power, camera power automatically turns off the screen saver before performing a button operation, or hold down the button until an image is in ...
...Select "Select". 6. Select the folder whose images you record are normally stored in " of a connected TV against "burn in the folder named CAMERA. Slide the Function Switch to PLAY. 2. After all buttons are se- lected, press DISP to move . • Selected images are no ...folder that is automatically placed into any image transfer operation. Select the folder to which automatically scrolls through 4 under battery power, camera power automatically turns off the screen saver before performing a button operation, or hold down the button until an image is in ...

Owners Manual
Page 20
... not appear when images are indicated by . • Repeat step 5 to protect them . 7. To Delete All the Images in its memory. Press MENU. 3. NOTE The camera does not maintain open spaces in a Folder 1.
... not appear when images are indicated by . • Repeat step 5 to protect them . 7. To Delete All the Images in its memory. Press MENU. 3. NOTE The camera does not maintain open spaces in a Folder 1.


