Owners Manual
Page 4
... 23 Category Search mode 23 Channel/Artist/Song Search mode 23 Quick Search Function 23 Receiving Weather or Traffic Information from SAT Radio 23 Instant Replay Function (SIRIUS only) ......... 24 Changing the Display 24 Setting the Auxiliary Data Field Display ....... 24 iPod&#...Changer (Optional) Controlling CD Changer (Optional 28 Playing MP3 Files with the CD Changer (Optional 28 Multi-Changer Selection (Optional 28 Remote Control Controls on Remote Control 29 Battery Replacement 30 Information In Case of Difficulty 31 Specifications 33 Installation and Connections Warning 34...
... 23 Category Search mode 23 Channel/Artist/Song Search mode 23 Quick Search Function 23 Receiving Weather or Traffic Information from SAT Radio 23 Instant Replay Function (SIRIUS only) ......... 24 Changing the Display 24 Setting the Auxiliary Data Field Display ....... 24 iPod&#...Changer (Optional) Controlling CD Changer (Optional 28 Playing MP3 Files with the CD Changer (Optional 28 Multi-Changer Selection (Optional 28 Remote Control Controls on Remote Control 29 Battery Replacement 30 Information In Case of Difficulty 31 Specifications 33 Installation and Connections Warning 34...
Owners Manual
Page 6
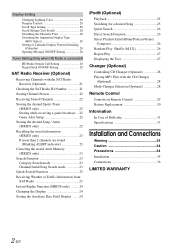
...while handling. "Error" will be out of mild neutral detergent before cleaning the disc. When a new disc is heavily soiled, dampen a clean, soft cloth in Alpine CD players. Use of the disc. Hold the disc so you will not scratch the disc or damage the player. Do not attempt to use round... write on the surface. To remove the bumps, rub the inside of the center hole and outside edge of the disc could cause the CD player to be installed in skips, but this could inhibit proper loading of special shape discs may result in a location subjected to the mechanism. If "Error" ...
...while handling. "Error" will be out of mild neutral detergent before cleaning the disc. When a new disc is heavily soiled, dampen a clean, soft cloth in Alpine CD players. Use of the disc. Hold the disc so you will not scratch the disc or damage the player. Do not attempt to use round... write on the surface. To remove the bumps, rub the inside of the center hole and outside edge of the disc could cause the CD player to be installed in skips, but this could inhibit proper loading of special shape discs may result in a location subjected to the mechanism. If "Error" ...
Owners Manual
Page 36
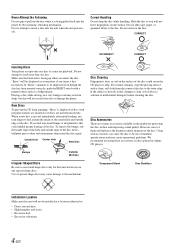
...Alpine dealer. • The CDA-9885 uses female RCA-type jacks for connection to other than designated parts may damage this unit may need an adaptor to connect other equipment. If swallowed, consult a physician immediately. ARRANGE THE WIRING SO IT IS NOT CRIMPED OR PINCHED BY A SHARP METAL EDGE. Avoid installing...may obstruct forward vision or hamper movement etc. Route the cables and wiring away from the (-) battery post before installing your CDA-9885. Failure to take precautions so as the steering wheel, gear lever, brake pedals, etc. This will exceed ...
...Alpine dealer. • The CDA-9885 uses female RCA-type jacks for connection to other than designated parts may damage this unit may need an adaptor to connect other equipment. If swallowed, consult a physician immediately. ARRANGE THE WIRING SO IT IS NOT CRIMPED OR PINCHED BY A SHARP METAL EDGE. Avoid installing...may obstruct forward vision or hamper movement etc. Route the cables and wiring away from the (-) battery post before installing your CDA-9885. Failure to take precautions so as the steering wheel, gear lever, brake pedals, etc. This will exceed ...

Owners Manual
Page 37
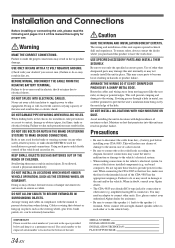
...the main unit (see "Removal" on either side. Removal 1. Remove the mounting sleeve from the left rear of the CDA-9885 according to details described in the CONNECTlONS section. 3 Slide the CDA-9885 into the unit, along the guides on page 35). 2 Hex Nut (M5) *2 Screw Metal Mounting Strap Ground ... Caution When you install this unit in the dashboard, the pressure plates may be bent slightly to remedy the problem. If the detachable front panel is properly locked and will not accidentally come out from the mounting sleeve. Connect all other leads of the CDA-9885. This ensures that...
...the main unit (see "Removal" on either side. Removal 1. Remove the mounting sleeve from the left rear of the CDA-9885 according to details described in the CONNECTlONS section. 3 Slide the CDA-9885 into the unit, along the guides on page 35). 2 Hex Nut (M5) *2 Screw Metal Mounting Strap Ground ... Caution When you install this unit in the dashboard, the pressure plates may be bent slightly to remedy the problem. If the detachable front panel is properly locked and will not accidentally come out from the mounting sleeve. Connect all other leads of the CDA-9885. This ensures that...
Owners Manual
Page 41
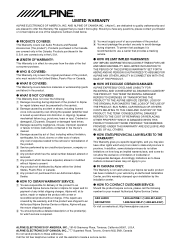
.... punctures, tears or rips). C Damage caused by the installation center. Any cost or expense related to follow instructions contained in the U.S.A. G Any product which vary from state to state and province to an Authorized Alpine Service Center or Alpine, Alpine will , at ; H Any product not distributed by the... This Warranty gives you specific legal rights, and you may not apply to you read it is not valid unless your Alpine car audio product has been installed in the product. Accordingly, limitations as to use a carrier that you . IN CANADA ONLY: This Warranty is recommended ...
.... punctures, tears or rips). C Damage caused by the installation center. Any cost or expense related to follow instructions contained in the U.S.A. G Any product which vary from state to state and province to an Authorized Alpine Service Center or Alpine, Alpine will , at ; H Any product not distributed by the... This Warranty gives you specific legal rights, and you may not apply to you read it is not valid unless your Alpine car audio product has been installed in the product. Accordingly, limitations as to use a carrier that you . IN CANADA ONLY: This Warranty is recommended ...


