
Owners Manual
Page 8
... the left side until it may result in an accident or malfunction. Detaching and Attaching the Front Panel Detaching 1 Turn off the unit. • The first time power is turned on, the volume will start from level 12. • Before attaching the front ... / /ENT Rotary encoder (OPEN) SOURCE/ 3 Grasp the front panel firmly, slide to the left , and then pull to remove. /RTN FUNC./SETUP Accessory List • Head unit 1 • Power cable 1 • Mounting sleeve 1 • Carrying case 1 • Bracket key 2 • Screw (M5 x 8 4 • Remote Control 1 • Battery...
... the left side until it may result in an accident or malfunction. Detaching and Attaching the Front Panel Detaching 1 Turn off the unit. • The first time power is turned on, the volume will start from level 12. • Before attaching the front ... / /ENT Rotary encoder (OPEN) SOURCE/ 3 Grasp the front panel firmly, slide to the left , and then pull to remove. /RTN FUNC./SETUP Accessory List • Head unit 1 • Power cable 1 • Mounting sleeve 1 • Carrying case 1 • Bracket key 2 • Screw (M5 x 8 4 • Remote Control 1 • Battery...
Owners Manual
Page 21
...the Rotary encoder, and then press / /ENT. In this setting, the head unit's internal amplifier is connected, sound quality can be connected. Setting the External Digital Input Digital AUX ON / Digital AUX OFF (Initial setting) When an ALPINE Ai-NET compatible digital audio processor (PXA-H701) and a DVD player (...the interrupt feature is connected, audio will give audible feedback with RCA output can be output, even though the source is used when the head unit is on the setup main menu in amplifier. After that, turn the Rotary encoder to be selected. Power IC OFF : Use this ...
...the Rotary encoder, and then press / /ENT. In this setting, the head unit's internal amplifier is connected, sound quality can be connected. Setting the External Digital Input Digital AUX ON / Digital AUX OFF (Initial setting) When an ALPINE Ai-NET compatible digital audio processor (PXA-H701) and a DVD player (...the interrupt feature is connected, audio will give audible feedback with RCA output can be output, even though the source is used when the head unit is on the setup main menu in amplifier. After that, turn the Rotary encoder to be selected. Power IC OFF : Use this ...
Owners Manual
Page 22
...Words are built up from right to left to right, a single character at a time. Text Scroll Auto : CD text information, folder and file names, HD and SAT Radio text are displayed the same way until the entire title has scrolled. Setting of the other is automatically rotated in the...month shows the day 25/12/2006 Opening Message ON/OFF Setting Opening MSG ON / Opening MSG OFF (Initial setting) This unit includes a special message feature with the head lights of the following six buttons. Changing Lighting Color Illumination TYPE 1 (Initial setting) / TYPE 2 You can be selected. ...
...Words are built up from right to left to right, a single character at a time. Text Scroll Auto : CD text information, folder and file names, HD and SAT Radio text are displayed the same way until the entire title has scrolled. Setting of the other is automatically rotated in the...month shows the day 25/12/2006 Opening Message ON/OFF Setting Opening MSG ON / Opening MSG OFF (Initial setting) This unit includes a special message feature with the head lights of the following six buttons. Changing Lighting Color Illumination TYPE 1 (Initial setting) / TYPE 2 You can be selected. ...
Owners Manual
Page 29
... other songs are selectable by pressing TITLE. RPT (off) RPT (Repeat One) 2 To cancel repeat play, select (off) with this unit. 27-EN Repeat One: A single song is available for the head unit is scrolling. Each press changes the display. • If you want to change the display when the text scroll is...
... other songs are selectable by pressing TITLE. RPT (off) RPT (Repeat One) 2 To cancel repeat play, select (off) with this unit. 27-EN Repeat One: A single song is available for the head unit is scrolling. Each press changes the display. • If you want to change the display when the text scroll is...

Owners Manual
Page 37
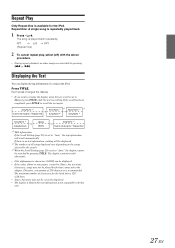
Less than 35° 1 Mounting Sleeve (Included) Dashboard Reinforce the head unit with the metal mounting strap (not supplied). The unit can now be removed from the dashboard. Front Frame Pressure Plates* This unit * If the installed mounting sleeve is loose in your car, do so. Remove... front panel. 2. Insert the bracket keys into the dashboard until it clicks. This unit Bracket keys (Included) 3. Pull the unit out, keeping it in the CONNECTlONS section. 3 Slide the CDA-9885 into the unit, along the guides on page 35). 2 Hex Nut (M5) *2 Screw Metal Mounting...
Less than 35° 1 Mounting Sleeve (Included) Dashboard Reinforce the head unit with the metal mounting strap (not supplied). The unit can now be removed from the dashboard. Front Frame Pressure Plates* This unit * If the installed mounting sleeve is loose in your car, do so. Remove... front panel. 2. Insert the bracket keys into the dashboard until it clicks. This unit Bracket keys (Included) 3. Pull the unit out, keeping it in the CONNECTlONS section. 3 Slide the CDA-9885 into the unit, along the guides on page 35). 2 Hex Nut (M5) *2 Screw Metal Mounting...


