User Guide
Page 29
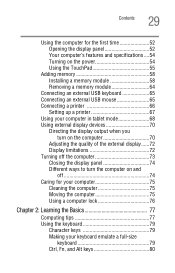
... time 52 Opening the display panel 52 Your computer's features and specifications ....54 Turning on the power 54 Using the TouchPad 55 Adding memory 58 Installing a memory module 58 Removing a memory module 64 Connecting an external USB keyboard 65 Connecting an external USB mouse 65 Connecting a printer 66 Setting up a printer 67 Using...
... time 52 Opening the display panel 52 Your computer's features and specifications ....54 Turning on the power 54 Using the TouchPad 55 Adding memory 58 Installing a memory module 58 Removing a memory module 64 Connecting an external USB keyboard 65 Connecting an external USB mouse 65 Connecting a printer 66 Setting up a printer 67 Using...
User Guide
Page 33
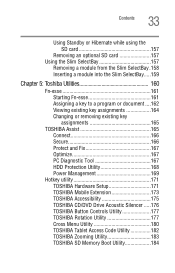
...the Slim SelectBay 157 Removing a module from the Slim SelectBay .158 Inserting a module into the Slim SelectBay.....159 Chapter 5: Toshiba Utilities 160 Fn-esse 161 Starting Fn-esse 161 Assigning a key to a program or document ....162 Viewing existing key ... utility 171 TOSHIBA Hardware Setup 171 TOSHIBA Mobile Extension 173 TOSHIBA Accessibility 175 TOSHIBA CD/DVD Drive Acoustic Silencer .....176 TOSHIBA Button Controls Utility 177 TOSHIBA Rotation Utility 177 Cross Menu Utility 180 TOSHIBA Tablet Access Code Utility 182 TOSHIBA Zooming Utility 183 TOSHIBA SD Memory Boot Utility ...
...the Slim SelectBay 157 Removing a module from the Slim SelectBay .158 Inserting a module into the Slim SelectBay.....159 Chapter 5: Toshiba Utilities 160 Fn-esse 161 Starting Fn-esse 161 Assigning a key to a program or document ....162 Viewing existing key ... utility 171 TOSHIBA Hardware Setup 171 TOSHIBA Mobile Extension 173 TOSHIBA Accessibility 175 TOSHIBA CD/DVD Drive Acoustic Silencer .....176 TOSHIBA Button Controls Utility 177 TOSHIBA Rotation Utility 177 Cross Menu Utility 180 TOSHIBA Tablet Access Code Utility 182 TOSHIBA Zooming Utility 183 TOSHIBA SD Memory Boot Utility ...
User Guide
Page 34
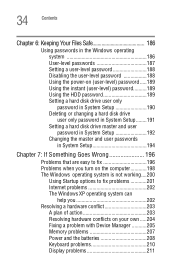
... can help you 202 Resolving a hardware conflict 203 A plan of action 203 Resolving hardware conflicts on your own .....204 Fixing a problem with Device Manager ...........205 Memory problems 207 Power and the batteries 208 Keyboard problems 210 Display problems 211
... can help you 202 Resolving a hardware conflict 203 A plan of action 203 Resolving hardware conflicts on your own .....204 Fixing a problem with Device Manager ...........205 Memory problems 207 Power and the batteries 208 Keyboard problems 210 Display problems 211
User Guide
Page 46
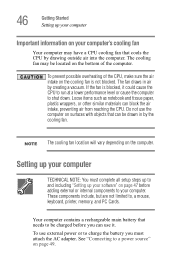
... and including "Setting up your computer Important information on your computer TECHNICAL NOTE: You must attach the AC adapter. See "Connecting to , a mouse, keyboard, printer, memory, and PC Cards. The cooling fan may have a CPU cooling fan that cools the CPU by creating a vacuum. These components include, but are not limited...
... and including "Setting up your computer Important information on your computer TECHNICAL NOTE: You must attach the AC adapter. See "Connecting to , a mouse, keyboard, printer, memory, and PC Cards. The cooling fan may have a CPU cooling fan that cools the CPU by creating a vacuum. These components include, but are not limited...
User Guide
Page 48
... send the Customer periodic updates, announcements, and special offers applicable to complete the setup process. Registering your computer with Toshiba NOTE If you are connecting your computer to a network, consult your system administrator before you choose your computer name ... during the initial start up process of your computer restarts automatically. Customer failure to the Toshiba web site at www.register.toshiba.com. Once you can be connected to : ❖ Add more memory (see "Adding memory" on page 58) ❖ Connect a mouse (see "Connecting an external USB keyboard...
... send the Customer periodic updates, announcements, and special offers applicable to complete the setup process. Registering your computer with Toshiba NOTE If you are connecting your computer to a network, consult your system administrator before you choose your computer name ... during the initial start up process of your computer restarts automatically. Customer failure to the Toshiba web site at www.register.toshiba.com. Once you can be connected to : ❖ Add more memory (see "Adding memory" on page 58) ❖ Connect a mouse (see "Connecting an external USB keyboard...

User Guide
Page 58
... this happens, let the module cool to run most of the computer. NOTE Before adding external devices or memory, Toshiba recommends setting up your software" on memory options, check the accessories information that is in the memory module slot on the base of today's popular applications. See "Setting up your system or visit accessories...
... this happens, let the module cool to run most of the computer. NOTE Before adding external devices or memory, Toshiba recommends setting up your software" on memory options, check the accessories information that is in the memory module slot on the base of today's popular applications. See "Setting up your system or visit accessories...
User Guide
Page 59
... turn the computer over, make sure that the computer display is properly closed and is in tablet mode. Before you install or remove a memory module while the computer is not in Standby or Hibernation mode, data will be lost. The Turn off the computer. 3 Unplug and remove... any cables connected to the screen. 5 Remove the battery. Getting Started Adding memory 59 Installing a memory module with the computer's power on page 122. 6 Locate the memory module slot cover. If the computer is on, click Start, Turn Off Computer. The operating system turns off...
... turn the computer over, make sure that the computer display is properly closed and is in tablet mode. Before you install or remove a memory module while the computer is not in Standby or Hibernation mode, data will be lost. The Turn off the computer. 3 Unplug and remove... any cables connected to the screen. 5 Remove the battery. Getting Started Adding memory 59 Installing a memory module with the computer's power on page 122. 6 Locate the memory module slot cover. If the computer is on, click Start, Turn Off Computer. The operating system turns off...
User Guide
Page 60
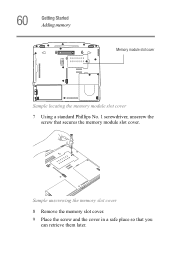
Sample unscrewing the memory slot cover 8 Remove the memory slot cover. 9 Place the screw and the cover in a safe place so that secures the memory module slot cover. 60 Getting Started Adding memory Memory module slot cover Sample locating the memory module slot cover 7 Using a standard Phillips No. 1 screwdriver, unscrew the screw that you can retrieve them later.
Sample unscrewing the memory slot cover 8 Remove the memory slot cover. 9 Place the screw and the cover in a safe place so that secures the memory module slot cover. 60 Getting Started Adding memory Memory module slot cover Sample locating the memory module slot cover 7 Using a standard Phillips No. 1 screwdriver, unscrew the screw that you can retrieve them later.
User Guide
Page 61
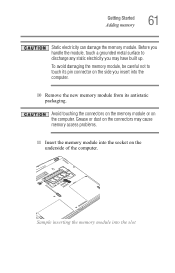
... the connectors on the memory module or on the side you insert into the computer. 10 Remove the new memory module from its antistatic packaging. Grease or dust on the underside of the computer. Before you may cause memory access problems. 11 Insert the memory module into the slot To... avoid damaging the memory module, be careful not to discharge any static electricity you handle the module, touch a grounded metal...
... the connectors on the memory module or on the side you insert into the computer. 10 Remove the new memory module from its antistatic packaging. Grease or dust on the underside of the computer. Before you may cause memory access problems. 11 Insert the memory module into the slot To... avoid damaging the memory module, be careful not to discharge any static electricity you handle the module, touch a grounded metal...
User Guide
Page 62
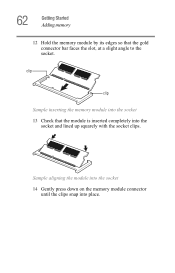
62 Getting Started Adding memory 12 Hold the memory module by its edges so that the module is inserted completely into the socket and lined up squarely with the socket clips. Sample aligning the module into the socket 14 Gently press down on the memory module connector until the clips snap into the socket 13 Check that the gold connector bar faces the slot, at a slight angle to the socket. clip clip Sample inserting the memory module into place.
62 Getting Started Adding memory 12 Hold the memory module by its edges so that the module is inserted completely into the socket and lined up squarely with the socket clips. Sample aligning the module into the socket 14 Gently press down on the memory module connector until the clips snap into the socket 13 Check that the gold connector bar faces the slot, at a slight angle to the socket. clip clip Sample inserting the memory module into place.
User Guide
Page 63
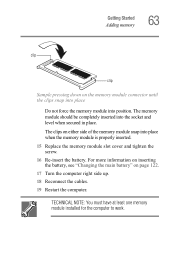
.... TECHNICAL NOTE: You must have at least one memory module installed for the computer to work. Getting Started Adding memory 63 clip clip Sample pressing down on the memory module connector until the clips snap into place Do not force the memory module into the socket and level when secured in .... For more information on inserting the battery, see "Changing the main battery" on either side of the memory module snap into place when the memory module is properly inserted. 15 Replace the memory module slot cover and tighten the screw. 16 Re-insert the battery. The clips on page 122. 17...
.... TECHNICAL NOTE: You must have at least one memory module installed for the computer to work. Getting Started Adding memory 63 clip clip Sample pressing down on the memory module connector until the clips snap into place Do not force the memory module into the socket and level when secured in .... For more information on inserting the battery, see "Changing the main battery" on either side of the memory module snap into place when the memory module is properly inserted. 15 Replace the memory module slot cover and tighten the screw. 16 Re-insert the battery. The clips on page 122. 17...
User Guide
Page 64
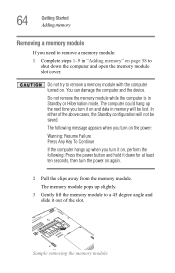
...on, perform the following: Press the power button and hold it down the computer and open the memory module slot cover. The computer could hang up slightly. 3 Gently lift the memory module to a 45 degree angle and slide it on page 58 to shut down for at least... turn it out of the above cases, the Standby configuration will be saved. Sample removing the memory module 64 Getting Started Adding memory Removing a memory module If you need to remove a memory module: 1 Complete steps 1-9 in "Adding memory" on and data in Standby or Hibernation mode. In either of the slot.
...on, perform the following: Press the power button and hold it down the computer and open the memory module slot cover. The computer could hang up slightly. 3 Gently lift the memory module to a 45 degree angle and slide it on page 58 to shut down for at least... turn it out of the above cases, the Standby configuration will be saved. Sample removing the memory module 64 Getting Started Adding memory Removing a memory module If you need to remove a memory module: 1 Complete steps 1-9 in "Adding memory" on and data in Standby or Hibernation mode. In either of the slot.
User Guide
Page 65
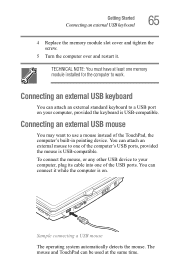
... to work. To connect the mouse, or any other USB device to a USB port on . Getting Started Connecting an external USB keyboard 65 4 Replace the memory module slot cover and tighten the screw. 5 Turn the computer over and restart it while the computer is on your computer, plug its cable into...
... to work. To connect the mouse, or any other USB device to a USB port on . Getting Started Connecting an external USB keyboard 65 4 Replace the memory module slot cover and tighten the screw. 5 Turn the computer over and restart it while the computer is on your computer, plug its cable into...
User Guide
Page 77
Your work temporarily stays in the computer's memory until you save feature which you must restart your computer, or your file to the hard disk at preset intervals. Your computer can turn on ...
Your work temporarily stays in the computer's memory until you save feature which you must restart your computer, or your file to the hard disk at preset intervals. Your computer can turn on ...
User Guide
Page 97
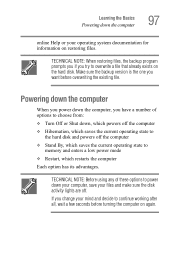
... Help or your files and make sure the disk activity lights are off the computer ❖ Stand By, which saves the current operating state to memory and enters a low power mode ❖ Restart, which saves the current operating state to continue working after all, wait a few seconds before overwriting the existing...
... Help or your files and make sure the disk activity lights are off the computer ❖ Stand By, which saves the current operating state to memory and enters a low power mode ❖ Restart, which saves the current operating state to continue working after all, wait a few seconds before overwriting the existing...
User Guide
Page 98
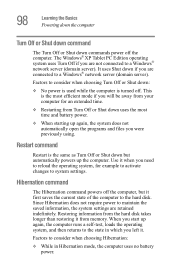
... to a Windows® network server (domain server). The Windows® XP Tablet PC Edition operating system uses Turn Off if you will be away from memory.
... to a Windows® network server (domain server). The Windows® XP Tablet PC Edition operating system uses Turn Off if you will be away from memory.
User Guide
Page 99
... option, because information is in Standby mode, the computer uses some battery power. Be sure to the state in memory so that, when you restart the computer, you can continue working from memory. ❖ On restarting, the computer returns to save your unsaved information will be lost if the battery discharges while...
... option, because information is in Standby mode, the computer uses some battery power. Be sure to the state in memory so that, when you restart the computer, you can continue working from memory. ❖ On restarting, the computer returns to save your unsaved information will be lost if the battery discharges while...
User Guide
Page 106
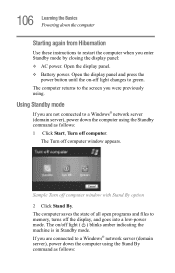
... to the screen you are connected to a Windows® network server (domain server), power down the computer Starting again from Hibernation Use these instructions to memory, turns off the display, and goes into a low-power mode. 106 Learning the Basics Powering down the computer using the Stand By command as follows...
... to the screen you are connected to a Windows® network server (domain server), power down the computer Starting again from Hibernation Use these instructions to memory, turns off the display, and goes into a low-power mode. 106 Learning the Basics Powering down the computer using the Stand By command as follows...
User Guide
Page 107
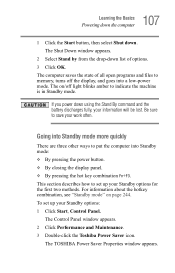
... low-power mode. The Control Panel window appears. 2 Click Performance and Maintenance. 3 Double-click the Toshiba Power Saver icon. The computer saves the state of options. 3 Click OK. Be sure to memory, turns off light blinks amber to set up your Standby options: 1 Click Start, Control Panel. 107 ...all open programs and files to save your information will be lost. To set up your Standby options for the first two methods. The TOSHIBA Power Saver Properties window appears. The Shut Down window appears. 2 Select Stand by from the drop-down . This section describes how ...
... low-power mode. The Control Panel window appears. 2 Click Performance and Maintenance. 3 Double-click the Toshiba Power Saver icon. The computer saves the state of options. 3 Click OK. Be sure to memory, turns off light blinks amber to set up your Standby options: 1 Click Start, Control Panel. 107 ...all open programs and files to save your information will be lost. To set up your Standby options for the first two methods. The TOSHIBA Power Saver Properties window appears. The Shut Down window appears. 2 Select Stand by from the drop-down . This section describes how ...
User Guide
Page 112
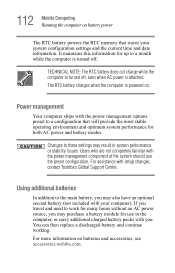
...power management options preset to the main battery, you may also have an optional second battery (not included with setup changes, contact Toshiba's Global Support Centre. For assistance with your system configuration settings and the current time and date information. Using additional batteries In addition... even when AC power is turned off. The RTC battery charges when the computer is powered on batteries and accessories, see accessories.toshiba.com. For more information on . You can then replace a discharged battery and continue working. 112 Mobile Computing Running the computer ...
...power management options preset to the main battery, you may also have an optional second battery (not included with setup changes, contact Toshiba's Global Support Centre. For assistance with your system configuration settings and the current time and date information. Using additional batteries In addition... even when AC power is turned off. The RTC battery charges when the computer is powered on batteries and accessories, see accessories.toshiba.com. For more information on . You can then replace a discharged battery and continue working. 112 Mobile Computing Running the computer ...


