Brochure
Page 2
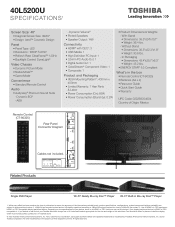
... Native Mode are the property of Origin: Mexico Rear Panel Connector Diagram Cables not included. All other trademarks are registered trademarks or trademarks of the television. Dynamic Volume® • Ported Speakers • Speaker Output: 14W Connectivity • HDMI® with CEC3: 3 • USB Media: 1 • High Definition PC Input: 1 • 3.5mm PC Audio Out: 1 • Digital Audio Out: 1 • ColorStream® Component Video: 1 • Composite: 1 Product and Packaging • VESA Mounting Pattern4...
... Native Mode are the property of Origin: Mexico Rear Panel Connector Diagram Cables not included. All other trademarks are registered trademarks or trademarks of the television. Dynamic Volume® • Ported Speakers • Speaker Output: 14W Connectivity • HDMI® with CEC3: 3 • USB Media: 1 • High Definition PC Input: 1 • 3.5mm PC Audio Out: 1 • Digital Audio Out: 1 • ColorStream® Component Video: 1 • Composite: 1 Product and Packaging • VESA Mounting Pattern4...
User Guide
Page 2
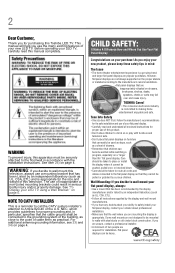
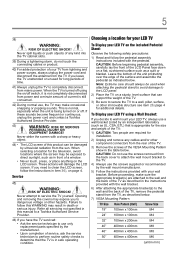
... furniture and television sets. • Don't place flat panel displays on page 5. TOSHIBA Cares! • The consumer electronics industry is a reminder to call the CATV system installer's attention to walls with the installation instructions. This manual will help you decide to the floor/wall in serious bodily injury and/or property damage. The use the many exciting features of inappropriate or non-Listed mounting brackets could result...
... furniture and television sets. • Don't place flat panel displays on page 5. TOSHIBA Cares! • The consumer electronics industry is a reminder to call the CATV system installer's attention to walls with the installation instructions. This manual will help you decide to the floor/wall in serious bodily injury and/or property damage. The use the many exciting features of inappropriate or non-Listed mounting brackets could result...
User Guide
Page 3
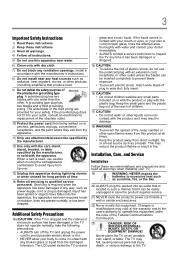
... or grounding type plug. The LCD panel inside a wall or similar enclosed area. 22) Never modify this equipment. The TV may reduce the product lifetime or result in case the product requires service. 21) NEVER route the product's power cord inside the TV contains glass and a toxic liquid. Installation, Care, and Service Installation Follow these instructions. 3) Heed all warnings. 4) Follow all times. •...
... or grounding type plug. The LCD panel inside a wall or similar enclosed area. 22) Never modify this equipment. The TV may reduce the product lifetime or result in case the product requires service. 21) NEVER route the product's power cord inside the TV contains glass and a toxic liquid. Installation, Care, and Service Installation Follow these instructions. 3) Heed all warnings. 4) Follow all times. •...
User Guide
Page 5
... connecting cables or product. 40) For added protection of the VESA Mounting Pattern show in safe operating condition. CAUTION: Do not use the screws removed from mains power. Opening and removing the covers may make sure the appropriate bracket(s) are required for the size and weight of the TV: 1) CAUTION: Two people are attached to the wall and the back of the TV, remove the pedestal stand...
... connecting cables or product. 40) For added protection of the VESA Mounting Pattern show in safe operating condition. CAUTION: Do not use the screws removed from mains power. Opening and removing the covers may make sure the appropriate bracket(s) are required for the size and weight of the TV: 1) CAUTION: Two people are attached to the wall and the back of the TV, remove the pedestal stand...
User Guide
Page 7
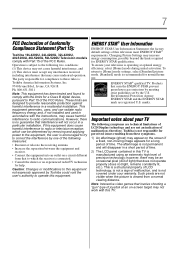
... by removing and applying power to the equipment, the user is : Toshiba America Information Systems, Inc. 9740 Irvine Blvd., Irvine, CA 92618. If this television meet ENERGY STAR® requirements. marks. The party responsible for help. ENERGY STAR® qualified TV. 7 FCC Declaration of Conformity Compliance Statement (Part 15): Toshiba 19L4200U, 24L4200U, 32L4200U, 40L5200U, 46L5200U, 50L5200U Television models comply with the instructions...
... by removing and applying power to the equipment, the user is : Toshiba America Information Systems, Inc. 9740 Irvine Blvd., Irvine, CA 92618. If this television meet ENERGY STAR® requirements. marks. The party responsible for help. ENERGY STAR® qualified TV. 7 FCC Declaration of Conformity Compliance Statement (Part 15): Toshiba 19L4200U, 24L4200U, 32L4200U, 40L5200U, 46L5200U, 50L5200U Television models comply with the instructions...
User Guide
Page 13
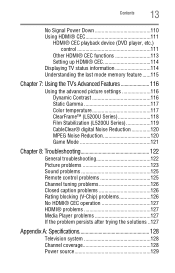
... Series 118 Film Stabilization (L5200U Series 119 CableClear® digital Noise Reduction 120 MPEG Noise Reduction 120 Game Mode 121 Chapter 8: Troubleshooting 122 General troubleshooting 122 Picture problems 123 Sound problems 125 Remote control problems 125 Channel tuning problems 126 Closed caption problems 126 Rating blocking (V-Chip) problems 126 No HDMI® CEC operation 127 HDMI® problems 127 Media Player problems 127 If the problem persists after trying the solutions ..127 Appendix A: Specifications 128 Television system 128 Channel coverage 128 Power source...
... Series 118 Film Stabilization (L5200U Series 119 CableClear® digital Noise Reduction 120 MPEG Noise Reduction 120 Game Mode 121 Chapter 8: Troubleshooting 122 General troubleshooting 122 Picture problems 123 Sound problems 125 Remote control problems 125 Channel tuning problems 126 Closed caption problems 126 Rating blocking (V-Chip) problems 126 No HDMI® CEC operation 127 HDMI® problems 127 Media Player problems 127 If the problem persists after trying the solutions ..127 Appendix A: Specifications 128 Television system 128 Channel coverage 128 Power source...
User Guide
Page 20
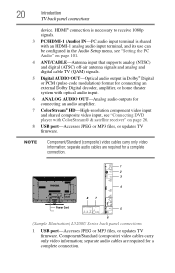
...-resolution component video input and shared composite video input, see "Connecting DVD player with ColorStream® & satellite receiver" on page 101. 4 ANT/CABLE-Antenna input that supports analog (NTSC) and digital (ATSC) off-air antenna signals and analog and digital cable TV (QAM) signals. 5 Digital AUDIO OUT-Optical audio output in Dolby® Digital or PCM (pulse-code modulation) format for connecting an external Dolby Digital decoder, amplifier, or home theater system with an HDMI-1 analog audio input terminal, and its use can be configured in the Audio Setup menu, see "Setting...
...-resolution component video input and shared composite video input, see "Connecting DVD player with ColorStream® & satellite receiver" on page 101. 4 ANT/CABLE-Antenna input that supports analog (NTSC) and digital (ATSC) off-air antenna signals and analog and digital cable TV (QAM) signals. 5 Digital AUDIO OUT-Optical audio output in Dolby® Digital or PCM (pulse-code modulation) format for connecting an external Dolby Digital decoder, amplifier, or home theater system with an HDMI-1 analog audio input terminal, and its use can be configured in the Audio Setup menu, see "Setting...
User Guide
Page 21
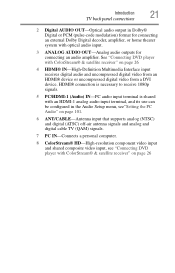
...input. 3 ANALOG AUDIO OUT-Analog audio outputs for connecting an audio amplifier. Introduction 21 TV back panel connections 2 Digital AUDIO OUT-Optical audio output in the Audio Setup menu, see"Setting the PC Audio" on page 101. 6 ANT/CABLE-Antenna input that supports analog (NTSC) and digital (ATSC) off-air antenna signals and analog and digital cable TV (QAM) signals. 7 PC IN-Connects a personal computer. 8 ColorStream® HD-High-resolution component video input and shared composite video input, see "Connecting DVD player with ColorStream® & satellite receiver" on page 26 4 HDMI...
...input. 3 ANALOG AUDIO OUT-Analog audio outputs for connecting an audio amplifier. Introduction 21 TV back panel connections 2 Digital AUDIO OUT-Optical audio output in the Audio Setup menu, see"Setting the PC Audio" on page 101. 6 ANT/CABLE-Antenna input that supports analog (NTSC) and digital (ATSC) off-air antenna signals and analog and digital cable TV (QAM) signals. 7 PC IN-Connects a personal computer. 8 ColorStream® HD-High-resolution component video input and shared composite video input, see "Connecting DVD player with ColorStream® & satellite receiver" on page 26 4 HDMI...
User Guide
Page 26
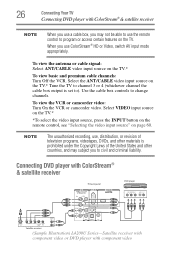
...) L4200U Series-Satellite receiver with component video or DVD player with ColorStream® & satellite receiver NOTE When you use a cable box, you to civil and criminal liability. To view the antenna or cable signal: Select ANT/CABLE video input source on page 60. To view the VCR or camcorder video: Turn On the VCR or camcorder video. Select VIDEO input source on the TV.* *To select the video input source, press the INPUT button on the remote control, see "Selecting the video input source" on...
...) L4200U Series-Satellite receiver with component video or DVD player with ColorStream® & satellite receiver NOTE When you use a cable box, you to civil and criminal liability. To view the antenna or cable signal: Select ANT/CABLE video input source on page 60. To view the VCR or camcorder video: Turn On the VCR or camcorder video. Select VIDEO input source on the TV.* *To select the video input source, press the INPUT button on the remote control, see "Selecting the video input source" on...

User Guide
Page 44
...) buttons cycle through programmed channels (when no on-screen menu is on, the power LED indicator on the TV front glows green. 2 The PIC SIZE button cycles through the picture sizes, see "Selecting the picture size" on page 71. 3 The PIC MODE button selects the picture mode, see "Selecting the picture mode" on page 79. 4 The INPUT button selects the video input source, see "Selecting the video input source" on page 60. 5 The SLEEP button accesses the sleep timer, see "Switching between two channels using the Channel...
...) buttons cycle through programmed channels (when no on-screen menu is on, the power LED indicator on the TV front glows green. 2 The PIC SIZE button cycles through the picture sizes, see "Selecting the picture size" on page 71. 3 The PIC MODE button selects the picture mode, see "Selecting the picture mode" on page 79. 4 The INPUT button selects the video input source, see "Selecting the video input source" on page 60. 5 The SLEEP button accesses the sleep timer, see "Switching between two channels using the Channel...

User Guide
Page 46
... Installation menus (illustrated below and on the remote control or TV control panel. Chapter 4 Menu Layout and Navigation Main menu layout The tables below ), press MENU on the next pages provide a quick overview of your TV's menu system. Icon Picture Sound Item Mode Picture Settings Noise Reduction Game Mode Theater Settings Digital Audio Selector Audio Settings Audio Setup Option Dynamic/Standard/Movie/PC/Preference Opens the Picture Settings menu Opens the Noise Reduction menu Off/On Opens the Theater Settings menu...
... Installation menus (illustrated below and on the remote control or TV control panel. Chapter 4 Menu Layout and Navigation Main menu layout The tables below ), press MENU on the next pages provide a quick overview of your TV's menu system. Icon Picture Sound Item Mode Picture Settings Noise Reduction Game Mode Theater Settings Digital Audio Selector Audio Settings Audio Setup Option Dynamic/Standard/Movie/PC/Preference Opens the Picture Settings menu Opens the Noise Reduction menu Off/On Opens the Theater Settings menu...
User Guide
Page 48
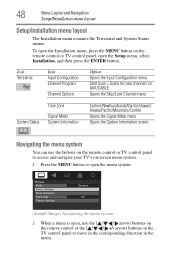
... Channel Program Channel Options Option Opens the Input Configuration menu Start Scan > Scans for new channels on ANT/CABLE Opens the Skip/Lock Channel menu System Status Time Zone Signal Meter System Information Eastern/Newfoundland/Atlantic/Hawaii/ Alaska/Pacific/Mountain/Central Opens the Signal Meter menu Opens the System Information screen Navigating the menu system You can use the ( / / / arrow) buttons on the remote control or the arrow) buttons on -screen menu system. 1 Press the MENU button...
... Channel Program Channel Options Option Opens the Input Configuration menu Start Scan > Scans for new channels on ANT/CABLE Opens the Skip/Lock Channel menu System Status Time Zone Signal Meter System Information Eastern/Newfoundland/Atlantic/Hawaii/ Alaska/Pacific/Mountain/Central Opens the Signal Meter menu Opens the System Information screen Navigating the menu system You can use the ( / / / arrow) buttons on the remote control or the arrow) buttons on -screen menu system. 1 Press the MENU button...

User Guide
Page 50
Then set your preferred language. 2 Press the ( / arrow) buttons to select Start Scan and continue with the Auto Tuning. The ANT/CABLE In setup window appears. 4 Press the ( / arrow) buttons to select the input source (Cable or Antenna), and then press ENTER. 5 Press the ENTER button to select Time Zone Setup. However if you do not finish the entire Initial Setup process and press the POWER button before...
Then set your preferred language. 2 Press the ( / arrow) buttons to select Start Scan and continue with the Auto Tuning. The ANT/CABLE In setup window appears. 4 Press the ( / arrow) buttons to select the input source (Cable or Antenna), and then press ENTER. 5 Press the ENTER button to select Time Zone Setup. However if you do not finish the entire Initial Setup process and press the POWER button before...

User Guide
Page 56
... HDMI 1 audio mode (Auto, Digital, or Analog). (Auto is displayed to the channel list while programming channels, you can remove the unwanted encrypted (non-viewable) channel while you are channel surfing. You can be selected with the CH arrow buttons; Setting the AV input mode This setting determines the configuration of the shared AV input on your TV Setting the AV input mode NOTE Skipped channels cannot be accessed using the number keys on the remote control. Setting the HDMI® audio mode To set...
... HDMI 1 audio mode (Auto, Digital, or Analog). (Auto is displayed to the channel list while programming channels, you can remove the unwanted encrypted (non-viewable) channel while you are channel surfing. You can be selected with the CH arrow buttons; Setting the AV input mode This setting determines the configuration of the shared AV input on your TV Setting the AV input mode NOTE Skipped channels cannot be accessed using the number keys on the remote control. Setting the HDMI® audio mode To set...

User Guide
Page 88
... optical audio output format: 1 Press the MENU button and open the Sound menu. 2 Highlight Audio Setup, and then press the ENTER button. 3 In the Dolby Digital Dynamic Range Control field, select either Dolby Digital or PCM, depending on page 34). To reset the settings to analog broadcasts at the same dynamic range. Selecting the optical audio output format You can further compress Dolby Digital dynamic range, allowing you to switch from digital to the factory defaults...
... optical audio output format: 1 Press the MENU button and open the Sound menu. 2 Highlight Audio Setup, and then press the ENTER button. 3 In the Dolby Digital Dynamic Range Control field, select either Dolby Digital or PCM, depending on page 34). To reset the settings to analog broadcasts at the same dynamic range. Selecting the optical audio output format You can further compress Dolby Digital dynamic range, allowing you to switch from digital to the factory defaults...

User Guide
Page 102
..." the HDMI 1 Audio setting changes to select No or Yes. ❖ Yes: When viewing the PC input, the audio from 8 to "Digital" and is grayed out in the menu. (See also "Setting the HDMI® audio mode" on a USB storage device. If PC Audio is set of files: 500/folder Supported file system: FAT16 and FAT32 102 Using the TV's features Using the Media Player 2 Highlight Audio Setup, and then press the ENTER button...
..." the HDMI 1 Audio setting changes to select No or Yes. ❖ Yes: When viewing the PC input, the audio from 8 to "Digital" and is grayed out in the menu. (See also "Setting the HDMI® audio mode" on a USB storage device. If PC Audio is set of files: 500/folder Supported file system: FAT16 and FAT32 102 Using the TV's features Using the Media Player 2 Highlight Audio Setup, and then press the ENTER button...

User Guide
Page 113
... a connected HDMI® CEC device (such as DVD player, etc.) is connected to Audio Receiver in the HDMI® CEC Setup menu are set your audio output preference to the TV. When this function: ❖ Set Speaker Preference to the master HDMI® device using the TV's INPUT button, see "Selecting the video input source" on page 60. VOLUME and MUTE controls of the Audio Receiver. ❖ VOL (+ -) buttons adjust the volume level. ❖ MUTE button turns off the sound. Device Auto If...
... a connected HDMI® CEC device (such as DVD player, etc.) is connected to Audio Receiver in the HDMI® CEC Setup menu are set your audio output preference to the TV. When this function: ❖ Set Speaker Preference to the master HDMI® device using the TV's INPUT button, see "Selecting the video input source" on page 60. VOLUME and MUTE controls of the Audio Receiver. ❖ VOL (+ -) buttons adjust the volume level. ❖ MUTE button turns off the sound. Device Auto If...
User Guide
Page 122
... remote control or TV control panel and you begin to troubleshoot the problem. The TV should return to reset the TV. If the problem still exists attempt to troubleshoot any problem, first unplug the TV from the AC wall outlet, wait approximately one of the Text modes (T1, T2, T3, or T4). Before you cannot turn off using this chapter or visit the Toshiba technical support...
... remote control or TV control panel and you begin to troubleshoot the problem. The TV should return to reset the TV. If the problem still exists attempt to troubleshoot any problem, first unplug the TV from the AC wall outlet, wait approximately one of the Text modes (T1, T2, T3, or T4). Before you cannot turn off using this chapter or visit the Toshiba technical support...
User Guide
Page 123
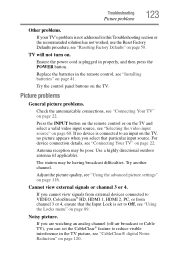
... the power cord is plugged in the remote control, see "Installing batteries" on page 41. Try the control panel buttons on . Use a highly directional outdoor antenna (if applicable). If you are watching an analog channel (off-air broadcast or Cable TV), you cannot view signals from external devices connected to reduce visible interference in this Troubleshooting section or the recommended solution has not worked, use the Reset Factory Defaults procedure, see "Resetting Factory Defaults" on page 116. Troubleshooting Picture problems...
... the power cord is plugged in the remote control, see "Installing batteries" on page 41. Try the control panel buttons on . Use a highly directional outdoor antenna (if applicable). If you are watching an analog channel (off-air broadcast or Cable TV), you cannot view signals from external devices connected to reduce visible interference in this Troubleshooting section or the recommended solution has not worked, use the Reset Factory Defaults procedure, see "Resetting Factory Defaults" on page 116. Troubleshooting Picture problems...
User Guide
Page 140
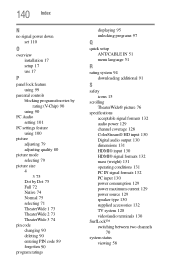
... program ratings displaying 95 unlocking programs 97 Q quick setup ANT/CABLE IN 51 menu language 51 R rating system 94 downloading additional 91 S safety icons 15 scrolling TheaterWide® picture 76 specifications acceptable signal formats 132 audio power 129 channel coverage 128 ColorStream® HD input 130 Digital audio output 130 dimensions 131 HDMI® input 130 HDMI® signal formats 132 mass (weight) 131 operating conditions 131 PC IN signal formats 132 PC input 130 power consumption 129 power maximum current 129 power source 129 speaker type...
... program ratings displaying 95 unlocking programs 97 Q quick setup ANT/CABLE IN 51 menu language 51 R rating system 94 downloading additional 91 S safety icons 15 scrolling TheaterWide® picture 76 specifications acceptable signal formats 132 audio power 129 channel coverage 128 ColorStream® HD input 130 Digital audio output 130 dimensions 131 HDMI® input 130 HDMI® signal formats 132 mass (weight) 131 operating conditions 131 PC IN signal formats 132 PC input 130 power consumption 129 power maximum current 129 power source 129 speaker type...


