
User's Guide for Model 39L22U
Page 2
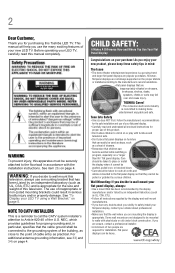
...are unsure, contact a professional installer. • A minimum of two people are mounting the display is committed to Article 820-40 of the U.S. TOSHIBA Cares! • The consumer electronics industry is appropriate. See item 26) on a "larger than life" flat panel display. WARNING: If you... your flat panel display. • Carefully read this television. Care should be taken to route all . This manual will help you for proper use of this Toshiba LED TV. For additional antenna grounding information, see 33) and 34) on dressers, bookcases, shelves, desks, speakers, chests...
...are unsure, contact a professional installer. • A minimum of two people are mounting the display is committed to Article 820-40 of the U.S. TOSHIBA Cares! • The consumer electronics industry is appropriate. See item 26) on a "larger than life" flat panel display. WARNING: If you... your flat panel display. • Carefully read this television. Care should be taken to route all . This manual will help you for proper use of this Toshiba LED TV. For additional antenna grounding information, see 33) and 34) on dressers, bookcases, shelves, desks, speakers, chests...
User's Guide for Model 39L22U
Page 5
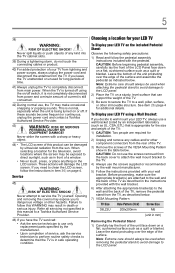
...always be damaged by an independent laboratory (such as described in this manual to a Toshiba Authorized Service Provider. 46) If you leave the TV unattended or unused for long periods of time. 41) Always unplug the TV to clean the LCD screen, follow this product can support the weight...the front of the unit face down on or off switch, it is not completely disconnected from the TV, as described below. 7) VESA Mounting Pattern TV Size Hole Pattern (HxV) Screw Size 39L22U 200x200mm M6 (unit in death or serious injury. Choosing a location for additional details. 5 38) ...
...always be damaged by an independent laboratory (such as described in this manual to a Toshiba Authorized Service Provider. 46) If you leave the TV unattended or unused for long periods of time. 41) Always unplug the TV to clean the LCD screen, follow this product can support the weight...the front of the unit face down on or off switch, it is not completely disconnected from the TV, as described below. 7) VESA Mounting Pattern TV Size Hole Pattern (HxV) Screw Size 39L22U 200x200mm M6 (unit in death or serious injury. Choosing a location for additional details. 5 38) ...
User's Guide for Model 39L22U
Page 17
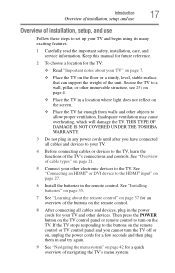
...panel or remote control to the buttons on the floor or a sturdy, level, stable surface that can support the weight of navigating the TV's menu system. THIS TYPE OF DAMAGE IS NOT COVERED UNDER THE TOSHIBA WARRANTY. 3 Do not plug in the power cords for a quick overview of the unit. If the... and devices, plug in any power cords until after you cannot turn on page 42 for your other devices. Keep this manual for future reference. 2 To choose a location for the TV: ❖ Read "Important notes about the remote control" on page 37 for an overview of cable types" on the remote ...
...panel or remote control to the buttons on the floor or a sturdy, level, stable surface that can support the weight of navigating the TV's menu system. THIS TYPE OF DAMAGE IS NOT COVERED UNDER THE TOSHIBA WARRANTY. 3 Do not plug in the power cords for a quick overview of the unit. If the... and devices, plug in any power cords until after you cannot turn on page 42 for your other devices. Keep this manual for future reference. 2 To choose a location for the TV: ❖ Read "Important notes about the remote control" on page 37 for an overview of cable types" on the remote ...
User's Guide for Model 39L22U
Page 23
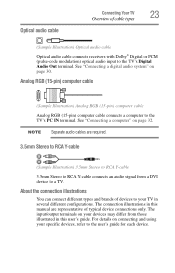
...differ from a DVI device to a TV. About the connection illustrations You can connect different types and brands of devices to your specific devices, refer to RCA Y-cable connects an audio signal from those illustrated in this manual are representative of cable types (Sample ...Illustration) Optical audio cable Optical audio cable connects receivers with Dolby® Digital or PCM (pulse-code modulation) optical audio input to the TV's PC IN terminal. The connection illustrations ...
...differ from a DVI device to a TV. About the connection illustrations You can connect different types and brands of devices to your specific devices, refer to RCA Y-cable connects an audio signal from those illustrated in this manual are representative of cable types (Sample ...Illustration) Optical audio cable Optical audio cable connects receivers with Dolby® Digital or PCM (pulse-code modulation) optical audio input to the TV's PC IN terminal. The connection illustrations ...

User's Guide for Model 39L22U
Page 29
Connecting Your TV 29 HDMI® CEC connection HDMI® CEC connection You can control the basic functions of cable types" on page 105. ❖ The connected devices ...® cable (type A connector) per HDMI® device (see "Overview of connected audio/video devices using the TV's remote control if you use an HDMI® cable with the desired settings, see the operation manual for each device. ❖ This feature uses the CEC technology as regulated by the HDMI® standard.
Connecting Your TV 29 HDMI® CEC connection HDMI® CEC connection You can control the basic functions of cable types" on page 105. ❖ The connected devices ...® cable (type A connector) per HDMI® device (see "Overview of connected audio/video devices using the TV's remote control if you use an HDMI® cable with the desired settings, see the operation manual for each device. ❖ This feature uses the CEC technology as regulated by the HDMI® standard.
User's Guide for Model 39L22U
Page 30
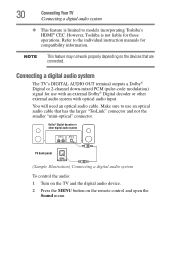
... decoder or other digital audio system TV back panel (Sample Illustration) Connecting a digital audio system To control the audio: 1 Turn on the TV and the digital audio device. 2...the larger "TosLink" connector and not the smaller "mini-optical" connector. 30 Connecting Your TV Connecting a digital audio system ❖ This feature is not liable for those operations. You...external audio system with optical audio input. Refer to models incorporating Toshiba's HDMI® CEC. Connecting a digital audio system The TV's DIGITAL AUDIO OUT terminal outputs a Dolby® Digital or ...
... decoder or other digital audio system TV back panel (Sample Illustration) Connecting a digital audio system To control the audio: 1 Turn on the TV and the digital audio device. 2...the larger "TosLink" connector and not the smaller "mini-optical" connector. 30 Connecting Your TV Connecting a digital audio system ❖ This feature is not liable for those operations. You...external audio system with optical audio input. Refer to models incorporating Toshiba's HDMI® CEC. Connecting a digital audio system The TV's DIGITAL AUDIO OUT terminal outputs a Dolby® Digital or ...
User's Guide for Model 39L22U
Page 46
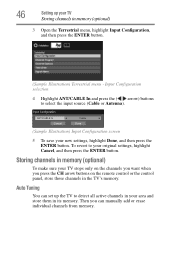
...you press the CH arrow buttons on the channels you want when you can set up your TV Storing channels in the TV's memory. To revert to your new settings, highlight Done, and then press the ENTER ...button. Storing channels in memory (optional) To make sure your TV stops only on the remote control or the control panel, store those channels in memory (optional) 3 Open... the ENTER button. (Sample Illustration) Terrestrial menu - 46 Setting up the TV to detect all active channels in your area and store them in its memory. Auto Tuning You can...
...you press the CH arrow buttons on the channels you want when you can set up your TV Storing channels in the TV's memory. To revert to your new settings, highlight Done, and then press the ENTER ...button. Storing channels in memory (optional) To make sure your TV stops only on the remote control or the control panel, store those channels in memory (optional) 3 Open... the ENTER button. (Sample Illustration) Terrestrial menu - 46 Setting up the TV to detect all active channels in your area and store them in its memory. Auto Tuning You can...
User's Guide for Model 39L22U
Page 49
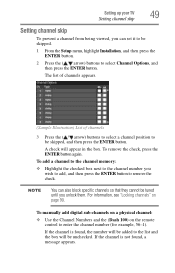
...information, see "Locking channels" on the remote control to enter the channel number (for example, 56-1). If the channel is found , a message appears. To manually add digital sub-channels on a physical channel: ❖ Use the Channel Numbers and the (Dash 100) on page 90. The list of channels appears. ... button. A check will be tuned until you wish to add, and then press the ENTER button to remove the check. Setting up your TV 49 Setting channel skip Setting channel skip To prevent a channel from being viewed, you can also block specific channels so that they cannot be ...
...information, see "Locking channels" on the remote control to enter the channel number (for example, 56-1). If the channel is found , a message appears. To manually add digital sub-channels on a physical channel: ❖ Use the Channel Numbers and the (Dash 100) on page 90. The list of channels appears. ... button. A check will be tuned until you wish to add, and then press the ENTER button to remove the check. Setting up your TV 49 Setting channel skip Setting channel skip To prevent a channel from being viewed, you can also block specific channels so that they cannot be ...
User's Guide for Model 39L22U
Page 96
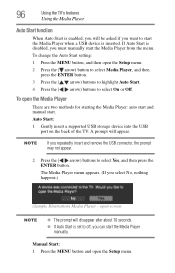
... Start: 1 Gently insert a supported USB storage device into the USB port on the back of the TV. NOTE If you repeatedly insert and remove the USB connector, the prompt may not appear. 2 Press the ... two methods for starting the Media Player: auto start and manual start the Media Player from the menu. 96 Using the TV's features Using the Media Player Auto Start function When Auto Start... is enabled, you will be asked if you want to off, you can start the Media Player manually. open the Setup ...
... Start: 1 Gently insert a supported USB storage device into the USB port on the back of the TV. NOTE If you repeatedly insert and remove the USB connector, the prompt may not appear. 2 Press the ... two methods for starting the Media Player: auto start and manual start the Media Player from the menu. 96 Using the TV's features Using the Media Player Auto Start function When Auto Start... is enabled, you will be asked if you want to off, you can start the Media Player manually. open the Setup ...

User's Guide for Model 39L22U
Page 98
This view allows you to the last viewed channel or external input. The television will return to change the photo content manually. Single view In this mode, only files located in Single View mode. Press to view the previous photo. ❖ Press to rotate the image 90&#...: 1 Press the ENTER button in the Single View mode. 2 Press the ( / arrow) buttons to Single View, the currently selected photo is displayed. 98 Using the TV's features Using the Media Player in photo list when there are disabled. Slide show This view allows you move to the next layer, or press...
This view allows you to the last viewed channel or external input. The television will return to change the photo content manually. Single view In this mode, only files located in Single View mode. Press to view the previous photo. ❖ Press to rotate the image 90&#...: 1 Press the ENTER button in the Single View mode. 2 Press the ( / arrow) buttons to Single View, the currently selected photo is displayed. 98 Using the TV's features Using the Media Player in photo list when there are disabled. Slide show This view allows you move to the next layer, or press...
User's Guide for Model 39L22U
Page 118
...174; CEC feature is not available, a black rectangle may appear. If this happens, turn off your TV and unplug the power cord, and then plug it in and turn off the closed captions" on ...settings of the device, turn it on page 74. If text is available for Toshiba HDMI® CECcompatible devices. For more information, see "Forgotten PIN code" on the screen. If... several devices are used. Read the instruction manual furnished with the ( ) logo are connected, the HDMI® CEC feature may not display correctly...
...174; CEC feature is not available, a black rectangle may appear. If this happens, turn off your TV and unplug the power cord, and then plug it in and turn off the closed captions" on ...settings of the device, turn it on page 74. If text is available for Toshiba HDMI® CECcompatible devices. For more information, see "Forgotten PIN code" on the screen. If... several devices are used. Read the instruction manual furnished with the ( ) logo are connected, the HDMI® CEC feature may not display correctly...


