Operating Guide
Page 6
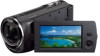
... operation. You can help preserve our environment by returning your camcorder. Use the nearby wall outlet (wall socket) when using your used rechargeable batteries to charge the battery pack using a genuine Sony battery charger or a device that can burst, cause a fire or even chemical burns. Observe the following two conditions: (1) This device may result. CAUTION...
... operation. You can help preserve our environment by returning your camcorder. Use the nearby wall outlet (wall socket) when using your used rechargeable batteries to charge the battery pack using a genuine Sony battery charger or a device that can burst, cause a fire or even chemical burns. Observe the following two conditions: (1) This device may result. CAUTION...
Operating Guide
Page 10
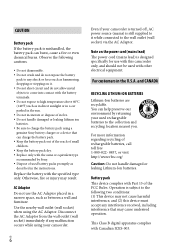
...other malfunctions could occur. ejecting the memory card when the access lamp (p. 22) is lit or flashing GB 10 removing the battery pack or AC Adaptor (models with local regulations. The image data that appear constantly on the LCD screen. And, the illustrations of the camcorder, ...films, video tapes, and other materials may appear different from the camcorder, or applying mechanical shock or vibration to the camcorder when the POWER/CHG (charge) lamp (p. 19) is lit or flashing green or the access lamp (p. 22) is lit or flashing When the camcorder is not ...
...other malfunctions could occur. ejecting the memory card when the access lamp (p. 22) is lit or flashing GB 10 removing the battery pack or AC Adaptor (models with local regulations. The image data that appear constantly on the LCD screen. And, the illustrations of the camcorder, ...films, video tapes, and other materials may appear different from the camcorder, or applying mechanical shock or vibration to the camcorder when the POWER/CHG (charge) lamp (p. 19) is lit or flashing green or the access lamp (p. 22) is lit or flashing When the camcorder is not ...
Operating Guide
Page 14
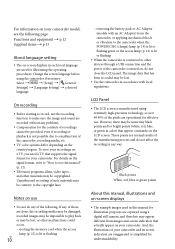
... Differences in equipment 13 Differences in supplied items 13 Parts and controls 16 Getting started Charging the battery pack 18 Attaching/Removing the battery pack 18 Charging the battery using the AC Adaptor (Models with an AC Adaptor 19 Charging the battery using your computer 19 Setting 21 Preparing your camcorder 21 Changing the recording media (Models...
... Differences in equipment 13 Differences in supplied items 13 Parts and controls 16 Getting started Charging the battery pack 18 Attaching/Removing the battery pack 18 Charging the battery using the AC Adaptor (Models with an AC Adaptor 19 Charging the battery using your computer 19 Setting 21 Preparing your camcorder 21 Changing the recording media (Models...
Operating Guide
Page 17
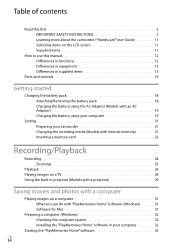
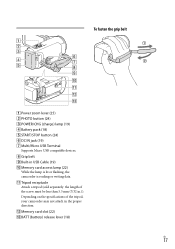
To fasten the grip belt Power zoom lever (25) PHOTO button (24) POWER/CHG (charge) lamp (19) Battery pack (18) START/STOP button (24) DC IN jack (19) Multi/Micro USB Terminal Supports Micro USB compatible devices. Grip belt &#... in .)). Depending on the specifications of the screw must be less than 5.5 mm (7/32 in the proper direction. Memory card slot (22) BATT (battery) release lever (18) GB 17
To fasten the grip belt Power zoom lever (25) PHOTO button (24) POWER/CHG (charge) lamp (19) Battery pack (18) START/STOP button (24) DC IN jack (19) Multi/Micro USB Terminal Supports Micro USB compatible devices. Grip belt &#... in .)). Depending on the specifications of the screw must be less than 5.5 mm (7/32 in the proper direction. Memory card slot (22) BATT (battery) release lever (18) GB 17

Operating Guide
Page 18
Battery pack GB 18 Getting started Charging the battery pack For information on your camcorder model, see the following page: Functions and equipment p.12 Supplied items p.13 Attaching/Removing the battery pack Close the LCD screen and attach the battery pack. Align the indentation on the camcorder and projection on the battery pack, then slide the battery pack upwards. To remove the battery pack, close the LCD screen, then slide the BATT (battery) release lever and remove the battery pack.
Battery pack GB 18 Getting started Charging the battery pack For information on your camcorder model, see the following page: Functions and equipment p.12 Supplied items p.13 Attaching/Removing the battery pack Close the LCD screen and attach the battery pack. Align the indentation on the camcorder and projection on the battery pack, then slide the battery pack upwards. To remove the battery pack, close the LCD screen, then slide the BATT (battery) release lever and remove the battery pack.
Operating Guide
Page 19
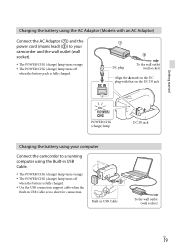
... (mains lead) () to your camcorder and the wall outlet (wall socket). The POWER/CHG (charge) lamp turns orange. The POWER/CHG (charge) lamp turns off when the battery pack is fully charged. DC plug To the wall outlet (wall socket) Align the mark on the ...DC plug with that on the DC IN jack Getting started POWER/CHG (charge) lamp DC IN jack Charging the battery using your computer Connect the camcorder to a running computer using the Built-in USB Cable. The POWER/CHG...
... (mains lead) () to your camcorder and the wall outlet (wall socket). The POWER/CHG (charge) lamp turns orange. The POWER/CHG (charge) lamp turns off when the battery pack is fully charged. DC plug To the wall outlet (wall socket) Align the mark on the ...DC plug with that on the DC IN jack Getting started POWER/CHG (charge) lamp DC IN jack Charging the battery using your computer Connect the camcorder to a running computer using the Built-in USB Cable. The POWER/CHG...
Operating Guide
Page 20
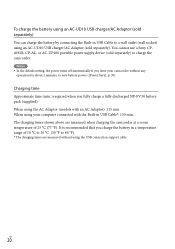
... support cable. It is recommended that you fully charge a fully discharged NP-FV30 battery pack (supplied). GB 20 Charging time Approximate time (min.) required when you charge the battery in USB Cable*: 150 min. The charging times shown above are measured when charging the camcorder at a room temperature of 10 &#...AC Adaptor (sold separately) You can charge the battery by connecting the Built-in USB Cable to a wall outlet (wall socket) using the AC Adaptor (models with the Built-in a temperature range of 25 °C (77 °F). You cannot use a Sony CPAH2R, CP-AL, or AC-...
... support cable. It is recommended that you fully charge a fully discharged NP-FV30 battery pack (supplied). GB 20 Charging time Approximate time (min.) required when you charge the battery in USB Cable*: 150 min. The charging times shown above are measured when charging the camcorder at a room temperature of 10 &#...AC Adaptor (sold separately) You can charge the battery by connecting the Built-in USB Cable to a wall outlet (wall socket) using the AC Adaptor (models with the Built-in a temperature range of 25 °C (77 °F). You cannot use a Sony CPAH2R, CP-AL, or AC-...
Operating Guide
Page 40
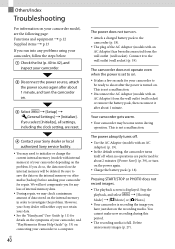
...40 to investigate the problem. GB 40 The power does not turn on the power again. Charge the battery pack (p. 18). Delete unnecessary images (p. 27). Others/Index Troubleshooting For information on your camcorder model, ...Sony dealer or local authorized Sony service facility. You may need to initialize or change the current internal memory (models with internal memory) of the AC Adaptor (models with an AC Adaptor) from the wall outlet (wall socket). However, your camcorder for about 1 minute, and turn the camcorder on . Attach a charged battery...
...40 to investigate the problem. GB 40 The power does not turn on the power again. Charge the battery pack (p. 18). Delete unnecessary images (p. 27). Others/Index Troubleshooting For information on your camcorder model, ...Sony dealer or local authorized Sony service facility. You may need to initialize or change the current internal memory (models with internal memory) of the AC Adaptor (models with an AC Adaptor) from the wall outlet (wall socket). However, your camcorder for about 1 minute, and turn the camcorder on . Attach a charged battery...
Operating Guide
Page 43
... Adaptor). Do not use a deformed or damaged battery pack. Keep metal contacts clean. If the battery electrolytic liquid has leaked: Consult your local authorized Sony service facility. Wash off any liquid that is ...used with plenty of the laptop computer will continue to a computer in this malfunction cannot be possible with all computers. If you may not function correctly depending on charging...
... Adaptor). Do not use a deformed or damaged battery pack. Keep metal contacts clean. If the battery electrolytic liquid has leaked: Consult your local authorized Sony service facility. Wash off any liquid that is ...used with plenty of the laptop computer will continue to a computer in this malfunction cannot be possible with all computers. If you may not function correctly depending on charging...
Operating Guide
Page 45
... However, even if the pre-installed rechargeable battery is recommended that you start using the AC Adaptor (models with an AC Adaptor) or attach the fully charged battery pack, and leave it with an AC Adaptor) or while the battery pack is connected to a wall outlet (wall... socket) using your camcorder. How to charge the pre-installed rechargeable battery Connect your camcorder is attached. The pre-installed rechargeable battery is always charged while your ...
... However, even if the pre-installed rechargeable battery is recommended that you start using the AC Adaptor (models with an AC Adaptor) or attach the fully charged battery pack, and leave it with an AC Adaptor) or while the battery pack is connected to a wall outlet (wall... socket) using your camcorder. How to charge the pre-installed rechargeable battery Connect your camcorder is attached. The pre-installed rechargeable battery is always charged while your ...
Operating Guide
Page 47
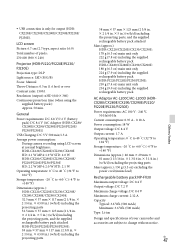
... 5 in.) (w/h/d) including the projecting parts, and the supplied rechargeable battery pack attached Mass (approx.) HDR-CX220/CX220E/CX230/CX230E: 178 g (6.3 oz) main unit only 222 g (7.8 oz) including the supplied rechargeable battery pack HDR-CX280/CX280E/CX290/CX290E: 180 g (6.3 oz) main unit only 224 g...parts Mass (approx.): 150 g (5.3 oz) excluding the power cord (mains lead) Rechargeable battery pack NP-FV30 Maximum output voltage: DC 8.4 V Output voltage: DC 7.2 V Maximum charge voltage: DC 8.4 V Maximum charge current: 2.12 A Capacity Typical: 3.6 Wh (500 mAh) Minimum: 3.6 Wh (500...
... 5 in.) (w/h/d) including the projecting parts, and the supplied rechargeable battery pack attached Mass (approx.) HDR-CX220/CX220E/CX230/CX230E: 178 g (6.3 oz) main unit only 222 g (7.8 oz) including the supplied rechargeable battery pack HDR-CX280/CX280E/CX290/CX290E: 180 g (6.3 oz) main unit only 224 g...parts Mass (approx.): 150 g (5.3 oz) excluding the power cord (mains lead) Rechargeable battery pack NP-FV30 Maximum output voltage: DC 8.4 V Output voltage: DC 7.2 V Maximum charge voltage: DC 8.4 V Maximum charge current: 2.12 A Capacity Typical: 3.6 Wh (500 mAh) Minimum: 3.6 Wh (500...
Operating Guide
Page 48
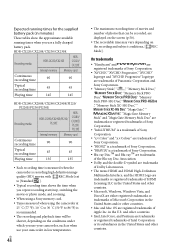
HDR-CX220/CX220E/CX230/CX230E Recording media HDR-CX230/CX230E HDRCX220/ CX220E Internal memory Memory card Continuous recording time 95 95 Typical recording time 45 45 Playing time 145 145 HDR-CX280/CX280E/CX290/CX290E/PJ220/ PJ220E/PJ230/PJ230E Recording media HDR... switching the movie or photo mode, and zooming. When using a Sony memory card. Times measured when using the camcorder at 25 C ...battery pack (in minutes) These tables show the approximate available running times when you use your camcorder, such as when use a fully charged battery pack.
HDR-CX220/CX220E/CX230/CX230E Recording media HDR-CX230/CX230E HDRCX220/ CX220E Internal memory Memory card Continuous recording time 95 95 Typical recording time 45 45 Playing time 145 145 HDR-CX280/CX280E/CX290/CX290E/PJ220/ PJ220E/PJ230/PJ230E Recording media HDR... switching the movie or photo mode, and zooming. When using a Sony memory card. Times measured when using the camcorder at 25 C ...battery pack (in minutes) These tables show the approximate available running times when you use your camcorder, such as when use a fully charged battery pack.
Operating Guide
Page 51
... 18 Beep 21 Built-in USB Cable 19 C Care 42 Charging the battery pack..........18 Charging the battery pack using your computer 19 Charging the battery using the AC adaptor 19 Computer 32 Creating discs 34 D Data Code 21 Date/Time 21 Display items on the LCD screen 24 Dual Capture ...
... 18 Beep 21 Built-in USB Cable 19 C Care 42 Charging the battery pack..........18 Charging the battery pack using your computer 19 Charging the battery using the AC adaptor 19 Computer 32 Creating discs 34 D Data Code 21 Date/Time 21 Display items on the LCD screen 24 Dual Capture ...


