

Operating Guide
Page 3
... is exposed to direct sunlight. Object and Liquid Entry Never push objects of power source indicated on or pinched by the manufacturer. Cleaning Unplug the set . for necessary ventilation. Power-Cord Protection Route the power cord so that could result in a fire or electric shock. The set may ... bracket, or table recommended by items placed upon or against them . Continued , 3 If the plug should be equipped with a polarized ac power cord plug (a plug having one described in the cabinet are unable to insert the plug fully into the outlet, try reversing the plug. Never spill...
... is exposed to direct sunlight. Object and Liquid Entry Never push objects of power source indicated on or pinched by the manufacturer. Cleaning Unplug the set . for necessary ventilation. Power-Cord Protection Route the power cord so that could result in a fire or electric shock. The set may ... bracket, or table recommended by items placed upon or against them . Continued , 3 If the plug should be equipped with a polarized ac power cord plug (a plug having one described in the cabinet are unable to insert the plug fully into the outlet, try reversing the plug. Never spill...
Operating Guide
Page 4
... as the original parts. Adjust only those controls that the set does not operate normally when following conditions: - Servicing Do not attempt to lightning and power-line surges. Replacement parts When replacement parts are specified in performance - If liquid has been spilled or objects have the same characteristics as opening or... (Continued) Lightning For added protection for this indicates a need for long periods of time, unplug it is left unattended and unused for service. When the power cord or plug is damaged or frayed. -
... as the original parts. Adjust only those controls that the set does not operate normally when following conditions: - Servicing Do not attempt to lightning and power-line surges. Replacement parts When replacement parts are specified in performance - If liquid has been spilled or objects have the same characteristics as opening or... (Continued) Lightning For added protection for this indicates a need for long periods of time, unplug it is left unattended and unused for service. When the power cord or plug is damaged or frayed. -

Operating Guide
Page 11
See page 6, 80 for compatible cassettes for your camcorder. AC Adaptor (1) (p. 12) Rechargeable battery pack NP-FP30 (1) (p. 12, 81) CD-ROM "Picture Package Ver.1.5.1" (1) (p. 55) Operating Guide (This manual) (1) Power cord (1) (p. 12) A/V connecting cable (1) (p. 32, 49) Lens cap (1) (p. 15, 24) ...• To attach the lens cap Attach the lens cap to the metal fittings of that you have following items supplied with your camcorder. Getting Started Getting Started Step...
See page 6, 80 for compatible cassettes for your camcorder. AC Adaptor (1) (p. 12) Rechargeable battery pack NP-FP30 (1) (p. 12, 81) CD-ROM "Picture Package Ver.1.5.1" (1) (p. 55) Operating Guide (This manual) (1) Power cord (1) (p. 12) A/V connecting cable (1) (p. 32, 49) Lens cap (1) (p. 15, 24) ...• To attach the lens cap Attach the lens cap to the metal fittings of that you have following items supplied with your camcorder. Getting Started Getting Started Step...

Operating Guide
Page 12
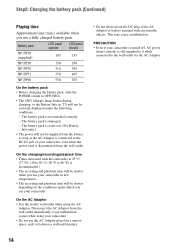
...the LCD screen 4 Connect the power cord to your camcorder. Step 2: Charging the battery pack You can charge the "InfoLITHIUM" battery pack (P series) (p. 81) after attaching it into place 2. 2 3 Connect the AC Adaptor to OFF(CHG) (The default setting). POWER switch 2 Slide the POWER switch in the direction of ...the battery pack and your camcorder. DC IN jack DC plug To the wall outlet AC Adaptor Power cord 1 Align the terminals of the arrow to the DC IN jack on...
...the LCD screen 4 Connect the power cord to your camcorder. Step 2: Charging the battery pack You can charge the "InfoLITHIUM" battery pack (P series) (p. 81) after attaching it into place 2. 2 3 Connect the AC Adaptor to OFF(CHG) (The default setting). POWER switch 2 Slide the POWER switch in the direction of ...the battery pack and your camcorder. DC IN jack DC plug To the wall outlet AC Adaptor Power cord 1 Align the terminals of the arrow to the DC IN jack on...
Operating Guide
Page 14
...Use the nearby wall outlet when using your camcorder. • Do not use the AC Adaptor placed in low temperatures. • The recording and playback time will not be shorter when you use your camcorder, even when the power cord is recommended.) • The recording and playback... time will be correctly displayed under which you use your camcorder. The battery pack is damaged. - The battery pack is not attached correctly...
...Use the nearby wall outlet when using your camcorder. • Do not use the AC Adaptor placed in low temperatures. • The recording and playback time will not be shorter when you use your camcorder, even when the power cord is recommended.) • The recording and playback... time will be correctly displayed under which you use your camcorder. The battery pack is damaged. - The battery pack is not attached correctly...
Operating Guide
Page 66
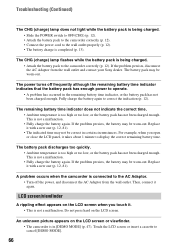
...The CHG (charge) lamp flashes while the battery pack is being charged. • Slide the POWER switch to OFF(CHG) (p. 12). • Attach the battery pack to the camcorder correctly (p. 12). • Connect the power cord to the wall outlet properly (p. 12). • The battery charge is completed (p. 13). ... indication (p. 12). The power turns off the power, and disconnect the AC Adaptor from the wall outlet and contact your Sony dealer. Then, connect it . • This is not a malfunction. Do not press hard on the LCD screen or viewfinder. • The camcorder is in the remaining battery...
...The CHG (charge) lamp flashes while the battery pack is being charged. • Slide the POWER switch to OFF(CHG) (p. 12). • Attach the battery pack to the camcorder correctly (p. 12). • Connect the power cord to the wall outlet properly (p. 12). • The battery charge is completed (p. 13). ... indication (p. 12). The power turns off the power, and disconnect the AC Adaptor from the wall outlet and contact your Sony dealer. Then, connect it . • This is not a malfunction. Do not press hard on the LCD screen or viewfinder. • The camcorder is in the remaining battery...
Operating Guide
Page 83
... required i.LINK cable Use the Sony i.LINK 4-pin-to other i.LINK (DV Interface) compatible devices made by the plug and not the cord. • Do not damage the power cord such as Digital Televisions, DVD, MICROMV or HDV recorders/players are not using your camcorder. • Do not wrap your camcorder on the product. This damages...
... required i.LINK cable Use the Sony i.LINK 4-pin-to other i.LINK (DV Interface) compatible devices made by the plug and not the cord. • Do not damage the power cord such as Digital Televisions, DVD, MICROMV or HDV recorders/players are not using your camcorder. • Do not wrap your camcorder on the product. This damages...

Operating Guide
Page 87
... 113 mm (2 5/8 × 3 1/8 × 4 1/2 in .) (w/h/d) excluding the projecting parts Mass (approx.) 190 g (6.7 oz) excluding the power cord *2See the label on the AC Adaptor for other specifications. Input/Output connectors Audio/Video output 10-pin connector Video signal: 1 Vp-p, 75 Ω (...S100) LCD screen Picture 6.2 cm (2.5 type) Total dot number 123 200 (560 × 220) General Power requirements DC 7.2 V (battery pack) DC 8.4 V (AC Adaptor) Average power consumption During camera recording using the viewfinder 1.8 W During camera recording using the LCD 2.1 W Operating temperature ...
... 113 mm (2 5/8 × 3 1/8 × 4 1/2 in .) (w/h/d) excluding the projecting parts Mass (approx.) 190 g (6.7 oz) excluding the power cord *2See the label on the AC Adaptor for other specifications. Input/Output connectors Audio/Video output 10-pin connector Video signal: 1 Vp-p, 75 Ω (...S100) LCD screen Picture 6.2 cm (2.5 type) Total dot number 123 200 (560 × 220) General Power requirements DC 7.2 V (battery pack) DC 8.4 V (AC Adaptor) Average power consumption During camera recording using the viewfinder 1.8 W During camera recording using the LCD 2.1 W Operating temperature ...
Operating Guide
Page 90
... Search 25 Pixela user support center .... 61 Playback 25 Double speed 40 Frame 40 Reverse 40 Slow 40 Playing time 14 PORTRAIT (Soft portrait)... 42 Power cord 12 POWER switch 15 Pre-installed rechargeable battery 85 PROGRAM AE 42, 71 R REC CTRL (Recording control 51 REC MODE (Recording mode 46 Rec review 31...
... Search 25 Pixela user support center .... 61 Playback 25 Double speed 40 Frame 40 Reverse 40 Slow 40 Playing time 14 PORTRAIT (Soft portrait)... 42 Power cord 12 POWER switch 15 Pre-installed rechargeable battery 85 PROGRAM AE 42, 71 R REC CTRL (Recording control 51 REC MODE (Recording mode 46 Rec review 31...


