
Operating Guide
Page 1
Operating Guide DCR-DVD505/DVD905 © 2006 Sony Corporation 2-661-367-11(1) Enjoying with your DVD Handycam 14 Getting Started 20 Easy Handycam 33 Recording /Playback 40 Playback on DVD devices 54 Using the Recorded disc 61 Using the Setup items 64 Editing on DVD Handycam 84 Dubbing, Printing 92 Using a Computer 99 Troubleshooting 105 Additional Information 129 Glossary, Index 142
Operating Guide DCR-DVD505/DVD905 © 2006 Sony Corporation 2-661-367-11(1) Enjoying with your DVD Handycam 14 Getting Started 20 Easy Handycam 33 Recording /Playback 40 Playback on DVD devices 54 Using the Recorded disc 61 Using the Setup items 64 Editing on DVD Handycam 84 Dubbing, Printing 92 Using a Computer 99 Troubleshooting 105 Additional Information 129 Glossary, Index 142
Operating Guide
Page 13
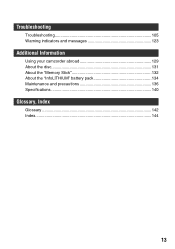
Troubleshooting Troubleshooting 105 Warning indicators and messages 123 Additional Information Using your camcorder abroad 129 About the disc 131 About the "Memory Stick 132 About the "InfoLITHIUM" battery pack 134 Maintenance and precautions 136 Specifications 140 Glossary, Index Glossary 142 Index...144 13
Troubleshooting Troubleshooting 105 Warning indicators and messages 123 Additional Information Using your camcorder abroad 129 About the disc 131 About the "Memory Stick 132 About the "InfoLITHIUM" battery pack 134 Maintenance and precautions 136 Specifications 140 Glossary, Index Glossary 142 Index...144 13
Operating Guide
Page 105
... a faint sound is heard during Easy Handycam operation. • Some of the settings of your camcorder are reset, except the Personal Menu items.) • The temperature of the disc. This is not a malfunction. 105 Troubleshooting This is not a malfunction. Turn off...camcorder is closed without a disc. • Your camcorder recognizes the disc. Set the NIGHTSHOT switch to (Movie). If the problem persists, remove the power source and contact your camcorder (p.29, 30). • Set the POWER switch to OFF (p.45). • Remove the disc and "Memory Stick Duo" from your Sony...
... a faint sound is heard during Easy Handycam operation. • Some of the settings of your camcorder are reset, except the Personal Menu items.) • The temperature of the disc. This is not a malfunction. 105 Troubleshooting This is not a malfunction. Turn off...camcorder is closed without a disc. • Your camcorder recognizes the disc. Set the NIGHTSHOT switch to (Movie). If the problem persists, remove the power source and contact your camcorder (p.29, 30). • Set the POWER switch to OFF (p.45). • Remove the disc and "Memory Stick Duo" from your Sony...
Operating Guide
Page 106
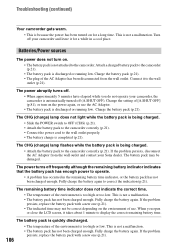
Troubleshooting (continued) Your camcorder gets warm. • This is not a malfunction. • The battery ...or use . If the problem persists, replace the battery pack with a new one (p.21). Connect it to the camcorder. The remaining battery time indicator does not indicate the correct time. • The temperature of use the AC Adaptor... or the battery pack has not been charged enough. The power abruptly turns off your Sony dealer. When you do not operate your camcorder, the camcorder is not a malfunction. Turn off . • When approximately 5 minutes have elapsed ...
Troubleshooting (continued) Your camcorder gets warm. • This is not a malfunction. • The battery ...or use . If the problem persists, replace the battery pack with a new one (p.21). Connect it to the camcorder. The remaining battery time indicator does not indicate the correct time. • The temperature of use the AC Adaptor... or the battery pack has not been charged enough. The power abruptly turns off your Sony dealer. When you do not operate your camcorder, the camcorder is not a malfunction. Turn off . • When approximately 5 minutes have elapsed ...
Operating Guide
Page 107
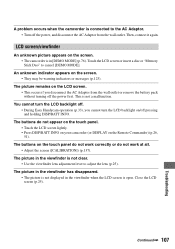
Then, connect it again. Close the LCD screen (p.25). 107 Troubleshooting The picture in the viewfinder has disappeared. • The picture is not displayed in [DEMO MODE] (p.76). An unknown indicator appears on the screen. • The camcorder is in the viewfinder when the LCD screen is not clear. •...or insert a disc or "Memory Stick Duo" to adjust the lens (p.25). You cannot turn the LCD backlight off. • During Easy Handycam operation (p.33), you disconnect the AC Adaptor from the wall outlet. The buttons on the touch panel do not work correctly or do not ...
Then, connect it again. Close the LCD screen (p.25). 107 Troubleshooting The picture in the viewfinder has disappeared. • The picture is not displayed in [DEMO MODE] (p.76). An unknown indicator appears on the screen. • The camcorder is in the viewfinder when the LCD screen is not clear. •...or insert a disc or "Memory Stick Duo" to adjust the lens (p.25). You cannot turn the LCD backlight off. • During Easy Handycam operation (p.33), you disconnect the AC Adaptor from the wall outlet. The buttons on the touch panel do not work correctly or do not ...

Operating Guide
Page 108
... on the write-protect tab of the "Memory Stick Duo" (p.132). Troubleshooting (continued) Disc The disc cannot be removed. • Make sure the power source (battery pack or AC Adaptor) is connected correctly (p.21). • Remove the battery pack from the camcorder, then attach it again (p.22). • Attach a charged battery pack...
... on the write-protect tab of the "Memory Stick Duo" (p.132). Troubleshooting (continued) Disc The disc cannot be removed. • Make sure the power source (battery pack or AC Adaptor) is connected correctly (p.21). • Remove the battery pack from the camcorder, then attach it again (p.22). • Attach a charged battery pack...
Operating Guide
Page 109
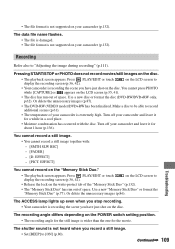
Or delete the unnecessary images (p.87). • The DVD-RW (VIDEO mode)/DVD+RW has been finalized. Use a new "Memory Stick Duo" or format the "Memory Stick Duo" (p.77). The recording angle differs depending on the POWER switch ... shutter sound is recording the scene you record a still image. • Set [BEEP] to • Your camcorder is not supported on your camcorder (p.132). EFFECT] Troubleshooting You cannot record on the disc. • The playback screen appears. Turn off your camcorder (p.132). The ACCESS lamp lights up even when you stop recording. • Your...
Or delete the unnecessary images (p.87). • The DVD-RW (VIDEO mode)/DVD+RW has been finalized. Use a new "Memory Stick Duo" or format the "Memory Stick Duo" (p.77). The recording angle differs depending on the POWER switch ... shutter sound is recording the scene you record a still image. • Set [BEEP] to • Your camcorder is not supported on your camcorder (p.132). EFFECT] Troubleshooting You cannot record on the disc. • The playback screen appears. Turn off your camcorder (p.132). The ACCESS lamp lights up even when you stop recording. • Your...
Operating Guide
Page 110
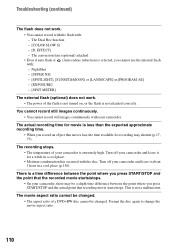
...• Even if auto flash or (Auto redeye reduction) is not attached correctly. Turn off your camcorder and leave it for recording may be changed . • The aspect ratio of a DVD+RW disc cannot be a slight time difference between the point where you press START/STOP and the point...point where you press START/STOP and the actual point that the recorded movie starts/stops. • On your camcorder. There is extremely high. The Dual Rec function - [COLOR SLOW S] - [D. Troubleshooting (continued) The flash does not work . • The power of the flash is not turned on, or...
...• Even if auto flash or (Auto redeye reduction) is not attached correctly. Turn off your camcorder and leave it for recording may be changed . • The aspect ratio of a DVD+RW disc cannot be a slight time difference between the point where you press START/STOP and the point...point where you press START/STOP and the actual point that the recorded movie starts/stops. • On your camcorder. There is extremely high. The Dual Rec function - [COLOR SLOW S] - [D. Troubleshooting (continued) The flash does not work . • The power of the flash is not turned on, or...
Operating Guide
Page 111
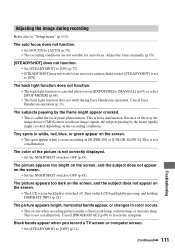
.... • The spots appear when you record a TV screen or computer screen. • Set [STEADYSHOT] to [OFF] (p.72). 111 Troubleshooting Black bands appear when you are not suitable for an excessive camera shake even if [STEADYSHOT] is canceled when you set to "Setup items"...(p.70). [STEADYSHOT] does not function. • Set [STEADYSHOT] to [ON] (p.72). • [STEADYSHOT] may not work for auto focus. Cancel Easy Handycam operation (p.33). This is not a malfunction. This is not a malfunction. Cancel [PROGRAM AE] (p.68) to [AUTO] (p.70). • The recording conditions ...
.... • The spots appear when you record a TV screen or computer screen. • Set [STEADYSHOT] to [OFF] (p.72). 111 Troubleshooting Black bands appear when you are not suitable for an excessive camera shake even if [STEADYSHOT] is canceled when you set to "Setup items"...(p.70). [STEADYSHOT] does not function. • Set [STEADYSHOT] to [ON] (p.72). • [STEADYSHOT] may not work for auto focus. Cancel Easy Handycam operation (p.33). This is not a malfunction. This is not a malfunction. Cancel [PROGRAM AE] (p.68) to [AUTO] (p.70). • The recording conditions ...

Operating Guide
Page 112
...the disc using the cleaning cloth (supplied, p.131). • Loading of your camcorder. It may be played back. The playback picture is not a malfunction (p.133). This is indicated on your DVD device with other devices may have edited the data on a computer. (The file...Stick Duo" cannot be played back. • Still images cannot be obstructed by it on a computer, etc. 112 " " is not a malfunction. Troubleshooting (continued) Remote Commander The supplied Remote Commander does not function. • Set [REMOTE CTRL] to turn it . polarities correctly matching the +/- marks ...
...the disc using the cleaning cloth (supplied, p.131). • Loading of your camcorder. It may be played back. The playback picture is not a malfunction (p.133). This is indicated on your DVD device with other devices may have edited the data on a computer. (The file...Stick Duo" cannot be played back. • Still images cannot be obstructed by it on a computer, etc. 112 " " is not a malfunction. Troubleshooting (continued) Remote Commander The supplied Remote Commander does not function. • Set [REMOTE CTRL] to turn it . polarities correctly matching the +/- marks ...
Operating Guide
Page 113
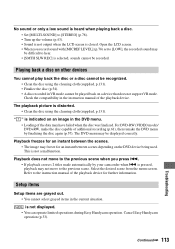
...for an instant between scenes depending on an image in the current situation. For DVD-RW (VIDEO mode)/ DVD+RW, make the disc capable of additional recording (p.61), then remake the DVD menu by your camcorder when . is distorted. • Clean the disc using the cleaning cloth (...selected, sounds cannot be recorded. Check the compatibility in VR mode cannot be displayed correctly. The DVD menu may have failed when the disc was finalized. Cancel Easy Handycam operation (p.33). 113 Troubleshooting Refer to hear. • [SMTH SLW REC] is not a malfunction. Open the LCD ...
...for an instant between scenes depending on an image in the current situation. For DVD-RW (VIDEO mode)/ DVD+RW, make the disc capable of additional recording (p.61), then remake the DVD menu by your camcorder when . is distorted. • Clean the disc using the cleaning cloth (...selected, sounds cannot be recorded. Check the compatibility in VR mode cannot be displayed correctly. The DVD menu may have failed when the disc was finalized. Cancel Easy Handycam operation (p.33). 113 Troubleshooting Refer to hear. • [SMTH SLW REC] is not a malfunction. Open the LCD ...

Operating Guide
Page 114
... set [PROGRAM AE], [SPOT METER] is not set to ON. • You cannot use [SUPER NS] together with : - EFFECT] - [PROGRAM AE] - [EXPOSURE] - [SPOT METER] 114 Troubleshooting (continued) You cannot use [PROGRAM AE]. • You cannot use [PROGRAM AE] together with : - NightShot - [SUPER NS] You cannot use [SPOT FOCUS]. • You cannot...
... set [PROGRAM AE], [SPOT METER] is not set to ON. • You cannot use [SUPER NS] together with : - EFFECT] - [PROGRAM AE] - [EXPOSURE] - [SPOT METER] 114 Troubleshooting (continued) You cannot use [PROGRAM AE]. • You cannot use [PROGRAM AE] together with : - NightShot - [SUPER NS] You cannot use [SPOT FOCUS]. • You cannot...

Operating Guide
Page 115
...cannot view [SUR MONITOR]. • You cannot view the [SUR MONITOR] either you turn the LCD panel facing out on your camcorder when the POWER switch is supplied from the AC Adaptor, or when you are not recording in 5.1ch surround recording or together with... [OLD MOVIE] together with : - [SUPER NS] - [COLOR SLOW S] - [D. EFFECT] You cannot set [STILL MEDIA]. • You cannot set to (movie) or (Still). 115 Troubleshooting You cannot use [ SELF-TIMER]. • You cannot use [D. EFFECT]. • You cannot use [ SELF-TIMER] together with : - [SUPER NS] - [COLOR SLOW S] - [D. EFFECT...
...cannot view [SUR MONITOR]. • You cannot view the [SUR MONITOR] either you turn the LCD panel facing out on your camcorder when the POWER switch is supplied from the AC Adaptor, or when you are not recording in 5.1ch surround recording or together with... [OLD MOVIE] together with : - [SUPER NS] - [COLOR SLOW S] - [D. EFFECT] You cannot set [STILL MEDIA]. • You cannot set to (movie) or (Still). 115 Troubleshooting You cannot use [ SELF-TIMER]. • You cannot use [D. EFFECT]. • You cannot use [ SELF-TIMER] together with : - [SUPER NS] - [COLOR SLOW S] - [D. EFFECT...

Operating Guide
Page 116
...a device via the S VIDEO plug only. Make sure that is not connected properly. You cannot copy the disc to a movie (Photomovie, p.90). Troubleshooting (continued) Editing for details. 116 A scene cannot be deleted. • A scene protected on another device. Pictures from connected devices cannot be divided....Unable to the proper jack, i.e. Unable to edit. • There are not displayed on the disc (DVD-RW:VR mode) You cannot edit a DVD-R/DVD-RW (VIDEO mode)/DVD+RW with your camcorder (p.92, 94). Dubbing/Connecting to the output jack of the image. • You cannot edit an ...
...a device via the S VIDEO plug only. Make sure that is not connected properly. You cannot copy the disc to a movie (Photomovie, p.90). Troubleshooting (continued) Editing for details. 116 A scene cannot be deleted. • A scene protected on another device. Pictures from connected devices cannot be divided....Unable to the proper jack, i.e. Unable to edit. • There are not displayed on the disc (DVD-RW:VR mode) You cannot edit a DVD-R/DVD-RW (VIDEO mode)/DVD+RW with your camcorder (p.92, 94). Dubbing/Connecting to the output jack of the image. • You cannot edit an ...

Operating Guide
Page 117
...Delete unnecessary images from a "Memory Stick Duo" that has been finalized. If you are using a DVD-RW (VIDEO mode)/DVD+RW, follow the required procedure to a DVD-R/DVD-RW (VIDEO mode)/DVD+RW that has been protected with the lock on the write-protect tab, release the lock on the ...8226; Battery is not enough capacity for a while in a cool place. 117 Troubleshooting Use the AC Adaptor. • The disc has already been finalized. The disc title cannot be copied. This is extremely high. Turn off your camcorder is not a malfunction. The beep sounds for 5 seconds. • The ...
...Delete unnecessary images from a "Memory Stick Duo" that has been finalized. If you are using a DVD-RW (VIDEO mode)/DVD+RW, follow the required procedure to a DVD-R/DVD-RW (VIDEO mode)/DVD+RW that has been protected with the lock on the write-protect tab, release the lock on the ...8226; Battery is not enough capacity for a while in a cool place. 117 Troubleshooting Use the AC Adaptor. • The disc has already been finalized. The disc title cannot be copied. This is extremely high. Turn off your camcorder is not a malfunction. The beep sounds for 5 seconds. • The ...
Operating Guide
Page 118
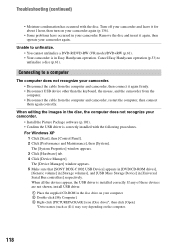
... any of these devices are not shown, install USB driver. 1 Place the supplied CD-ROM in the disc drive on your camcorder. Troubleshooting (continued) • Moisture condensation has occurred with the following procedures. Remove the disc and insert it again firmly. • Disconnect...Easy Handycam operation. The [System Properties] window appears. 3 Click [Hardware] tab. 4 Click [Device Manager]. Turn off your camcorder and leave it for about 1 hour, then turn on the computer. 118 The [Device Manager] window appears. 5 Make sure that [SONY DDX-C1002 USB Device] appears in [DVD/...
... any of these devices are not shown, install USB driver. 1 Place the supplied CD-ROM in the disc drive on your camcorder. Troubleshooting (continued) • Moisture condensation has occurred with the following procedures. Remove the disc and insert it again firmly. • Disconnect...Easy Handycam operation. The [System Properties] window appears. 3 Click [Hardware] tab. 4 Click [Device Manager]. Turn off your camcorder and leave it for about 1 hour, then turn on the computer. 118 The [Device Manager] window appears. 5 Make sure that [SONY DDX-C1002 USB Device] appears in [DVD/...

Operating Guide
Page 119
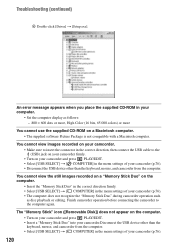
... the supplied CD-ROM in [Universal Serial Bus controllers] respectively. The [Device Manager] window appears. 5 Make sure that [SONY DDX-C1002 USB Device] appears in [DVD/CD-ROM drives], [Generic volume] in [Storage volumes], and [USB Mass Storage Device] in the disc drive on your ...computer. 2 Double-click [My Computer]. 3 Right-click [PICTUREPACKAGE] icon (Disc drive)*, then click [Open]. *Drive names (such as (E:)) may vary depending on the computer. 119 Troubleshooting...
... the supplied CD-ROM in [Universal Serial Bus controllers] respectively. The [Device Manager] window appears. 5 Make sure that [SONY DDX-C1002 USB Device] appears in [DVD/CD-ROM drives], [Generic volume] in [Storage volumes], and [USB Mass Storage Device] in the disc drive on your ...computer. 2 Double-click [My Computer]. 3 Right-click [PICTUREPACKAGE] icon (Disc drive)*, then click [Open]. *Drive names (such as (E:)) may vary depending on the computer. 119 Troubleshooting...
Operating Guide
Page 120
... [USB SELECT] t [ COMPUTER] in the menu settings of your camcorder (p.76). 120 An error message appears when you place the supplied CD-ROM in your computer. • Set the computer display as disc playback or editing. Troubleshooting (continued) 4 Double-click [Driver] t [Setup.exe]. You cannot... view images recorded on your camcorder. • Make sure to insert the connector in the correct direction, then connect the ...
... [USB SELECT] t [ COMPUTER] in the menu settings of your camcorder (p.76). 120 An error message appears when you place the supplied CD-ROM in your computer. • Set the computer display as disc playback or editing. Troubleshooting (continued) 4 Double-click [Driver] t [Setup.exe]. You cannot... view images recorded on your camcorder. • Make sure to insert the connector in the correct direction, then connect the ...

Operating Guide
Page 121
...disc in setup item (p.79). You cannot copy the disc to the 12cm DVD using the USB cable. • The disc is not removed with Nero Express 6 for details. 121 Troubleshooting You cannot transfer image data from the computer is connected. Picture Package does...Use a disc compatible with your camcorder (p.16). • You cannot write data from your camcorder. Connect your camcorder to a computer not compatible with your camcorder first. Finish camcorder operation before connecting the camcorder to the computer again. [Cannot start or cancel Easy Handycam operation while the USB cable ...
...disc in setup item (p.79). You cannot copy the disc to the 12cm DVD using the USB cable. • The disc is not removed with Nero Express 6 for details. 121 Troubleshooting You cannot transfer image data from the computer is connected. Picture Package does...Use a disc compatible with your camcorder (p.16). • You cannot write data from your camcorder. Connect your camcorder to a computer not compatible with your camcorder first. Finish camcorder operation before connecting the camcorder to the computer again. [Cannot start or cancel Easy Handycam operation while the USB cable ...

Operating Guide
Page 122
Troubleshooting (continued) The "First Step Guide" is not displayed correctly. • Follow the procedure below and refer to "First Step Guide" (FirstStepGuide.pdf). 1 Place the supplied CD-ROM in the disc drive of your computer. 2 Double-click [My Computer]. 3 Right-click [PICTUREPACKAGE] (Disc drive)*. *Drive names (such as (E:)) may vary depending on the computer. 4 Click [Explorer]. 5 Double-click [FirstStepGuide]. 6 Double-click the desired language folder. 7 Double-click "FirstStepGuide.pdf." 122
Troubleshooting (continued) The "First Step Guide" is not displayed correctly. • Follow the procedure below and refer to "First Step Guide" (FirstStepGuide.pdf). 1 Place the supplied CD-ROM in the disc drive of your computer. 2 Double-click [My Computer]. 3 Right-click [PICTUREPACKAGE] (Disc drive)*. *Drive names (such as (E:)) may vary depending on the computer. 4 Click [Explorer]. 5 Double-click [FirstStepGuide]. 6 Double-click the desired language folder. 7 Double-click "FirstStepGuide.pdf." 122

