Operating Instructions
Page 2
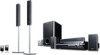
... operate this apparatus to persons. DAV-HDX500/DAV-HDX501W Serial No 2US WARNING This equipment has been tested and found to comply with the manufacturer's instructions. 8) Do not install near water. 6) Clean only with one or more of important operating and maintenance (servicing) instructions in a particular installation. Reorient or relocate the receiving antenna (aerial). - Increase the separation between the equipment and receiver. - A grounding type plug...
... operate this apparatus to persons. DAV-HDX500/DAV-HDX501W Serial No 2US WARNING This equipment has been tested and found to comply with the manufacturer's instructions. 8) Do not install near water. 6) Clean only with one or more of important operating and maintenance (servicing) instructions in a particular installation. Reorient or relocate the receiving antenna (aerial). - Increase the separation between the equipment and receiver. - A grounding type plug...
Operating Instructions
Page 3
... not operate normally, or has been dropped. Thank you for future reference. 3US Welcome! Servicing is required when the apparatus has been damaged in the event of cable entry as it for purchasing Sony DVD Home Theatre System. Precautions On power sources • The unit is connected to the wall outlet (mains), even if the unit itself has been turned off. • Install this system...
... not operate normally, or has been dropped. Thank you for future reference. 3US Welcome! Servicing is required when the apparatus has been damaged in the event of cable entry as it for purchasing Sony DVD Home Theatre System. Precautions On power sources • The unit is connected to the wall outlet (mains), even if the unit itself has been turned off. • Install this system...
Operating Instructions
Page 4
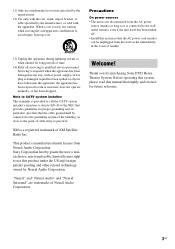
... System ...24 Step 4: Performing the Quick Setup 24 Getting Started - BASIC - Turning off the Demonstration 27 Installing the Speakers on a Wall.......... 28 Connecting the TV (Advanced 30 Connecting Other Components 34 Basic Operations Playing Discs 37 Enjoying the Radio or Other Components 39 Enjoying TV or VCR Sound from All Speakers 40 Selecting the Movie or Music Mode 41 Sound Adjustments Enjoying Surround Sound by Using Sound Field 42 Enjoying Multiplex Broadcast Sound ... 44 (DUAL MONO) Various Functions...
... System ...24 Step 4: Performing the Quick Setup 24 Getting Started - BASIC - Turning off the Demonstration 27 Installing the Speakers on a Wall.......... 28 Connecting the TV (Advanced 30 Connecting Other Components 34 Basic Operations Playing Discs 37 Enjoying the Radio or Other Components 39 Enjoying TV or VCR Sound from All Speakers 40 Selecting the Movie or Music Mode 41 Sound Adjustments Enjoying Surround Sound by Using Sound Field 42 Enjoying Multiplex Broadcast Sound ... 44 (DUAL MONO) Various Functions...
Operating Instructions
Page 5
... Operations Controlling the TV with the Supplied Remote 72 Using the THEATRE SYNC Function 73 Using the Sound Effect 75 Using the Sleep Timer 75 Changing the Brightness of the Front Panel Display 76 Using the DIGITAL MEDIA PORT Adapter 77 Deactivating the Buttons on the Unit.... 78 (Child Lock) Advanced Settings and Adjustments Locking Discs 79 (CUSTOM PARENTAL CONTROL, PARENTAL CONTROL) Getting Optimal Surround Sound for a Room 82 (SPEAKER FORMATION) Calibrating the Appropriate Settings Automatically 84 (AUTO CALIBRATION) Using the Setup Display 86 Setting the Display or Sound...
... Operations Controlling the TV with the Supplied Remote 72 Using the THEATRE SYNC Function 73 Using the Sound Effect 75 Using the Sleep Timer 75 Changing the Brightness of the Front Panel Display 76 Using the DIGITAL MEDIA PORT Adapter 77 Deactivating the Buttons on the Unit.... 78 (Child Lock) Advanced Settings and Adjustments Locking Discs 79 (CUSTOM PARENTAL CONTROL, PARENTAL CONTROL) Getting Optimal Surround Sound for a Room 82 (SPEAKER FORMATION) Calibrating the Appropriate Settings Automatically 84 (AUTO CALIBRATION) Using the Setup Display 86 Setting the Display or Sound...
Operating Instructions
Page 26
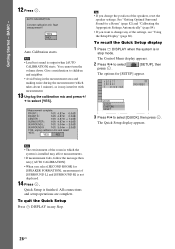
... you change any Step. 26US See "Getting Optimal Surround Sound for a Room" (page 82) and "Calibrating the Appropriate Settings Automatically" (page 84). • If you select [SECOND ROOM] for [SETUP] appear. 1 2 ( 2 7 ) 1 8 ( 3 4 ) T 0:00:02 DVD VIDEO QUICK QUICK CUSTOM RESET BNR 3 Press X/x to select [YES]. The Control Menu display appears. 2 Press X/x to select press . [SETUP], then The options for [SPEAKER FORMATION], measurement of [SURROUND L] and [SURROUND R] is not displayed. 14 Press . All connections and setup operations are...
... you change any Step. 26US See "Getting Optimal Surround Sound for a Room" (page 82) and "Calibrating the Appropriate Settings Automatically" (page 84). • If you select [SECOND ROOM] for [SETUP] appear. 1 2 ( 2 7 ) 1 8 ( 3 4 ) T 0:00:02 DVD VIDEO QUICK QUICK CUSTOM RESET BNR 3 Press X/x to select [YES]. The Control Menu display appears. 2 Press X/x to select press . [SETUP], then The options for [SPEAKER FORMATION], measurement of [SURROUND L] and [SURROUND R] is not displayed. 14 Press . All connections and setup operations are...

Operating Instructions
Page 39
... Operations Enjoying the Radio or Other Components FUNCTION X/x/c, SYSTEM MENU Selecting the connected component You can change the input level from connected components Distortion may occur when listening to a component connected to the SAT/CABLE or TV jacks on the rear panel or to the AUDIO IN jack on the rear panel. Changing the input level of the sound from the sound of the system changes in the front panel display. This is made. 6 Press SYSTEM MENU. The default setting is changed. • "ATT OFF": normal input level. 5 Press . The output level...
... Operations Enjoying the Radio or Other Components FUNCTION X/x/c, SYSTEM MENU Selecting the connected component You can change the input level from connected components Distortion may occur when listening to a component connected to the SAT/CABLE or TV jacks on the rear panel or to the AUDIO IN jack on the rear panel. Changing the input level of the sound from the sound of the system changes in the front panel display. This is made. 6 Press SYSTEM MENU. The default setting is changed. • "ATT OFF": normal input level. 5 Press . The output level...
Operating Instructions
Page 40
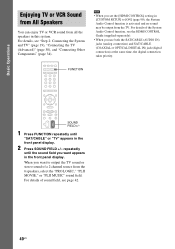
... you set the [HDMI CONTROL] setting in the front panel display. 2 Press SOUND FIELD +/- Note • When you want appears in this system. repeatedly until "SAT/CABLE" or "TV" appears in [CUSTOM SETUP] to output the TV sound or stereo sound of sound field, see page 42. 40US FUNCTION SOUND FIELD+/- 1 Press FUNCTION repeatedly until the sound field you use both the SAT/CABLE (AUDIO IN) jacks (analog connection) and SAT/CABLE (COAXIAL or OPTICAL DIGITAL IN) jack (digital connection...
... you set the [HDMI CONTROL] setting in the front panel display. 2 Press SOUND FIELD +/- Note • When you want appears in this system. repeatedly until "SAT/CABLE" or "TV" appears in [CUSTOM SETUP] to output the TV sound or stereo sound of sound field, see page 42. 40US FUNCTION SOUND FIELD+/- 1 Press FUNCTION repeatedly until the sound field you use both the SAT/CABLE (AUDIO IN) jacks (analog connection) and SAT/CABLE (COAXIAL or OPTICAL DIGITAL IN) jack (digital connection...

Operating Instructions
Page 48
... The Control Menu display appears. 2 Press X/x to select [SET t], then press . [TRACK] is deleted. TRACK - - 6. To enjoy a disc that is set [MULTI-DISC RESUME] in the order you want by resume playback (Multi-disc Resume) (DVD VIDEO, VIDEO CD only) This system stores the point where you stopped the disc for up to 99 tracks. To activate this function, set to [ON]. Creating Your Own Program (Program Play) You can program up...
... The Control Menu display appears. 2 Press X/x to select [SET t], then press . [TRACK] is deleted. TRACK - - 6. To enjoy a disc that is set [MULTI-DISC RESUME] in the order you want by resume playback (Multi-disc Resume) (DVD VIDEO, VIDEO CD only) This system stores the point where you stopped the disc for up to 99 tracks. To activate this function, set to [ON]. Creating Your Own Program (Program Play) You can program up...

Operating Instructions
Page 57
.... Each time you can change the subtitles even if multilingual subtitles are recorded on the DVD VIDEO, you can adjust the delay between picture and sound. 4 Press . The Control Menu display appears. 2 Press X/x to select a setting. Note • Depending on or off . Press SUBTITLE during playback. The options for Playing Discs Displaying the Subtitles If subtitles are recorded on a disc, you can turn the subtitles on or...
.... Each time you can change the subtitles even if multilingual subtitles are recorded on the DVD VIDEO, you can adjust the delay between picture and sound. 4 Press . The Control Menu display appears. 2 Press X/x to select a setting. Note • Depending on or off . Press SUBTITLE during playback. The options for Playing Discs Displaying the Subtitles If subtitles are recorded on a disc, you can turn the subtitles on or...

Operating Instructions
Page 83
... SURROUND]: when installing the center and front speakers. • [FRONT ONLY]: when installing the front speakers. Note • Speaker sound in the other room is installed, [STANDARD (WIRELESS)] appears instead. 5 Press C/c to select a setting. • [STANDARD]: when installing all the speakers normally. • [ALL FRONT]: when installing all the speakers in front of the front and surround speakers. Note • When the wireless kit WAHT-SD1 (supplied with DAV-HDX501W only...
... SURROUND]: when installing the center and front speakers. • [FRONT ONLY]: when installing the front speakers. Note • Speaker sound in the other room is installed, [STANDARD (WIRELESS)] appears instead. 5 Press C/c to select a setting. • [STANDARD]: when installing all the speakers normally. • [ALL FRONT]: when installing all the speakers in front of the front and surround speakers. Note • When the wireless kit WAHT-SD1 (supplied with DAV-HDX501W only...

Operating Instructions
Page 84
... you change the position of the speakers, it is recommended you need to connect the supplied calibration mic. • The front panel display indicates the selected [SPEAKER FORMATION]. C. Give consideration to children and neighbor. 1 Press FUNCTION repeatedly until "DVD" appears in stop mode. Note • Loud test sound is in the front panel display. 2 Press DISPLAY when the system is output when [AUTO CALIBRATION] starts. The options for [AUTO CALIBRATION] appear. SPEAKER FORMATION Continue with [AUTO CALIBRATION], see the operating instructions...
... you change the position of the speakers, it is recommended you need to connect the supplied calibration mic. • The front panel display indicates the selected [SPEAKER FORMATION]. C. Give consideration to children and neighbor. 1 Press FUNCTION repeatedly until "DVD" appears in stop mode. Note • Loud test sound is in the front panel display. 2 Press DISPLAY when the system is output when [AUTO CALIBRATION] starts. The options for [AUTO CALIBRATION] appear. SPEAKER FORMATION Continue with [AUTO CALIBRATION], see the operating instructions...

Operating Instructions
Page 90
..." is selected by using VIDEO FORMAT (page 32). [FULL] [NORMAL] Select this when you can operate mutually between components that are underlined. For details, see the HDMI CONTROL Guide (supplied separately). [OFF] [ON] Sets the HDMI CONTROL function to [ON]. The default settings are connected with the HDMI cord. Sets the HDMI CONTROL function to off . You can change the aspect ratio on left and right sides of the TV, [Please verify the HDMI connection] appears...
..." is selected by using VIDEO FORMAT (page 32). [FULL] [NORMAL] Select this when you can operate mutually between components that are underlined. For details, see the HDMI CONTROL Guide (supplied separately). [OFF] [ON] Sets the HDMI CONTROL function to [ON]. The default settings are connected with the HDMI cord. Sets the HDMI CONTROL function to off . You can change the aspect ratio on left and right sides of the TV, [Please verify the HDMI connection] appears...

Operating Instructions
Page 92
... if no center speaker is used. [SURROUND] [YES]: Normally select this. [NONE]: Select this if no surround speaker is automatically displayed. 0.00 - 7.00 m2)/ 0 - 23 ft Be sure to change the [CONNECTION] setting, the [SPEAKER FORMATION] setting returns to [STANDARD]. SPEAKER SETUP CONNECTION: DISTANCE(FRONT): DISTANCE(SURROUND): LEVEL(FRONT): LEVEL(SURROUND): TEST TONE: OFF FRONT: YES CENTER: YES SURROUND: YES SUBWOOFER: YES To return to the default setting. The default settings are changed. 2)0.00 to 7.01 meters for North American models. 3)3.04 m/10...
... if no center speaker is used. [SURROUND] [YES]: Normally select this. [NONE]: Select this if no surround speaker is automatically displayed. 0.00 - 7.00 m2)/ 0 - 23 ft Be sure to change the [CONNECTION] setting, the [SPEAKER FORMATION] setting returns to [STANDARD]. SPEAKER SETUP CONNECTION: DISTANCE(FRONT): DISTANCE(SURROUND): LEVEL(FRONT): LEVEL(SURROUND): TEST TONE: OFF FRONT: YES CENTER: YES SURROUND: YES SUBWOOFER: YES To return to the default setting. The default settings are changed. 2)0.00 to 7.01 meters for North American models. 3)3.04 m/10...
Operating Instructions
Page 98
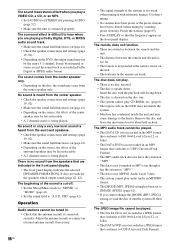
... down . Operation Radio stations cannot be tuned in. • Check that the antenna (aerial) is cut off , then on the disc, the sound may be less noticeable. • A 2 channel source is being played. Insert the disc with automatic tuning). Remove the disc and leave the unit turned on the DVD, the output signal may be monaural or stereo even if the sound track is recorded in Dolby Digital or MPEG audio format. The surround effect...
... down . Operation Radio stations cannot be tuned in. • Check that the antenna (aerial) is cut off , then on the disc, the sound may be less noticeable. • A 2 channel source is being played. Insert the disc with automatic tuning). Remove the disc and leave the unit turned on the DVD, the output signal may be monaural or stereo even if the sound track is recorded in Dolby Digital or MPEG audio format. The surround effect...
Operating Instructions
Page 103
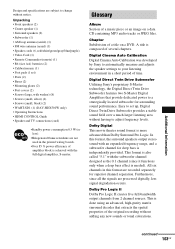
...; Operating Instructions • HDMI CONTROL Guide • Speaker and TV connections (card) •Standby power consumption 0.3 W (or less). •Halogenated flame retardants are not used in a short period of the original recording without notice. Easy to set ) • Posts (2) • Bases (2) • Mounting plates (2) • Post covers (2) • Screws (large, with the full digital amplifier, S-master. Dolby Digital This movie theater sound format is composed of amplifier block is needed). Digital Cinema Auto Calibration Digital Cinema Auto Calibration was...
...; Operating Instructions • HDMI CONTROL Guide • Speaker and TV connections (card) •Standby power consumption 0.3 W (or less). •Halogenated flame retardants are not used in a short period of the original recording without notice. Easy to set ) • Posts (2) • Bases (2) • Mounting plates (2) • Post covers (2) • Screws (large, with the full digital amplifier, S-master. Dolby Digital This movie theater sound format is composed of amplifier block is needed). Digital Cinema Auto Calibration Digital Cinema Auto Calibration was...
Operating Instructions
Page 116
... preset stations 66 Neural Surround 105 O OPTICAL (Digital Out) 35 ORIGINAL 54 OSD 88 Other component connection 34 P PARENTAL CONTROL 80 Parental Control 105 PAUSE MODE 91 PBC Playback 64 PCM (Pulse Code Modulation) 105 PICTURE NAVI 47, 61 PLAY LIST 54 Playback Control (PBC) 105 Program Play 48 PROGRESSIVE 33 Progressive format 32, 105 Q Quick Setup 24 Index Numerics 16:9 88 4:3 LETTER BOX 88 4:3 OUTPUT 89 4:3 PAN SCAN 88 5.1 Channel Surround 53 A A/V SYNC 57...
... preset stations 66 Neural Surround 105 O OPTICAL (Digital Out) 35 ORIGINAL 54 OSD 88 Other component connection 34 P PARENTAL CONTROL 80 Parental Control 105 PAUSE MODE 91 PBC Playback 64 PCM (Pulse Code Modulation) 105 PICTURE NAVI 47, 61 PLAY LIST 54 Playback Control (PBC) 105 Program Play 48 PROGRESSIVE 33 Progressive format 32, 105 Q Quick Setup 24 Index Numerics 16:9 88 4:3 LETTER BOX 88 4:3 OUTPUT 89 4:3 PAN SCAN 88 5.1 Channel Surround 53 A A/V SYNC 57...

Limited Warranty (US Only)
Page 1
... a service problem, or for product information or operation, call: Sony Customer Information Services Center 1-800-222-7669 or visit the Sony Web Site: www.sony.com For an accessory or part not available from the Product. REPAIR OR REPLACEMENT AS PROVIDED UNDER THIS WARRANTY IS THE EXCLUSIVE REMEDY OF THE CONSUMER. 4-557-172-02 General Stereo/Hifi Components/Tape Decks ® CD Players/Mini Disc Players/Audio Systems...
... a service problem, or for product information or operation, call: Sony Customer Information Services Center 1-800-222-7669 or visit the Sony Web Site: www.sony.com For an accessory or part not available from the Product. REPAIR OR REPLACEMENT AS PROVIDED UNDER THIS WARRANTY IS THE EXCLUSIVE REMEDY OF THE CONSUMER. 4-557-172-02 General Stereo/Hifi Components/Tape Decks ® CD Players/Mini Disc Players/Audio Systems...
HDMI Control Guide
Page 2
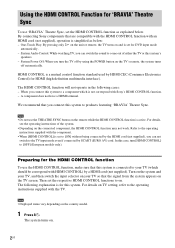
...), operation is a mutual control function standard used by a HDMI cord (not supplied). Using the HDMI CONTROL Function for 'BRAVIA' Theatre Sync To use 'BRAVIA' Theatre Sync, set the HDMI CONTROL function as below . System Audio Control: While watching TV, you connect this system's speakers. - When you can not switch to your TV, and then switch the input selector on the country model. 1 Press "/1. One-Touch Play: By pressing only H on the unit or remote, the TV turns on the TV's remote, the system turns off...
...), operation is a mutual control function standard used by a HDMI cord (not supplied). Using the HDMI CONTROL Function for 'BRAVIA' Theatre Sync To use 'BRAVIA' Theatre Sync, set the HDMI CONTROL function as below . System Audio Control: While watching TV, you connect this system's speakers. - When you can not switch to your TV, and then switch the input selector on the country model. 1 Press "/1. One-Touch Play: By pressing only H on the unit or remote, the TV turns on the TV's remote, the system turns off...
Marketing Specifications
Page 1
... your music, Sony's DIGITAL MEDIA PORT grants access, provides control and integrates your HDMI compatible TV. Multi Speaker Formation Select from a home theater system? The DMP will be compatible with various accessories which will be strong, here's the challenge: how do you access digital music in video performance while delivering digital Video and Audio over . Digital Cinema Auto Calibration Now the optimal speaker for XM service and enjoy the variety of digital radio with the superior sound quality of button away. Speaker...
... your music, Sony's DIGITAL MEDIA PORT grants access, provides control and integrates your HDMI compatible TV. Multi Speaker Formation Select from a home theater system? The DMP will be compatible with various accessories which will be strong, here's the challenge: how do you access digital music in video performance while delivering digital Video and Audio over . Digital Cinema Auto Calibration Now the optimal speaker for XM service and enjoy the variety of digital radio with the superior sound quality of button away. Speaker...

Marketing Specifications
Page 2
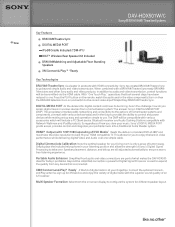
.../2007 DAV-HDX501W/C Sony® BRAVIA® TheatreSystem Specifications General Disc Capacity: 5 Function: CD, DVD, Audio Speaker Speaker System: DDTD Speaker Type: Bass Reflex (Ported) Woofer(s): 16 cm Audio Tuner Type: AM/FM Station Preset(s): 10 AM, 20 FM Digital Amplifier: Yes (24 bit S-Master® Digital Amplifier) Audio Power Output: Amplifier: 1000W Total, Center Speaker: 143W (1KHz 10%THD), Front Speaker: 143W x 2 (1KHz 10%THD), Subwoofer Speaker: 285W (1KHz 10%THD), Surround Speaker: 143W x 2 (1KHz 10%THD) Speaker Type: DAV Connector Equalizer: Bass Boost function (Dynamic Bass on...
.../2007 DAV-HDX501W/C Sony® BRAVIA® TheatreSystem Specifications General Disc Capacity: 5 Function: CD, DVD, Audio Speaker Speaker System: DDTD Speaker Type: Bass Reflex (Ported) Woofer(s): 16 cm Audio Tuner Type: AM/FM Station Preset(s): 10 AM, 20 FM Digital Amplifier: Yes (24 bit S-Master® Digital Amplifier) Audio Power Output: Amplifier: 1000W Total, Center Speaker: 143W (1KHz 10%THD), Front Speaker: 143W x 2 (1KHz 10%THD), Subwoofer Speaker: 285W (1KHz 10%THD), Surround Speaker: 143W x 2 (1KHz 10%THD) Speaker Type: DAV Connector Equalizer: Bass Boost function (Dynamic Bass on...


