Adjustment Guide
Page 3
... Current Value Setting 13 1.4.3 PTC Current Value Setting ...13 1.5 Image Quality Adjustment...13 1.5.1 Copy Colour Balance Adjustment ...13 1.5.2 Printer Colour Balance Adjustment ...14 1.5.3 Standard Calibration...15 1.5.4 Copy Calibration by Dither Pattern...15 1.5.5 Printer Calibration by Dither Pattern ...16 1.5.6 Colour Copy Black Component Amount Adjustment 17 1.5.7 Area Separation Level Adjustment...17 1.6 Other Functions...
... Current Value Setting 13 1.4.3 PTC Current Value Setting ...13 1.5 Image Quality Adjustment...13 1.5.1 Copy Colour Balance Adjustment ...13 1.5.2 Printer Colour Balance Adjustment ...14 1.5.3 Standard Calibration...15 1.5.4 Copy Calibration by Dither Pattern...15 1.5.5 Printer Calibration by Dither Pattern ...16 1.5.6 Colour Copy Black Component Amount Adjustment 17 1.5.7 Area Separation Level Adjustment...17 1.6 Other Functions...
Adjustment Guide
Page 11
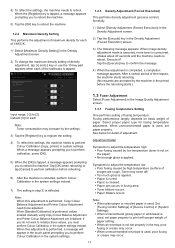
...range: [-2] to perform calibration, press [OK]. 5) When the [OK] is performed, values entered manually using Copy Colour Balance Adjustment and Printer Colour Balance Adjustment are initialized. When a message appears prompting you to [2] Default: [0] for each of Y/M/C/K. 1) Select [Maximum Density Setting]...it ? Fusing performance largely depends on the paper) Not enough gloss is performed, Copy Colour Balance Adjustment and Printer Colour Adjustment need to perform calibration before the rebooting starts.) 1.3 Fuser Adjustment Select [Fuser Adjustment] in the Image Quality...
...range: [-2] to perform calibration, press [OK]. 5) When the [OK] is performed, values entered manually using Copy Colour Balance Adjustment and Printer Colour Balance Adjustment are initialized. When a message appears prompting you to [2] Default: [0] for each of Y/M/C/K. 1) Select [Maximum Density Setting]...it ? Fusing performance largely depends on the paper) Not enough gloss is performed, Copy Colour Balance Adjustment and Printer Colour Adjustment need to perform calibration before the rebooting starts.) 1.3 Fuser Adjustment Select [Fuser Adjustment] in the Image Quality...

Adjustment Guide
Page 14
... Input range: [1] to [999] Default: [500] for [Set in a Batch] is not active. (A beep sounds when the textbox is tapped.) 1) Select [Printer Colour Balance Adjustment] in a Batch] is not active. (A beep sounds when the textbox is tapped.) 5) After adjustment, tap the [Execute] button again, print a... print pattern, and check the results of the Printer Colour Balance Adjustment screen The [Set in a Batch] checkbox is not checked, the textbox for each To change all density points at...
... Input range: [1] to [999] Default: [500] for [Set in a Batch] is not active. (A beep sounds when the textbox is tapped.) 1) Select [Printer Colour Balance Adjustment] in a Batch] is not active. (A beep sounds when the textbox is tapped.) 5) After adjustment, tap the [Execute] button again, print a... print pattern, and check the results of the Printer Colour Balance Adjustment screen The [Set in a Batch] checkbox is not checked, the textbox for each To change all density points at...
Adjustment Guide
Page 15
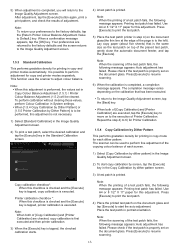
... the printed test patch on the document glass. Note: To return your preferences to the factory defaults, tap the [Return Printer Colour Balance Adjustment Value to adjust colour balance. Press [Execute] to the Image Quality Adjustment screen. Copy calibration checkbox*: When... patch, select the desired calibration and tap the [Execute] key in System settings. When [1.5.4 Copy Calibration by Dither Pattern] or [1.5.5 Printer Calibration by dither pattern screen. 3) A test patch is printed. After adjustment, tap the [Execute] button again, print a print pattern, and check...
... the printed test patch on the document glass. Note: To return your preferences to the factory defaults, tap the [Return Printer Colour Balance Adjustment Value to adjust colour balance. Press [Execute] to the Image Quality Adjustment screen. Copy calibration checkbox*: When... patch, select the desired calibration and tap the [Execute] key in System settings. When [1.5.4 Copy Calibration by Dither Pattern] or [1.5.5 Printer Calibration by dither pattern screen. 3) A test patch is printed. After adjustment, tap the [Execute] button again, print a print pattern, and check...

Adjustment Guide
Page 16
...test patch fails, the following message appears: Printing test patch has failed. Place the test patch in portrait orientation. 9) When the printer calibration by dither pattern screen. Place the test patch in portrait orientation. 5) When the adjustment is completed, a completion message appears... appears: Printing test patch has failed. Press [Execute] to the Image Quality Adjustment screen, tap the [Back] key. 1.5.5 Printer Calibration by Dither Pattern This performs gradation density for this adjustment. Please check if the test patch is completed, a completion message ...
...test patch fails, the following message appears: Printing test patch has failed. Place the test patch in portrait orientation. 9) When the printer calibration by dither pattern screen. Place the test patch in portrait orientation. 5) When the adjustment is completed, a completion message appears... appears: Printing test patch has failed. Press [Execute] to the Image Quality Adjustment screen, tap the [Back] key. 1.5.5 Printer Calibration by Dither Pattern This performs gradation density for this adjustment. Please check if the test patch is completed, a completion message ...


