User Manual (ENGLISH)
Page 4
... the Battery 10 Setting Up Your Voice Mail 11 Understanding Your Phone 12 Features of Your Phone 12 Closed View of Your Phone 13 Open View of Your Phone 14 Command Keys ...16 Understanding the Display Screen 18 Your Phone's Modes 19 Call Functions 23 Making a Call ...24 Answering a Call ...27 Calls ...... a New Contacts Entry 54 Editing a Contacts Entry 56 Saving a Number After a Call 59 Speed Dial ...60 Contacts Groups ...62 Deleting a Contacts Entry 65 Memory Info ...65 Messaging 66 Types of Messages 67 Create and Send Text Messages 67 Send Picture Messages in Camera Mode 68 4
... the Battery 10 Setting Up Your Voice Mail 11 Understanding Your Phone 12 Features of Your Phone 12 Closed View of Your Phone 13 Open View of Your Phone 14 Command Keys ...16 Understanding the Display Screen 18 Your Phone's Modes 19 Call Functions 23 Making a Call ...24 Answering a Call ...27 Calls ...... a New Contacts Entry 54 Editing a Contacts Entry 56 Saving a Number After a Call 59 Speed Dial ...60 Contacts Groups ...62 Deleting a Contacts Entry 65 Memory Info ...65 Messaging 66 Types of Messages 67 Create and Send Text Messages 67 Send Picture Messages in Camera Mode 68 4
User Manual (ENGLISH)
Page 6
... ...142 Changing Your Settings 143 Location ...144 Call Settings ...144 Phone Settings ...147 Memory Info ...154 Phone Info ...159 Health and Safety Information 161 Health and Safety Information 161 Samsung Mobile Products and Recycling 163 UL Certified Travel Adapter 163 Consumer Information on Wireless Phones 163 Road Safety ...170 Responsible Listening 171 Operating Environment 173 Using...
... ...142 Changing Your Settings 143 Location ...144 Call Settings ...144 Phone Settings ...147 Memory Info ...154 Phone Info ...159 Health and Safety Information 161 Health and Safety Information 161 Samsung Mobile Products and Recycling 163 UL Certified Travel Adapter 163 Consumer Information on Wireless Phones 163 Road Safety ...170 Responsible Listening 171 Operating Environment 173 Using...
User Manual (ENGLISH)
Page 12
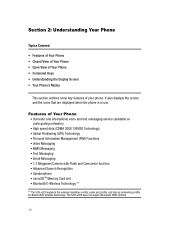
... • Advanced Speech Recognition • Speakerphone • microSDTM Memory Card slot • Bluetooth® Wireless Technology ** ** The SCH-u520 supports the wireless handsfree profile, serial port profile, and dial-up networking profile for Bluetooth® wireless technology. It also displays the screen and the icons that are displayed when the phone is in use. Features of your...
... • Advanced Speech Recognition • Speakerphone • microSDTM Memory Card slot • Bluetooth® Wireless Technology ** ** The SCH-u520 supports the wireless handsfree profile, serial port profile, and dial-up networking profile for Bluetooth® wireless technology. It also displays the screen and the icons that are displayed when the phone is in use. Features of your...
User Manual (ENGLISH)
Page 13
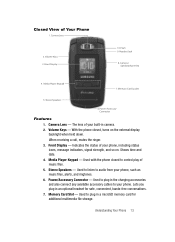
... Keys - Used to listen to plug in camera. 2. Media Player Keypad 7. The lens of Your Phone 1. Used to audio from your phone, such as music files, alerts, and ringtones. 6. Stereo Speakers - Closed View of your built-in a microSD memory card for safe, convenient, hands-free conversations. 7. Camera / Speakerphone Key 4. Stereo Speakers 6. Front Display...
... Keys - Used to listen to plug in camera. 2. Media Player Keypad 7. The lens of Your Phone 1. Used to audio from your phone, such as music files, alerts, and ringtones. 6. Stereo Speakers - Closed View of your built-in a microSD memory card for safe, convenient, hands-free conversations. 7. Camera / Speakerphone Key 4. Stereo Speakers 6. Front Display...
User Manual (ENGLISH)
Page 18
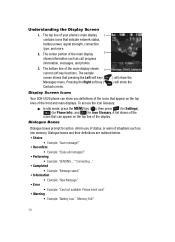
... Dialogue boxes prompt for Icon Glossary. The sample screen shows that can show the Display Screen Icons Your SCH-U520 phone can appear on the top lines of the main display 2 shows information such as low memory. "Connecting..." • Completed • Example: "Message saved" • Information • Example:...front and main displays. Please Insert card" • Warning • Example: "Battery Low," "Memory Full!" 18 A list shows of the display. The top line of your phone's main display 1 contains icons that appear on the top line of the icons that pressing the ...
... Dialogue boxes prompt for Icon Glossary. The sample screen shows that can show the Display Screen Icons Your SCH-U520 phone can appear on the top lines of the main display 2 shows information such as low memory. "Connecting..." • Completed • Example: "Message saved" • Information • Example:...front and main displays. Please Insert card" • Warning • Example: "Battery Low," "Memory Full!" 18 A list shows of the display. The top line of your phone's main display 1 contains icons that appear on the top line of the icons that pressing the ...
User Manual (ENGLISH)
Page 41
1.4.4 Family 1.4.5 Friends 1.5 Memory Info 2 Calls 2.1 Outgoing Calls 2.2 Incoming Calls 2.3 Missed Calls 2.4 All Calls 2.5 Data Call 2.6 Call Timer 2.7 Data Counter 3 Messages 3.1 Send Message 3.1.1 Text Message 3.1.2 Picture Message 3.1.3 Video Message 3.2 Inbox 3.3 Outbox 3.4 Drafts 3.5 Voicemail 3.6 Erase Messages 3.6.1 Inbox 3.6.2 Outbox 3.6.3 Drafts 3.6.4 All Messages 3.7 Msg Settings 3.7.1 General 3.7.1.1 Auto Save 3.7.1.2 Auto Erase 3.7.1.3 Quick Text 3.7.1.4 Voicemail # 3.7.1.5 Entry Mode 3.7.1.6 Callback # 3.7.1.7 Signature Menu Navigation 41
1.4.4 Family 1.4.5 Friends 1.5 Memory Info 2 Calls 2.1 Outgoing Calls 2.2 Incoming Calls 2.3 Missed Calls 2.4 All Calls 2.5 Data Call 2.6 Call Timer 2.7 Data Counter 3 Messages 3.1 Send Message 3.1.1 Text Message 3.1.2 Picture Message 3.1.3 Video Message 3.2 Inbox 3.3 Outbox 3.4 Drafts 3.5 Voicemail 3.6 Erase Messages 3.6.1 Inbox 3.6.2 Outbox 3.6.3 Drafts 3.6.4 All Messages 3.7 Msg Settings 3.7.1 General 3.7.1.1 Auto Save 3.7.1.2 Auto Erase 3.7.1.3 Quick Text 3.7.1.4 Voicemail # 3.7.1.5 Entry Mode 3.7.1.6 Callback # 3.7.1.7 Signature Menu Navigation 41
User Manual (ENGLISH)
Page 45
... 9.3.1 Airplane Mode 9.3.2 Shortcut Key 9.3.3 Language 9.3.4 Secruity 9.3.4.1 Lock Phone 9.3.4.2 Change Lock 9.3.4.3 Emergency # 9.3.4.4 9.3.4.3.1 911 9.3.4.3.2 Empty 9.3.4.3.3 Empty Reset Phone 9.3.4.5 Erase All Entry 9.3.4.6 Restriction 9.3.5 9.3.4.6.1 9.3.4.6.2 9.3.4.6.3 NAM Selection Outgoing Incoming Contacts 9.3.6 System Select 9.3.7 Set Time 9.3.7.1 Set Time 9.3.7.2 Set Date 9.3.8 Quick Search 9.3.9 PC Connection 9.4 Memory Info 9.4.1 Save Options 9.4.1.1 Images 9.4.1.2 Videos 9.4.2 Phone Memory 9.4.2.1 Memory Usage 9.4.2.2 My Images Menu Navigation 45
... 9.3.1 Airplane Mode 9.3.2 Shortcut Key 9.3.3 Language 9.3.4 Secruity 9.3.4.1 Lock Phone 9.3.4.2 Change Lock 9.3.4.3 Emergency # 9.3.4.4 9.3.4.3.1 911 9.3.4.3.2 Empty 9.3.4.3.3 Empty Reset Phone 9.3.4.5 Erase All Entry 9.3.4.6 Restriction 9.3.5 9.3.4.6.1 9.3.4.6.2 9.3.4.6.3 NAM Selection Outgoing Incoming Contacts 9.3.6 System Select 9.3.7 Set Time 9.3.7.1 Set Time 9.3.7.2 Set Date 9.3.8 Quick Search 9.3.9 PC Connection 9.4 Memory Info 9.4.1 Save Options 9.4.1.1 Images 9.4.1.2 Videos 9.4.2 Phone Memory 9.4.2.1 Memory Usage 9.4.2.2 My Images Menu Navigation 45
User Manual (ENGLISH)
Page 51
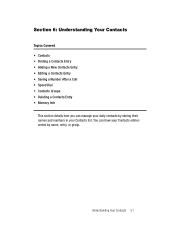
You can manage your daily contacts by storing their names and numbers in your Contacts entries sorted by name, entry, or group. Understanding Your Contacts 51 Section 6: Understanding Your Contacts Topics Covered • Contacts • Finding a Contacts Entry • Adding a New Contacts Entry • Editing a Contacts Entry • Saving a Number After a Call • Speed Dial • Contacts Groups • Deleting a Contacts Entry • Memory Info This section details how you can have your Contacts list.
You can manage your daily contacts by storing their names and numbers in your Contacts entries sorted by name, entry, or group. Understanding Your Contacts 51 Section 6: Understanding Your Contacts Topics Covered • Contacts • Finding a Contacts Entry • Adding a New Contacts Entry • Editing a Contacts Entry • Saving a Number After a Call • Speed Dial • Contacts Groups • Deleting a Contacts Entry • Memory Info This section details how you can have your Contacts list.
User Manual (ENGLISH)
Page 52
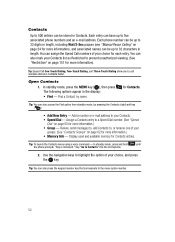
...key ( ). • Add New Entry - Tip: To launch the Contacts menu using a voice command - In standby mode, press and hold until the phone prompts, "Say a command." Use the navigation keys to your groups. (See "Contacts Groups" on page 24 for more information). Tip: You can also... a number or e-mail address to highlight the option of your choice for more information.) • Group - Display used and available memory for more information.) • Memory Info - You can be stored in length, including Wait/2-Sec pauses (see "Manual Pause Calling" on page 62 for each entry....
...key ( ). • Add New Entry - Tip: To launch the Contacts menu using a voice command - In standby mode, press and hold until the phone prompts, "Say a command." Use the navigation keys to your groups. (See "Contacts Groups" on page 24 for more information). Tip: You can also... a number or e-mail address to highlight the option of your choice for more information.) • Group - Display used and available memory for more information.) • Memory Info - You can be stored in length, including Wait/2-Sec pauses (see "Manual Pause Calling" on page 62 for each entry....

User Manual (ENGLISH)
Page 65
... highlight Erase, the press the OK key. Press the Options (right) soft key . The phone prompts you to confirm the erasure. 5. Memory Info The Memory Info menu option lets you view the amount of memory Used and remaining (Free) for Memory Info. Understanding Your Contacts 65 Use the Up and Down navigation keys to highlight...
... highlight Erase, the press the OK key. Press the Options (right) soft key . The phone prompts you to confirm the erasure. 5. Memory Info The Memory Info menu option lets you view the amount of memory Used and remaining (Free) for Memory Info. Understanding Your Contacts 65 Use the Up and Down navigation keys to highlight...
User Manual (ENGLISH)
Page 70
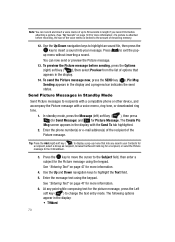
Use the Up/Down navigation keys to highlight an sound file, then press the OK key to the amount of remaining memory. 12. Press CLR to highlight the Text field. 5. To preview the Picture message before recording, the size of the voice memo is attached before sending, ... standby mode, press the Message (left) soft key ( ), then press @ )) (for Send Message) and for a recipient, or send the Picture message to recipients with a compatible phone or other device, and accompany the Picture message with the Send To tab highlighted. 2. Tip: Press the Add (right) soft key ( ) to display a pop-up...
Use the Up/Down navigation keys to highlight an sound file, then press the OK key to the amount of remaining memory. 12. Press CLR to highlight the Text field. 5. To preview the Picture message before recording, the size of the voice memo is attached before sending, ... standby mode, press the Message (left) soft key ( ), then press @ )) (for Send Message) and for a recipient, or send the Picture message to recipients with a compatible phone or other device, and accompany the Picture message with the Send To tab highlighted. 2. Tip: Press the Add (right) soft key ( ) to display a pop-up...
User Manual (ENGLISH)
Page 72
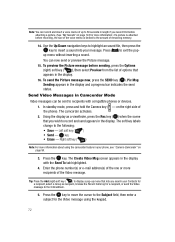
... press the SEND key ( OK ). In standby mode, press and hold the Camera key ( - Enter the phone number(s) or e-mail address(s) of the one or more information.) If a picture is attached before recording, the ... the Picture message before attaching a picture. (See "My Sounds" on page 124 for more recipients of the phone). Note: You can record and insert a voice memo of up menu that appears in the display. 16. ... or send the Video message to the amount of remaining memory. 14. The Create Video Msg screen appears in the display and a progress bar indicates the send status.
... press the SEND key ( OK ). In standby mode, press and hold the Camera key ( - Enter the phone number(s) or e-mail address(s) of the one or more information.) If a picture is attached before recording, the ... the Picture message before attaching a picture. (See "My Sounds" on page 124 for more recipients of the phone). Note: You can record and insert a voice memo of up menu that appears in the display. 16. ... or send the Video message to the amount of remaining memory. 14. The Create Video Msg screen appears in the display and a progress bar indicates the send status.
User Manual (ENGLISH)
Page 87
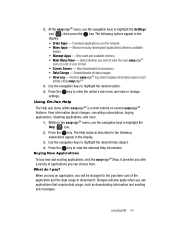
... Help sub menu within easyedgeSM is a short tutorial on several easyedgeSM features. Press the OK key to highlight the desired option. 4. View used and available memory. • Main Menu View - View information about recent activity using easyedgeSM. 3. Within in the display: • Order Apps - 2. View downloaded screensavers. • Data Charge - Press...
... Help sub menu within easyedgeSM is a short tutorial on several easyedgeSM features. Press the OK key to highlight the desired option. 4. View used and available memory. • Main Menu View - View information about recent activity using easyedgeSM. 3. Within in the display: • Order Apps - 2. View downloaded screensavers. • Data Charge - Press...
User Manual (ENGLISH)
Page 89
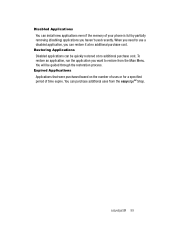
... quickly restored at no additional purchase cost. Expired Applications Applications that were purchased based on the number of uses or for a specified period of your phone is full by partially removing (disabling) applications you haven't used recently. easyedgeSM 89 Disabled Applications You can be guided through the restoration process. To restore... no additional purchase cost. When you can purchase additional uses from the Main Menu. Restoring Applications Disabled applications can install new applications even if the memory of time expire.
... quickly restored at no additional purchase cost. Expired Applications Applications that were purchased based on the number of uses or for a specified period of your phone is full by partially removing (disabling) applications you haven't used recently. easyedgeSM 89 Disabled Applications You can be guided through the restoration process. To restore... no additional purchase cost. When you can purchase additional uses from the Main Menu. Restoring Applications Disabled applications can install new applications even if the memory of time expire.

User Manual (ENGLISH)
Page 91
... you can use the camera, but not the camcorder, with the built-in quick succession. Taking Pictures and Videos Taking pictures videos with the phone's flip closed. Note: You can select the best picture(s) and discard the rest. 1. appears in the display followed by a camera view finder...a subject, pointing the lens [located on page 96 for more information.) Camera-Camcorder 91 Press the OK key when the image that you wish to memory. 5. The message "Loading..." Press the Erase (right) soft key ( ) to suit particular uses for more information. See "Camera Options" on ...
... you can use the camera, but not the camcorder, with the built-in quick succession. Taking Pictures and Videos Taking pictures videos with the phone's flip closed. Note: You can select the best picture(s) and discard the rest. 1. appears in the display followed by a camera view finder...a subject, pointing the lens [located on page 96 for more information.) Camera-Camcorder 91 Press the OK key when the image that you wish to memory. 5. The message "Loading..." Press the Erase (right) soft key ( ) to suit particular uses for more information. See "Camera Options" on ...

User Manual (ENGLISH)
Page 92
... display. 5. Press the Done (left) soft key ( ) to save the remaining picture(s) to unselect them 9. Lets you want discarded, then press the OK key to memory. Press the Options (right) soft key ( ). A Series Shot icon ( ), a progress bar, and a counter appear in the display. 8.
... display. 5. Press the Done (left) soft key ( ) to save the remaining picture(s) to unselect them 9. Lets you want discarded, then press the OK key to memory. Press the Options (right) soft key ( ). A Series Shot icon ( ), a progress bar, and a counter appear in the display. 8.

User Manual (ENGLISH)
Page 93
... key, using the current camcorder settings, do the following: 1. appears in the display. Recording continues until you activate your phone's camera, the second line of the subject at your stored pictures. (See "The Photo Gallery" on the right side...Camcorder. 2.From the camera screen, by a camera view finder screen. (See "Camera Screen" on the bottom line of the phone. Press the Save (left soft key ( ) opens the My Images multimedia folder so you wish to capture appears in the ... Images - Taking Videos To take a video using the Left and Right navigation keys to memory. 6.
... key, using the current camcorder settings, do the following: 1. appears in the display. Recording continues until you activate your phone's camera, the second line of the subject at your stored pictures. (See "The Photo Gallery" on the right side...Camcorder. 2.From the camera screen, by a camera view finder screen. (See "Camera Screen" on the bottom line of the phone. Press the Save (left soft key ( ) opens the My Images multimedia folder so you wish to capture appears in the ... Images - Taking Videos To take a video using the Left and Right navigation keys to memory. 6.
User Manual (ENGLISH)
Page 94
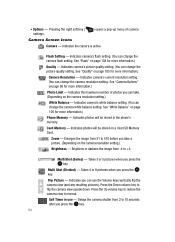
... setting. See "Camera Options" on the camera resolution setting.) White Balance - See "White Balance" on page 104 for more information.) Phone Memory - Zoom - Flip Picture - Press the Down volume key to normal. Indicates photos will be stored in use the Volume keys vertically ...camera resolution setting.) Brightness - Indicates you can use - Delays the camera shutter from -4 to 10 seconds after you press the OK key. Card Memory - Brightens or darkens the image from 2 to +4. Pressing the right soft key ( settings. ) opens a pop-up menu of photos you can...
... setting. See "Camera Options" on the camera resolution setting.) White Balance - See "White Balance" on page 104 for more information.) Phone Memory - Zoom - Flip Picture - Press the Down volume key to normal. Indicates photos will be stored in use the Volume keys vertically ...camera resolution setting.) Brightness - Indicates you can use - Delays the camera shutter from -4 to 10 seconds after you press the OK key. Card Memory - Brightens or darkens the image from 2 to +4. Pressing the right soft key ( settings. ) opens a pop-up menu of photos you can...
User Manual (ENGLISH)
Page 95
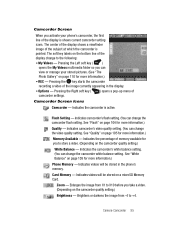
...quality setting. Camera-Camcorder 95 Indicates the camcorder is pointed. Indicates the percentage of the image currently appearing in the phone's memory. The center of the display shows a viewfinder image of camcorder settings. Pressing the Left soft key ( ) .... (Depending on the camcorder quality setting.) Brightness - Camcorder Screen Icons Camcorder - See "Flash" on page 104 for more information.) Phone Memory - Card Memory - Zoom - Camcorder Screen When you to store a video. (Depending on the camcorder quality setting.) White Balance - Indicates camcorder's...
...quality setting. Camera-Camcorder 95 Indicates the camcorder is pointed. Indicates the percentage of the image currently appearing in the phone's memory. The center of the display shows a viewfinder image of camcorder settings. Pressing the Left soft key ( ) .... (Depending on the camcorder quality setting.) Brightness - Camcorder Screen Icons Camcorder - See "Flash" on page 104 for more information.) Phone Memory - Card Memory - Zoom - Camcorder Screen When you to store a video. (Depending on the camcorder quality setting.) White Balance - Indicates camcorder's...
User Manual (ENGLISH)
Page 96
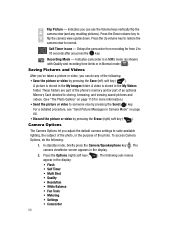
...) soft key ( appear in the My Images folder. Self Timer in use the Volume keys vertically flip the camera view (and any of an optional Memory Card devoted to storing, browsing, and viewing saved pictures and videos. (See "The Photo Gallery" on page 68. • Discard the picture or video... restore the camera view to suite available lighting, the subject of the photo, or the purpose of the photo. These folders are part of the phone's memory and/or part of the following: • Save the picture or video by pressing the Erase (right) soft key ( ). For a detailed procedure, see "Send...
...) soft key ( appear in the My Images folder. Self Timer in use the Volume keys vertically flip the camera view (and any of an optional Memory Card devoted to storing, browsing, and viewing saved pictures and videos. (See "The Photo Gallery" on page 68. • Discard the picture or video... restore the camera view to suite available lighting, the subject of the photo, or the purpose of the photo. These folders are part of the phone's memory and/or part of the following: • Save the picture or video by pressing the Erase (right) soft key ( ). For a detailed procedure, see "Send...


