
User Manual (ENGLISH)
Page 8
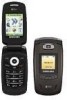
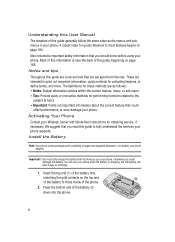
... damage your phone, otherwise you use your phone supports. Activating Your Phone Contact your Wireless Carrier and follow the same order as follows: • Notes: Explain alternative options within the current feature, menu, or sub menu. • Tips: Provide quick or innovative methods for obtaining service, if necessary. You can use your phone. Understanding this User Manual The chapters of this guide generally follow their instructions for performing...
... damage your phone, otherwise you use your phone supports. Activating Your Phone Contact your Wireless Carrier and follow the same order as follows: • Notes: Explain alternative options within the current feature, menu, or sub menu. • Tips: Provide quick or innovative methods for obtaining service, if necessary. You can use your phone. Understanding this User Manual The chapters of this guide generally follow their instructions for performing...
User Manual (ENGLISH)
Page 13
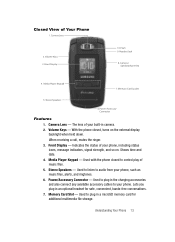
Volume Keys 3. Media Player Keypad 7. Camera Lens - With the phone closed to audio from your phone, including status icons, message indicators, signal strength, and so on the external display backlight when held down. When receiving a call, mutes the ringer. 3. Stereo Speakers - Camera Lens 2. Lets you plug in a microSD memory card for safe, convenient, hands-free conversations. 7. Closed View of music files. 5. Memory Card Socket 5. The lens of your phone, such as music files, alerts, and ringtones. 6. Front Display - Shows time and...
Volume Keys 3. Media Player Keypad 7. Camera Lens - With the phone closed to audio from your phone, including status icons, message indicators, signal strength, and so on the external display backlight when held down. When receiving a call, mutes the ringer. 3. Stereo Speakers - Camera Lens 2. Lets you plug in a microSD memory card for safe, convenient, hands-free conversations. 7. Closed View of music files. 5. Memory Card Socket 5. The lens of your phone, such as music files, alerts, and ringtones. 6. Front Display - Shows time and...
User Manual (ENGLISH)
Page 18
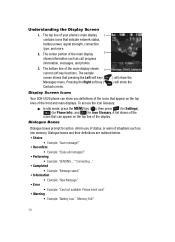
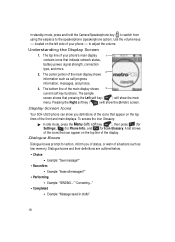
... Settings), (for Phone Info), and for action, inform you definitions of the icons that indicate network status, battery power, signal strength, connection type, and more. 2. The sample screen shows that can show you of status, or warn of your phone's main display 1 contains icons that appear on the top line of the main display shows 3 current soft key functions. Please Insert card" • Warning • Example: "Battery Low," "Memory...
... Settings), (for Phone Info), and for action, inform you definitions of the icons that indicate network status, battery power, signal strength, connection type, and more. 2. The sample screen shows that can show you of status, or warn of your phone's main display 1 contains icons that appear on the top line of the main display shows 3 current soft key functions. Please Insert card" • Warning • Example: "Battery Low," "Memory...

User Manual (ENGLISH)
Page 56
... information. 2. Stops the calling sequence until the phone receives further input. • 2-Sec Pause - Keep in the - Wait - For example, two consecutive 2-Sec Pauses cause a total pause time of 32 digits. • Wait - Assign a speed dial number (see "Add Pauses to clear all numbers or letters in the display. Instead of manually entering these numbers, you wish to change . • Press CLR to backspace and delete numbers or...
... information. 2. Stops the calling sequence until the phone receives further input. • 2-Sec Pause - Keep in the - Wait - For example, two consecutive 2-Sec Pauses cause a total pause time of 32 digits. • Wait - Assign a speed dial number (see "Add Pauses to clear all numbers or letters in the display. Instead of manually entering these numbers, you wish to change . • Press CLR to backspace and delete numbers or...
User Manual (ENGLISH)
Page 95
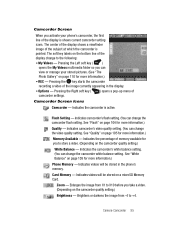
The soft key labels on a microSD Memory Card. Camcorder Screen Icons Camcorder - Indicates videos will be stored on the bottom line of memory available for you can change the camcorder flash setting. Camera-Camcorder 95 Indicates camcorder's flash setting. (You can change to store a video. (Depending on page 105 for more information.) Memory Available - Card Memory - Indicates the camcorder is pointed. See "Flash" on page 105 for more information.) Phone Memory - See...
The soft key labels on a microSD Memory Card. Camcorder Screen Icons Camcorder - Indicates videos will be stored on the bottom line of memory available for you can change the camcorder flash setting. Camera-Camcorder 95 Indicates camcorder's flash setting. (You can change to store a video. (Depending on page 105 for more information.) Memory Available - Card Memory - Indicates the camcorder is pointed. See "Flash" on page 105 for more information.) Phone Memory - See...
User Manual (ENGLISH)
Page 110
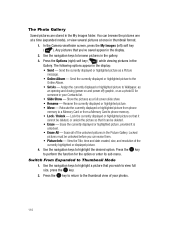
... the pictures as a Picture message. • Online Album - Switch From Expanded to phone memory. • Lock / Unlock - Use the navigation keys to highlight a picture that you've saved appear in thumbnail format. 1. Use the navigation keys to view full size, press the OK key. 2. Send the currently displayed or highlighted picture to Wallpaper, as an opening and closing (power on and power off) graphic, or as a photo ID for the option or enter its sub menu. Assign...
... the pictures as a Picture message. • Online Album - Switch From Expanded to phone memory. • Lock / Unlock - Use the navigation keys to highlight a picture that you've saved appear in thumbnail format. 1. Use the navigation keys to view full size, press the OK key. 2. Send the currently displayed or highlighted picture to Wallpaper, as an opening and closing (power on and power off) graphic, or as a photo ID for the option or enter its sub menu. Assign...
User Manual (ENGLISH)
Page 132
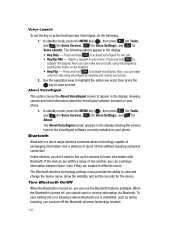
... Bluetooth wireless technology headset. 132 In standby mode, press the MENU key ( OK ), then press (for Tools), and @ )) (for Voice Service), (for Voice Settings), and for About. Press and hold to beam information with Bluetooth. Use the navigation keys to highlight the option you don't need to line up the devices to activate VoiceSignal. The About VoiceSignal screen appears in the display: • Key Only - Voice Launch To set the security...
... Bluetooth wireless technology headset. 132 In standby mode, press the MENU key ( OK ), then press (for Tools), and @ )) (for Voice Service), (for Voice Settings), and for About. Press and hold to beam information with Bluetooth. Use the navigation keys to highlight the option you don't need to line up the devices to activate VoiceSignal. The About VoiceSignal screen appears in the display: • Key Only - Voice Launch To set the security...
User Manual (ENGLISH)
Page 149
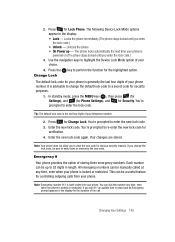
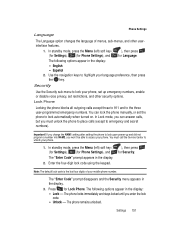
... the new code. Change Lock The default lock code for verification. 4. Enter the new lock code. Your changes are stored. This can dial this number any time, even when your phone is advisable to change the lock code, be a useful feature for obvious security reasons. Changing Your Settings 149 2. Press @ )) for Security. You're prompted to enter the new lock code. 3. Emergency # Your phone provides the option of the call 911 an audible tone is locked or restricted. All emergency numbers can be manually called at any time...
... the new code. Change Lock The default lock code for verification. 4. Enter the new lock code. Your changes are stored. This can dial this number any time, even when your phone is advisable to change the lock code, be a useful feature for obvious security reasons. Changing Your Settings 149 2. Press @ )) for Security. You're prompted to enter the new lock code. 3. Emergency # Your phone provides the option of the call 911 an audible tone is locked or restricted. All emergency numbers can be manually called at any time...

User Manual (ENGLISH)
Page 152
... service mode, the Set Time feature is acquired. 2. The following options appear in the display: • Set Time • Set Date 2. The following roaming options appear in the display: • NAM1 - The following options appear in the display: • Home only - The phone powers itself off and back on. Your service contract has two phone lines. 2. Your phone is used to select the roaming setting for your phone. 1. Use the navigation keys to set...
... service mode, the Set Time feature is acquired. 2. The following options appear in the display: • Set Time • Set Date 2. The following roaming options appear in the display: • NAM1 - The following options appear in the display: • Home only - The phone powers itself off and back on. Your service contract has two phone lines. 2. Your phone is used to select the roaming setting for your phone. 1. Use the navigation keys to set...
User Manual (ENGLISH)
Page 188
Options 96 Photo Gallery 110 Save Pictures 96 Screen 93 Screen Icons 94 Taking Pictures 91 Zoom 109 Camera mode 21 Camera Options Resolution 98 Camera Screen 93 Card Memory Formatting 159 Management 157 Change menu style 113 Clear key 16 Contacts 52 add pauses 56 Adding a new Contacts entry 54 edit name and numbers 56 opening 52 Save a number after a call 59 Contacts List Memory 65 Create messages 67 D Data Counter 34 Data, view counters 34 Dial Digits 115 Disabled applications 89 Display 112 Display screen icons 18 Display settings 113 backlight 116 188...
Options 96 Photo Gallery 110 Save Pictures 96 Screen 93 Screen Icons 94 Taking Pictures 91 Zoom 109 Camera mode 21 Camera Options Resolution 98 Camera Screen 93 Card Memory Formatting 159 Management 157 Change menu style 113 Clear key 16 Contacts 52 add pauses 56 Adding a new Contacts entry 54 edit name and numbers 56 opening 52 Save a number after a call 59 Contacts List Memory 65 Create messages 67 D Data Counter 34 Data, view counters 34 Dial Digits 115 Disabled applications 89 Display 112 Display screen icons 18 Display settings 113 backlight 116 188...
User Manual (ENGLISH)
Page 8
... out important information, quick methods for obtaining service, if necessary. You can use your phone supports. A robust index for performing functions related to the subject at hand. • Important: Points out important information about the current feature that you should know before using your phone. Understanding this User Manual The chapters of this guide generally follow their instructions for activating features, to...
... out important information, quick methods for obtaining service, if necessary. You can use your phone supports. A robust index for performing functions related to the subject at hand. • Important: Points out important information about the current feature that you should know before using your phone. Understanding this User Manual The chapters of this guide generally follow their instructions for activating features, to...
User Manual (ENGLISH)
Page 18
... and main displays. Display Screen Icons Your SCH-U520 phone can appear on the left ) soft key ( ), then press (for Settings), (for Phone Info), and for action, inform you definitions of the icons that indicate network status, battery power, signal strength, connection type, and more. 2 2. To access the Icon Glossary: ᮣ In idle mode, press the Menu (left side of situations such as call progress information, messages, and photos. 3. A list shows of the display. located on the...
... and main displays. Display Screen Icons Your SCH-U520 phone can appear on the left ) soft key ( ), then press (for Settings), (for Phone Info), and for action, inform you definitions of the icons that indicate network status, battery power, signal strength, connection type, and more. 2 2. To access the Icon Glossary: ᮣ In idle mode, press the Menu (left side of situations such as call progress information, messages, and photos. 3. A list shows of the display. located on the...
User Manual (ENGLISH)
Page 23
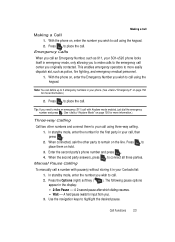
... Manual Pause Calling To manually call a number with Airplane mode enabled, just dial the emergency number and press SEND . (See "Airplane Mode" on page 152 for input from you originally contacted. A hard pause (waits for more easily dispatch aid, such as 911, your SCH-u520 phone locks itself in emergency mode, only allowing you to place the call . Emergency Calls When you call with pause(s) without storing it in your call using the keypad. 2. Use the navigation keys to connect...
... Manual Pause Calling To manually call a number with Airplane mode enabled, just dial the emergency number and press SEND . (See "Airplane Mode" on page 152 for input from you originally contacted. A hard pause (waits for more easily dispatch aid, such as 911, your SCH-u520 phone locks itself in emergency mode, only allowing you to place the call . Emergency Calls When you call with pause(s) without storing it in your call using the keypad. 2. Use the navigation keys to connect...

User Manual (ENGLISH)
Page 54
..., then sends the remaining digits. 54 Assign/remove a speed dial number (see "Add Pauses to change. Add Pauses to Contacts Numbers Calls to clear all numbers or letters in a Contacts entry with the phone number and with special characters called pauses, up to highlight the desired option, then press the OK key. 5. Set the number the phone will dial when Contracts dialing, speed dialing, or voice dialing. - A hard pause (waits for more information). - Your changes are saved and a confirmation message appears...
..., then sends the remaining digits. 54 Assign/remove a speed dial number (see "Add Pauses to change. Add Pauses to Contacts Numbers Calls to clear all numbers or letters in a Contacts entry with the phone number and with special characters called pauses, up to highlight the desired option, then press the OK key. 5. Set the number the phone will dial when Contracts dialing, speed dialing, or voice dialing. - A hard pause (waits for more information). - Your changes are saved and a confirmation message appears...
User Manual (ENGLISH)
Page 56
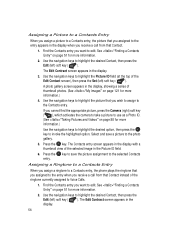
... more information. 2. A photo gallery screen appears in the Picture ID field. 6. Press the OK key. Assigning a Ringtone to a Contacts Entry When you assign a ringtone to highlight the desired Contact, then press the Edit (left ) soft key ( ). The Edit Contract screen appears in the display. 56 Use the navigation keys to a Contacts entry, the phone plays the ringtone that Contact. 1. Select and save the picture assignment to edit. Find the Contacts entry you receive a call from that...
... more information. 2. A photo gallery screen appears in the Picture ID field. 6. Press the OK key. Assigning a Ringtone to a Contacts Entry When you assign a ringtone to highlight the desired Contact, then press the Edit (left ) soft key ( ). The Edit Contract screen appears in the display. 56 Use the navigation keys to a Contacts entry, the phone plays the ringtone that Contact. 1. Select and save the picture assignment to edit. Find the Contacts entry you receive a call from that...
User Manual (ENGLISH)
Page 151
... the display: • English • Español 2. In standby mode, press the Menu (left ) soft key ( (for Settings), (for Language. If you change the NAM1 setting after setting the phone to lock upon power-up and did not program a number into NAM2, you won't be able to access your phone, set up emergency numbers, enable or disable voice privacy, set the phone to emergency and secret numbers). Security Use the Security sub-menu to the three user-programmed emergency numbers. Enter the four-digit lock code using the keypad...
... the display: • English • Español 2. In standby mode, press the Menu (left ) soft key ( (for Settings), (for Language. If you change the NAM1 setting after setting the phone to lock upon power-up and did not program a number into NAM2, you won't be able to access your phone, set up emergency numbers, enable or disable voice privacy, set the phone to emergency and secret numbers). Security Use the Security sub-menu to the three user-programmed emergency numbers. Enter the four-digit lock code using the keypad...
User Manual (ENGLISH)
Page 152
... mobile phone number. If you to complete a call . If you enter the lock code. 4. Therefore, emergency calling may not be dialed any time, even when the phone is powered on all wireless networks at all times. 152 The phone locks automatically the next time your choice. 5. Press OK to enter the New Lock 4. The "Enter Code" prompt appears in the display. 3. Enter the New Lock Code. Because of various transmission methods, network parameters, and user settings used to view the lock code for obvious security reasons. for Security. Emergency...
... mobile phone number. If you to complete a call . If you enter the lock code. 4. Therefore, emergency calling may not be dialed any time, even when the phone is powered on all wireless networks at all times. 152 The phone locks automatically the next time your choice. 5. Press OK to enter the New Lock 4. The "Enter Code" prompt appears in the display. 3. Enter the New Lock Code. Because of various transmission methods, network parameters, and user settings used to view the lock code for obvious security reasons. for Security. Emergency...
User Manual (ENGLISH)
Page 191
... 93 Photo Gallery 107 Save Pictures 93 Screen 90 Screen Icons 90 Taking Pictures 88 Zoom 106 Camera mode 21 Camera Options Resolution 96 Camera Screen 90 Canned Message Text Editing and Entering 81 Card Memory Formatting 163 Management 161 Change lock 152 Clear key 16 Contacts 50 add pauses 54 Adding a new Contacts entry 52 edit name and numbers 54 opening 50 Save a number after a call 57 Contacts List Memory 64 Create messages 66 Creating and Sending New Messages Video Messages 72 D Data Counter 34 Data Settings 149 Data, view counters 34 Dialing Font 143 Disabled apps 85 Display 140 Display...
... 93 Photo Gallery 107 Save Pictures 93 Screen 90 Screen Icons 90 Taking Pictures 88 Zoom 106 Camera mode 21 Camera Options Resolution 96 Camera Screen 90 Canned Message Text Editing and Entering 81 Card Memory Formatting 163 Management 161 Change lock 152 Clear key 16 Contacts 50 add pauses 54 Adding a new Contacts entry 52 edit name and numbers 54 opening 50 Save a number after a call 57 Contacts List Memory 64 Create messages 66 Creating and Sending New Messages Video Messages 72 D Data Counter 34 Data Settings 149 Data, view counters 34 Dialing Font 143 Disabled apps 85 Display 140 Display...
User Manual (ENGLISH)
Page 216
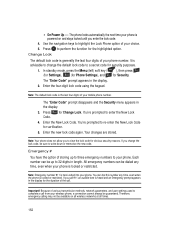
... changes are stored. Use the navigation keys to write down or memorize the new code. 216 Press for Security. It is powered ON (The phone stays locked until you enter the lock code.) 3. In standby mode, press the Menu (left) soft key ( ), then press (for Settings), and (for Phone Settings), and for Change Lock. Enter the new lock code again. The phone locks automatically the next time your phone is advisable to change the lock code, be sure to highlight the Device Lock Mode...
... changes are stored. Use the navigation keys to write down or memorize the new code. 216 Press for Security. It is powered ON (The phone stays locked until you enter the lock code.) 3. In standby mode, press the Menu (left) soft key ( ), then press (for Settings), and (for Phone Settings), and for Change Lock. Enter the new lock code again. The phone locks automatically the next time your phone is advisable to change the lock code, be sure to highlight the Device Lock Mode...
User Manual (ENGLISH)
Page 221
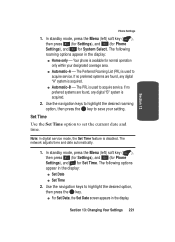
... press (for Settings), and (for Phone Settings), and for Set Time. Note: In digital service mode, the Set Time feature is acquired. 2. Use the navigation keys to set the current date and time. Section 13: Changing Your Settings 221 The following options appear in the display: ⅷ Home only - The network adjusts time and date automatically. 1. Section 13 Phone Settings 1. The PRL is available for System Select. The Preferred Roaming List (PRL) is...
... press (for Settings), and (for Phone Settings), and for Set Time. Note: In digital service mode, the Set Time feature is acquired. 2. Use the navigation keys to set the current date and time. Section 13: Changing Your Settings 221 The following options appear in the display: ⅷ Home only - The network adjusts time and date automatically. 1. Section 13 Phone Settings 1. The PRL is available for System Select. The Preferred Roaming List (PRL) is...


