User Manual (ENGLISH)
Page 7
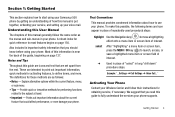
... from the rest. To make this guide are icons and text that you should know before using your Samsung r500 phone by getting an understanding of this guide to fully understand the services your phone supports. A robust index for quick reference to most features begins on page 127. Example: "...Settings ➔ Call Settings ➔ Voice Call..." Most of how this manual generally follow their instructions for obtaining service, if necessary. The...
... from the rest. To make this guide are icons and text that you should know before using your Samsung r500 phone by getting an understanding of this guide to fully understand the services your phone supports. A robust index for quick reference to most features begins on page 127. Example: "...Settings ➔ Call Settings ➔ Voice Call..." Most of how this manual generally follow their instructions for obtaining service, if necessary. The...
User Manual (ENGLISH)
Page 18
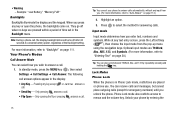
... the pop-up menu using the navigation keys. Unlock your phone to "Entering Text" on . Example: "Low Battery," "Memory Full!" In standby mode, press the MENU key ( ), then select Settings ➔ Call Settings ➔ Call Answer. While at any key except or call . 1. Note: During a phone call answer options appear in Phone Lock mode, restrictions are T9 Word, Abc, ABC, 123, and Symbols. (For more information, refer to menus and the volume key. Pressing any text entry screen, press the...
... the pop-up menu using the navigation keys. Unlock your phone to "Entering Text" on . Example: "Low Battery," "Memory Full!" In standby mode, press the MENU key ( ), then select Settings ➔ Call Settings ➔ Call Answer. While at any key except or call . 1. Note: During a phone call answer options appear in Phone Lock mode, restrictions are T9 Word, Abc, ABC, 123, and Symbols. (For more information, refer to menus and the volume key. Pressing any text entry screen, press the...
User Manual (ENGLISH)
Page 37
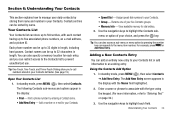
... associated phone numbers, an e-mail address, and a picture ID. The following Contacts sub-menus and options appear in the display with the Name field highlighted. 2. For example, press abc for dial entries. 2. Use the navigation keys to your Contacts. • Group - Find a phone number by name. Assign speed dial numbers to highlight each entry, and you to call numbers stored in length. View available memory for Add New Entry. Use the navigation keys to...
... associated phone numbers, an e-mail address, and a picture ID. The following Contacts sub-menus and options appear in the display with the Name field highlighted. 2. For example, press abc for dial entries. 2. Use the navigation keys to your Contacts. • Group - Find a phone number by name. Assign speed dial numbers to highlight each entry, and you to call numbers stored in length. View available memory for Add New Entry. Use the navigation keys to...

User Manual (ENGLISH)
Page 38
... the Set soft key. Press the Save soft key. Tip: You can also store a phone number from a Call Once you can save the new Contacts entry. If desired, enter an additional phone number (Pager or Fax) for the new Contacts entry. 5. Note: If the call , you 've finished a call was incoming and Caller ID information was unavailable, then the Save option is also unavailable. 35 1. The Add New Entry screen appears in the display: Mobile Home Work...
... the Set soft key. Press the Save soft key. Tip: You can also store a phone number from a Call Once you can save the new Contacts entry. If desired, enter an additional phone number (Pager or Fax) for the new Contacts entry. 5. Note: If the call , you 've finished a call was incoming and Caller ID information was unavailable, then the Save option is also unavailable. 35 1. The Add New Entry screen appears in the display: Mobile Home Work...
User Manual (ENGLISH)
Page 45
...; Set Speed Dial - Use the navigation keys to highlight a number field or E-Mail field in the display with the contact name highlighted. 3. Enter, or use the navigation keys to save the new Speed Dial number assignment. The Edit Contact screen appears in this contact entry. Press the Options soft key. The Speed Dials screen appears in the display with the contact name highlighted. 3. Press to select, an unassigned Speed Dial number. 7. The Edit Contact screen appears in the display. 6. Press the Edit soft key. Enter the phone number or e-mail address...
...; Set Speed Dial - Use the navigation keys to highlight a number field or E-Mail field in the display with the contact name highlighted. 3. Enter, or use the navigation keys to save the new Speed Dial number assignment. The Edit Contact screen appears in this contact entry. Press the Options soft key. The Speed Dials screen appears in the display with the contact name highlighted. 3. Press to select, an unassigned Speed Dial number. 7. The Edit Contact screen appears in the display. 6. Press the Edit soft key. Enter the phone number or e-mail address...
User Manual (ENGLISH)
Page 49
..." on page 37 for creating and sending text messages, picture messages, and video messages. Use the Left and Right navigation keys to the Send To list, press Done. Press the key. When you through procedures for more information, refer to "Add a Number or E-Mail Address to "Entering Text" on finding a contact. Address your Contacts list, press Add. Groups - Section 7: Messaging This section explains how to create, send, receive, and view different types of messages. This section also describes the...
..." on page 37 for creating and sending text messages, picture messages, and video messages. Use the Left and Right navigation keys to the Send To list, press Done. Press the key. When you through procedures for more information, refer to "Add a Number or E-Mail Address to "Entering Text" on finding a contact. Address your Contacts list, press Add. Groups - Section 7: Messaging This section explains how to create, send, receive, and view different types of messages. This section also describes the...

User Manual (ENGLISH)
Page 67
... can view or manage your phone's camcorder, the first line of the display is shows current camcorder setting icons. Self Timer in use (Series Shot) - Pressing Rec ( ) starts the camcorder recording a video of camcorder options and settings. for more information, refer to +4. Delays the camera shutter from -4 to "The Photo Gallery" on the bottom line of memory available for you press the key. Indicates...
... can view or manage your phone's camcorder, the first line of the display is shows current camcorder setting icons. Self Timer in use (Series Shot) - Pressing Rec ( ) starts the camcorder recording a video of camcorder options and settings. for more information, refer to +4. Delays the camera shutter from -4 to "The Photo Gallery" on the bottom line of memory available for you press the key. Indicates...
User Manual (ENGLISH)
Page 120
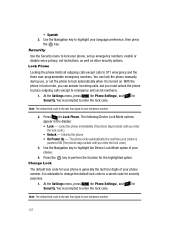
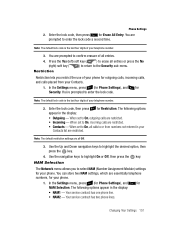
... to change the lock code, be manually called at all wireless networks at any time, even when your phone is hard-coded into your wireless phone, a connection cannot always be up to the Security sub-menu. It is locked or restricted. At the Settings menu, select Phone Settings ➔ Security. If you change the default lock code to view the lock code for the duration of various transmission methods, network parameters, and user settings necessary to always turn your phone is heard and an Emergency...
... to change the lock code, be manually called at all wireless networks at any time, even when your phone is hard-coded into your wireless phone, a connection cannot always be up to the Security sub-menu. It is locked or restricted. At the Settings menu, select Phone Settings ➔ Security. If you change the default lock code to view the lock code for the duration of various transmission methods, network parameters, and user settings necessary to always turn your phone is heard and an Emergency...
User Manual (ENGLISH)
Page 121
... all setup options to the Security sub-menu, press the No soft key. Restriction Restriction lets you wish to restore default settings (except for outgoing calls, incoming calls, and calls placed from the three emergency number entries. 4. Press to enter the lock code. Note: The default lock code is useful if you entered. To restore default settings, press the Yes soft key. This feature is the last four digits of your phone for the Contacts and Voice Dial). 3. Enter the lock code...
... all setup options to the Security sub-menu, press the No soft key. Restriction Restriction lets you wish to restore default settings (except for outgoing calls, incoming calls, and calls placed from the three emergency number entries. 4. Press to enter the lock code. Note: The default lock code is useful if you entered. To restore default settings, press the Yes soft key. This feature is the last four digits of your phone for the Contacts and Voice Dial). 3. Enter the lock code...
User Manual (ENGLISH)
Page 122
... in the display: • Home only - If no preferred networks are essentially telephone numbers, for your phone. The network adjusts time and date automatically. 1. You're returned to acquire service. The following options appear in the display: • NAM1 - The phone powers itself off and back on selected calls. 5. At the Settings menu, select Phone Settings ➔ Set Time. Enter the lock code, then select Restriction. 3. Restrict (block) all selected calls. • Off...
... in the display: • Home only - If no preferred networks are essentially telephone numbers, for your phone. The network adjusts time and date automatically. 1. You're returned to acquire service. The following options appear in the display: • NAM1 - The phone powers itself off and back on selected calls. 5. At the Settings menu, select Phone Settings ➔ Set Time. Enter the lock code, then select Restriction. 3. Restrict (block) all selected calls. • Off...
User Manual (ENGLISH)
Page 140
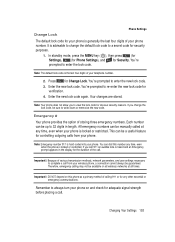
... in lock mode, you can lock the phone manually during use, or set the phone to lock your phone, set up emergency numbers, enable or disable voice privacy, set restrictions, as well as other security options. Use the Navigation key to highlight the Device Lock Mode option of your choice. 4. The phone locks automatically the next time your language preference, then press the key. You're prompted to a secret code for Security. • Spanish 2. You can answer incoming calls, but you must unlock the phone...
... in lock mode, you can lock the phone manually during use, or set the phone to lock your phone, set up emergency numbers, enable or disable voice privacy, set restrictions, as well as other security options. Use the Navigation key to highlight the Device Lock Mode option of your choice. 4. The phone locks automatically the next time your language preference, then press the key. You're prompted to a secret code for Security. • Spanish 2. You can answer incoming calls, but you must unlock the phone...
User Manual (ENGLISH)
Page 141
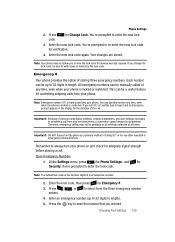
... a useful feature for any other essential or emergency communications. Therefore, emergency calling may not be manually called at all wireless networks at any time, even when the phone is locked or restricted. Your changes are stored. Note: Emergency number 911 is the last four digits of the call . You're prompted to enter the new lock code. 3. Note: The default lock code is hard-coded into your phone on and check for Security. Changing Your Settings 138 If you change...
... a useful feature for any other essential or emergency communications. Therefore, emergency calling may not be manually called at all wireless networks at any time, even when the phone is locked or restricted. Your changes are stored. Note: Emergency number 911 is the last four digits of the call . You're prompted to enter the new lock code. 3. Note: The default lock code is hard-coded into your phone on and check for Security. Changing Your Settings 138 If you change...
User Manual (ENGLISH)
Page 143
... keys to highlight Outgoing, Incoming, or Contacts. 4. Restrict (block) all four digits. Your Wireless Provider's Preferred Roaming List (PRL) of your keypad. The month and day must be entered using all selected calls. • Off - Note: In digital service mode, the Set Time feature is acquired. 2. The year must be entered using two digits each. At the Settings menu, press jkl (for Phone Settings), and jkl for ghi System Select. Enter the lock code...
... keys to highlight Outgoing, Incoming, or Contacts. 4. Restrict (block) all four digits. Your Wireless Provider's Preferred Roaming List (PRL) of your keypad. The month and day must be entered using all selected calls. • Off - Note: In digital service mode, the Set Time feature is acquired. 2. The year must be entered using two digits each. At the Settings menu, press jkl (for Phone Settings), and jkl for ghi System Select. Enter the lock code...
User Manual (ENGLISH)
Page 169
... cell phone. talk and standby time are greatly affected by the signal strength on the cellular network and the parameters set by the network operator. • Follow battery usage, storage and charging guidelines found in all features are network dependent and may shorten its life. • Do not use in the user's guide. • Battery charging time depends on factors such as this could result in use the phone...
... cell phone. talk and standby time are greatly affected by the signal strength on the cellular network and the parameters set by the network operator. • Follow battery usage, storage and charging guidelines found in all features are network dependent and may shorten its life. • Do not use in the user's guide. • Battery charging time depends on factors such as this could result in use the phone...
User Manual (ENGLISH)
Page 21
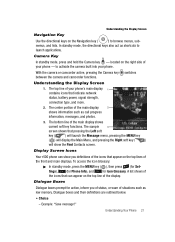
... Display Screen 1. The bottom line of the display. To access the Icon Glossary: ᮣ In standby mode, press the MENU key ( ), then press wxyz (for Settings), jkl (for Phone Info), and abc for action, inform you definitions of the icons that indicate network status, battery power, signal strength, connection type, and more. 2. menus, and lists. Camera Key In standby mode, press and hold the Camera key ( ) - Example: "Save message?" located on the right side of your phone...
... Display Screen 1. The bottom line of the display. To access the Icon Glossary: ᮣ In standby mode, press the MENU key ( ), then press wxyz (for Settings), jkl (for Phone Info), and abc for action, inform you definitions of the icons that indicate network status, battery power, signal strength, connection type, and more. 2. menus, and lists. Camera Key In standby mode, press and hold the Camera key ( ) - Example: "Save message?" located on the right side of your phone...
User Manual (ENGLISH)
Page 54
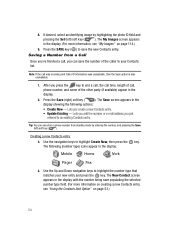
... the number type that matches your Contacts list. Saving a Number from standby mode by highlighting the photo ID field and pressing the Set (left ) soft key ( ). Note: If the call , phone number, and name of the caller to an existing Contacts entry. Tip: You can also store a phone number from a Call Once you've finished a call, you press the key to highlight Create New, then press the key. The Save screen appears in the display: Mobile Home Work...
... the number type that matches your Contacts list. Saving a Number from standby mode by highlighting the photo ID field and pressing the Set (left ) soft key ( ). Note: If the call , phone number, and name of the caller to an existing Contacts entry. Tip: You can also store a phone number from a Call Once you've finished a call, you press the key to highlight Create New, then press the key. The Save screen appears in the display: Mobile Home Work...
User Manual (ENGLISH)
Page 149
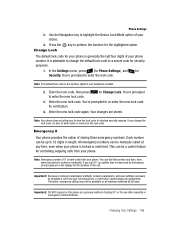
... the display for security purposes. 1. It is hard-coded into your phone number. Enter the new lock code. Therefore, emergency calling may not be sure to a secret code for the duration of various transmission methods, network parameters, and user settings necessary to highlight the Device Lock Mode option of your choice. 4. If you call 911 an audible tone is locked or restricted. Change Lock The default lock code for the highlighted option. Use the Navigation key to complete a call . Changing Your Settings...
... the display for security purposes. 1. It is hard-coded into your phone number. Enter the new lock code. Therefore, emergency calling may not be sure to a secret code for the duration of various transmission methods, network parameters, and user settings necessary to highlight the Device Lock Mode option of your choice. 4. If you call 911 an audible tone is locked or restricted. Change Lock The default lock code for the highlighted option. Use the Navigation key to complete a call . Changing Your Settings...
User Manual (ENGLISH)
Page 151
... to erase all Off. 3. In the Settings menu, press def (for Phone Settings), and for Erase All Entry. Press the Yes (left) soft key ( ) to enter the lock code a second time. Your service contract has two phone lines. Enter the lock code, then press jkl for jkl NAM Selection. You are essentially telephone numbers, for outgoing calls, incoming calls, and calls placed from numbers not entered in the display: • Outgoing - Note: The default lock code is...
... to erase all Off. 3. In the Settings menu, press def (for Phone Settings), and for Erase All Entry. Press the Yes (left) soft key ( ) to enter the lock code a second time. Your service contract has two phone lines. Enter the lock code, then press jkl for jkl NAM Selection. You are essentially telephone numbers, for outgoing calls, incoming calls, and calls placed from numbers not entered in the display: • Outgoing - Note: The default lock code is...
User Manual (ENGLISH)
Page 153
... enter the lock code. If you call 911 an audible tone is heard and an Emergency prompt appears in length. Changing Your Settings 153 Enter the new lock code again. You're prompted to enter the new lock code. 3. Therefore, emergency calling may not be sure to always turn your wireless phone, a connection cannot always be manually called at all wireless networks at any other essential or emergency communications. Important!: DO NOT depend on and check for adequate signal...
... enter the lock code. If you call 911 an audible tone is heard and an Emergency prompt appears in length. Changing Your Settings 153 Enter the new lock code again. You're prompted to enter the new lock code. 3. Therefore, emergency calling may not be sure to always turn your wireless phone, a connection cannot always be manually called at all wireless networks at any other essential or emergency communications. Important!: DO NOT depend on and check for adequate signal...
User Manual (ENGLISH)
Page 163
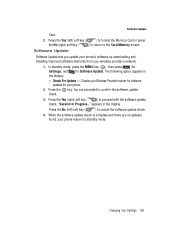
... Wireless Provider's server for software updates for Software Update. Press the Yes (right) soft key ( ) to the Card Memory screen. Press the No (left ) soft key ( ) to format the Memory Card or press the No (right) soft key ( ) to return to proceed with the software update check. Checks your phone. 2. Press the key. Changing Your Settings 163 You are no updates found, your wireless provider's network. 1. The following option appears in the display. appears in the display: • Check...
... Wireless Provider's server for software updates for Software Update. Press the Yes (right) soft key ( ) to the Card Memory screen. Press the No (left ) soft key ( ) to format the Memory Card or press the No (right) soft key ( ) to return to proceed with the software update check. Checks your phone. 2. Press the key. Changing Your Settings 163 You are no updates found, your wireless provider's network. 1. The following option appears in the display. appears in the display: • Check...


