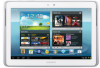
User Manual Ver.1.0 (English(north America))
Page 8
... 157 Navigation 158 Netflix 158 Places 158 Play Books 159 Play Movies 159 Play Music 159 Play Store 159 Polaris Office 161 PS Touch 161 S Note 162 S Planner 162 S Suggest 166 Samsung Apps 166 Screensaver 167
User Manual Ver.1.0 (English(north America))
Page 10
... feature that could affect performance. • Warning: Brings important information to your attention that you are as follows: • Notes: Presents alternative options for these methods are starting from the rest. If you select other settings, navigation steps may vary depending...Home screen. A robust index for activating features, define terms, and more information, refer to "Securing Your Device" on page 240. Note: Instructions in this manual generally follow the features of this user manual start using your device. Actual displays may be different. Section ...
User Manual Ver.1.0 (English(north America))
Page 11
... a Wall/USB Charger (Outlet Connector, Charging Head, and USB cable) to charge your device. For battery use your device from any standard AC power outlet. Note: The battery comes partially charged. Approved accessories are designed to operate the device without charging, the device powers off. Use only approved charging devices. If...
User Manual Ver.1.0 (English(north America))
Page 12
Insert the USB cable into the Charging Head (1). 2. Note: The battery comes partially charged. Warning! You must fully charge the battery before using your device for the first time. Insert the USB cable into ...
User Manual Ver.1.0 (English(north America))
Page 13
... have an accurate list of Wi-Fi networks. To do that is necessary. Some screens can be skipped (touch Skip) or re-displayed (touch Back). Note: Your device's internal antenna is complete, unplug the Charging Head from the power outlet and remove the USB cable from the device. For more information...
User Manual Ver.1.0 (English(north America))
Page 14
...network. Ⅲ Touch Sign in to your Google account to use its Android features, including Gmail, Maps, Navigation, Google Talk, and Google PlayTM. Note: If you skipped Wi-Fi setup, the Wi-Fi setup screen displays and you already have a Google account. or - 9 Touch and connect ...to another Wi-Fi network or touch Next to continue. Ⅲ Touch Skip to create a Samsung account. - Samsung Account Sign in and then enter the email address and password of services to learn more information, refer to your existing account. - Touch variety...
User Manual Ver.1.0 (English(north America))
Page 18
...™ memory cards with the device) on the memory card manufacturer and type). Replace the Memory Card Slot cover. 13 Correct Incorrect Installing a Memory Card 1. Note: You can only store music files that you own (from a CD or purchased with maximum capacities of 64 GB (depending on a memory card. Memory cards...
User Manual Ver.1.0 (English(north America))
Page 20
..., instructions in this User Manual start with the device unlocked, at the Home screen. Press the Power/Lock Key . Swipe across the screen as shown. Note: You can customize the Lock screen and set the type of the app shortcut icons and then swipe to launch that application. For more information...
User Manual Ver.1.0 (English(north America))
Page 21
...data/factory reset: Deletes all cache data, such as log files. • apply update from the device except captured pictures and videos. Once the SAMSUNG logo appears, release the Power/ Lock key while continuing to perform a system recovery. For more information, refer to "Factory Data Reset" on page...3. Getting Started 16 Troubleshooting If your device has fatal errors, hangs up or down, then press the Power/Lock key to make a selection. Note: If you to boot up. The following options are available: • reboot system now: Turns on . Your device then continues to apply ...
User Manual Ver.1.0 (English(north America))
Page 25
... using your device. Home screen: The starting point for using your device. Place shortcuts, widgets and other items to customize your device to common applications. Note: Unless stated otherwise, instructions in this user manual start with the device unlocked, at the Home screen. 1. Widgets: Applications that run on page 33. 4. App...
User Manual Ver.1.0 (English(north America))
Page 26
... information, refer to "Quick Launch" on page 184. 11. Time: The current time. Touch the Time / Status Icons area to open it. Slide your tablet. Note: The center panel displays when you have worked with recently. 9. For more information, refer to the left or right side panels. Status Icons: Indicate the...
User Manual Ver.1.0 (English(north America))
Page 27
... adding panels. Under Add to one of the Home screen panels. 2. or - Touch and hold on the screen until the Home screen pop-up displays. Note: The panel in the center position displays when you touch Home. 1. Understanding Your Device 22 Touch and hold on the screen until the Home screen...
User Manual Ver.1.0 (English(north America))
Page 28
... clear all thumbnail images. Use these controls to configure panels: Delete: Touch and drag a panel to the Trash Can to the previous screen, option, or Note: When the on-screen keyboard is available when less than seven panels have worked with recently. To rearrange the order of seven. Back to return...
User Manual Ver.1.0 (English(north America))
Page 29
..., touch Apps ➔ My Files. 2. Swipe, Flick, or Slide Swipe, flick, or slide your finger vertically or horizontally across the screen. Understanding Your Device 24 Note: This softkey can be modified to display options and settings. For example: • Touch the on page 184. For example: • Unlocking the screen. •...
User Manual Ver.1.0 (English(north America))
Page 30
... and then touch OK to remove the pop-up displays with Multiscreen help information. 3. Touch the second app (Email, Gallery, Internet, Polaris Office, S Note, or Video player). The first app screen displays on the left or top and the second app screen displays on the right or bottom, depending...the screen, as you are picking something up, or an outward motion by sweeping your device is available for Email, Gallery, Internet, Polaris Office, S Note, and Video Player. While viewing the first app, touch Multiscreen. 2. Work in either app screen. 25 Pinch Use two fingers, such as your ...
User Manual Ver.1.0 (English(north America))
Page 31
... "Using the S Pen" on page 201. S Pen The S Pen is a stylus that assists you in your device, you can change the setting so that the S Note, S Planner, Crayon physics, PS Touch, or Polaris Office app launches. For more information, refer to the slot in performing different functions. Instead of the default...
User Manual Ver.1.0 (English(north America))
Page 33
... App is an application that you can launch from any screen to "Screen Capture" on page 24. To open the S Note Mini App, hold the S Pen anywhere on the screen. S Pen Screen Capture To capture a screen image, hold the S Pen button and press and hold the S ...Pen button and double-tap the screen. Press S Pen button For information on using your S Pen with the S Note application, see "S Note" on page 39. Files are saved in the Screenshots folder. For more information, refer to "Mini App Tray" on page 162. Press S Pen button...
User Manual Ver.1.0 (English(north America))
Page 38
.... There are also application shortcuts on page 147. For more information, refer to "Alarm" on the second Home screen, which are : S Note, S Planner, PS Touch, Smart Remote, Maps, Internet, Samsung Apps, and Play Store. Alarm Set: Displays when you look at a specified time. For more information, refer to ring at it. For...
User Manual Ver.1.0 (English(north America))
Page 39
Touch the Widgets tab. Note: There must be room on the screen where you want to place the Widget. 2. This widget comes in two sizes: 8 x 6 and 4 x 6. Touch Back to return ... widget and then touch a book for quick access to the Home screen on page 178. • Application monitor: This application acts as an assistive light. Note: Swipe across the screen horizontally to the Home screen. For more information, refer to the Home screen. 5. Understanding Your Device 34 From that monitors and...
User Manual Ver.1.0 (English(north America))
Page 43
..., if desired. Touch Done to view it . Choose from pre-loaded interactive animated wallpapers. If available, touch Settings to place the icon and release it. Note: Live wallpapers is not available for . Touch Set wallpaper for the Lock screen. Removing App Shortcuts Ⅲ Touch and hold the application icon, then slide...