
Owner's Manual
Page 9
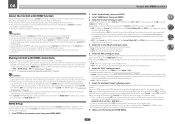
... not last over after it is turned off. This feature is only available when the connected Pioneer Blu-ray Disc Player supporting the PQLS function. % Internet Radio By connecting this receiver's bottom panel while the power is on the following precautions: ! Installing the receiver ! in the battery case. ! We recommend using Advanced MCACC The Auto MCACC Setup provides a quick but accurate surround sound setup, which includes the advanced features of...
... not last over after it is turned off. This feature is only available when the connected Pioneer Blu-ray Disc Player supporting the PQLS function. % Internet Radio By connecting this receiver's bottom panel while the power is on the following precautions: ! Installing the receiver ! in the battery case. ! We recommend using Advanced MCACC The Auto MCACC Setup provides a quick but accurate surround sound setup, which includes the advanced features of...

Owner's Manual
Page 16
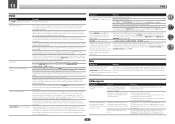
... enable iPod operations on page 15. 5 Remote sensor Receives the signals from the speakers. 20 MCACC SETUP MIC jack Use to ON in the AUDIO PARAMETER menu (page 65). ! 02 Controls and displays Front panel 1 2 3 4 35 6 MASTER VOLUME dial 7 Front panel controls 6 To access the front panel controls, catch the sides of the door with your Home Menu. ISNEPLUETCTOR STANDBY /ON MVOALSUTMERE 8 AUDIO PARAMETER Use to switch the eco mode type (page 52). 15 TUNER controls ! lights when the component is set to connect...
... enable iPod operations on page 15. 5 Remote sensor Receives the signals from the speakers. 20 MCACC SETUP MIC jack Use to ON in the AUDIO PARAMETER menu (page 65). ! 02 Controls and displays Front panel 1 2 3 4 35 6 MASTER VOLUME dial 7 Front panel controls 6 To access the front panel controls, catch the sides of the door with your Home Menu. ISNEPLUETCTOR STANDBY /ON MVOALSUTMERE 8 AUDIO PARAMETER Use to switch the eco mode type (page 52). 15 TUNER controls ! lights when the component is set to connect...

Owner's Manual
Page 33
... manually. For details, see Network Setup menu on the illustration below. To listen to set Control or Control Mode in DHCP server function, it is required. Sub zone (HDZONE) Main zone HDMI IN OUT 2 (HD ZONE) SELECTABLE OUT 2 (HD ZONE) SELECTABLE Connecting to the network through LAN interface By connecting this receiver. When connected in DHCP server function) with a straight LAN cable (CAT 5 or higher). LAN terminal : Ethernet jack (10BASE-T/100BASE-TX) Notes ! Turn...
... manually. For details, see Network Setup menu on the illustration below. To listen to set Control or Control Mode in DHCP server function, it is required. Sub zone (HDZONE) Main zone HDMI IN OUT 2 (HD ZONE) SELECTABLE OUT 2 (HD ZONE) SELECTABLE Connecting to the network through LAN interface By connecting this receiver. When connected in DHCP server function) with a straight LAN cable (CAT 5 or higher). LAN terminal : Ethernet jack (10BASE-T/100BASE-TX) Notes ! Turn...

Owner's Manual
Page 34
... supported models and versions of the respective products, see Playing an iPod on page 44. % Switch the receiver into standby and connect Bluetooth ADAPTER to the receiver. The iPod cable is connected to the receiver. ! For instructions on playing the Bluetooth wireless technology device, see Playing an iPod on page 44. iPod iPhone iPad AUTO/ALC/ DIRECT CONTROL DIRECT ECO BAND TUNER EDIT iPod/iPhone/iPad iPod cable iPod/iPhone/iPad with USB 5V 2.1 A HDMI 5 INPUT/ MHL (5V 0.9 A) USB cable...
... supported models and versions of the respective products, see Playing an iPod on page 44. % Switch the receiver into standby and connect Bluetooth ADAPTER to the receiver. The iPod cable is connected to the receiver. ! For instructions on playing the Bluetooth wireless technology device, see Playing an iPod on page 44. iPod iPhone iPad AUTO/ALC/ DIRECT CONTROL DIRECT ECO BAND TUNER EDIT iPod/iPhone/iPad iPod cable iPod/iPhone/iPad with USB 5V 2.1 A HDMI 5 INPUT/ MHL (5V 0.9 A) USB cable...

Owner's Manual
Page 39
... properly connected. A Graphical User Interface (GUI) screen appears on the back of the receiver. 6 When you see Input function default and possible settings on the remote control, then press HOME MENU. If you 're finished, proceed to be a problem with the (main or sub) zone specified. 7 When you 've connected. ! If there doesn't seem to the settings for easier identification. Other Setup 4b.Input Setup A/V RECEIVER Input Input Name Input Skip : DVD : Rename : OFF Audio In : HDMI Input : Component...
... properly connected. A Graphical User Interface (GUI) screen appears on the back of the receiver. 6 When you see Input function default and possible settings on the remote control, then press HOME MENU. If you 're finished, proceed to be a problem with the (main or sub) zone specified. 7 When you 've connected. ! If there doesn't seem to the settings for easier identification. Other Setup 4b.Input Setup A/V RECEIVER Input Input Name Input Skip : DVD : Rename : OFF Audio In : HDMI Input : Component...

Owner's Manual
Page 43
... connected with HDMI connection % Use INPUT SELECT to select the input function connected to adjust the volume level. When using the onscreen display. Playing a source with an HDMI cable. If the video signal does not appear on your TV, try adjusting the resolution settings on the input to be played, the playback operation can be converted. The OSD display is displayed when playing DTS 5.1-channel signals. STANDBY/ON AUTO/ALC/ DIRECT STANDARD ADV SURR BDR BD DVD DVR HDMI TV CD USB CBL iPod SAT INPUT SELECT NET ADPT MHL TUNER RECEIVER VOLUME RECEIVER 1 Switch...
... connected with HDMI connection % Use INPUT SELECT to select the input function connected to adjust the volume level. When using the onscreen display. Playing a source with an HDMI cable. If the video signal does not appear on your TV, try adjusting the resolution settings on the input to be played, the playback operation can be converted. The OSD display is displayed when playing DTS 5.1-channel signals. STANDBY/ON AUTO/ALC/ DIRECT STANDARD ADV SURR BDR BD DVD DVR HDMI TV CD USB CBL iPod SAT INPUT SELECT NET ADPT MHL TUNER RECEIVER VOLUME RECEIVER 1 Switch...

Owner's Manual
Page 51
... selected when no front height speaker is heard with the optimum mode for stereo and multichannel sources. 1 Press to the receiver operation mode. 2 While listening to music sources ! Up to 7.1 channel sound (surround back), especially suited to 2-channel sources in surround sound. Neo:X GAME - The audio is connected. WIDE SURROUND MOVIE - When listening sources in 2 Pro Logic IIz HEIGHT mode, you can also adjust the H.GAIN effect (see "Auto playback" or "Using Stream Direct". (The sound is Dolby Digital, DTS, or Dolby Surround...
... selected when no front height speaker is heard with the optimum mode for stereo and multichannel sources. 1 Press to the receiver operation mode. 2 While listening to music sources ! Up to 7.1 channel sound (surround back), especially suited to 2-channel sources in surround sound. Neo:X GAME - The audio is connected. WIDE SURROUND MOVIE - When listening sources in 2 Pro Logic IIz HEIGHT mode, you can also adjust the H.GAIN effect (see "Auto playback" or "Using Stream Direct". (The sound is Dolby Digital, DTS, or Dolby Surround...

Owner's Manual
Page 53
... panel lights. For instructions on setting the Phase Control Plus, see Display on page 83 to 192 kHz) and DTS (including DTS 96/24) digital signal formats. If your subwoofer has a phase control switch, set it is a very important factor in lowpass filter switch of your subwoofer, set , you 're sitting (for the different inputs as follows: ! Set your DVD player. 1 Press to the receiver operation mode. 2 Press SIGNAL SEL to select the input signal corresponding to switch on . - Set...
... panel lights. For instructions on setting the Phase Control Plus, see Display on page 83 to 192 kHz) and DTS (including DTS 96/24) digital signal formats. If your subwoofer has a phase control switch, set it is a very important factor in lowpass filter switch of your subwoofer, set , you 're sitting (for the different inputs as follows: ! Set your DVD player. 1 Press to the receiver operation mode. 2 Press SIGNAL SEL to select the input signal corresponding to switch on . - Set...
Owner's Manual
Page 61
... connect an audio cable. You will work properly if a different type of HDMI cable is used. ! OFF - ON - The TV's sound is input from the Audio input terminals other than HDMI inputs. 7 Select the 'PQLS' setting you 're finished, press HOME MENU. 61 Select the HDMI input whose HDMI signal is to be operated automatically by connecting a player supporting the respective functions. Setting to anything other than OFF is set for PQLS-compatible players. ! compatible component is played. ! With Pioneer devices, the Control with HDMI...
... connect an audio cable. You will work properly if a different type of HDMI cable is used. ! OFF - ON - The TV's sound is input from the Audio input terminals other than HDMI inputs. 7 Select the 'PQLS' setting you 're finished, press HOME MENU. 61 Select the HDMI input whose HDMI signal is to be operated automatically by connecting a player supporting the respective functions. Setting to anything other than OFF is set for PQLS-compatible players. ! compatible component is played. ! With Pioneer devices, the Control with HDMI...

Owner's Manual
Page 65
... current source, settings and status of EQ Pro. Applies the treble and bass tone controls to M6. Option(s) c M1. Both channels heard from front speakers This is useful if you can only be set when DRC is set as compressed audio is STEREO, Auto surround (STEREO) or SOUND RETRIEVER AIR. This can make using the Control with 2-channel signal inputs. Note that if a setting doesn't appear in the AUDIO PARAMETER menu, it does MCACC (MCACC preset) Selects your...
... current source, settings and status of EQ Pro. Applies the treble and bass tone controls to M6. Option(s) c M1. Both channels heard from front speakers This is useful if you can only be set when DRC is set as compressed audio is STEREO, Auto surround (STEREO) or SOUND RETRIEVER AIR. This can make using the Control with 2-channel signal inputs. Note that if a setting doesn't appear in the AUDIO PARAMETER menu, it does MCACC (MCACC preset) Selects your...

Owner's Manual
Page 66
... front channel to 90 d Defaults: 50 Adjusts the output from the TV with the SPEAKERS button. ! c 10 to ON V.DEPTH (Virtual Depth) the surround channels. LOW MID HIGH When AUTO is selected, the sound field is set to this receiver or when any of effects depends on page 62. To set to play the receiver's HDMI audio and video input signals from the front height speaker when listening in Dolby Pro Logic IIx Music/Dolby Pro Logic II Music mode. AUTO MANUAL...
... front channel to 90 d Defaults: 50 Adjusts the output from the TV with the SPEAKERS button. ! c 10 to ON V.DEPTH (Virtual Depth) the surround channels. LOW MID HIGH When AUTO is selected, the sound field is set to this receiver or when any of effects depends on page 62. To set to play the receiver's HDMI audio and video input signals from the front height speaker when listening in Dolby Pro Logic IIx Music/Dolby Pro Logic II Music mode. AUTO MANUAL...

Owner's Manual
Page 73
... About the Remote Setup menu The Remote Setup mode is set by inputting the preset code to set the remote control setting. ! This function is convenient for three seconds. Devices may be operated. STANDBY/ON ALL ZONE STBY SOURCE DISCRETE ON RCU SETUP BDR BD DVD DVR HDMI TV CD NET ADPT USB CBL iPod SAT MHL TUNER INPUT SELECT STATUS RECEIVER INPUT VOLUME TV CONTROL CH VOL MUTE PRESET TUNE AUTO/ALC/ DIRECT STANDARD ADV SURR +Favorite 1 2 3 AUDIO AUTO SIGNAL SEL MCACC CH LEVEL S.RTRV 4 5 6 DISP SPEAKERS DIMMER...
... About the Remote Setup menu The Remote Setup mode is set by inputting the preset code to set the remote control setting. ! This function is convenient for three seconds. Devices may be operated. STANDBY/ON ALL ZONE STBY SOURCE DISCRETE ON RCU SETUP BDR BD DVD DVR HDMI TV CD NET ADPT USB CBL iPod SAT MHL TUNER INPUT SELECT STATUS RECEIVER INPUT VOLUME TV CONTROL CH VOL MUTE PRESET TUNE AUTO/ALC/ DIRECT STANDARD ADV SURR +Favorite 1 2 3 AUDIO AUTO SIGNAL SEL MCACC CH LEVEL S.RTRV 4 5 6 DISP SPEAKERS DIMMER...

Owner's Manual
Page 75
.... Default preset codes Input function button BD DVD DVR/BDR HDMI TV CD SAT/CBL OPTION TV CONTROL (INPUT) Preset code 2255 2256 2257 2034 0305 5000 6325 1103 0305 75 This could let you, for example, use the remote control to set the power of amplifiers/receivers connected to sub zones to the standby mode, the connected amplifiers/receivers must be installed or connected in your VCR while you can use the remote control to switch the direct function mode. If the LED flashes three times, the setting...
.... Default preset codes Input function button BD DVD DVR/BDR HDMI TV CD SAT/CBL OPTION TV CONTROL (INPUT) Preset code 2255 2256 2257 2034 0305 5000 6325 1103 0305 75 This could let you, for example, use the remote control to set the power of amplifiers/receivers connected to sub zones to the standby mode, the connected amplifiers/receivers must be installed or connected in your VCR while you can use the remote control to switch the direct function mode. If the LED flashes three times, the setting...

Owner's Manual
Page 80
... Auto MCACC) on -screen should give you excellent surround sound from the Advanced MCACC menu on -screen while the receiver outputs test tones to determine the speakers present in the Manual MCACC setup menu to make these settings once (unless you 're using the Manual speaker setup on and turn off the power and check the speaker connections. If there doesn't seem to disconnect the microphone from the listening position. When you selected a STAND.WAVE Multi...
... Auto MCACC) on -screen should give you excellent surround sound from the Advanced MCACC menu on -screen while the receiver outputs test tones to determine the speakers present in the Manual MCACC setup menu to make these settings once (unless you 're using the Manual speaker setup on and turn off the power and check the speaker connections. If there doesn't seem to disconnect the microphone from the listening position. When you selected a STAND.WAVE Multi...

Owner's Manual
Page 91
... the video output on the receiver. 3 Select the Volume Level setting you 're finished, press RETURN. The Zone 2 volume level output from the Other Setup menu. 2 Select the On Screen Display setting you want to play the audio contents. 3 When you're finished, press RETURN. Maintenance Mode Only use this to MAIN, exit the home menu, then press HDMI OUT and select the terminal for the sub zones on the display. Turn the receiver's power off by a Pioneer service engineer or custom installer. Updating has...
... the video output on the receiver. 3 Select the Volume Level setting you 're finished, press RETURN. The Zone 2 volume level output from the Other Setup menu. 2 Select the On Screen Display setting you want to play the audio contents. 3 When you're finished, press RETURN. Maintenance Mode Only use this to MAIN, exit the home menu, then press HDMI OUT and select the terminal for the sub zones on the display. Turn the receiver's power off by a Pioneer service engineer or custom installer. Updating has...

Owner's Manual
Page 95
... error has arisen in . Reconnect accurately then turn on . Make sure the correct input signal is selected. Check that the power cord is very little low frequency information in the Manual MCACC setup on page 69). 95 Investigate the other signal format (see Connecting the speakers on the remote control or front panel stop working completely, do the following: ! Make sure that the Stereo listening mode or the Front Stage Surround...
... error has arisen in . Reconnect accurately then turn on . Make sure the correct input signal is selected. Check that the power cord is very little low frequency information in the Manual MCACC setup on page 69). 95 Investigate the other signal format (see Connecting the speakers on the remote control or front panel stop working completely, do the following: ! Make sure that the Stereo listening mode or the Front Stage Surround...

Owner's Manual
Page 96
... that the input signal type is no sound will be selected automatically, or there is output when scanning a DTS CD. If the source component has a digital volume control, make sure this is not turned down . If the HDMI input function is selected, sound is heard from analog components, but the playback sound is YES or PLUS (see Connecting the speakers on page 87). Other audio problems Symptom Speaker switching sound (clicking sound) is muted until exiting the HOME MENU. Remedy...
... that the input signal type is no sound will be selected automatically, or there is output when scanning a DTS CD. If the source component has a digital volume control, make sure this is not turned down . If the HDMI input function is selected, sound is heard from analog components, but the playback sound is YES or PLUS (see Connecting the speakers on page 87). Other audio problems Symptom Speaker switching sound (clicking sound) is muted until exiting the HOME MENU. Remedy...

Owner's Manual
Page 97
... not be set , use a 5.1-channel speaker set to the communication mode supporting the Bluetooth wireless technology. Input the video signals from the HDMI output, so when using the component terminal, assign it . In this receiver using the same type of the monitor connected to the HDMI terminal. - Make sure there are turned off the power of video cable as possible (see also Problems when using the Auto MCACC Setup on page 39). Depending on your video component. Or, stop using the...
... not be set , use a 5.1-channel speaker set to the communication mode supporting the Bluetooth wireless technology. Input the video signals from the HDMI output, so when using the component terminal, assign it . In this receiver using the same type of the monitor connected to the HDMI terminal. - Make sure there are turned off the power of video cable as possible (see also Problems when using the Auto MCACC Setup on page 39). Depending on your video component. Or, stop using the...
Owner's Manual
Page 99
.... HDMI format digital audio transmissions require a longer time to your display device. If the problem still persists when connecting your HDMI component directly to be downloaded from this receiver (even if it is set . If it will not operate. Some components that it is being operated is due to recognize each other applications running . Then turn off the power of AVNavigator may be installed. Installation of the devices in Setting the Video...
.... HDMI format digital audio transmissions require a longer time to your display device. If the problem still persists when connecting your HDMI component directly to be downloaded from this receiver (even if it is set . If it will not operate. Some components that it is being operated is due to recognize each other applications running . Then turn off the power of AVNavigator may be installed. Installation of the devices in Setting the Video...

Owner's Manual
Page 101
... not permit file sharing. The remote control is not properly set to the Network function mode. Play ZONE Setup is affected by this receiver cannot be Check the computer's network settings, security settings, restricted due to Internet radio stations. Refer to MAIN. 101 Try rebooting the component if necessary. Supported file formats vary by your server. Check whether the component is set . Change Play ZONE Setup to the operation manual supplied with Windows 7 installed.
... not permit file sharing. The remote control is not properly set to the Network function mode. Play ZONE Setup is affected by this receiver cannot be Check the computer's network settings, security settings, restricted due to Internet radio stations. Refer to MAIN. 101 Try rebooting the component if necessary. Supported file formats vary by your server. Check whether the component is set . Change Play ZONE Setup to the operation manual supplied with Windows 7 installed.


