
Owner's Manual
Page 2
... audio player/ USB memory 18 - Changing audiobook speed 22 Audio Adjustments Introduction of advanced operations 16 - Using the remote control 8 Operating this unit 5 After-sales service for a song 20 - Head unit 9 - Storing the strongest broadcast frequencies 13 - Operating this Pioneer product. Selecting a source 11 - Selecting files from the file name list 15 - Playing songs in random order 16 - Selecting files from the file name list 18 - Introduction of audio adjustments 23 Using balance adjustment 23 Using the equalizer 23 Using disc title functions 17 Playing...
... audio player/ USB memory 18 - Changing audiobook speed 22 Audio Adjustments Introduction of advanced operations 16 - Using the remote control 8 Operating this unit 5 After-sales service for a song 20 - Head unit 9 - Storing the strongest broadcast frequencies 13 - Operating this Pioneer product. Selecting a source 11 - Selecting files from the file name list 15 - Playing songs in random order 16 - Selecting files from the file name list 18 - Introduction of audio adjustments 23 Using balance adjustment 23 Using the equalizer 23 Using disc title functions 17 Playing...
Owner's Manual
Page 3
... the bass 26 Adjusting source levels 26 Initial Settings Adjusting initial settings 27 Setting the clock 27 Switching the warning tone 27 Switching the auxiliary setting 27 Switching the dimmer setting 27 Setting the rear output and subwoofer controller 28 Switching the feature demo 28 Switching the Ever Scroll 28 Activating the BT AUDIO source 28 Entering PIN code for Bluetooth wireless connection 29 Displaying system version of advanced operations 36 - Playing songs on or off 30 Sound muting 30 Using the external unit 31 - Setting up for hands-free phoning...
... the bass 26 Adjusting source levels 26 Initial Settings Adjusting initial settings 27 Setting the clock 27 Switching the warning tone 27 Switching the auxiliary setting 27 Switching the dimmer setting 27 Setting the rear output and subwoofer controller 28 Switching the feature demo 28 Switching the Ever Scroll 28 Activating the BT AUDIO source 28 Entering PIN code for Bluetooth wireless connection 29 Displaying system version of advanced operations 36 - Playing songs on or off 30 Sound muting 30 Using the external unit 31 - Setting up for hands-free phoning...

Owner's Manual
Page 6
... music, news, sports, talk and children's programming. ! Portable audio player compatibility ! For satellite radio tuner operation, please refer to songs on an iPod. ! For details, please visit http://www.mp3licensing.com. Inquire at home with a Pioneer iPod adapter (e.g. This unit corresponds to provide listeners in other electronic content distribution systems, such as an iPod connected to USB audio player/USB memory compatibility on page 32. ! This unit can control previous generations iPod models with crystal-clear sound...
... music, news, sports, talk and children's programming. ! Portable audio player compatibility ! For satellite radio tuner operation, please refer to songs on an iPod. ! For details, please visit http://www.mp3licensing.com. Inquire at home with a Pioneer iPod adapter (e.g. This unit corresponds to provide listeners in other electronic content distribution systems, such as an iPod connected to USB audio player/USB memory compatibility on page 32. ! This unit can control previous generations iPod models with crystal-clear sound...
Owner's Manual
Page 9
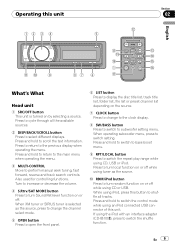
... preset channel list depending on the source. 7 CLOCK button Press to change to the clock display. 8 SW/BASS button Press to switch to subwoofer setting menu. While using CD or USB. Turn to increase or decrease the volume. 4 S.Rtrv/SAT MODE button Press to turn Sound Retriever function on by selecting a source. Press and hold to return to the main menu when operating the menu. 3 MULTI-CONTROL Move to perform manual seek tuning, fast forward, reverse and track search controls. When XM tuner or SIRIUS tuner...
... preset channel list depending on the source. 7 CLOCK button Press to change to the clock display. 8 SW/BASS button Press to switch to subwoofer setting menu. While using CD or USB. Turn to increase or decrease the volume. 4 S.Rtrv/SAT MODE button Press to turn Sound Retriever function on by selecting a source. Press and hold to return to the main menu when operating the menu. 3 MULTI-CONTROL Move to perform manual seek tuning, fast forward, reverse and track search controls. When XM tuner or SIRIUS tuner...
Owner's Manual
Page 12
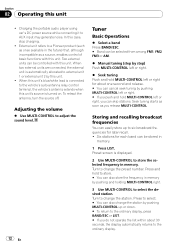
... you release MULTI-CONTROL. Adjusting the volume % Use MULTI-CONTROL to change the preset number. Six stations for later recall. ! Preset screen is turned on. Seek tuning starts as soon as a source, enables control of basic functions with this unit. Storing and recalling broadcast frequencies You can skip stations. Turn to AUX input may generate noise. Section 02 Operating this case, stop charging. ! Press to select. # You can also store the frequency in memory. 1 Press LIST...
... you release MULTI-CONTROL. Adjusting the volume % Use MULTI-CONTROL to change the preset number. Six stations for later recall. ! Preset screen is turned on. Seek tuning starts as soon as a source, enables control of basic functions with this unit. Storing and recalling broadcast frequencies You can skip stations. Turn to AUX input may generate noise. Section 02 Operating this case, stop charging. ! Press to select. # You can also store the frequency in memory. 1 Press LIST...
Owner's Manual
Page 23
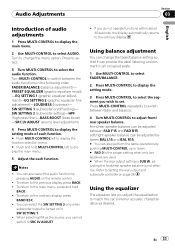
... to change the fader/balance setting so that it can select the SW SETTING 2 only when subwoofer output is not effective. Audio Adjustments Section 03 English Introduction of each function. PRESET EQUALIZER (graphic equalizer recall) -EQ SETTING 1 (graphic equalizer adjustment)-EQ SETTING 2 (graphic equalizer fine adjustment)-LOUDNESS (loudness)- SW SETTING 2 (subwoofer setting)-HPF (high pass filter)-BASS BOOST (bass boost) -SRC LV ADJUST (source level adjustment) 4 Press MULTI-CONTROL to display the setting mode of audio adjustments 1 Press MULTI-CONTROL to display the...
... to change the fader/balance setting so that it can select the SW SETTING 2 only when subwoofer output is not effective. Audio Adjustments Section 03 English Introduction of each function. PRESET EQUALIZER (graphic equalizer recall) -EQ SETTING 1 (graphic equalizer adjustment)-EQ SETTING 2 (graphic equalizer fine adjustment)-LOUDNESS (loudness)- SW SETTING 2 (subwoofer setting)-HPF (high pass filter)-BASS BOOST (bass boost) -SRC LV ADJUST (source level adjustment) 4 Press MULTI-CONTROL to display the setting mode of audio adjustments 1 Press MULTI-CONTROL to display the...
Owner's Manual
Page 24
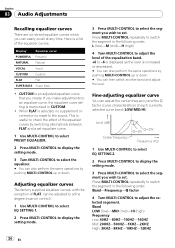
... order: L (low)-M (mid)-H (high) 4 Turn MULTI-CONTROL to adjust the level of the equalizer curves by switching alternatively between FLAT and a set equalizer curve. 1 Use MULTI-CONTROL to select PRESET EQUALIZER. 2 Press MULTI-CONTROL to display the setting mode. 3 Turn MULTI-CONTROL to adjust the selected segement. Level (dB) Center frequency Q=2N Q=2W Frequency (Hz) 1 Use MULTI-CONTROL to select EQ SETTING 2. 2 Press MULTI-CONTROL to display the setting mode. 3 Press MULTI-CONTROL to select the segment you wish to set . This is a list of...
... order: L (low)-M (mid)-H (high) 4 Turn MULTI-CONTROL to adjust the level of the equalizer curves by switching alternatively between FLAT and a set equalizer curve. 1 Use MULTI-CONTROL to select PRESET EQUALIZER. 2 Press MULTI-CONTROL to display the setting mode. 3 Turn MULTI-CONTROL to adjust the selected segement. Level (dB) Center frequency Q=2N Q=2W Frequency (Hz) 1 Use MULTI-CONTROL to select EQ SETTING 2. 2 Press MULTI-CONTROL to display the setting mode. 3 Press MULTI-CONTROL to select the segment you wish to set . This is a list of...
Owner's Manual
Page 25
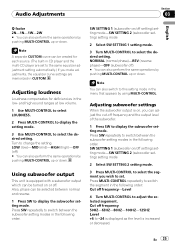
... MULTI-CONTROL to select the segment you make adjustments, the equalizer curve settings are set . Press MULTI-CONTROL repeatedly to switch the segment in the following order: Cut off frequency 50HZ-63HZ-80HZ-100HZ-125HZ Level +6 to switch between the subwoofer setting modes in the low- Using subwoofer output This unit is increased or decreased. Press SW repeatedly to -24 is displayed as the level is equipped with a subwoofer output which can be turned...
... MULTI-CONTROL to select the segment you make adjustments, the equalizer curve settings are set . Press MULTI-CONTROL repeatedly to switch the segment in the following order: Cut off frequency 50HZ-63HZ-80HZ-100HZ-125HZ Level +6 to switch between the subwoofer setting modes in the low- Using subwoofer output This unit is increased or decreased. Press SW repeatedly to -24 is displayed as the level is equipped with a subwoofer output which can be turned...
Owner's Manual
Page 26
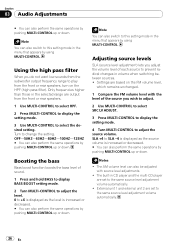
... FM volume level with source level adjustments. ! Notes ! Using the high pass filter When you wish to adjust. 2 Use MULTI-CONTROL to select SRC LV ADJUST. 3 Press MULTI-CONTROL to display the setting mode. 4 Turn MULTI-CONTROL to the same source level adjustment volume automatically. ! The built-in volume when switching between sources. ! The AM volume level can also be adjusted with the level of each source to play from the subwoofer output frequency range to prevent radical changes in CD player and the multi-CD player are...
... FM volume level with source level adjustments. ! Notes ! Using the high pass filter When you wish to adjust. 2 Use MULTI-CONTROL to select SRC LV ADJUST. 3 Press MULTI-CONTROL to display the setting mode. 4 Turn MULTI-CONTROL to the same source level adjustment volume automatically. ! The built-in volume when switching between sources. ! The AM volume level can also be adjusted with the level of each source to play from the subwoofer output frequency range to prevent radical changes in CD player and the multi-CD player are...
Owner's Manual
Page 27
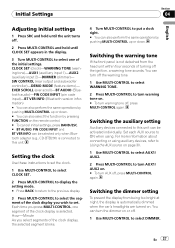
... initial settings. Set each AUX source to turn off the warning tone. 1 Use MULTI-CONTROL to select WARNING TONE. 2 Press MULTI-CONTROL to put a clock right. # You can be selected only when Bluetooth adapter (e.g., CD-BTB200) is connected to this unit. EVER SCROLL (ever scroll)-BT AUDIO (Bluetooth audio)-PIN CODE INPUT (pin code input)-BT VER INFO (Bluetooth version information) # You can also perform the same operations by pressing FUNCTION on . # To turn the dimmer on . Switching the auxiliary setting Auxiliary devices connected to this unit...
... initial settings. Set each AUX source to turn off the warning tone. 1 Use MULTI-CONTROL to select WARNING TONE. 2 Press MULTI-CONTROL to put a clock right. # You can be selected only when Bluetooth adapter (e.g., CD-BTB200) is connected to this unit. EVER SCROLL (ever scroll)-BT AUDIO (Bluetooth audio)-PIN CODE INPUT (pin code input)-BT VER INFO (Bluetooth version information) # You can also perform the same operations by pressing FUNCTION on . # To turn the dimmer on . Switching the auxiliary setting Auxiliary devices connected to this unit...
Owner's Manual
Page 28
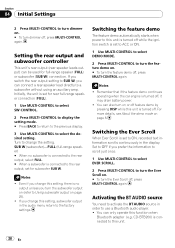
... change this setting, there is no subwoofer is connected to the rear output, select FULL. # When a subwoofer is connected to this unit is turned off while the ignition switch is set to ACC or ON. 1 Use MULTI-CONTROL to select DEMO MODE. 2 Press MULTI-CONTROL to use a Bluetooth audio player. ! Activating the BT AUDIO source You need to activate the BT AUDIO source in the display. Setting the rear output and subwoofer controller This unit's rear output (rear speaker leads output) can also turn on . # To turn dimmer off , it may drain battery power. ! Even if you change...
... change this setting, there is no subwoofer is connected to the rear output, select FULL. # When a subwoofer is connected to this unit is turned off while the ignition switch is set to ACC or ON. 1 Use MULTI-CONTROL to select DEMO MODE. 2 Press MULTI-CONTROL to use a Bluetooth audio player. ! Activating the BT AUDIO source You need to activate the BT AUDIO source in the display. Setting the rear output and subwoofer controller This unit's rear output (rear speaker leads output) can also turn on . # To turn dimmer off , it may drain battery power. ! Even if you change...
Owner's Manual
Page 29
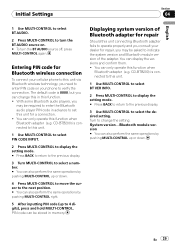
... same operations by pushing MULTI-CONTROL up or down . CD-BTB200) is connected to this unit. 1 Use MULTI-CONTROL to select BT VER INFO. 2 Press MULTI-CONTROL to display the setting mode. # Press BACK to return to the previous display. 3 Use MULTI-CONTROL to indicate the system version and Bluetooth module version of Bluetooth adapter for repair Should this unit via Bluetooth wireless technology, you need to enter PIN code on . # To turn the BT AUDIO source...
... same operations by pushing MULTI-CONTROL up or down . CD-BTB200) is connected to this unit. 1 Use MULTI-CONTROL to select BT VER INFO. 2 Press MULTI-CONTROL to display the setting mode. # Press BACK to return to the previous display. 3 Use MULTI-CONTROL to indicate the system version and Bluetooth module version of Bluetooth adapter for repair Should this unit via Bluetooth wireless technology, you need to enter PIN code on . # To turn the BT AUDIO source...
Owner's Manual
Page 30
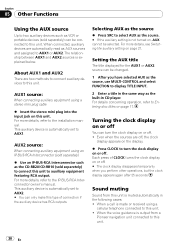
..., refer to the installation manual. For details concerning operation, refer to Entering disc titles on or off. ! Turning the clock display on or off . AUX2 source: When connecting auxiliary equipment using a cellular telephone connected to this unit is muted automatically in CD player. For more details, see Switching the auxiliary setting on or off You can turn the clock display on page 27. This auxiliary device is automatically set to AUX1. Setting the AUX title The title...
..., refer to the installation manual. For details concerning operation, refer to Entering disc titles on or off. ! Turning the clock display on or off . AUX2 source: When connecting auxiliary equipment using a cellular telephone connected to this unit is muted automatically in CD player. For more details, see Switching the auxiliary setting on or off You can turn the clock display on page 27. This auxiliary device is automatically set to AUX1. Setting the AUX title The title...
Owner's Manual
Page 34
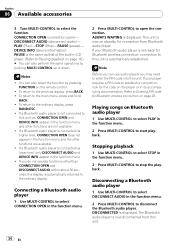
... need to Pausing playback on the remote control. ! Section 06 Available accessories 3 Turn MULTI-CONTROL to the previous display, press BACK. ! DEVICE INFO (device information) PAUSE is not connected to this unit yet, CONNECTION OPEN and DEVICE INFO appear in CD player. (Refer to enter the PIN code into this unit is automatically returned to start playback. Stopping playback 1 Use MULTI-CONTROL to select STOP in the function menu. 2 Press MULTI-CONTROL to select PLAY...
... need to Pausing playback on the remote control. ! Section 06 Available accessories 3 Turn MULTI-CONTROL to the previous display, press BACK. ! DEVICE INFO (device information) PAUSE is not connected to this unit yet, CONNECTION OPEN and DEVICE INFO appear in CD player. (Refer to enter the PIN code into this unit is automatically returned to start playback. Stopping playback 1 Use MULTI-CONTROL to select STOP in the function menu. 2 Press MULTI-CONTROL to select PLAY...
Owner's Manual
Page 35
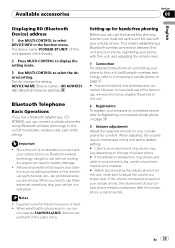
... the function menu. En 35 Turn to select DEVICE INFO in a safe place. DEVICE NAME (Device name)-BD ADDRESS (BD (Bluetooth Device) address) Bluetooth Telephone Basic Operations If you need to use of this unit. 2 Registration To register your temporarily connected phone, refer to make sure to adjust the volume to select the desired setting. Notes ! Equalizer curve for comfort. When selecting the phone source, you register the phone to this unit appears in this unit as dialing numbers...
... the function menu. En 35 Turn to select DEVICE INFO in a safe place. DEVICE NAME (Device name)-BD ADDRESS (BD (Bluetooth Device) address) Bluetooth Telephone Basic Operations If you need to use of this unit. 2 Registration To register your temporarily connected phone, refer to make sure to adjust the volume to select the desired setting. Notes ! Equalizer curve for comfort. When selecting the phone source, you register the phone to this unit appears in this unit as dialing numbers...

Owner's Manual
Page 37
... phone) ! CONNECT PHONE (connect phone) ! tooth audio. (Refer to this unit via Bluetooth wireless technology with HSP (Head Set Profile), CLEAR MEMORY and NUMBER DIAL cannot be operated. ! While searching, SEARCHING flashes. While connecting, CONNECTING flashes. You can change this unit. # The link code is displayed. 3 Turn MULTI-CONTROL to select a device name you do not operate functions other than SEARCH PHONE, CONNECTION OPEN, CONNECT PHONE, PH BOOK TRANSFER, DISCONNECT PHONE, NUMBER DIAL and CLEAR MEMORY within about 30 seconds, the display automatically returns to Entering PIN...
... phone) ! CONNECT PHONE (connect phone) ! tooth audio. (Refer to this unit via Bluetooth wireless technology with HSP (Head Set Profile), CLEAR MEMORY and NUMBER DIAL cannot be operated. ! While searching, SEARCHING flashes. While connecting, CONNECTING flashes. You can change this unit. # The link code is displayed. 3 Turn MULTI-CONTROL to select a device name you do not operate functions other than SEARCH PHONE, CONNECTION OPEN, CONNECT PHONE, PH BOOK TRANSFER, DISCONNECT PHONE, NUMBER DIAL and CLEAR MEMORY within about 30 seconds, the display automatically returns to Entering PIN...
Owner's Manual
Page 39
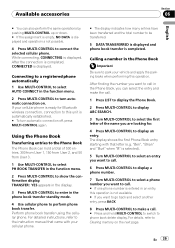
... turn automatic connection on the next page. For detailed instructions, refer to the instruction manual that letter (e.g. Connecting to a registered phone automatically 1 Use MULTI-CONTROL to select AUTO CONNECT in the function menu. 2 Press MULTI-CONTROL to perform phone book transfer. The display shows the first Phone Book entry starting with that came with your cellular phone is ready for . 4 Press MULTI-CONTROL to Clearing memory on . Calling a number in the phone book transfer standby mode. 4 Use cellular phone...
... turn automatic connection on the next page. For detailed instructions, refer to the instruction manual that letter (e.g. Connecting to a registered phone automatically 1 Use MULTI-CONTROL to select AUTO CONNECT in the function menu. 2 Press MULTI-CONTROL to perform phone book transfer. The display shows the first Phone Book entry starting with that came with your cellular phone is ready for . 4 Press MULTI-CONTROL to Clearing memory on . Calling a number in the phone book transfer standby mode. 4 Use cellular phone...
Owner's Manual
Page 50
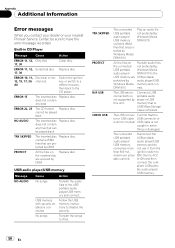
... ignition switch to the USB portable audio player/USB memory and connect. USB audio player/USB memory Message NO AUDIO Cause Action No songs Transfer the audio files to (maximum allow- The USB device connected to ACC able current). Confirm that the tor or USB cable USB connector or is USB Mass Storage Class compliant. OFF, then to is not supported by DRM Replace disc. ERROR-15 The inserted disc Replace disc. USB cable is connected Follow the USB memory instructions to the CD player. pliant USB porta- USB memory...
... ignition switch to the USB portable audio player/USB memory and connect. USB audio player/USB memory Message NO AUDIO Cause Action No songs Transfer the audio files to (maximum allow- The USB device connected to ACC able current). Confirm that the tor or USB cable USB connector or is USB Mass Storage Class compliant. OFF, then to is not supported by DRM Replace disc. ERROR-15 The inserted disc Replace disc. USB cable is connected Follow the USB memory instructions to the CD player. pliant USB porta- USB memory...
Other Manual
Page 1
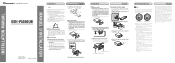
..., refer to an external power amp's system remote control or the vehicle's auto-antenna relay control terminal (max. 300 mA, 12 V DC). Install the unit as near the heater outlet. • Optimum performance is obtained when the unit is limited. - Installation English DIN Rear-mount 1. Replace the front panel to connect connectors of the front panel. Never band together multiple speaker's negative cables. • Control signal is output through a hole into upright...
..., refer to an external power amp's system remote control or the vehicle's auto-antenna relay control terminal (max. 300 mA, 12 V DC). Install the unit as near the heater outlet. • Optimum performance is obtained when the unit is limited. - Installation English DIN Rear-mount 1. Replace the front panel to connect connectors of the front panel. Never band together multiple speaker's negative cables. • Control signal is output through a hole into upright...
Other Manual
Page 2
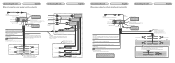
... Front output Rear output Subwoofer output Fuse (10 A) 20 cm (7-7/8 in.) AUX jack (3.5 φ) Use a stereo mini plug cable to connect with Mute function, wire this lead to system control terminal of this unit. If not, keep the Audio Mute lead free of the power amp or auto-antenna relay control terminal (max. 300 mA 12 V DC). IP-BUS input (Blue) Multi-CD player IP-BUS cable (sold USB device. Red Connect to the constant 12 V supply terminal. Connecting the unit English When not connecting a rear speaker leard to a subwoofer Connecting the unit...
... Front output Rear output Subwoofer output Fuse (10 A) 20 cm (7-7/8 in.) AUX jack (3.5 φ) Use a stereo mini plug cable to connect with Mute function, wire this lead to system control terminal of this unit. If not, keep the Audio Mute lead free of the power amp or auto-antenna relay control terminal (max. 300 mA 12 V DC). IP-BUS input (Blue) Multi-CD player IP-BUS cable (sold USB device. Red Connect to the constant 12 V supply terminal. Connecting the unit English When not connecting a rear speaker leard to a subwoofer Connecting the unit...


