Owner's Manual
Page 2
... frequencies 10 - Introduction to advanced operations 14 - Browsing for the first time, to advanced operations 10 - Using the equalizer 17 - Adjusting initial settings 18 - Using the AUX source 18 - Turning the clock display on iPod 14 - Head unit 7 - Pausing playback 13 - Changing audiobook speed 16 Audio Adjustments 16 - Switching the auxiliary setting 18 Other Functions 18 - Please read through this unit 4 iPod compatibility 4 After-sales service for Pioneer products 5 Visit our website 5 In case of currently playing artist 15 - Installing the battery 6 - Selecting...
... frequencies 10 - Introduction to advanced operations 14 - Browsing for the first time, to advanced operations 10 - Using the equalizer 17 - Adjusting initial settings 18 - Using the AUX source 18 - Turning the clock display on iPod 14 - Head unit 7 - Pausing playback 13 - Changing audiobook speed 16 Audio Adjustments 16 - Switching the auxiliary setting 18 Other Functions 18 - Please read through this unit 4 iPod compatibility 4 After-sales service for Pioneer products 5 Visit our website 5 In case of currently playing artist 15 - Installing the battery 6 - Selecting...
Owner's Manual
Page 3
About iPod settings 25 Copyright and trademark notice 25 Specifications 27 En 3 DIN Rear-mount 22 Fastening the front panel 22 Additional Information Error messages 23 Handling guideline of discs and player 23 Dual Discs 24 Compressed audio compatibility 24 Compressed audio files on the disc 24 Example of a hierarchy 25 iPod 25 - About handling the iPod 25 - DIN Front-mount 21 - English Contents Connections Connection diagram 20 Installation DIN front/rear mount 21 -
About iPod settings 25 Copyright and trademark notice 25 Specifications 27 En 3 DIN Rear-mount 22 Fastening the front panel 22 Additional Information Error messages 23 Handling guideline of discs and player 23 Dual Discs 24 Compressed audio compatibility 24 Compressed audio files on the disc 24 Example of a hierarchy 25 iPod 25 - About handling the iPod 25 - DIN Front-mount 21 - English Contents Connections Connection diagram 20 Installation DIN front/rear mount 21 -
Owner's Manual
Page 4
.... ! This unit supports only the following iPods. CAUTION ! Keep this unit are shown below. If the battery is located on this unit, smoke, and overheating could result. 4 En sion 1.3.1) - iPod classic (software version 1.1.2) - For Canadian model This Class B digital apparatus complies with the product may expose you can control and listen to songs on an iPod. ! CAUTION: USE OF CONTROL OR ADJUSTMENT OR PERFORMANCE...
.... ! This unit supports only the following iPods. CAUTION ! Keep this unit are shown below. If the battery is located on this unit, smoke, and overheating could result. 4 En sion 1.3.1) - iPod classic (software version 1.1.2) - For Canadian model This Class B digital apparatus complies with the product may expose you can control and listen to songs on an iPod. ! CAUTION: USE OF CONTROL OR ADJUSTMENT OR PERFORMANCE...
Owner's Manual
Page 5
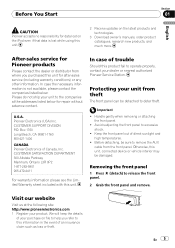
...using this unit. 2 Receive updates on file to help you purchased this product fail to operate properly, contact your dealer or nearest authorized Pioneer Service Station. In case of trouble Should this unit for after-sales service...removing or attaching the front panel. ! Removing the front panel 1 Press (detach) to deter theft. Otherwise, this unit, connected device or vehicle interior may be sure to remove the AUX cable from theft The front panel can be detached to release the front panel. 2 Grab the front panel and remove. Before You Start Section 01 English CAUTION Pioneer...
...using this unit. 2 Receive updates on file to help you purchased this product fail to operate properly, contact your dealer or nearest authorized Pioneer Service Station. In case of trouble Should this unit for after-sales service...removing or attaching the front panel. ! Removing the front panel 1 Press (detach) to deter theft. Otherwise, this unit, connected device or vehicle interior may be sure to remove the AUX cable from theft The front panel can be detached to release the front panel. 2 Grab the front panel and remove. Before You Start Section 01 English CAUTION Pioneer...
Owner's Manual
Page 7
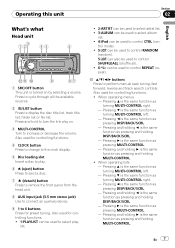
... to turn the link play . 6 h (eject) button Press to eject a disc. 7 (detach) button Press to remove the front panel from the head unit. 8 AUX input jack (3.5 mm stereo jack) Use to connect an auxiliary device. 9 1 to control CTRL (con- Pressing b is the same function as turning MULTI-CONTROL left . - Pressing a is the same function as turning MULTI-CONTROL left . - trol mode). ! 5/ can be used to control RANDOM (random). 5/ can be used to 6 buttons Press for controlling functions. ! 1/PLAYLIST can be used to select playlist...
... to turn the link play . 6 h (eject) button Press to eject a disc. 7 (detach) button Press to remove the front panel from the head unit. 8 AUX input jack (3.5 mm stereo jack) Use to connect an auxiliary device. 9 1 to control CTRL (con- Pressing b is the same function as turning MULTI-CONTROL left . - Pressing a is the same function as turning MULTI-CONTROL left . - trol mode). ! 5/ can be used to control RANDOM (random). 5/ can be used to 6 buttons Press for controlling functions. ! 1/PLAYLIST can be used to select playlist...
Owner's Manual
Page 8
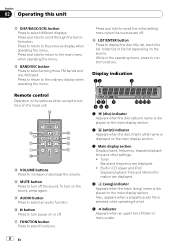
... displays. f AUDIO button Press to control functions. While in CD player and iPod Elapsed playback time and literal information are displayed. ! h FUNCTION button Press to the ordinary display when operating the menu. To turn pause on the head unit. Press to return to select functions. 57 9 468 abcd 1 (disc) indicator Appears when the disc (album) name is displayed on the main display section. 2 (artist) indicator Appears when the disc (track) artist name is displayed on the source...
... displays. f AUDIO button Press to control functions. While in CD player and iPod Elapsed playback time and literal information are displayed. ! h FUNCTION button Press to the ordinary display when operating the menu. To turn pause on the head unit. Press to return to select functions. 57 9 468 abcd 1 (disc) indicator Appears when the disc (album) name is displayed on the main display section. 2 (artist) indicator Appears when the disc (track) artist name is displayed on the source...
Owner's Manual
Page 9
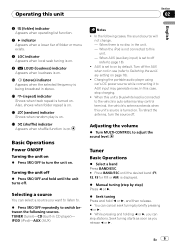
... play is being broadcast in stereo. Selecting a source You can skip stations. When the iPod is not connected to AUX input may generate noise. Charging the portable audio player using car's DC power source while connecting it to this unit. - Adjusting the volume % Turn MULTI-CONTROL to Switching the auxiliary setting on page 18). ! TUNER (tuner)-CD (built-in CD player)- Turn off the AUX when not in use (refer to adjust the sound level. To retract the antenna, turn the unit on. When this unit's blue/white lead is set...
... play is being broadcast in stereo. Selecting a source You can skip stations. When the iPod is not connected to AUX input may generate noise. Charging the portable audio player using car's DC power source while connecting it to this unit. - Adjusting the volume % Turn MULTI-CONTROL to Switching the auxiliary setting on page 18). ! TUNER (tuner)-CD (built-in CD player)- Turn off the AUX when not in use (refer to adjust the sound level. To retract the antenna, turn the unit on. When this unit's blue/white lead is set...
Owner's Manual
Page 10
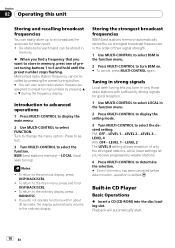
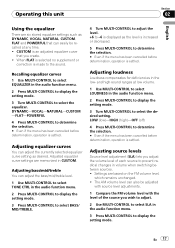
... function menu. 2 Press MULTI-CONTROL to display the setting mode. 3 Turn MULTI-CONTROL to select the desired setting. To return to select the function. Playback will automatically start. 10 En Section 02 Operating this unit Storing and recalling broadcast frequencies You can also recall radio station frequencies assigned to preset tuning numbers by pressing a or b during the frequency display. To return to the main menu, press and hold until the preset number stops flashing. LEVEL 4 AM: OFF-LEVEL 1-LEVEL 2 The LEVEL 4 setting...
... function menu. 2 Press MULTI-CONTROL to display the setting mode. 3 Turn MULTI-CONTROL to select the desired setting. To return to select the function. Playback will automatically start. 10 En Section 02 Operating this unit Storing and recalling broadcast frequencies You can also recall radio station frequencies assigned to preset tuning numbers by pressing a or b during the frequency display. To return to the main menu, press and hold until the preset number stops flashing. LEVEL 4 AM: OFF-LEVEL 1-LEVEL 2 The LEVEL 4 setting...
Owner's Manual
Page 13
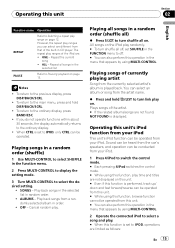
... selected repeat range. 1 Use MULTI-CONTROL to select SCAN in a random order. # To turn scan play on. Tracks play in the function menu. 2 Press MULTI-CONTROL to turn random play back a subfolder of a disc (folder) is displayed, refer to Error messages on page 23. ! Operating this unit Section 02 English # When FOLDER (folder repeat) is selected, it is connected to this unit, the iPod cannot be turned on or off. ! Playing songs on iPod...
... selected repeat range. 1 Use MULTI-CONTROL to select SCAN in a random order. # To turn scan play on. Tracks play in the function menu. 2 Press MULTI-CONTROL to turn random play back a subfolder of a disc (folder) is displayed, refer to Error messages on page 23. ! Operating this unit Section 02 English # When FOLDER (folder repeat) is selected, it is connected to this unit, the iPod cannot be turned on or off. ! Playing songs on iPod...
Owner's Manual
Page 14
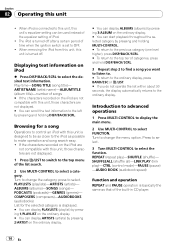
... information. ARTISTNAME (artist name)-ALBUMTITLE (album title)-number of iPod. ! ALBUMS (albums)-SONGS (songs)- Turn to change the category; press to select FUNCTION. When removing the iPod from this unit, this unit ! Turn to change the menu option. Displaying text information on the iPod are not compatible with this unit's equalizer setting can start playback throughout the selected category by pressing and holding MULTI-CONTROL. # To return to the previous category...
... information. ARTISTNAME (artist name)-ALBUMTITLE (album title)-number of iPod. ! ALBUMS (albums)-SONGS (songs)- Turn to change the category; press to select FUNCTION. When removing the iPod from this unit, this unit ! Turn to change the menu option. Displaying text information on the iPod are not compatible with this unit's equalizer setting can start playback throughout the selected category by pressing and holding MULTI-CONTROL. # To return to the previous category...
Owner's Manual
Page 15
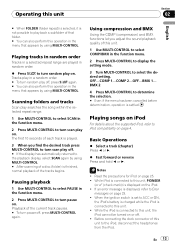
... function, browse function cannot be operated from this unit. # You can also perform this operation in the menu that appears by using MULTI-CONTROL. 2 Operate the connected iPod to select a song and play. # When this function is set SHUFFLE in order. ! Sound can be heard from the car's speakers, and operation can be conducted from your iPod. 1 Press 4/iPod to switch the control mode. # Each pressing 4/iPod switches the control mode. # While using MULTI-CONTROL. However, the repeat play randomly. # To turn...
... function, browse function cannot be operated from this unit. # You can also perform this operation in the menu that appears by using MULTI-CONTROL. 2 Operate the connected iPod to select a song and play. # When this function is set SHUFFLE in order. ! Sound can be heard from the car's speakers, and operation can be conducted from your iPod. 1 Press 4/iPod to switch the control mode. # Each pressing 4/iPod switches the control mode. # While using MULTI-CONTROL. However, the repeat play randomly. # To turn...
Owner's Manual
Page 16
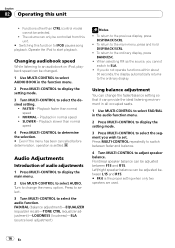
.../balance setting so that it can be changed. 1 Use MULTI-CONTROL to select AUDIO BOOK in the function menu. 2 Press MULTI-CONTROL to display the setting mode. 3 Turn MULTI-CONTROL to select the desired setting. ! If you cannot switch to SLA. ! FAD/BAL (balance adjustment)-EQUALIZER (equalizer recall)-TONE CTRL (equalizer adjustment)-LOUDNESS (loudness)-SLA (source level adjustment) Notes ! Press MULTI-CONTROL repeatedly to switch between fader and balance. 4 Turn MULTI-CONTROL to the previous display, press DISP/BACK/SCRL. ! Operate the iPod to select AUDIO. Changing audiobook...
.../balance setting so that it can be changed. 1 Use MULTI-CONTROL to select AUDIO BOOK in the function menu. 2 Press MULTI-CONTROL to display the setting mode. 3 Turn MULTI-CONTROL to select the desired setting. ! If you cannot switch to SLA. ! FAD/BAL (balance adjustment)-EQUALIZER (equalizer recall)-TONE CTRL (equalizer adjustment)-LOUDNESS (loudness)-SLA (source level adjustment) Notes ! Press MULTI-CONTROL repeatedly to switch between fader and balance. 4 Turn MULTI-CONTROL to the previous display, press DISP/BACK/SCRL. ! Operate the iPod to select AUDIO. Changing audiobook...
Owner's Manual
Page 17
...-POWERFUL 4 Press MULTI-CONTROL to determine the selection. # Even if the menu has been cancelled before determination, operation is settled. Adjusting equalizer curves You can adjust the bass/mid/treble level. 1 Use MULTI-CONTROL to select TONE CTRL in the audio function menu. 2 Press MULTI-CONTROL to display the setting mode. 3 Press MULTI-CONTROL to select BASS/ MID/TREBLE. 4 Turn MULTI-CONTROL to adjust the level. +6 to -6 is displayed as the level is increased or decreased. 5 Press MULTI-CONTROL to determine the selection...
...-POWERFUL 4 Press MULTI-CONTROL to determine the selection. # Even if the menu has been cancelled before determination, operation is settled. Adjusting equalizer curves You can adjust the bass/mid/treble level. 1 Use MULTI-CONTROL to select TONE CTRL in the audio function menu. 2 Press MULTI-CONTROL to display the setting mode. 3 Press MULTI-CONTROL to select BASS/ MID/TREBLE. 4 Turn MULTI-CONTROL to adjust the level. +6 to -6 is displayed as the level is increased or decreased. 5 Press MULTI-CONTROL to determine the selection...
Owner's Manual
Page 18
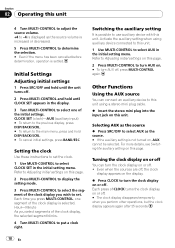
... . Activate the auxiliary setting when using auxiliary device connected to this unit. 1 Use MULTI-CONTROL to this unit using a stereo mini plug cable. % Insert the stereo mini plug into the input jack on this unit. Selecting AUX as the source % Press SRC/OFF to put a clock right. Hour-Minute As you wish to turn the clock display on the display. % Press CLOCK to set the clock. 1 Use MULTI-CONTROL to use auxiliary device with this unit. Section 02 Operating this unit 4 Turn MULTI-CONTROL to adjust the source volume. +4 to -4 is displayed as the source volume...
... . Activate the auxiliary setting when using auxiliary device connected to this unit. 1 Use MULTI-CONTROL to this unit using a stereo mini plug cable. % Insert the stereo mini plug into the input jack on this unit. Selecting AUX as the source % Press SRC/OFF to put a clock right. Hour-Minute As you wish to turn the clock display on the display. % Press CLOCK to set the clock. 1 Use MULTI-CONTROL to use auxiliary device with this unit. Section 02 Operating this unit 4 Turn MULTI-CONTROL to adjust the source volume. +4 to -4 is displayed as the source volume...
Owner's Manual
Page 19
Do not pass the yellow cable through blue/white cable when this unit in conditions other than the following could result in order to the power terminal of this unit is equipped with insulating tape. - Never wire the speaker negative cable directly to external power amp's power terminal. Never connect blue/white cable to ground. - This cable and other devices. Use of the auto antenna. Place all cables away from hot places, such...
Do not pass the yellow cable through blue/white cable when this unit in conditions other than the following could result in order to the power terminal of this unit is equipped with insulating tape. - Never wire the speaker negative cable directly to external power amp's power terminal. Never connect blue/white cable to ground. - This cable and other devices. Use of the auto antenna. Place all cables away from hot places, such...
Owner's Manual
Page 20
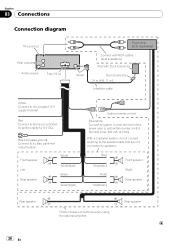
...-free metal location. Front speaker Left Rear speaker White White/black Green Green/black System remote control Blue/white Connect to speakers. With a 2 speaker system, do not connect anything to the speaker leads that are not connected to system control terminal of the power amp or auto-antenna relay control terminal (max. 300 mA 12 V DC). Section 03 Connections Connection diagram This product Rear output Antenna jack Fuse (10 A) Power amp (sold separately) Connect with RCA cables (sold separately) iPod with Dock Connector...
...-free metal location. Front speaker Left Rear speaker White White/black Green Green/black System remote control Blue/white Connect to speakers. With a 2 speaker system, do not connect anything to the speaker leads that are not connected to system control terminal of the power amp or auto-antenna relay control terminal (max. 300 mA 12 V DC). Section 03 Connections Connection diagram This product Rear output Antenna jack Fuse (10 A) Power amp (sold separately) Connect with RCA cables (sold separately) iPod with Dock Connector...

Owner's Manual
Page 21
... use factory supplied mounting sleeve. 2 Secure the mounting sleeve by using this unit to malfunction, such as a result of holes or other modifications to bend the metal tabs (90°) into the dashboard. DIN Front-mount Installation with operation of unauthorized parts may cause this unit, make sure you leave ample space behind the unit, use unauthorized parts. Unstable installation may cause malfunctions. ! DIN front/rear mount This unit...
... use factory supplied mounting sleeve. 2 Secure the mounting sleeve by using this unit to malfunction, such as a result of holes or other modifications to bend the metal tabs (90°) into the dashboard. DIN Front-mount Installation with operation of unauthorized parts may cause this unit, make sure you leave ample space behind the unit, use unauthorized parts. Unstable installation may cause malfunctions. ! DIN front/rear mount This unit...
Owner's Manual
Page 23
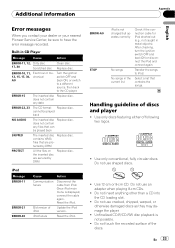
... disc playback is displayed, connect the cable again. Reset the iPod. Handling guideline of the discs. Do not insert anything other than a CD into the CD loading slot. ! Additional Information Appendix English Error messages When you contact your dealer or your nearest Pioneer Service Center, be played back NO AUDIO The inserted disc Replace disc. ERROR-10, 11, Electrical or me12, 15, 17, 30, chanical A0 Turn the ignition switch...
... disc playback is displayed, connect the cable again. Reset the iPod. Handling guideline of the discs. Do not insert anything other than a CD into the CD loading slot. ! Additional Information Appendix English Error messages When you contact your dealer or your nearest Pioneer Service Center, be played back NO AUDIO The inserted disc Replace disc. ERROR-10, 11, Electrical or me12, 15, 17, 30, chanical A0 Turn the ignition switch...
Owner's Manual
Page 24
... Windows Media Player ! Windows Media Audio 9 Professional, Loss- Sampling frequency: 16 kHz to play the CD side with a soft cloth outward from using them. Compatible ID3 tag version: 1.0, 1.1, 2.2, 2.3, 2.4 (ID3 tag Version 2.x is not physically compatible with the general CD standard, it to adjust to the warmer temperature for about Dual Discs. Dual Discs are two-sided discs that have a recordable CD for video on the...
... Windows Media Player ! Windows Media Audio 9 Professional, Loss- Sampling frequency: 16 kHz to play the CD side with a soft cloth outward from using them. Compatible ID3 tag version: 1.0, 1.1, 2.2, 2.3, 2.4 (ID3 tag Version 2.x is not physically compatible with the general CD standard, it to adjust to the warmer temperature for about Dual Discs. Dual Discs are two-sided discs that have a recordable CD for video on the...
Owner's Manual
Page 25
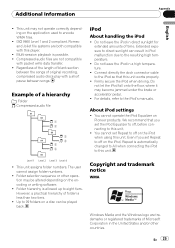
... numbers. Firmly secure the iPod when driving. You cannot set the iPod Equalizer to off, before connecting to 99 folders on Pioneer products. However, a practical hierarchy of a hierarchy : Folder : Compressed audio file 1 2 3 4 5 6 iPod About handling the iPod ! En 25 Example of folder is possible. ! Level 1 Level 2 Level 3 Level 4 ! Additional Information Appendix English ! The user cannot assign folder numbers. ! For details, refer to the iPod's manuals. You cannot operate the iPod Equalizer on a disc...
... numbers. Firmly secure the iPod when driving. You cannot set the iPod Equalizer to off, before connecting to 99 folders on Pioneer products. However, a practical hierarchy of a hierarchy : Folder : Compressed audio file 1 2 3 4 5 6 iPod About handling the iPod ! En 25 Example of folder is possible. ! Level 1 Level 2 Level 3 Level 4 ! Additional Information Appendix English ! The user cannot assign folder numbers. ! For details, refer to the iPod's manuals. You cannot operate the iPod Equalizer on a disc...


