Owner's Manual
Page 2
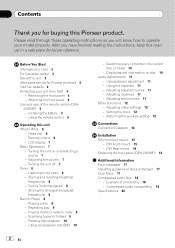
...rear mount 15 - Using the remote control 5 Operating this unit 3 After-sales service for Pioneer products 4 Visit our website 4 Protecting your model properly. After you for buying this Pioneer product. Attaching the front panel 4 Use and care of a hierarchy 18 - Listening to ...you will know how to the radio 8 - Head unit 6 - Storing the strongest broadcast frequencies 8 Built-in the current disc or folder 10 - Scanning tracks or folders 9 - Setting the clock 12 - DIN Rear-mount 16 Fastening the front panel (DEH-2000MP) 16 Additional Information Error messages 17...
...rear mount 15 - Using the remote control 5 Operating this unit 3 After-sales service for Pioneer products 4 Visit our website 4 Protecting your model properly. After you for buying this Pioneer product. Attaching the front panel 4 Use and care of a hierarchy 18 - Listening to ...you will know how to the radio 8 - Head unit 6 - Storing the strongest broadcast frequencies 8 Built-in the current disc or folder 10 - Scanning tracks or folders 9 - Setting the clock 12 - DIN Rear-mount 16 Fastening the front panel (DEH-2000MP) 16 Additional Information Error messages 17...
Owner's Manual
Page 6
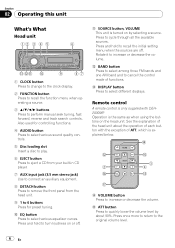
.... Section 02 Operating this unit What's What Head unit 12 3 4 5 6 d cb a 9 87 1 CLOCK button Press to change to the clock display. 2 FUNCTION button Press to recall the function menu when operating a source. 3 a/b/c/d buttons Press to increase ...AM band and to increase or decrease the volume. Press to recall the initial setting menu when the sources are off . Press and hold to select various equalizer ...Disc loading slot Insert a disc to play. 6 EJECT button Press to eject a CD from your built-in CD player. 7 AUX input jack (3.5 mm stereo jack) Use to connect an auxiliary ...
.... Section 02 Operating this unit What's What Head unit 12 3 4 5 6 d cb a 9 87 1 CLOCK button Press to change to the clock display. 2 FUNCTION button Press to recall the function menu when operating a source. 3 a/b/c/d buttons Press to increase ...AM band and to increase or decrease the volume. Press to recall the initial setting menu when the sources are off . Press and hold to select various equalizer ...Disc loading slot Insert a disc to play. 6 EJECT button Press to eject a CD from your built-in CD player. 7 AUX input jack (3.5 mm stereo jack) Use to connect an auxiliary ...
Owner's Manual
Page 12
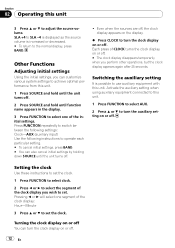
... 25 seconds. Press FUNCTION repeatedly to switch between the following settings: Clock-AUX (auxiliary input) Use the following instructions to operate each particular setting. # To cancel initial settings, press BAND. # You can customize various system settings to achieve optimal performance from this unit. Activate the auxiliary setting when using auxiliary equipment connected to this unit 3 Press...
... 25 seconds. Press FUNCTION repeatedly to switch between the following settings: Clock-AUX (auxiliary input) Use the following instructions to operate each particular setting. # To cancel initial settings, press BAND. # You can customize various system settings to achieve optimal performance from this unit. Activate the auxiliary setting when using auxiliary equipment connected to this unit 3 Press...


