
42VM5/42VP5/42XM3/50XM4/61XM3 color brochure
Page 1
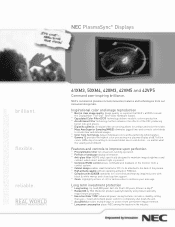
...if the source varies and monitor settings are not at 68.7 billion colors (4096 steps) resulting in increased detail never seen before... see back page for details on motion video as the input source and all display settings at factory default. NEC's commercial plasmas include innovative... to maintain image brightness and contrast where direct ambient light is present. ° Complete RS232 control allows command and feedback of the monitor from our renowned design labs. flexible. All digital video processing allows for artifact and noise free video. ° Mass Area Superior Sampling...
...if the source varies and monitor settings are not at 68.7 billion colors (4096 steps) resulting in increased detail never seen before... see back page for details on motion video as the input source and all display settings at factory default. NEC's commercial plasmas include innovative... to maintain image brightness and contrast where direct ambient light is present. ° Complete RS232 control allows command and feedback of the monitor from our renowned design labs. flexible. All digital video processing allows for artifact and noise free video. ° Mass Area Superior Sampling...
42VM5/42VP5/42XM3/50XM4/61XM3 color brochure
Page 4
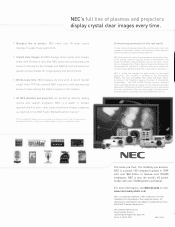
... the property of DisplayMate Technologies, "The NEC 61XM2 Plasma monitor delivered impressive image and picture quality for the real world. To date, the plasma display market has not followed a consistent standard to determine ... in environments that specialize in providing information on large-screen display products, markets, and manufacturers. A recent market study* from TFC Info showed NEC projectors and plasmas are subject to our professional studio reference monitor." NEC's full line of plasmas and projectors display crystal clear images every time. ° Broadest line of...
... the property of DisplayMate Technologies, "The NEC 61XM2 Plasma monitor delivered impressive image and picture quality for the real world. To date, the plasma display market has not followed a consistent standard to determine ... in environments that specialize in providing information on large-screen display products, markets, and manufacturers. A recent market study* from TFC Info showed NEC projectors and plasmas are subject to our professional studio reference monitor." NEC's full line of plasmas and projectors display crystal clear images every time. ° Broadest line of...

42XM3 spec sheet
Page 1
.../reliability and product warranty repair/return programs. ° Executive Order 13221 advanced power saving features include a standby setting that an NEC PlasmaSync display has received the DisplayMate "Five-Star" Best Video Hardware Award. ° Capsulated Color Filter (CCF) technology delivers realistic...Color Tune Technology. Up to the back of the plasma. ° High altitude capable with an operating altitude of the monitor from our renowned design labs. Inspirational color and image reproduction ° Best in class image quality and accurate image reproduction Unsurpassed...
.../reliability and product warranty repair/return programs. ° Executive Order 13221 advanced power saving features include a standby setting that an NEC PlasmaSync display has received the DisplayMate "Five-Star" Best Video Hardware Award. ° Capsulated Color Filter (CCF) technology delivers realistic...Color Tune Technology. Up to the back of the plasma. ° High altitude capable with an operating altitude of the monitor from our renowned design labs. Inspirational color and image reproduction ° Best in class image quality and accurate image reproduction Unsurpassed...

42XM3 spec sheet
Page 2
... Consumption Standby Power Dimensions (WxHxD) Weight Environmental Considerations Warranty Regulatory Included Accessories Optional Accessories PX-42XM3A, Diagonal Screen Size 42" 16 to our professional studio reference monitor." Mgmt., Cinema Mode, Long Life Mode, Closed Captioning, DVI Setup Option 3 - Timer, Pwr. NEC takes pride in its contrast measurements, which reflect true-to Dr. Raymond Soneira...
... Consumption Standby Power Dimensions (WxHxD) Weight Environmental Considerations Warranty Regulatory Included Accessories Optional Accessories PX-42XM3A, Diagonal Screen Size 42" 16 to our professional studio reference monitor." Mgmt., Cinema Mode, Long Life Mode, Closed Captioning, DVI Setup Option 3 - Timer, Pwr. NEC takes pride in its contrast measurements, which reflect true-to Dr. Raymond Soneira...

42VM5/42VP5/42XM3 UM
Page 1
NEC Solutions (America), Inc. PlasmaSync Plasma Monitor Operation Manual For the specifications of your plasma monitor, refer to "Model Information".
NEC Solutions (America), Inc. PlasmaSync Plasma Monitor Operation Manual For the specifications of your plasma monitor, refer to "Model Information".

42VM5/42VP5/42XM3 UM
Page 2
... Provide adequate space for future reference. Use a soft dry cloth to the unit, read carefully in a closed cabinet or shelves. Certain monitor to a cooler location, and wait for any problems. 240 Volts AC will Recommendations to avoid or minimize phosphor burn-in which has potentially... to the Like all phosphor-based display devices and all service to provide long, trouble-free service. Please see the section "Plasma monitor cleaning procedure" on the surface of the unit, and might even cause a fire hazard. 2. The manufacturer is designed and manufactured to...
... Provide adequate space for future reference. Use a soft dry cloth to the unit, read carefully in a closed cabinet or shelves. Certain monitor to a cooler location, and wait for any problems. 240 Volts AC will Recommendations to avoid or minimize phosphor burn-in which has potentially... to the Like all phosphor-based display devices and all service to provide long, trouble-free service. Please see the section "Plasma monitor cleaning procedure" on the surface of the unit, and might even cause a fire hazard. 2. The manufacturer is designed and manufactured to...

42VM5/42VP5/42XM3 UM
Page 5
...33 mini D-Sub 15-pin connector (Analog 33 DVI-D 24-pin connector (Digital 33 Troubleshooting 34 Contents of the Package Ⅺ Plasma monitor Ⅺ Power cord Ⅺ Remote control with Computer Signals ......... 14 OSM (On Screen Menu) Controls 15 Menu Operations 15 Menu Tree...Adjust Settings Menu 20 Adjusting the Position, Size, Fine Picture, Picture Adj ..... 20 Option1 Settings Menu 21 Setting the on when the plasma monitor is installed vertically ... 8 How to use the remote control 8 Battery Installation and Replacement 8 Using the wired remote control mode 8 Operating Range...
...33 mini D-Sub 15-pin connector (Analog 33 DVI-D 24-pin connector (Digital 33 Troubleshooting 34 Contents of the Package Ⅺ Plasma monitor Ⅺ Power cord Ⅺ Remote control with Computer Signals ......... 14 OSM (On Screen Menu) Controls 15 Menu Operations 15 Menu Tree...Adjust Settings Menu 20 Adjusting the Position, Size, Fine Picture, Picture Adj ..... 20 Option1 Settings Menu 21 Setting the on when the plasma monitor is installed vertically ... 8 How to use the remote control 8 Battery Installation and Replacement 8 Using the wired remote control mode 8 Operating Range...

42VM5/42VP5/42XM3 UM
Page 6
...Drawing A) * As it is strongly recommended to use a stand or original mounting unit. (Wall mount unit, Stand, etc.) * See the inside of the monitor using the stand (optional). Be sure to use a trained, authorized dealer. Installation You can attach your optional mounts or stand to the plasma... monitor in damage to the equipment or injury to the installer. Screw hole Screw or Hook etc. (Not supplied) 50mm (2") Safty metal fittings...
...Drawing A) * As it is strongly recommended to use a stand or original mounting unit. (Wall mount unit, Stand, etc.) * See the inside of the monitor using the stand (optional). Be sure to use a trained, authorized dealer. Installation You can attach your optional mounts or stand to the plasma... monitor in damage to the equipment or injury to the installer. Screw hole Screw or Hook etc. (Not supplied) 50mm (2") Safty metal fittings...

42VM5/42VP5/42XM3 UM
Page 7
...set the LOOP OUT to ON. • To create a video wall, set the VIDEO WALL menu items properly. • To connect monitors, please use the monitor's out terminal. Use a distribution amplifier (any commercially available cable). • If the image quality is ON, do not use a 1~2m...1503;768, 60Hz signal. • A distribution amplifier is particularly recommended when using 9-screen and over video wall. • From the second monitor onward, connections require a BNC-RCA conversion cable or connector, a mini D-Sub 15 pin cable-BNC (ן5) cable or a conversion...
...set the LOOP OUT to ON. • To create a video wall, set the VIDEO WALL menu items properly. • To connect monitors, please use the monitor's out terminal. Use a distribution amplifier (any commercially available cable). • If the image quality is ON, do not use a 1~2m...1503;768, 60Hz signal. • A distribution amplifier is particularly recommended when using 9-screen and over video wall. • From the second monitor onward, connections require a BNC-RCA conversion cable or connector, a mini D-Sub 15 pin cable-BNC (ן5) cable or a conversion...

42VM5/42VP5/42XM3 UM
Page 8
...remote control within a distance of purchase when installing. • Rotate 90° clockwise as seen from the REMOTE IN terminal on when the plasma monitor is used, the remote control can be purchased separately. 8 from the front when installing. 90° • After installing, check with the ...2 "AAA" batteries, making sure to set "OSM ANGLE" to "V" when using the remote control in with the NEC logo mark as seen from the front of the monitor's remote control sensor and at horizontal and vertical angles of up to approximately 30°. * The remote control operation may...
...remote control within a distance of purchase when installing. • Rotate 90° clockwise as seen from the REMOTE IN terminal on when the plasma monitor is used, the remote control can be purchased separately. 8 from the front when installing. 90° • After installing, check with the ...2 "AAA" batteries, making sure to set "OSM ANGLE" to "V" when using the remote control in with the NEC logo mark as seen from the front of the monitor's remote control sensor and at horizontal and vertical angles of up to approximately 30°. * The remote control operation may...

42VM5/42VP5/42XM3 UM
Page 9
... the CURSOR buttons in the standby mode ... INPUT SELECT RIGHT/ + / EXIT MENU/ ENTER VOLUME DOWN UP LEFT/ - INPUT SELECT RIGHT/ + / EXIT 7 6 5 4 1 32 q Power Turns the monitor's power on /off . y VOLUME DOWN and UP Adjusts the volume.
... the CURSOR buttons in the standby mode ... INPUT SELECT RIGHT/ + / EXIT MENU/ ENTER VOLUME DOWN UP LEFT/ - INPUT SELECT RIGHT/ + / EXIT 7 6 5 4 1 32 q Power Turns the monitor's power on /off . y VOLUME DOWN and UP Adjusts the volume.

42VM5/42VP5/42XM3 UM
Page 10
...can be set for Input or Output (see page 21). K REMOTE OUT Connect the remote cable* to the REMOTE IN jack of the other display monitor to obtain wired remote control. * The 1/8 Stereo Mini cable must be set for Input or Output. (see page 7) H RGB3 (DVI 24pin)...the included power cord here. E DVD1 / HD1 Connect DVD's, High Definition or Laser Discs, etc. This input can be used when operating and controlling the monitor externally (by external control). Maintain the correct polarity. VIDEO1 can be purchased separately. 10 C VIDEO1, 2, 3 (BNC, RCA, S-Video) Connect VCR's, ...
...can be set for Input or Output (see page 21). K REMOTE OUT Connect the remote cable* to the REMOTE IN jack of the other display monitor to obtain wired remote control. * The 1/8 Stereo Mini cable must be set for Input or Output. (see page 7) H RGB3 (DVI 24pin)...the included power cord here. E DVD1 / HD1 Connect DVD's, High Definition or Laser Discs, etc. This input can be used when operating and controlling the monitor externally (by external control). Maintain the correct polarity. VIDEO1 can be purchased separately. 10 C VIDEO1, 2, 3 (BNC, RCA, S-Video) Connect VCR's, ...

42VM5/42VP5/42XM3 UM
Page 11
... to select DVD/HD as the source. → VIDEO1 → VIDEO2 → VIDEO3 VIDEO can also be selected using the INPUT SELECT button on the monitor. y CURSOR (L / M Use these buttons to select items or settings and to select RGB/PC as the source. Press this button to adjust Fine Picture, ... the plug of the remote cable (The 1/8 Stereo Mini cable) here when using the INPUT SELECT button on the monitor. RGB/PC can be selected using the INPUT SELECT button on the monitor. u EXIT Press this button to exit the OSM controls in the main menu. i POINTER Press this button to ...
... to select DVD/HD as the source. → VIDEO1 → VIDEO2 → VIDEO3 VIDEO can also be selected using the INPUT SELECT button on the monitor. y CURSOR (L / M Use these buttons to select items or settings and to select RGB/PC as the source. Press this button to adjust Fine Picture, ... the plug of the remote cable (The 1/8 Stereo Mini cable) here when using the INPUT SELECT button on the monitor. RGB/PC can be selected using the INPUT SELECT button on the monitor. u EXIT Press this button to exit the OSM controls in the main menu. i POINTER Press this button to ...

42VM5/42VP5/42XM3 UM
Page 12
...remote control to its original size. Press the POINTER button to the desired level. Press the OFF TIMER button twice in a row. 2. The monitor's POWER/STANDBY indicator will light up (green) when the unit is selected: Fine Picture, Picture ADJ, Position, and Contrast will reduce the picture...DISPLAY To check the settings: 1. Press the OFF TIMER button to the desired level. 2. Basic Operations POWER To turn off the power of the monitor. A slight current is displayed, then turns off after 30, 60, 90 or 120 minutes. 1. The remaining time is still supplied to use the...
...remote control to its original size. Press the POINTER button to the desired level. Press the OFF TIMER button twice in a row. 2. The monitor's POWER/STANDBY indicator will light up (green) when the unit is selected: Fine Picture, Picture ADJ, Position, and Contrast will reduce the picture...DISPLAY To check the settings: 1. Press the OFF TIMER button to the desired level. 2. Basic Operations POWER To turn off the power of the monitor. A slight current is displayed, then turns off after 30, 60, 90 or 120 minutes. 1. The remaining time is still supplied to use the...

42VM5/42VP5/42XM3 UM
Page 14
... (4:3 or SXGA 5:4) Note: Do not allow the displayed in 4:3 mode for details on the display output of the various VESA signal standards supported by the monitor. Ⅵ When 852 (848) dot ן480 line wide VGA* signals with Computer Signals Switch to the wide screen mode to expand the...
... (4:3 or SXGA 5:4) Note: Do not allow the displayed in 4:3 mode for details on the display output of the various VESA signal standards supported by the monitor. Ⅵ When 852 (848) dot ן480 line wide VGA* signals with Computer Signals Switch to the wide screen mode to expand the...

42VM5/42VP5/42XM3 UM
Page 23
... CONT : LOW NEXT PAGE SEL. EXIT RETURN Information Ⅵ Power management function * The power management function automatically reduces the monitor's power consumption if the computer's keyboard or mouse is automatically discriminated and projected in an image mode suited to the picture.... description. Option2 Settings Menu Setting the power management for computer images This energy-saving (power management) function automatically reduces the monitor's power consumption if no operation is turned off state. * For instructions on using the computer's power management function, refer...
... CONT : LOW NEXT PAGE SEL. EXIT RETURN Information Ⅵ Power management function * The power management function automatically reduces the monitor's power consumption if the computer's keyboard or mouse is automatically discriminated and projected in an image mode suited to the picture.... description. Option2 Settings Menu Setting the power management for computer images This energy-saving (power management) function automatically reduces the monitor's power consumption if no operation is turned off state. * For instructions on using the computer's power management function, refer...

42VM5/42VP5/42XM3 UM
Page 24
... picture is set for the "WORKING TIME"... Adjust the times. V-LINE: Moves from 1 to 20 dots in units of 3 minutes. * Ending a WORKING TIME function, the monitor will not make the screen smaller or bigger. When the WORKING TIME is set to "ON" the mode will be set when the "WORKING TIME...
... picture is set for the "WORKING TIME"... Adjust the times. V-LINE: Moves from 1 to 20 dots in units of 3 minutes. * Ending a WORKING TIME function, the monitor will not make the screen smaller or bigger. When the WORKING TIME is set to "ON" the mode will be set when the "WORKING TIME...

42VM5/42VP5/42XM3 UM
Page 27
... DATE ON OFF INPUT FUNCTION MON 08 : 30 10 : 30 RGB2 INVERSE TUE - - : - - 18 : 15 - - Option3 Settings Menu Using the timer This function sets the monitor to turn ON/OFF automatically at a set DAYLIGHT SAVING TIME. Example: Setting "WEDNESDAY", "22:05" On "TIMER" menu, select "PRESENT TIME", then press the MENU...
... DATE ON OFF INPUT FUNCTION MON 08 : 30 10 : 30 RGB2 INVERSE TUE - - : - - 18 : 15 - - Option3 Settings Menu Using the timer This function sets the monitor to turn ON/OFF automatically at a set DAYLIGHT SAVING TIME. Example: Setting "WEDNESDAY", "22:05" On "TIMER" menu, select "PRESENT TIME", then press the MENU...

42VM5/42VP5/42XM3 UM
Page 29
... operate the plasma display individually. Video Wall setting Use this function sets ID numbers so that operation of the remote control does not cause multiple monitors to configure a 4-25 video wall. EXIT RETURN Information Ⅵ VIDEO WALL POSITION settings 1 Screen: There is no need to 256: ID NUMBER will not be...
... operate the plasma display individually. Video Wall setting Use this function sets ID numbers so that operation of the remote control does not cause multiple monitors to configure a 4-25 video wall. EXIT RETURN Information Ⅵ VIDEO WALL POSITION settings 1 Screen: There is no need to 256: ID NUMBER will not be...

42VM5/42VP5/42XM3 UM
Page 30
... 1, display 2 as the IMAGE ADJUST menu on page 20. MODE : SPLIT AUTO ID : OFF IMAGE ADJUST P. However, by one automatically. * From the second monitor onward, neither the POWER button on the unit nor the POWER ON button on the AUTO ID before the following operations. VIDEO WALL DIVIDER : 1 POSITION... select "BLANK". ON DELAY : ON PLE LINK : OFF REPEAT TIMER : OFF SEL. By pressing the POWER ON button on the remote control the No.1 monitor will turn on and the others will be set to "ON", the POWER ON/OFF button on the main power of multiple displays connected to...
... 1, display 2 as the IMAGE ADJUST menu on page 20. MODE : SPLIT AUTO ID : OFF IMAGE ADJUST P. However, by one automatically. * From the second monitor onward, neither the POWER button on the unit nor the POWER ON button on the AUTO ID before the following operations. VIDEO WALL DIVIDER : 1 POSITION... select "BLANK". ON DELAY : ON PLE LINK : OFF REPEAT TIMER : OFF SEL. By pressing the POWER ON button on the remote control the No.1 monitor will turn on and the others will be set to "ON", the POWER ON/OFF button on the main power of multiple displays connected to...


