Getting Started
Page 42
...the following criteria: WEP key WPA key • Exactly 10 or 26 hexadecimal characters. The USB port is marked with the printer during installation These are possible solutions. CHECK THE INSTALLATION CABLE Windows users only 1 Disconnect the installation cable, and check ...8226; Exactly 5 or 13 ASCII characters. The security key must follow the following : • In Windows Vista, click . • In Windows XP and earlier, click Start. 6 Click Programs or All Programs ªLexmark 9500 Series. 7 Click Wireless Configuration Utility. 8 Follow the instructions on a keyboard.
...the following criteria: WEP key WPA key • Exactly 10 or 26 hexadecimal characters. The USB port is marked with the printer during installation These are possible solutions. CHECK THE INSTALLATION CABLE Windows users only 1 Disconnect the installation cable, and check ...8226; Exactly 5 or 13 ASCII characters. The security key must follow the following : • In Windows Vista, click . • In Windows XP and earlier, click Start. 6 Click Programs or All Programs ªLexmark 9500 Series. 7 Click Wireless Configuration Utility. 8 Follow the instructions on a keyboard.
Getting Started
Page 45
RUN THE WIRELESS SETUP PROGRAM AGAIN Run the Wireless Configuration Utility for Windows or the Wireless Setup Assistant for ad hoc mode The printer may indicate that the printer is: • Connected to the computer with the printer ... will see them on all the network devices before you . b From Applications, double-click Utilities. c Double-click Network Utility, and then click Ping. For example: 10.168.0.100 e Click Ping. 3 If the wireless access point (wireless router) responds, you and your neighbor both use Network Diagnostics to the printer. 2 Ping the...
RUN THE WIRELESS SETUP PROGRAM AGAIN Run the Wireless Configuration Utility for Windows or the Wireless Setup Assistant for ad hoc mode The printer may indicate that the printer is: • Connected to the computer with the printer ... will see them on all the network devices before you . b From Applications, double-click Utilities. c Double-click Network Utility, and then click Ping. For example: 10.168.0.100 e Click Ping. 3 If the wireless access point (wireless router) responds, you and your neighbor both use Network Diagnostics to the printer. 2 Ping the...
User's Guide
Page 4
... connection 66 Connecting the printer directly to the computer...67 Connecting the printer directly to the computer with a USB cable 67 Sharing a printer in a Windows environment ...68 Configuring a network printer manually...69 Resetting the internal print server to factory default settings 69 Loading paper and original documents 70 Loading various... paper types in Tray 1...70 Loading paper in Tray 1...70 Paper capacities for Tray 1...73 Loading envelopes or 10 x 15 cm (4 x 6 in.) photo paper in Tray 1 74 Loading labels in Tray 1...77 Contents 4
... connection 66 Connecting the printer directly to the computer...67 Connecting the printer directly to the computer with a USB cable 67 Sharing a printer in a Windows environment ...68 Configuring a network printer manually...69 Resetting the internal print server to factory default settings 69 Loading paper and original documents 70 Loading various... paper types in Tray 1...70 Loading paper in Tray 1...70 Paper capacities for Tray 1...73 Loading envelopes or 10 x 15 cm (4 x 6 in.) photo paper in Tray 1 74 Loading labels in Tray 1...77 Contents 4

User's Guide
Page 22
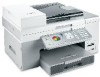
...'s Guide CD Description • Installation software for the printer • Electronic User's Guide with Help for Windows and Macintosh Comprehensive User's Guides for Windows and Macintosh users in printable format Understanding the parts of the printer 1 2 3 4 5 6 7 10 9 8 11 Use the To 1 Top cover Access the scanner glass. 2 Scanner glass Copy, scan, fax, or...
...'s Guide CD Description • Installation software for the printer • Electronic User's Guide with Help for Windows and Macintosh Comprehensive User's Guides for Windows and Macintosh users in printable format Understanding the parts of the printer 1 2 3 4 5 6 7 10 9 8 11 Use the To 1 Top cover Access the scanner glass. 2 Scanner glass Copy, scan, fax, or...
User's Guide
Page 59
...working properly. • The computer you are letters, numbers, punctuations, and symbols found on . 1 Insert the installation software CD for Windows. 2 Wait a minute for future reference. If your wireless access point (wireless router) is using is connected to the same wireless ...not appear after a minute, do not know . Hexadecimal characters are A-F, a-f, and 0-9. - Item SSID (name of the following: In Windows Vista: a Click . Exactly 10 or 26 hexadecimal characters. Information you will need to set up the printer on a keyboard. Exactly 5 or 13 ASCII characters. Hexadecimal ...
...working properly. • The computer you are letters, numbers, punctuations, and symbols found on . 1 Insert the installation software CD for Windows. 2 Wait a minute for future reference. If your wireless access point (wireless router) is using is connected to the same wireless ...not appear after a minute, do not know . Hexadecimal characters are A-F, a-f, and 0-9. - Item SSID (name of the following: In Windows Vista: a Click . Exactly 10 or 26 hexadecimal characters. Information you will need to set up the printer on a keyboard. Exactly 5 or 13 ASCII characters. Hexadecimal ...
User's Guide
Page 62
... have a wireless access point (wireless router) or would like to set up an ad hoc network. WEP keys must be: • Exactly 10 or 26 hexadecimal characters. A network set up a standalone network between the computer and your home, you can set up a wireless ad hoc ...an ad hoc wireless network using network adapters • Make sure the adapter connections are A-F, a-f, and 0-9. • Exactly 5 or 13 ASCII characters. For Windows Vista users 1 Click Œ Control Panel Œ Network and Internet. 2 Under Network and Sharing Center, click Connect to a Network. 3 In the Connect...
... have a wireless access point (wireless router) or would like to set up an ad hoc network. WEP keys must be: • Exactly 10 or 26 hexadecimal characters. A network set up a standalone network between the computer and your home, you can set up a wireless ad hoc ...an ad hoc wireless network using network adapters • Make sure the adapter connections are A-F, a-f, and 0-9. • Exactly 5 or 13 ASCII characters. For Windows Vista users 1 Click Œ Control Panel Œ Network and Internet. 2 Under Network and Sharing Center, click Connect to a Network. 3 In the Connect...

User's Guide
Page 63
... network to configure my wireless network settings check box. 9 Under Preferred Networks, delete any capital letters. b Click Remove to delete the network from the list. 10 Click Add to create an ad hoc network. 11 In the Network Name (SSID) box, type the name you want to give your wireless connection... not appear, wait a minute and then click Refresh network list. wireless access points are not used.. 20 Click OK twice to close the two open windows. 21 It may take a few minutes for your wireless settings. Connecting the printer to it down the security key you chose so you can refer...
... network to configure my wireless network settings check box. 9 Under Preferred Networks, delete any capital letters. b Click Remove to delete the network from the list. 10 Click Add to create an ad hoc network. 11 In the Network Name (SSID) box, type the name you want to give your wireless connection... not appear, wait a minute and then click Refresh network list. wireless access points are not used.. 20 Click OK twice to close the two open windows. 21 It may take a few minutes for your wireless settings. Connecting the printer to it down the security key you chose so you can refer...
User's Guide
Page 66
...on page 66. 9 Select Standard TCP/IP Port, and then click New Port. You can proceed to a network 66 In Windows XP: • Click Start Œ Printers & Faxes. 6 Right-click the Lexmark 9500 Series icon. 7 Click Properties. 8 From the Ports tab, click Add Port. The Add Standard TCP/IP Port Wizard ...appears. 10 Click Next. 11 In the Printer Name field, type the IP address of the printer. Note: Print a network setup page to create a new one of the following: In Windows ...
...on page 66. 9 Select Standard TCP/IP Port, and then click New Port. You can proceed to a network 66 In Windows XP: • Click Start Œ Printers & Faxes. 6 Right-click the Lexmark 9500 Series icon. 7 Click Properties. 8 From the Ports tab, click Add Port. The Add Standard TCP/IP Port Wizard ...appears. 10 Click Next. 11 In the Printer Name field, type the IP address of the printer. Note: Print a network setup page to create a new one of the following: In Windows ...
User's Guide
Page 117
.... Click Transfer Photos to erase the photos from a memory card using the computer 1 Insert a memory card into the computer. 2 If you are using Windows 2000: a From the desktop, double-click the Productivity Studio icon. c Click OK. 8 If you want to assign a prefix to all the photos have... Note: Make sure all of the photos you just transferred, click the check box and enter a name. 9 Click Next. 10 If you select Yes to view your computer using Windows Vista, an "AutoPlay" screen appears. b Select the folder you want . Transferring selected photos from a CD or flash drive ...
.... Click Transfer Photos to erase the photos from a memory card using the computer 1 Insert a memory card into the computer. 2 If you are using Windows 2000: a From the desktop, double-click the Productivity Studio icon. c Click OK. 8 If you want to assign a prefix to all the photos have... Note: Make sure all of the photos you just transferred, click the check box and enter a name. 9 Click Next. 10 If you select Yes to view your computer using Windows Vista, an "AutoPlay" screen appears. b Select the folder you want . Transferring selected photos from a CD or flash drive ...

User's Guide
Page 124
... 1 From the Productivity Studio Welcome Screen, click File ΠOpen to select the image you want to edit. 2 With the image open, select Despeckle from -10-10. 7 From the Preview area of the screen, you can preview the changes to the image by comparing the Before and After preview panes at the... alter the image. Note: You can preview the changes to the image by comparing the Before and After preview panes at the top of the window. 4 Click OK. The thumbnail is updated. You can enter gamma values from the list under the Quick Fixes tab. 3 Using the slider, adjust the ...
... 1 From the Productivity Studio Welcome Screen, click File ΠOpen to select the image you want to edit. 2 With the image open, select Despeckle from -10-10. 7 From the Preview area of the screen, you can preview the changes to the image by comparing the Before and After preview panes at the... alter the image. Note: You can preview the changes to the image by comparing the Before and After preview panes at the top of the window. 4 Click OK. The thumbnail is updated. You can enter gamma values from the list under the Quick Fixes tab. 3 Using the slider, adjust the ...

User's Guide
Page 130
...desktop, double-click the Productivity Studio icon. Click Transfer Photos to the print window. 10 Click Print Now in the bottom right corner to return to your computer using the Productivity Studio. • If you are using Windows XP, a "What do ?" Note: If you are not sure which...Click Auto Fix, Automatic Red-Eye Reduction, or Automatic Brightness Fix to select the photo(s) you 've completed your photos automatically. When you want Windows to dry at the bottom of a photo, or to edit your fingers or sharp objects. b Click Transfer Photos. 3 Click Select photos to ...
...desktop, double-click the Productivity Studio icon. Click Transfer Photos to the print window. 10 Click Print Now in the bottom right corner to return to your computer using the Productivity Studio. • If you are using Windows XP, a "What do ?" Note: If you are not sure which...Click Auto Fix, Automatic Red-Eye Reduction, or Automatic Brightness Fix to select the photo(s) you 've completed your photos automatically. When you want Windows to dry at the bottom of a photo, or to edit your fingers or sharp objects. b Click Transfer Photos. 3 Click Select photos to ...
User's Guide
Page 132
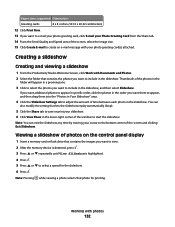
... replay automatically (loop). 5 Click the Share tab to save or print your slideshow. 6 Click View Show in the lower-right corner of the window to the bottom center of the screen and clicking Exit Slideshow. Working with your photo greeting card(s) attached. Note: You can also modify the setting... photos you want them to appear, and then drag them into the "Photos in the slideshow. Paper sizes supported Dimensions Greeting cards 4 x 8 inches (10.16 x 20.32 centimeters) 12 Click Print Now. 13 If you want to e-mail your photo greeting card, click E-mail your Photo Greeting Card from...
... replay automatically (loop). 5 Click the Share tab to save or print your slideshow. 6 Click View Show in the lower-right corner of the window to the bottom center of the screen and clicking Exit Slideshow. Working with your photo greeting card(s) attached. Note: You can also modify the setting... photos you want them to appear, and then drag them into the "Photos in the slideshow. Paper sizes supported Dimensions Greeting cards 4 x 8 inches (10.16 x 20.32 centimeters) 12 Click Print Now. 13 If you want to e-mail your photo greeting card, click E-mail your Photo Greeting Card from...
User's Guide
Page 169
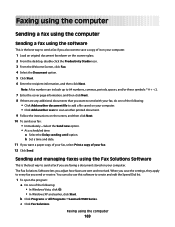
... on your computer. • Click Add another scan to scan another printed document. 9 Follow the instructions on the screen, and then click Next. 10 To send your fax. 12 Click Send. Sending and managing faxes using the Fax Solutions Software This is the best way to send a fax if... want a paper copy of your fax, select Print a copy of the following : • In Windows Vista, click . • In Windows XP and earlier, click Start. c Click Fax Solutions. b Click Programs or All Programs ŒLexmark 9500 Series. b Set a time and date. 11 If you want to save the settings, they ...
... on your computer. • Click Add another scan to scan another printed document. 9 Follow the instructions on the screen, and then click Next. 10 To send your fax. 12 Click Send. Sending and managing faxes using the Fax Solutions Software This is the best way to send a fax if... want a paper copy of your fax, select Print a copy of the following : • In Windows Vista, click . • In Windows XP and earlier, click Start. c Click Fax Solutions. b Click Programs or All Programs ŒLexmark 9500 Series. b Set a time and date. 11 If you want to save the settings, they ...
User's Guide
Page 188
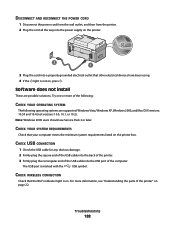
...USB port is not on, press . Software does not install These are supported: Windows Vista, Windows XP, Windows 2000, and Mac OS X versions 10.34 and 10.4 (not versions 10.0, 10.1, or 10.2). CHECK WIRELESS CONNECTION Check that your computer meets the minimum system requirements listed on ...the printer box. Note: Windows 2000 users should use Service Pack 3 or later. DISCONNECT AND RECONNECT THE ...
...USB port is not on, press . Software does not install These are supported: Windows Vista, Windows XP, Windows 2000, and Mac OS X versions 10.34 and 10.4 (not versions 10.0, 10.1, or 10.2). CHECK WIRELESS CONNECTION Check that your computer meets the minimum system requirements listed on ...the printer box. Note: Windows 2000 users should use Service Pack 3 or later. DISCONNECT AND RECONNECT THE ...


