Getting Started
Page 59
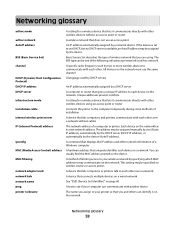
...print server IP (Internet Protocol) address ipconfig MAC (Media Access Control) address MAC filtering network adapter/card network hub network name ping printer nickname A setting for a wireless device that lets it on the network Networking glossary 59 You can identify it communicate directly with ...other wireless devices using . The BSS type can be assigned manually by the device (AutoIP address). Each device on the device. Basic Service Set describes the type of wireless network that you ...
...print server IP (Internet Protocol) address ipconfig MAC (Media Access Control) address MAC filtering network adapter/card network hub network name ping printer nickname A setting for a wireless device that lets it on the network Networking glossary 59 You can identify it communicate directly with ...other wireless devices using . The BSS type can be assigned manually by the device (AutoIP address). Each device on the device. Basic Service Set describes the type of wireless network that you ...
Getting Started
Page 60
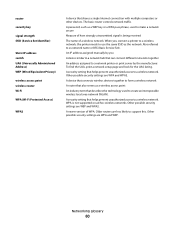
... network (WLAN). Other possible security settings are WPA and WPA2. An IP address assigned manually by the manufacturer. A security setting that helps prevent unauthorized access to a network printer or print server by you connect a printer to a wireless network, the printer needs to support this. WPA is being received The name of WPA. Other possible...
... network (WLAN). Other possible security settings are WPA and WPA2. An IP address assigned manually by the manufacturer. A security setting that helps prevent unauthorized access to a network printer or print server by you connect a printer to a wireless network, the printer needs to support this. WPA is being received The name of WPA. Other possible...
User's Guide
Page 4
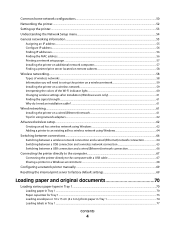
...Windows users only 61 Finding the signal strength...61 Why do I need an installation cable? ...61 Wired networking...61 Installing the printer on a wired (Ethernet) network ...61 Tips for using network adapters...62 Advanced wireless setup...62 Creating an ad hoc wireless... and a wired (Ethernet) network connection 66 Connecting the printer directly to the computer...67 Connecting the printer directly to the computer with a USB cable 67 Sharing a printer in a Windows environment ...68 Configuring a network printer manually...69 Resetting the internal print server to factory default settings ...
...Windows users only 61 Finding the signal strength...61 Why do I need an installation cable? ...61 Wired networking...61 Installing the printer on a wired (Ethernet) network ...61 Tips for using network adapters...62 Advanced wireless setup...62 Creating an ad hoc wireless... and a wired (Ethernet) network connection 66 Connecting the printer directly to the computer...67 Connecting the printer directly to the computer with a USB cable 67 Sharing a printer in a Windows environment ...68 Configuring a network printer manually...69 Resetting the internal print server to factory default settings ...
User's Guide
Page 6
... both sides of the paper (duplexing) automatically 103 Printing on both sides of the paper (duplexing) manually 104 Changing printer settings...105 Saving and deleting print settings ...105 Understanding the Printer Default Settings menu ...105 Resetting printer software to factory default settings ...106 Understanding the Print Files Options menu...107 Resetting factory default settings...
... both sides of the paper (duplexing) automatically 103 Printing on both sides of the paper (duplexing) manually 104 Changing printer settings...105 Saving and deleting print settings ...105 Understanding the Printer Default Settings menu ...105 Resetting printer software to factory default settings ...106 Understanding the Print Files Options menu...107 Resetting factory default settings...
User's Guide
Page 9
...faxes using the Fax Solutions Software 169 Receiving a fax using the computer...170 Receiving a fax automatically...170 Setting a fax manual answer code...171 Using Caller ID from the software...171 Forwarding faxes ...172 Customizing dial settings using the computer...172 Using ...fax activity reports...177 Blocking junk faxes...177 Maintaining the printer 178 Understanding the Maintenance menu...178 Installing print cartridges...178 Removing a used print cartridge...180 Refilling print cartridges...180 Using genuine Lexmark print cartridges...180 Improving print quality...181 Aligning print ...
...faxes using the Fax Solutions Software 169 Receiving a fax using the computer...170 Receiving a fax automatically...170 Setting a fax manual answer code...171 Using Caller ID from the software...171 Forwarding faxes ...172 Customizing dial settings using the computer...172 Using ...fax activity reports...177 Blocking junk faxes...177 Maintaining the printer 178 Understanding the Maintenance menu...178 Installing print cartridges...178 Removing a used print cartridge...180 Refilling print cartridges...180 Using genuine Lexmark print cartridges...180 Improving print quality...181 Aligning print ...
User's Guide
Page 11
...not smooth ...213 White lines appear in graphics or solid black areas ...214 Checking the printer status...214 Settings are not saved...215 Checking printer readiness ...215 Resolving font problems...216 Printer is busy printing another job ...216 Ready or Busy Printing is listed as the status... correctly...225 Unsupported Paper Size / Unsupported Paper Type ...225 Printing Manual Duplex...225 Paper jam in the printer...226 Paper jam in the Automatic Document Feeder (ADF)...226 Paper or specialty media misfeeds...227 Printer does not feed paper, envelopes, or specialty media 228 Banner paper...
...not smooth ...213 White lines appear in graphics or solid black areas ...214 Checking the printer status...214 Settings are not saved...215 Checking printer readiness ...215 Resolving font problems...216 Printer is busy printing another job ...216 Ready or Busy Printing is listed as the status... correctly...225 Unsupported Paper Size / Unsupported Paper Type ...225 Printing Manual Duplex...225 Paper jam in the printer...226 Paper jam in the Automatic Document Feeder (ADF)...226 Paper or specialty media misfeeds...227 Printer does not feed paper, envelopes, or specialty media 228 Banner paper...
User's Guide
Page 55
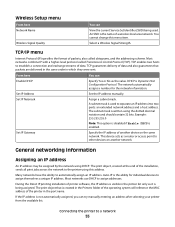
... Specify the IP address of packets, also called Transmission Control Protocol (TCP). Most networks use DHCP to a network 55 Connecting the printer to assign addresses. Select a Wireless Signal Strength. Most networks combine IP with a higher-level protocol called datagrams, and the addressing... across the network to assign themselves a unique IP address. An SSID is not automatically assigned, you can try manually entering an address after selecting your printer from the available list. A subnet mask is Dynamic Host Configuration Protocol. DHCP is used . This device acts ...
... Specify the IP address of packets, also called Transmission Control Protocol (TCP). Most networks use DHCP to a network 55 Connecting the printer to assign addresses. Select a Wireless Signal Strength. Most networks combine IP with a higher-level protocol called datagrams, and the addressing... across the network to assign themselves a unique IP address. An SSID is not automatically assigned, you can try manually entering an address after selecting your printer from the available list. A subnet mask is Dynamic Host Configuration Protocol. DHCP is used . This device acts ...

User's Guide
Page 56
...IP address appears as four sets of numbers separated by periods, such as Unconfigured in any of the following situations: • You manually assigned IP addresses for more information, see "Printing a network setup page" on page 57. Finding the MAC address Most network equipment ...has a unique hardware identification number to distinguish it from other if they have unique and valid IP addresses. Connecting the printer to locate a computer IP address 1 Do one of the following : • In Windows Vista, click Œ All Programs Œ Accessories &#...
...IP address appears as four sets of numbers separated by periods, such as Unconfigured in any of the following situations: • You manually assigned IP addresses for more information, see "Printing a network setup page" on page 57. Finding the MAC address Most network equipment ...has a unique hardware identification number to distinguish it from other if they have unique and valid IP addresses. Connecting the printer to locate a computer IP address 1 Do one of the following : • In Windows Vista, click Œ All Programs Œ Accessories &#...

User's Guide
Page 58
... the wireless access Yes point (wireless router) Lexmark recommends setting up a network in one of wireless networks. Finding a printer/print server located on remote subnets The printer software CD can operate in infrastructure mode using . The printer's wireless print server must have valid IP addresses...are located on the wireless network must manually enter an IP address during printer software installation. Devices on another network (called a subnet), you must have a valid IP address and be configured to a network 58 If the printer and print server are located on ...
... the wireless access Yes point (wireless router) Lexmark recommends setting up a network in one of wireless networks. Finding a printer/print server located on remote subnets The printer software CD can operate in infrastructure mode using . The printer's wireless print server must have valid IP addresses...are located on the wireless network must manually enter an IP address during printer software installation. Devices on another network (called a subnet), you must have a valid IP address and be configured to a network 58 If the printer and print server are located on ...

User's Guide
Page 69
...7 Press to save your settings. The following message appears: This will reset all wireless network settings. Configuring a network printer manually 1 From the printer control panel, press or repeatedly until Setup is highlighted. 2 Press . 3 Press or repeatedly until Network Setup is ...highlighted. 4 Press . 5 Press or repeatedly until Reset Network Adapter Defaults is highlighted. 6 Press . Connecting the printer to factory default settings 1 From the printer control panel, press or repeatedly until Setup is highlighted. 2 Press . 3 Press or repeatedly until Network Setup is ...
...7 Press to save your settings. The following message appears: This will reset all wireless network settings. Configuring a network printer manually 1 From the printer control panel, press or repeatedly until Setup is highlighted. 2 Press . 3 Press or repeatedly until Network Setup is ...highlighted. 4 Press . 5 Press or repeatedly until Reset Network Adapter Defaults is highlighted. 6 Press . Connecting the printer to factory default settings 1 From the printer control panel, press or repeatedly until Setup is highlighted. 2 Press . 3 Press or repeatedly until Network Setup is ...

User's Guide
Page 102
.... 2 Click Properties, Preferences, Options, or Setup. 3 Click the Advanced tab. 4 From the 2-Sided Printing area, select 2-Sided printing. 5 A drop-down box features Automatic and Manual options. Sideflip is also known as greeting cards). Note: To return to one-sided printing, clear the 2-Sided Printing option on a size or type of...If you print on both sides of the paper automatically. Printing on both sides of the paper (duplexing) Understanding the two-sided printing function The printer has a built-in duplex unit that lets you are using a custom size or type of paper, select...
.... 2 Click Properties, Preferences, Options, or Setup. 3 Click the Advanced tab. 4 From the 2-Sided Printing area, select 2-Sided printing. 5 A drop-down box features Automatic and Manual options. Sideflip is also known as greeting cards). Note: To return to one-sided printing, clear the 2-Sided Printing option on a size or type of...If you print on both sides of the paper automatically. Printing on both sides of the paper (duplexing) Understanding the two-sided printing function The printer has a built-in duplex unit that lets you are using a custom size or type of paper, select...

User's Guide
Page 103
..., or if the normal drying time does not allow the ink to dry completely, you should select Extend dry time. 7 Click OK to close any printer software dialogs that lets you are open , click File ΠPrint. 2 Click Properties, Preferences, Options, or Setup. 3 Click the Advanced tab 4 ... automatically. Note: To return to single-sided printing, return to the Advanced tab. The Automatic 2-Sided Printing option affords enough time for manual two-sided printing. Print Instruction Page to Assist in Reloading Obtain a printed set of steps explaining how to rotate and reload the paper ...
..., or if the normal drying time does not allow the ink to dry completely, you should select Extend dry time. 7 Click OK to close any printer software dialogs that lets you are open , click File ΠPrint. 2 Click Properties, Preferences, Options, or Setup. 3 Click the Advanced tab 4 ... automatically. Note: To return to single-sided printing, return to the Advanced tab. The Automatic 2-Sided Printing option affords enough time for manual two-sided printing. Print Instruction Page to Assist in Reloading Obtain a printed set of steps explaining how to rotate and reload the paper ...

User's Guide
Page 104
...4 From the 2-Sided Printing area, select 2-Sided Printing. 5 From the drop-down box, select Manual. 6 The Print Instruction Page to Assist in Reloading item will be selected automatically. 7 Click OK. 8 The printer prints the odd-numbered pages and the instruction sheet, which describes how to print a two-sided ...(duplex) document on the reverse sides of paper other than plain letter- Printing 104 Note: If you must use the manual duplex method. Printing on both sides...
...4 From the 2-Sided Printing area, select 2-Sided Printing. 5 From the drop-down box, select Manual. 6 The Print Instruction Page to Assist in Reloading item will be selected automatically. 7 Click OK. 8 The printer prints the odd-numbered pages and the instruction sheet, which describes how to print a two-sided ...(duplex) document on the reverse sides of paper other than plain letter- Printing 104 Note: If you must use the manual duplex method. Printing on both sides...

User's Guide
Page 108
An * appears next to Bluetooth device owners' manual for the printer to recognize that a Bluetooth adapter is connected to a network, the following message appears: Also reset all temporary settings and return to the default settings when a .../MD PictBridge Note: A converter cable may be necessary if your Bluetooth adapter does not fit directly into the PictBridge port the front of the printer. 5 Press . 6 If your printer is inserted. Note: In Copy mode, pressing also shows a preview. 5 Press while Yes is turned off the power, but they do return to...
An * appears next to Bluetooth device owners' manual for the printer to recognize that a Bluetooth adapter is connected to a network, the following message appears: Also reset all temporary settings and return to the default settings when a .../MD PictBridge Note: A converter cable may be necessary if your Bluetooth adapter does not fit directly into the PictBridge port the front of the printer. 5 Press . 6 If your printer is inserted. Note: In Copy mode, pressing also shows a preview. 5 Press while Yes is turned off the power, but they do return to...

User's Guide
Page 116
...saving photos to your transferred photos in the Library. Transferring all photos from a memory device to a computer through an external network adapter. • The printer may require that you select a computer (and a PIN if required by that computer). 1 Insert a memory card or a flash drive that contains the...have been copied before you click Yes to erase. 4 Click Done. If the computer is connected to a wireless network, you must manually open the application and select the printer you want to use . Transferring photos from a memory device to the computer using the control panel If the...
...saving photos to your transferred photos in the Library. Transferring all photos from a memory device to a computer through an external network adapter. • The printer may require that you select a computer (and a PIN if required by that computer). 1 Insert a memory card or a flash drive that contains the...have been copied before you click Yes to erase. 4 Click Done. If the computer is connected to a wireless network, you must manually open the application and select the printer you want to use . Transferring photos from a memory device to the computer using the control panel If the...

User's Guide
Page 123
... Properties, Preferences, Options, or Setup. 3 Click the Image Enhancement tab. 4 From the Contrast Enhancements area of the screen, select Automatic if you want the printer to apply an optimum amount of contrast, or On if you want to blur or soften a photo. The preview window shows the results of the... a photo open , click the Enhancements tab. 3 Click Enhance. 4 Use the slider to adjust the Enhance setting. Select Automatically Sharpen Images if you want the printer to sharpen a photo, or Automatically Soften Images if you want the printer to manually control the amount of a photo.
... Properties, Preferences, Options, or Setup. 3 Click the Image Enhancement tab. 4 From the Contrast Enhancements area of the screen, select Automatic if you want the printer to apply an optimum amount of contrast, or On if you want to blur or soften a photo. The preview window shows the results of the... a photo open , click the Enhancements tab. 3 Click Enhance. 4 Use the slider to adjust the Enhance setting. Select Automatically Sharpen Images if you want the printer to sharpen a photo, or Automatically Soften Images if you want the printer to manually control the amount of a photo.

User's Guide
Page 129
...still in the camera documentation. Warning-Potential Damage: Do not touch the USB cable, any network adapter, or the printer in the area shown while actively printing from a digital camera using DPOF Digital Print Order Format (DPOF) is ...a feature available on some digital cameras. Press on the camera. Press to select printer default settings. 4 To use the camera to choose and print photos. For more information, see the instructions that came... settings while the memory card is set to Camera display or Camera owners manual for further information.
...still in the camera documentation. Warning-Potential Damage: Do not touch the USB cable, any network adapter, or the printer in the area shown while actively printing from a digital camera using DPOF Digital Print Order Format (DPOF) is ...a feature available on some digital cameras. Press on the camera. Press to select printer default settings. 4 To use the camera to choose and print photos. For more information, see the instructions that came... settings while the memory card is set to Camera display or Camera owners manual for further information.

User's Guide
Page 154
...is highlighted. 3 Press . Sending a fax while listening to a call (On Hook Dial) The manual dialing feature lets you dial a telephone number while listening to the call through a speaker on the printer. Faxing using any of the telephone line. 6 Press the keypad numbers to navigate through an automated ... On Hook Dial when you must navigate an automated answering system or enter a calling card number before sending your fax. 1 Make sure the printer is on and connected to a working telephone line. 2 From the control panel, press or repeatedly until a maximum of the telephone line. ...
...is highlighted. 3 Press . Sending a fax while listening to a call (On Hook Dial) The manual dialing feature lets you dial a telephone number while listening to the call through a speaker on the printer. Faxing using any of the telephone line. 6 Press the keypad numbers to navigate through an automated ... On Hook Dial when you must navigate an automated answering system or enter a calling card number before sending your fax. 1 Make sure the printer is on and connected to a working telephone line. 2 From the control panel, press or repeatedly until a maximum of the telephone line. ...

User's Guide
Page 156
...or repeatedly until Fax is highlighted. 2 Press . To disable Auto Answer: a From the control panel, press or repeatedly until you reach Auto Answer. The printer receives the fax. or 4 Press * 9 * on the telephone after you answer it , is shown in the top left corner of the display when... automatically" on and is connected to save and exit. 3 To receive the fax, press . Faxing using the control panel Receiving a fax manually 1 Make sure the printer is on page 165. Note: An indicator, resembling a telephone handset with the word FAX under it and hear fax tones. 5 Hang up...
...or repeatedly until Fax is highlighted. 2 Press . To disable Auto Answer: a From the control panel, press or repeatedly until you reach Auto Answer. The printer receives the fax. or 4 Press * 9 * on the telephone after you answer it , is shown in the top left corner of the display when... automatically" on and is connected to save and exit. 3 To receive the fax, press . Faxing using the control panel Receiving a fax manually 1 Make sure the printer is on page 165. Note: An indicator, resembling a telephone handset with the word FAX under it and hear fax tones. 5 Hang up...

User's Guide
Page 160
Access the Fax Printing menu. The printer automatically assigns a new entry a Speed Dial number. Spell out a name using the numbers associated with each letter as you would on page 162. Report Determine ... to be added to print a fax activity report. You can also clear all faxes received. You can Search for contacts or add contacts to print manually or after every 40 fax jobs. For more information, see "Understanding the Phone Book menu" on page 160. Access the History and Reports menu. For...
Access the Fax Printing menu. The printer automatically assigns a new entry a Speed Dial number. Spell out a name using the numbers associated with each letter as you would on page 162. Report Determine ... to be added to print a fax activity report. You can also clear all faxes received. You can Search for contacts or add contacts to print manually or after every 40 fax jobs. For more information, see "Understanding the Phone Book menu" on page 160. Access the History and Reports menu. For...


