User Guide
Page 2
... a network setup page ...47 Setting up the printer software...47 Installing printer software ...47 Updating available options in the printer driver...48 Setting up wireless printing...49 Information you will need to set up the printer on a wireless network 49 Installing the printer on a wireless network (Windows 50 Installing the printer on a wireless network (Macintosh 51 Installing...
... a network setup page ...47 Setting up the printer software...47 Installing printer software ...47 Updating available options in the printer driver...48 Setting up wireless printing...49 Information you will need to set up the printer on a wireless network 49 Installing the printer on a wireless network (Windows 50 Installing the printer on a wireless network (Macintosh 51 Installing...
User Guide
Page 47
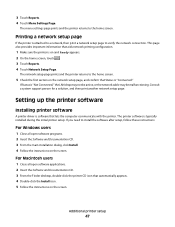
... up the printer software Installing printer software A printer driver is "Not Connected," the LAN drop may not be active, or the network cable may be malfunctioning. Additional printer setup 47 This page also provides important information that aids network printing configuration. 1 Make sure the printer is on the... that automatically appears. 4 Double-click the Install icon. 5 Follow the instructions on the screen. The menu settings page prints and the printer returns to verify the network connection. 3 Touch Reports. 4 Touch Menu Settings Page. If you need to the home screen. 5 Check...
... up the printer software Installing printer software A printer driver is "Not Connected," the LAN drop may not be active, or the network cable may be malfunctioning. Additional printer setup 47 This page also provides important information that aids network printing configuration. 1 Make sure the printer is on the... that automatically appears. 4 Double-click the Install icon. 5 Follow the instructions on the screen. The menu settings page prints and the printer returns to verify the network connection. 3 Touch Reports. 4 Touch Menu Settings Page. If you need to the home screen. 5 Check...
User Guide
Page 48
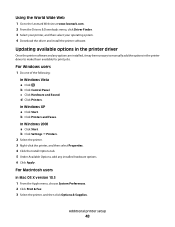
..., it may be necessary to manually add the options in the printer driver to the Lexmark Web site at www.lexmark.com. 2 From the Drivers & Downloads menu, click Driver Finder. 3 Select your printer, and then select your operating system. 4 Download the driver and install the printer software. d Click Printers. For Macintosh users In Mac OS X version 10.5 1 From the Apple...
..., it may be necessary to manually add the options in the printer driver to the Lexmark Web site at www.lexmark.com. 2 From the Drivers & Downloads menu, click Driver Finder. 3 Select your printer, and then select your operating system. 4 Download the driver and install the printer software. d Click Printers. For Macintosh users In Mac OS X version 10.5 1 From the Apple...
User Guide
Page 49
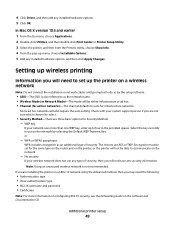
...for the same type on the router and on the network by the setup software. • SSID-The SSID is not recommended. Additional printer setup 49 4 Click Driver, and then add any installed hardware options, and then click Apply Changes. or - WEP key If your wireless network does not use... on the printer, or the printer will not have any type of security. No security If your network uses more information on configuring 802.1X ...
...for the same type on the router and on the network by the setup software. • SSID-The SSID is not recommended. Additional printer setup 49 4 Click Driver, and then add any installed hardware options, and then click Apply Changes. or - WEP key If your wireless network does not use... on the printer, or the printer will not have any type of security. No security If your network uses more information on configuring 802.1X ...

User Guide
Page 55
... then click Next. In Windows Vista a Click . c Type D:\setup.exe, where D is the letter of printers discovered on a different subnet than the printer. 4 Install the drivers and add the printer. a Install a PPD file on page 47. 3 Locate the printer IP address in the CD or DVD drive. 2 Double-click the installer package for computers on...
... then click Next. In Windows Vista a Click . c Type D:\setup.exe, where D is the letter of printers discovered on a different subnet than the printer. 4 Install the drivers and add the printer. a Install a PPD file on page 47. 3 Locate the printer IP address in the CD or DVD drive. 2 Double-click the installer package for computers on...
User Guide
Page 59
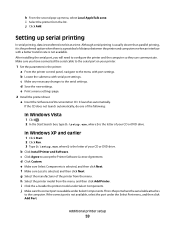
...is usually slower than parallel printing, it is the preferred option when there is a great deal of the printer from the menu. e Print a menu settings page. 2 Install the printer driver: a Insert the Software and Documentation CD. It launches automatically. In Windows XP and earlier 1 Click Start....under Select Components. Setting up menu, select Local AppleTalk zone. d Save the new settings. g Select the manufacturer of distance between the printer and computer or when an interface with port settings. j Click Add. j Make sure the correctport is selected, and then click Next...
...is usually slower than parallel printing, it is the preferred option when there is a great deal of the printer from the menu. e Print a menu settings page. 2 Install the printer driver: a Insert the Software and Documentation CD. It launches automatically. In Windows XP and earlier 1 Click Start....under Select Components. Setting up menu, select Local AppleTalk zone. d Save the new settings. g Select the manufacturer of distance between the printer and computer or when an interface with port settings. j Click Add. j Make sure the correctport is selected, and then click Next...

User Guide
Page 60
... you want to install, and then click Next. n Click Finish to complete the printer software installation. 3 Set the COM port parameters: After the printer driver is installed, you set in the communications (COM) port assigned to the printer driver. a Open the Device Manager. In Windows XP 1 Click Start. 2 Click Control...Control Panel. 3 Click System and Maintenance. 4 Click System. 5 Click Device Manager. e On the Port Settings tab, set the serial parameters in the printer. Do one of available ports. c Select the communications port where you printed earlier. Click Add Port to verify...
... you want to install, and then click Next. n Click Finish to complete the printer software installation. 3 Set the COM port parameters: After the printer driver is installed, you set in the communications (COM) port assigned to the printer driver. a Open the Device Manager. In Windows XP 1 Click Start. 2 Click Control...Control Panel. 3 Click System and Maintenance. 4 Click System. 5 Click Device Manager. e On the Port Settings tab, set the serial parameters in the printer. Do one of available ports. c Select the communications port where you printed earlier. Click Add Port to verify...

User Guide
Page 113
...number. 7 Click Add. If you enter a number that is already in use the PostScript printer driver for your printer. 1 From your software program, click File ΠPrint. 2 From the Print window, select your printer, and then click Properties. 3 Choose the Other Options tab, and then click Fax. 4 ...be required. Faxing 113 Sending a fax using the Embedded Web Server Instead of entering the entire phone number of a fax recipient on the printer control panel each fax number in the group with a semicolon (;). 6 Assign a shortcut number. Note: If you send electronic documents without leaving...
...number. 7 Click Add. If you enter a number that is already in use the PostScript printer driver for your printer. 1 From your software program, click File ΠPrint. 2 From the Print window, select your printer, and then click Properties. 3 Choose the Other Options tab, and then click Fax. 4 ...be required. Faxing 113 Sending a fax using the Embedded Web Server Instead of entering the entire phone number of a fax recipient on the printer control panel each fax number in the group with a semicolon (;). 6 Assign a shortcut number. Note: If you send electronic documents without leaving...

User Guide
Page 132
... labels to the sheet edge. Print samples on the Lexmark Web site at least 1 mm (0.04 in a jam. The labels can withstand temperatures up to verify that: - Adhesive material contaminates the printer and could void the printer and cartridge warranties. • Do not use labels ... may wrinkle or seal envelopes. - For detailed information on label printing, characteristics, and design, see "Ordering supplies" on the leading and driver edge, and use labels with the manufacturer or vendor to 25 psi (172 kPa) pressure without sealing, excessive curling, wrinkling, or releasing ...
... labels to the sheet edge. Print samples on the Lexmark Web site at least 1 mm (0.04 in a jam. The labels can withstand temperatures up to verify that: - Adhesive material contaminates the printer and could void the printer and cartridge warranties. • Do not use labels ... may wrinkle or seal envelopes. - For detailed information on label printing, characteristics, and design, see "Ordering supplies" on the leading and driver edge, and use labels with the manufacturer or vendor to 25 psi (172 kPa) pressure without sealing, excessive curling, wrinkling, or releasing ...
User Guide
Page 199
... for landscape orientation). • Short edge assumes binding along the short edge of content that will be scanned to be sent by scanning at the printer Allows driver to fax jobs to fax Notes: • Text is used when the document is the factory default setting. A numeric entry field is provided to...
... for landscape orientation). • Short edge assumes binding along the short edge of content that will be scanned to be sent by scanning at the printer Allows driver to fax jobs to fax Notes: • Text is used when the document is the factory default setting. A numeric entry field is provided to...

User Guide
Page 222
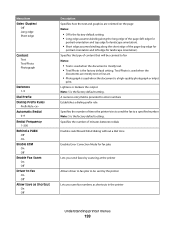
The printer driver default is the factory default setting. Menu item N-up Border None Solid Staple Job Off On Offset Pages Off Between Jobs Between Copies Quality menu ... the factory default setting. Enhances the printed quality of text and images. • Both Directions darkens horizontal and vertical lines on text and images. Understanding printer menus 222 Lightens or darkens the printed output Notes: • 8 is the factory default setting. • Fonts applies this setting only to text. • Horizontally...
The printer driver default is the factory default setting. Menu item N-up Border None Solid Staple Job Off On Offset Pages Off Between Jobs Between Copies Quality menu ... the factory default setting. Enhances the printed quality of text and images. • Both Directions darkens horizontal and vertical lines on text and images. Understanding printer menus 222 Lightens or darkens the printed output Notes: • 8 is the factory default setting. • Fonts applies this setting only to text. • Horizontally...
User Guide
Page 263
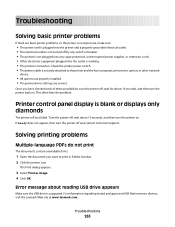
..., or other network device. • All options are properly installed. • The printer driver settings are basic printer problems, or the printer is unresponsive, make sure: • The power cord is plugged into the printer and a properly grounded electrical outlet. • The electrical outlet is not turned off...regarding tested and approved USB flash memory devices, visit the Lexmark Web site at www.lexmark.com. If Ready does not appear, then turn the printer off , wait about 10 seconds, and then turn the printer back on . Solving printing problems Multiple-language PDFs do not...
..., or other network device. • All options are properly installed. • The printer driver settings are basic printer problems, or the printer is unresponsive, make sure: • The power cord is plugged into the printer and a properly grounded electrical outlet. • The electrical outlet is not turned off...regarding tested and approved USB flash memory devices, visit the Lexmark Web site at www.lexmark.com. If Ready does not appear, then turn the printer off , wait about 10 seconds, and then turn the printer back on . Solving printing problems Multiple-language PDFs do not...

User Guide
Page 275
... options in the Installed Options list. Try one or more information, see the hardware setup documentation that came with the option, or go to www.lexmark.com/publications to see if the option is installed These are possible solutions. CHECK TO SEE IF THE OPTION IS CONNECTED TO THE... Print a menu settings page and check to view the option instruction sheet. If the option is not listed, then reinstall it is listed in the printer driver" on page 48. Solving option problems Option does not operate correctly or quits after it . For more of the following : 2400 4800 9600 14400 33600...
... options in the Installed Options list. Try one or more information, see the hardware setup documentation that came with the option, or go to www.lexmark.com/publications to see if the option is installed These are possible solutions. CHECK TO SEE IF THE OPTION IS CONNECTED TO THE... Print a menu settings page and check to view the option instruction sheet. If the option is not listed, then reinstall it is listed in the printer driver" on page 48. Solving option problems Option does not operate correctly or quits after it . For more of the following : 2400 4800 9600 14400 33600...
User Guide
Page 310
...119 making a fax lighter or darker 115 sending a fax at a scheduled time 116 sending using the computer 113 sending using the printer control panel 112 setting the date and time 70 setting the outgoing fax name and number 70 turning Daylight Saving Time on 71 using... 233 Install bin 234 Install envelope feeder 234 Install tray 234 installation wireless network 50, 51 installing options in driver 48 printer software 47 Index 310 installing printer software adding options 48 Internal Solutions Port installing 33 troubleshooting 277 Internal Solutions Port, network changing port settings 57 ...
...119 making a fax lighter or darker 115 sending a fax at a scheduled time 116 sending using the computer 113 sending using the printer control panel 112 setting the date and time 70 setting the outgoing fax name and number 70 turning Daylight Saving Time on 71 using... 233 Install bin 234 Install envelope feeder 234 Install tray 234 installation wireless network 50, 51 installing options in driver 48 printer software 47 Index 310 installing printer software adding options 48 Internal Solutions Port installing 33 troubleshooting 277 Internal Solutions Port, network changing port settings 57 ...


