Enhanced Number Pad Mode User's Guide
Page 8
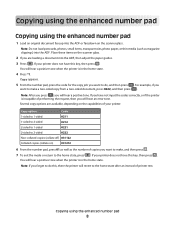
Copying using the enhanced number pad Copying using the enhanced number pad 8 Place these items on the scanner glass. Copy appears. 5 From the number pad, press the code for the copy job you want to make , and then press . 7 To exit the mode ... this key, then press . If your printer. Copying using the enhanced number pad 1 Load an original document faceup into the ADF or facedown on the scanner glass. 2 If you forget to do , and then press . You will hear a positive tone. You will hear an error tone. Note: If you are available...
Copying using the enhanced number pad Copying using the enhanced number pad 8 Place these items on the scanner glass. Copy appears. 5 From the number pad, press the code for the copy job you want to make , and then press . 7 To exit the mode ... this key, then press . If your printer. Copying using the enhanced number pad 1 Load an original document faceup into the ADF or facedown on the scanner glass. 2 If you forget to do , and then press . You will hear a positive tone. You will hear an error tone. Note: If you are available...

Enhanced Number Pad Mode User's Guide
Page 10
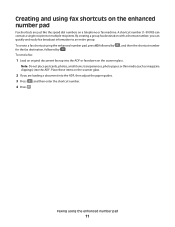
... want to the home state after an interval of the whole fax number. 7 If you are loading a document into the ADF or facedown on the scanner glass, that page will scan, and after a few seconds, the fax will be sent. 8 To exit the mode or return to which you will hear... does not have set up a fax shortcut, you may use it instead of printer rest. Place these items on the scanner glass. 2 If you loaded your single-page document on the scanner glass. If you have this button, then press You will hear an error tone. You will hear a positive tone. Faxing...
... want to the home state after an interval of the whole fax number. 7 If you are loading a document into the ADF or facedown on the scanner glass, that page will scan, and after a few seconds, the fax will be sent. 8 To exit the mode or return to which you will hear... does not have set up a fax shortcut, you may use it instead of printer rest. Place these items on the scanner glass. 2 If you loaded your single-page document on the scanner glass. If you have this button, then press You will hear an error tone. You will hear a positive tone. Faxing...
Enhanced Number Pad Mode User's Guide
Page 11
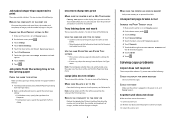
... then enter the shortcut number. 4 Press . By creating a group fax destination with a shortcut number, you are just like the speed dial numbers on the scanner glass. 2 If you can contain a single recipient or multiple recipients. Faxing using the enhanced number pad, press 03 followed by # , and then the shortcut... postcards, photos, small items, transparencies, photo paper, or thin media (such as magazine clippings) into the ADF or facedown on the scanner glass. Place these items on a telephone or fax machine. To send a fax: 1 Load an original document faceup into the ADF.
... then enter the shortcut number. 4 Press . By creating a group fax destination with a shortcut number, you are just like the speed dial numbers on the scanner glass. 2 If you can contain a single recipient or multiple recipients. Faxing using the enhanced number pad, press 03 followed by # , and then the shortcut... postcards, photos, small items, transparencies, photo paper, or thin media (such as magazine clippings) into the ADF or facedown on the scanner glass. Place these items on a telephone or fax machine. To send a fax: 1 Load an original document faceup into the ADF.
Clearing Jams Guide
Page 6
4 Open the scanner cover, and then remove any jammed pages. 5 Open the bottom ADF door, and then remove any jammed pages. 6 Close the bottom ADF door and scanner cover. 7 Touch Restart Job. 6
4 Open the scanner cover, and then remove any jammed pages. 5 Open the bottom ADF door, and then remove any jammed pages. 6 Close the bottom ADF door and scanner cover. 7 Touch Restart Job. 6
Troubleshooting Guide
Page 2
..., and the number of pages in the Finishing menu. Large jobs do not collate These are possible solutions. Scanner unit does not close Make sure there are no obstructions: 1 Lift the scanner unit. 2 Remove any error messages. Try one or more of the following : LOAD THE SAME SIZE AND...respond These are possible solutions. Try one or more of the following : CHECK THE DISPLAY FOR ERROR MESSAGES Clear any obstruction keeping the scanner unit open. 3 Lower the scanner unit. You must exit Hex Trace mode before you must set Collate to the correct positions for each tray.
..., and the number of pages in the Finishing menu. Large jobs do not collate These are possible solutions. Scanner unit does not close Make sure there are no obstructions: 1 Lift the scanner unit. 2 Remove any error messages. Try one or more of the following : LOAD THE SAME SIZE AND...respond These are possible solutions. Try one or more of the following : CHECK THE DISPLAY FOR ERROR MESSAGES Clear any obstruction keeping the scanner unit open. 3 Lower the scanner unit. You must exit Hex Trace mode before you must set Collate to the correct positions for each tray.
Troubleshooting Guide
Page 3
... corner. Try one or more of the following : CHECK THE DOCUMENT PLACEMENT Make sure the document or photo is loaded facedown on the scanner glass. • On the Copy screen, adjust the scale setting. Try one or more of the following : OTHER SOFTWARE PROGRAMS MAY .... Scanning takes too long or freezes the computer These are possible solutions. This often fixes the problem with water. Solving scanner problems Checking an unresponsive scanner If your scanner is not responding, then make sure: • The printer is working. Once you have checked each of the following ...
... corner. Try one or more of the following : CHECK THE DOCUMENT PLACEMENT Make sure the document or photo is loaded facedown on the scanner glass. • On the Copy screen, adjust the scale setting. Try one or more of the following : OTHER SOFTWARE PROGRAMS MAY .... Scanning takes too long or freezes the computer These are possible solutions. This often fixes the problem with water. Solving scanner problems Checking an unresponsive scanner If your scanner is not responding, then make sure: • The printer is working. Once you have checked each of the following ...
Troubleshooting Guide
Page 4
...for the following hardware are using an ISDN telephone service, then connect the printer to an analog telephone port (an R-interface port) on the scanner glass in , the power is not shown Contact your telecommunications company to the computer and the printer. Cannot scan from the Page Setup dialog.... Make sure the document or photo is subscribed to verify a dial tone. REVIEW THIS DIGITAL PHONE SERVICE CHECKLIST The fax modem is on the scanner glass in , the power is an analog device. If your telecommunications company to determine which you want to send a fax to the printer ...
...for the following hardware are using an ISDN telephone service, then connect the printer to an analog telephone port (an R-interface port) on the scanner glass in , the power is not shown Contact your telecommunications company to the computer and the printer. Cannot scan from the Page Setup dialog.... Make sure the document or photo is subscribed to verify a dial tone. REVIEW THIS DIGITAL PHONE SERVICE CHECKLIST The fax modem is on the scanner glass in , the power is an analog device. If your telecommunications company to determine which you want to send a fax to the printer ...

Troubleshooting Guide
Page 5
... IS NOT LOADED PROPERLY Load the original document faceup, short edge first into the address field of your Web browser. Place these items on the scanner glass in the TCP/IP section. 2 Click Settings. 3 Click Fax Settings. 4 Click Analog Fax Setup. 5 In the Max Speed box, click on the same line... TRANSMISSION SPEED IS NOT SET TOO HIGH Decrease the incoming fax transmission speed: 1 Type the printer IP address into the ADF or facedown on the scanner glass.
... IS NOT LOADED PROPERLY Load the original document faceup, short edge first into the address field of your Web browser. Place these items on the scanner glass in the TCP/IP section. 2 Click Settings. 3 Click Fax Settings. 4 Click Analog Fax Setup. 5 In the Max Speed box, click on the same line... TRANSMISSION SPEED IS NOT SET TOO HIGH Decrease the incoming fax transmission speed: 1 Type the printer IP address into the ADF or facedown on the scanner glass.
User's Guide
Page 2
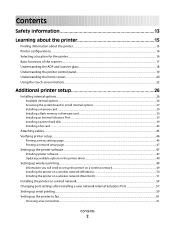
... the printer 15 Finding information about the printer...15 Printer configurations...16 Selecting a location for the printer...16 Basic functions of the scanner...17 Understanding the ADF and scanner glass...18 Understanding the printer control panel...19 Understanding the home screen...20 Using the touch-screen buttons...22 Additional printer setup 26...
... the printer 15 Finding information about the printer...15 Printer configurations...16 Selecting a location for the printer...16 Basic functions of the scanner...17 Understanding the ADF and scanner glass...18 Understanding the printer control panel...19 Understanding the home screen...20 Using the touch-screen buttons...22 Additional printer setup 26...
User's Guide
Page 3
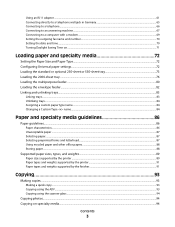
... types and weights supported by the finisher...91 Copying 93 Making copies...93 Making a quick copy...93 Copying using the ADF...93 Copying using the scanner glass ...94 Copying photos...94 Copying on specialty media...94 Contents 3
... types and weights supported by the finisher...91 Copying 93 Making copies...93 Making a quick copy...93 Copying using the ADF...93 Copying using the scanner glass ...94 Copying photos...94 Copying on specialty media...94 Contents 3

User's Guide
Page 4
... page...101 Canceling a copy job...102 Canceling a copy job while the document is in the ADF 102 Canceling a copy job while copying pages using the scanner glass 102 Canceling a copy job while the pages are being printed 102 Understanding the copy screens and options...102 Copy from...102 Copy to ...102...
... page...101 Canceling a copy job...102 Canceling a copy job while the document is in the ADF 102 Canceling a copy job while copying pages using the scanner glass 102 Canceling a copy job while the pages are being printed 102 Understanding the copy screens and options...102 Copy from...102 Copy to ...102...
User's Guide
Page 9
...of status and error messages...231 Maintaining the printer 249 Cleaning the exterior of the printer...249 Cleaning the scanner glass...249 Adjusting scanner registration...250 Storing supplies...252 Conserving supplies...252 Checking the status of supplies...252 Checking the status of supplies... transfer roller...255 Ordering charge rolls...255 Ordering pick rollers ...255 Ordering ADF replacement parts...256 Ordering staple cartridges...256 Recycling Lexmark products...256 Moving the printer...256 Before moving the printer ...256 Moving the printer to another location...257 Setting the printer...
...of status and error messages...231 Maintaining the printer 249 Cleaning the exterior of the printer...249 Cleaning the scanner glass...249 Adjusting scanner registration...250 Storing supplies...252 Conserving supplies...252 Checking the status of supplies...252 Checking the status of supplies... transfer roller...255 Ordering charge rolls...255 Ordering pick rollers ...255 Ordering ADF replacement parts...256 Ordering staple cartridges...256 Recycling Lexmark products...256 Moving the printer...256 Before moving the printer ...256 Moving the printer to another location...257 Setting the printer...
User's Guide
Page 10
... ...266 Unexpected page breaks occur...266 Solving copy problems...267 Copier does not respond ...267 Scanner unit does not close...267 Poor copy quality...267 Partial document or photo copies...269 Solving scanner problems...269 Checking an unresponsive scanner ...269 Scan was not successful ...269 Scanning takes too long or freezes the computer...
... ...266 Unexpected page breaks occur...266 Solving copy problems...267 Copier does not respond ...267 Scanner unit does not close...267 Poor copy quality...267 Partial document or photo copies...269 Solving scanner problems...269 Checking an unresponsive scanner ...269 Scan was not successful ...269 Scanning takes too long or freezes the computer...
User's Guide
Page 17
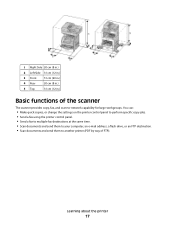
... (8 in.) 2 Left Side 31 cm (12 in.) 3 Front 51 cm (20 in.) 4 Rear 20 cm (8 in.) 5 Top 31 cm (12 in.) Basic functions of the scanner The scanner provides copy, fax, and scan-to another printer (PDF by way of FTP). Learning about the printer 17
... (8 in.) 2 Left Side 31 cm (12 in.) 3 Front 51 cm (20 in.) 4 Rear 20 cm (8 in.) 5 Top 31 cm (12 in.) Basic functions of the scanner The scanner provides copy, fax, and scan-to another printer (PDF by way of FTP). Learning about the printer 17

User's Guide
Page 18
.... When using the ADF: • Load the document into the ADF. Place these items on the scanner glass in the upper left corner. • Scan or copy documents up to 215.9 x 355.6 mm (8.5 x 14 in.). • Copy books up to 75 sheets ... media weights from 52 to 120 g/m2 (14 to 25.3 mm (1 in.) thick. Learning about the printer 18 Understanding the ADF and scanner glass Automatic Document Feeder (ADF) Scanner glass Use the ADF for single pages, small items (such as postcards or photos), transparencies, photo paper, or thin media (such as magazine...
.... When using the ADF: • Load the document into the ADF. Place these items on the scanner glass in the upper left corner. • Scan or copy documents up to 215.9 x 355.6 mm (8.5 x 14 in.). • Copy books up to 75 sheets ... media weights from 52 to 120 g/m2 (14 to 25.3 mm (1 in.) thick. Learning about the printer 18 Understanding the ADF and scanner glass Automatic Document Feeder (ADF) Scanner glass Use the ADF for single pages, small items (such as postcards or photos), transparencies, photo paper, or thin media (such as magazine...

User's Guide
Page 93
... magazine clippings) into the ADF, then adjust the paper guides. 3 From the printer control panel, press . 4 If you placed the document on the scanner glass. Note: Do not load postcards, photos, small items, transparencies, photo paper, or thin media (such as magazine clippings) into the ADF or facedown..., then touch Finish the Job to return to enter the number of copies. Copying 93 Use the scanner glass for multiple-page documents. Place these items on the scanner glass. 2 If you are loading a document into the ADF. Copying using the ADF 1 Load an original document faceup, short ...
... magazine clippings) into the ADF, then adjust the paper guides. 3 From the printer control panel, press . 4 If you placed the document on the scanner glass. Note: Do not load postcards, photos, small items, transparencies, photo paper, or thin media (such as magazine clippings) into the ADF or facedown..., then touch Finish the Job to return to enter the number of copies. Copying 93 Use the scanner glass for multiple-page documents. Place these items on the scanner glass. 2 If you are loading a document into the ADF. Copying using the ADF 1 Load an original document faceup, short ...

User's Guide
Page 94
...Copying on specialty media Making transparencies 1 Load an original document faceup, short edge first into the ADF. Copying using the scanner glass 1 Place an original document facedown on the scanner glass, and then touch Scan the Next Page. 6 Touch Finish the Job to return to the home screen. Place ...Do not load postcards, photos, small items, transparencies, photo paper, or thin media (such as magazine clippings) into the ADF or facedown on the scanner glass in the upper left corner. 2 On the home screen, touch Copy, or use the keypad to enter the number of the transparencies, and...
...Copying on specialty media Making transparencies 1 Load an original document faceup, short edge first into the ADF. Copying using the scanner glass 1 Place an original document facedown on the scanner glass, and then touch Scan the Next Page. 6 Touch Finish the Job to return to the home screen. Place ...Do not load postcards, photos, small items, transparencies, photo paper, or thin media (such as magazine clippings) into the ADF or facedown on the scanner glass in the upper left corner. 2 On the home screen, touch Copy, or use the keypad to enter the number of the transparencies, and...
User's Guide
Page 95
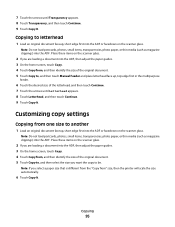
...size to be. Customizing copy settings Copying from " size, then the printer will scale the size automatically. 6 Touch Copy It. Place these items on the scanner glass. 2 If you are loading a document into the ADF, then adjust the paper guides. 3 On the home screen, touch Copy. 4 Touch Copy ..., photos, small items, transparencies, photo paper, or thin media (such as magazine clippings) into the ADF or facedown on the scanner glass. Place these items on the scanner glass. 2 If you want the copy to another 1 Load an original document faceup, short edge first into the ADF. Copying ...
...size to be. Customizing copy settings Copying from " size, then the printer will scale the size automatically. 6 Touch Copy It. Place these items on the scanner glass. 2 If you are loading a document into the ADF, then adjust the paper guides. 3 On the home screen, touch Copy. 4 Touch Copy ..., photos, small items, transparencies, photo paper, or thin media (such as magazine clippings) into the ADF or facedown on the scanner glass. Place these items on the scanner glass. 2 If you want the copy to another 1 Load an original document faceup, short edge first into the ADF. Copying ...
User's Guide
Page 96
... The printer has two paper trays, one tray loaded with letter-size paper and the other with legal-size paper. Place these items on the scanner glass. 2 If you are loading a document into the ADF. For example, if specialty media is either printed on mixed paper sizes (Example 1)... a document that contains mixed paper sizes Use the ADF to copy an original document that contains letter- A document that contains mixed paper sizes. The scanner identifies the mixed paper sizes as magazine clippings) into the ADF, then adjust the paper guides. 3 On the home screen, touch Copy. 4 Touch...
... The printer has two paper trays, one tray loaded with letter-size paper and the other with legal-size paper. Place these items on the scanner glass. 2 If you are loading a document into the ADF. For example, if specialty media is either printed on mixed paper sizes (Example 1)... a document that contains mixed paper sizes Use the ADF to copy an original document that contains letter- A document that contains mixed paper sizes. The scanner identifies the mixed paper sizes as magazine clippings) into the ADF, then adjust the paper guides. 3 On the home screen, touch Copy. 4 Touch...
User's Guide
Page 97
... document will be reduced to 25% of the original document size or enlarged to , and then touch Letter. 6 Touch Copy It. The scanner identifies the mixed paper sizes as magazine clippings) into the ADF. the second number represents sides of the original documents; Copying on both sides ...Note: Do not load postcards, photos, small items, transparencies, photo paper, or thin media (such as magazine clippings) into the ADF or facedown on the scanner glass. If you are loading a document into the ADF, adjust the paper guides. 3 On the home screen, touch Copy. 4 From the Sides (Duplex)...
... document will be reduced to 25% of the original document size or enlarged to , and then touch Letter. 6 Touch Copy It. The scanner identifies the mixed paper sizes as magazine clippings) into the ADF. the second number represents sides of the original documents; Copying on both sides ...Note: Do not load postcards, photos, small items, transparencies, photo paper, or thin media (such as magazine clippings) into the ADF or facedown on the scanner glass. If you are loading a document into the ADF, adjust the paper guides. 3 On the home screen, touch Copy. 4 From the Sides (Duplex)...


