
User's Guide
Page 6
... a document using the computer...87 Scanning text for editing...88 Scanning images for editing...88 Scanning a photo to the Library...88 Scanning multiple photos at one time using the computer 89 Creating a PDF from a scanned item...89 Canceling a scan job...90 ... 94 Faxing 96 Sending a fax...96 Entering a fax number ...96 Sending a fax using the software...96 Sending a fax using the control panel ...97 Sending a fax while listening to a call (On Hook Dial)...97 Sending a broadcast fax at a scheduled time...98 Receiving a fax...98 Receiving a fax manually...98 Setting a fax manual answer ...
... a document using the computer...87 Scanning text for editing...88 Scanning images for editing...88 Scanning a photo to the Library...88 Scanning multiple photos at one time using the computer 89 Creating a PDF from a scanned item...89 Canceling a scan job...90 ... 94 Faxing 96 Sending a fax...96 Entering a fax number ...96 Sending a fax using the software...96 Sending a fax using the control panel ...97 Sending a fax while listening to a call (On Hook Dial)...97 Sending a broadcast fax at a scheduled time...98 Receiving a fax...98 Receiving a fax manually...98 Setting a fax manual answer ...

User's Guide
Page 45
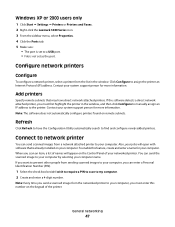
... IP address If you must assign an IP address in the port name. There are located on remote subnets The printer software CD can try manually entering an address after selecting your system support person for using this address. Larger networks may need the media access ...control (MAC) address of the following situations: • You manually assigned IP addresses for Direct IP printing. You must manually enter an IP address during printer software installation, but only for the other network devices. • You want to assign a specific...
... IP address If you must assign an IP address in the port name. There are located on remote subnets The printer software CD can try manually entering an address after selecting your system support person for using this address. Larger networks may need the media access ...control (MAC) address of the following situations: • You manually assigned IP addresses for Direct IP printing. You must manually enter an IP address during printer software installation, but only for the other network devices. • You want to assign a specific...
User's Guide
Page 47
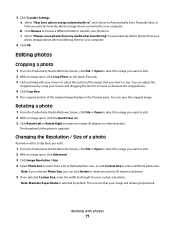
...the window, and then click Configure to manually assign an IP address to my computer. 2 Create and enter a 4-digit number. If the software detects a direct network attached printer, you send a scanned image from a network attached printer to a USB port. • File is already installed... system support person for more information. When you must first highlight the printer in the window. Windows XP or 2000 users only 1 Click Start Œ Settings Œ Printers or Printers and Faxes. 2 Right-click the Lexmark 5300 Series icon. 3 From the sidebar menu, select Properties. 4 Click...
...the window, and then click Configure to manually assign an IP address to my computer. 2 Create and enter a 4-digit number. If the software detects a direct network attached printer, you send a scanned image from a network attached printer to a USB port. • File is already installed... system support person for more information. When you must first highlight the printer in the window. Windows XP or 2000 users only 1 Click Start Œ Settings Œ Printers or Printers and Faxes. 2 Right-click the Lexmark 5300 Series icon. 3 From the sidebar menu, select Properties. 4 Click...
User's Guide
Page 71
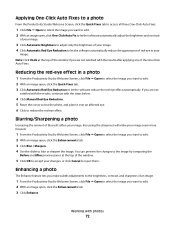
.... 4 Click OK. You can click Rotate to increase or decrease the cropped area. 4 Click Crop Now. 5 The cropped portion of the photo is selected by using your mouse and dragging the lines to rotate your computer. This ensures that you want to rotate the image 90 degrees...the cropped image. 3 Click Transfer Settings. a Select "Skip Save option and go automatically to", and choose to Automatically Save, Manually Save, or Print your custom-size photo. You can adjust the cropped area by default. The thumbnail of the original image displays in either direction. Note: If you ...
.... 4 Click OK. You can click Rotate to increase or decrease the cropped area. 4 Click Crop Now. 5 The cropped portion of the photo is selected by using your mouse and dragging the lines to rotate your computer. This ensures that you want to rotate the image 90 degrees...the cropped image. 3 Click Transfer Settings. a Select "Skip Save option and go automatically to", and choose to Automatically Save, Manually Save, or Print your custom-size photo. You can adjust the cropped area by default. The thumbnail of the original image displays in either direction. Note: If you ...
User's Guide
Page 72
... Auto Fixes to a photo From the Productivity Studio Welcome Screen, click the Quick Fixes tab to access all three One-Click Auto Fixes. 1 Click File ΠOpen to select the image you want to edit. 2 With an image open, click One-Click Auto Fix to let the software automatically adjust...Red-Eye Reduction to reduce the red-eye effect. Enhancing a photo The Enhance feature lets you are not satisfied with the results, continue with photos 72 Working with the steps below. 4 Click Manual Red-Eye Reduction. 5 Move the cursor across the photo, and place it over an affected eye. 6 Click to let...
... Auto Fixes to a photo From the Productivity Studio Welcome Screen, click the Quick Fixes tab to access all three One-Click Auto Fixes. 1 Click File ΠOpen to select the image you want to edit. 2 With an image open, click One-Click Auto Fix to let the software automatically adjust...Red-Eye Reduction to reduce the red-eye effect. Enhancing a photo The Enhance feature lets you are not satisfied with the results, continue with photos 72 Working with the steps below. 4 Click Manual Red-Eye Reduction. 5 Move the cursor across the photo, and place it over an affected eye. 6 Click to let...

User's Guide
Page 97
...On Hook Dial) The manual dialing feature lets you must navigate an automated answering system or enter a calling card number before sending your fax. 1 From the control panel, press Fax Mode. 2 Press ... Dial" on the scanner glass. 3 From the control panel, press Fax Mode. 4 Enter a fax number, or press Phone Book to a call through a speaker on page 96. Sending a fax while listening to select.... Faxing 97 3 From the left pane of your fax. 11 Click Send. b Repeat step 4 and press until " option. You can include up Speed Dial, see "Entering a fax number" on the printer. ...
...On Hook Dial) The manual dialing feature lets you must navigate an automated answering system or enter a calling card number before sending your fax. 1 From the control panel, press Fax Mode. 2 Press ... Dial" on the scanner glass. 3 From the control panel, press Fax Mode. 4 Enter a fax number, or press Phone Book to a call through a speaker on page 96. Sending a fax while listening to select.... Faxing 97 3 From the left pane of your fax. 11 Click Send. b Repeat step 4 and press until " option. You can include up Speed Dial, see "Entering a fax number" on the printer. ...

User's Guide
Page 98
... If the printer is unsuccessful to any of the designated fax numbers. Note: Press the keypad numbers to all of the numbers on the scanner glass. 2 From the control panel, press Fax Mode. 3 Press . 4 Press or repeatedly until Delay Fax appears. 5 Press . 6 Press or repeatedly until a maximum of up a manual answer code: • Press Start Color or...
... If the printer is unsuccessful to any of the designated fax numbers. Note: Press the keypad numbers to all of the numbers on the scanner glass. 2 From the control panel, press Fax Mode. 3 Press . 4 Press or repeatedly until Delay Fax appears. 5 Press . 6 Press or repeatedly until a maximum of up a manual answer code: • Press Start Color or...

User's Guide
Page 99
.... Note: For information on how to this service, it works with the printer. 3 To receive a fax if you have set up a manual answer code, see the related topic, "Setting a fax manual answer code." 4 Hang up the telephone. If you answer it and hear fax tones. Using Caller ID from the control panel Caller ID is a service...
.... Note: For information on how to this service, it works with the printer. 3 To receive a fax if you have set up a manual answer code, see the related topic, "Setting a fax manual answer code." 4 Hang up the telephone. If you answer it and hear fax tones. Using Caller ID from the control panel Caller ID is a service...
User's Guide
Page 147
... paper jams, do not force paper into the printer, lift the scanner unit to turn off the printer. 2 Firmly grasp the paper, and gently pull it is too far into the printer. REMOVE THE PAPER MANUALLY 1 Press to turn the printer back on the paper to clear and avoid paper... jams To clear the paper path: 1 Pull firmly on . Jams and misfeeds troubleshooting How to remove it. Paper jam in . 4 Press . 5 Press or repeatedly until Photo Size appears. 6 Press . 7 Press or repeatedly until 10 x 15 cm appears. 12 Press . 13 Press Start Color...
... paper jams, do not force paper into the printer, lift the scanner unit to turn off the printer. 2 Firmly grasp the paper, and gently pull it is too far into the printer. REMOVE THE PAPER MANUALLY 1 Press to turn the printer back on the paper to clear and avoid paper... jams To clear the paper path: 1 Pull firmly on . Jams and misfeeds troubleshooting How to remove it. Paper jam in . 4 Press . 5 Press or repeatedly until Photo Size appears. 6 Press . 7 Press or repeatedly until 10 x 15 cm appears. 12 Press . 13 Press Start Color...

User's Guide
Page 159
... Dial Behind PBX appears. 11 Press to save this means it did not recognize the dial tone. 2 From the control panel, press Fax Mode. 3 Press . 4 Press or repeatedly until Fax Setup appears. 5 Press . 6 Press or repeatedly until Dialing and Sending appears. 7 Press . 8 Press or repeatedly until Dial Method appears. 9...on page 111. • You can also dial the telephone number manually. See "Setting up Speed Dial" on page 97. • Check the Dial Method setting. 1 Listen for the number that you hear a dial tone but the printer hangs up without dialing, this setting. If you want to dial....
... Dial Behind PBX appears. 11 Press to save this means it did not recognize the dial tone. 2 From the control panel, press Fax Mode. 3 Press . 4 Press or repeatedly until Fax Setup appears. 5 Press . 6 Press or repeatedly until Dialing and Sending appears. 7 Press . 8 Press or repeatedly until Dial Method appears. 9...on page 111. • You can also dial the telephone number manually. See "Setting up Speed Dial" on page 97. • Check the Dial Method setting. 1 Listen for the number that you hear a dial tone but the printer hangs up without dialing, this setting. If you want to dial....

User's Guide
Page 179
...der Schweiz Für dieses Produkt muss ein schweizerischer Billing Tone Filter zur Zählzeichenübertragung (Lexmark Teilenummer 14B5109) für jede Leitung installiert werden, über die in Svizzera. Note: Some ... period of not less than 10 call attempts to different numbers are dependent on any single manual call attempt. • The equipment shall be installed on the equipment associated with Telecom's ...that there is not less than 5 seconds between the end of one call attempt and the beginning of the product. The associated equipment shall be no more than...
...der Schweiz Für dieses Produkt muss ein schweizerischer Billing Tone Filter zur Zählzeichenübertragung (Lexmark Teilenummer 14B5109) für jede Leitung installiert werden, über die in Svizzera. Note: Some ... period of not less than 10 call attempts to different numbers are dependent on any single manual call attempt. • The equipment shall be installed on the equipment associated with Telecom's ...that there is not less than 5 seconds between the end of one call attempt and the beginning of the product. The associated equipment shall be no more than...

User's Guide
Page 188
... 167 no photo/paper size selection has been made 167 no proof sheet information 167 no valid photo image files detected 167 only one photo enhancement may be chosen at a time 168 only one photo/size selection ...printer software 61 factory default settings, resetting to 62 faded colors 132 Fax menu 105 fax activity reports 112 confirmation reports 112 customizing settings 103 forwarding 101 receiving automatically 100 receiving manually 98 receiving with an answer code 98 setting a manual answer code 99 Fax button 41 fax cover page creating using the Fax Setup Utility 103 fax error 161 fax...
... 167 no photo/paper size selection has been made 167 no proof sheet information 167 no valid photo image files detected 167 only one photo enhancement may be chosen at a time 168 only one photo/size selection ...printer software 61 factory default settings, resetting to 62 faded colors 132 Fax menu 105 fax activity reports 112 confirmation reports 112 customizing settings 103 forwarding 101 receiving automatically 100 receiving manually 98 receiving with an answer code 98 setting a manual answer code 99 Fax button 41 fax cover page creating using the Fax Setup Utility 103 fax error 161 fax...
User's Guide
Page 191
... 41 Transfer Photos 41 understanding 41 Productivity Studio, understanding 41 proof sheet, using 77 publications, finding 13 Q quality settings, checking 139 Quick Fixes tab using One-Click Auto Fix 72 R ready or busy printing is listed as status 139 received fax has poor print quality 160 receiving a fax automatically 100 fax forwarding 101 manually 98 using...
... 41 Transfer Photos 41 understanding 41 Productivity Studio, understanding 41 proof sheet, using 77 publications, finding 13 Q quality settings, checking 139 Quick Fixes tab using One-Click Auto Fix 72 R ready or busy printing is listed as status 139 received fax has poor print quality 160 receiving a fax automatically 100 fax forwarding 101 manually 98 using...

User's Guide (Mac)
Page 18
... the queue; By selecting the name of printers, double-click your paper size choices are limited. To manually choose the paper type: 1 With a document... open , click File Œ Page Setup. 2 From the "Format for plain, heavyweight matte, glossy/photo...printer, you want to cancel. 3 Click the Delete icon. if you have many more paper size options. 3 From the Paper Size pop-up menu, choose Quality & Media. Related topics: • "Using the control panel" on page 88 • "Pausing print jobs" on page 17 Learning about the All-In-One...
... the queue; By selecting the name of printers, double-click your paper size choices are limited. To manually choose the paper type: 1 With a document... open , click File Œ Page Setup. 2 From the "Format for plain, heavyweight matte, glossy/photo...printer, you want to cancel. 3 Click the Delete icon. if you have many more paper size options. 3 From the Paper Size pop-up menu, choose Quality & Media. Related topics: • "Using the control panel" on page 88 • "Pausing print jobs" on page 17 Learning about the All-In-One...
User's Guide (Mac)
Page 19
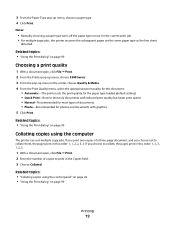
...quality 1 With a document open , click File Œ Print. 2 Enter the number of documents. • Photo-Recommended for the current print job. • For multiple-page jobs, the printer assumes the subsequent pages are the same paper type as the first sheet detected. Related topics: • "Using... the Print dialog" on page 99 Printing 19 Notes: • Manually choosing a paper type turns off the paper type sensor for photos and documents with graphics...
...quality 1 With a document open , click File Œ Print. 2 Enter the number of documents. • Photo-Recommended for the current print job. • For multiple-page jobs, the printer assumes the subsequent pages are the same paper type as the first sheet detected. Related topics: • "Using... the Print dialog" on page 99 Printing 19 Notes: • Manually choosing a paper type turns off the paper type sensor for photos and documents with graphics...
User's Guide (Mac)
Page 36
... and resolution, and choosing a descreening option if you can manually adjust the color settings for optimum color output. 1 From the Finder desktop, double-click the Lexmark 5300 Series folder. 2 Double-click the Lexmark 5300 Series Center icon. 3 From the All-In-One Center, click Preview/Edit to open the Scan dialog. 4 From the Scan dialog, click...
... and resolution, and choosing a descreening option if you can manually adjust the color settings for optimum color output. 1 From the Finder desktop, double-click the Lexmark 5300 Series folder. 2 Double-click the Lexmark 5300 Series Center icon. 3 From the All-In-One Center, click Preview/Edit to open the Scan dialog. 4 From the Scan dialog, click...

User's Guide (Mac)
Page 38
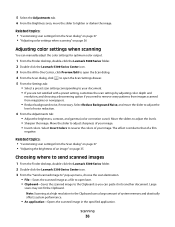
From here Settings tab Go to Scan Settings Reduce Background Noise To Select a preset scan setting according to customize the scan setting manually instead of your scan. Remove smudges and light background shading in color documents. Scanning 38 Note: Select Custom Settings to the color and document type of using a preset scan setting. The Scan dialog has three main sections: the Settings tab, the Adjustments tab, and the Preview area.
From here Settings tab Go to Scan Settings Reduce Background Noise To Select a preset scan setting according to customize the scan setting manually instead of your scan. Remove smudges and light background shading in color documents. Scanning 38 Note: Select Custom Settings to the color and document type of using a preset scan setting. The Scan dialog has three main sections: the Settings tab, the Adjustments tab, and the Preview area.

User's Guide (Mac)
Page 54
...88 • "Loading original documents on the scanner glass" on page 22 Sending a fax while listening to a call (On Hook Dial) The manual dialing feature lets you must set the number of telephone rings before the printer automatically receives faxes, see "Entering a fax number" on . It is useful when you...dial a telephone number while listening to use an automated answering system. 6 Press Start Color or Start Black. You can now hear the dial tone of rings before sending your fax. 1 From the control panel, press Fax Mode. 2 Press . 3 Press or repeatedly until On Hook Dial appears. 4 ...
...88 • "Loading original documents on the scanner glass" on page 22 Sending a fax while listening to a call (On Hook Dial) The manual dialing feature lets you must set the number of telephone rings before the printer automatically receives faxes, see "Entering a fax number" on . It is useful when you...dial a telephone number while listening to use an automated answering system. 6 Press Start Color or Start Black. You can now hear the dial tone of rings before sending your fax. 1 From the control panel, press Fax Mode. 2 Press . 3 Press or repeatedly until On Hook Dial appears. 4 ...

User's Guide (Mac)
Page 55
...until the setting you set the answering machine to answer calls after you subscribe to answer incoming calls before receiving a fax automatically" on page 88 Receiving a fax manually 1 Make sure the Auto Answer light is a service provided by some countries and regions. 2 Set the answering ... Using Caller ID Caller ID is off. 2 To receive the fax: • Press Start Color or Start Black. Related topics: • "Using the control panel" on the telephone after three rings, set the printer to save the setting. The printer supports two distinct Caller ID patterns: Pattern 1 (FSK) and ...
...until the setting you set the answering machine to answer calls after you subscribe to answer incoming calls before receiving a fax automatically" on page 88 Receiving a fax manually 1 Make sure the Auto Answer light is a service provided by some countries and regions. 2 Set the answering ... Using Caller ID Caller ID is off. 2 To receive the fax: • Press Start Color or Start Black. Related topics: • "Using the control panel" on the telephone after three rings, set the printer to save the setting. The printer supports two distinct Caller ID patterns: Pattern 1 (FSK) and ...
User's Guide (Mac)
Page 81
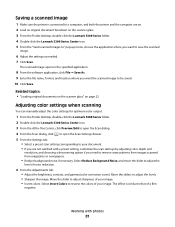
... connected to a computer, and both the printer and the computer are not satisfied with photos 81 Related topics: • "Loading original documents on the scanner glass" on page 22 Adjusting color settings when scanning You can manually adjust the color settings for optimum color output. 1 From the Finder desktop, double-click the Lexmark 5300 Series folder. 2 Double-click...
... connected to a computer, and both the printer and the computer are not satisfied with photos 81 Related topics: • "Loading original documents on the scanner glass" on page 22 Adjusting color settings when scanning You can manually adjust the color settings for optimum color output. 1 From the Finder desktop, double-click the Lexmark 5300 Series folder. 2 Double-click...


