User's Guide
Page 5
...) manually 55 Changing printer settings...55 Saving and deleting print settings...55 Using the Change Printer Default Settings submenu 56 Resetting printer software to factory default settings 56 Resetting the printer to factory default settings 57 Working with photos 58 Using recommended paper...58 Retrieving and managing photos...58 Understanding the Photo Card Mode...
...) manually 55 Changing printer settings...55 Saving and deleting print settings...55 Using the Change Printer Default Settings submenu 56 Resetting printer software to factory default settings 56 Resetting the printer to factory default settings 57 Working with photos 58 Using recommended paper...58 Retrieving and managing photos...58 Understanding the Photo Card Mode...
User's Guide
Page 8
... access point ...115 Ping the printer ...116 Run the Wireless Setup Utility (Windows users only 116 Changing wireless settings after installation 116 Resetting an internal wireless print server to factory default settings 117 Check printer ports (Windows users only 117 Print troubleshooting...117 Partial 4 x 6 in. (10 x 15 cm) photo prints when using...
... access point ...115 Ping the printer ...116 Run the Wireless Setup Utility (Windows users only 116 Changing wireless settings after installation 116 Resetting an internal wireless print server to factory default settings 117 Check printer ports (Windows users only 117 Print troubleshooting...117 Partial 4 x 6 in. (10 x 15 cm) photo prints when using...

User's Guide
Page 56
...140; Printers or Printers and Faxes. 2 Right-click the Lexmark 4800 Series icon. 3 Click Printing Preferences. 4 Click the Save Settings menu. 5 From the Restore section, select Factory Settings (Defaults). 56 Specify the size and type of the ...Save Block Host Settings Speaker Volume To Set the current time using the keypad numbers. Set the printer to factory default settings Windows 2000, Windows XP, or Windows Vista users 1 In Windows Vista, click Π...shown on page 44. On is the default. Resetting printer software to enter a power saving mode at or after a certain time limit.
...140; Printers or Printers and Faxes. 2 Right-click the Lexmark 4800 Series icon. 3 Click Printing Preferences. 4 Click the Save Settings menu. 5 From the Restore section, select Factory Settings (Defaults). 56 Specify the size and type of the ...Save Block Host Settings Speaker Volume To Set the current time using the keypad numbers. Set the printer to factory default settings Windows 2000, Windows XP, or Windows Vista users 1 In Windows Vista, click Π...shown on page 44. On is the default. Resetting printer software to enter a power saving mode at or after a certain time limit.

User's Guide
Page 57
Resetting the printer to factory default settings You can reset your printer to reset all network settings. 57 Note: Factory default settings cannot be deleted. Note: Resetting to factory default settings will delete all printer settings you selected. 1 Press repeatedly to choose Maintenance. 2 Press . 3 Press repeatedly to choose Reset Defaults. 4 Press . 5 Select Yes to reset all menu defaults. 6 Select Yes to the original settings without using the printer software.
Resetting the printer to factory default settings You can reset your printer to reset all network settings. 57 Note: Factory default settings cannot be deleted. Note: Resetting to factory default settings will delete all printer settings you selected. 1 Press repeatedly to choose Maintenance. 2 Press . 3 Press repeatedly to choose Reset Defaults. 4 Press . 5 Select Yes to reset all menu defaults. 6 Select Yes to the original settings without using the printer software.
User's Guide
Page 101
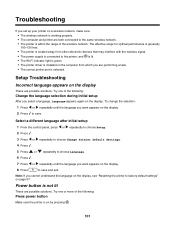
Note: If you cannot understand the language on the display, see "Resetting the printer to factory default settings" on the display These are possible solutions. Try one of the following : Press power button Make sure the printer is on the display. ...
Note: If you cannot understand the language on the display, see "Resetting the printer to factory default settings" on the display These are possible solutions. Try one of the following : Press power button Make sure the printer is on the display. ...
User's Guide
Page 110
... same name as part of the following: Check cable Make sure the installation cable is not connected to factory defaults. For more of the setup process. 4 Follow the instructions on all the other network settings; For...8226; In Windows Vista: . • In Windows XP and earlier: Start. 2 Click Programs or All Programs Œ Lexmark 4800 Series. 3 Click Wireless Setup. Try one or more information, see "Configuring the optional internal wireless print server" in the...on your wireless access point (wireless router), you must reset the printer and computer SSID to your having been...
... same name as part of the following: Check cable Make sure the installation cable is not connected to factory defaults. For more of the setup process. 4 Follow the instructions on all the other network settings; For...8226; In Windows Vista: . • In Windows XP and earlier: Start. 2 Click Programs or All Programs Œ Lexmark 4800 Series. 3 Click Wireless Setup. Try one or more information, see "Configuring the optional internal wireless print server" in the...on your wireless access point (wireless router), you must reset the printer and computer SSID to your having been...
User's Guide
Page 112
... wireless access point (wireless router) to make sure it before you will be displayed. Some reasons your settings may have changed include your having been reset to factory defaults. If you do not know the IP address of the wireless access point (wireless router): 1 Do one of the following: • In Windows...
... wireless access point (wireless router) to make sure it before you will be displayed. Some reasons your settings may have changed include your having been reset to factory defaults. If you do not know the IP address of the wireless access point (wireless router): 1 Do one of the following: • In Windows...

User's Guide
Page 117
... printer port is selected. 1 Click Start ΠControl Panel ΠPrinters. 2 Right-click Lexmark XXXX, where XXXX is the model series number of your printer. 3 Click Properties ΠPorts....Press to print from step 4. Are you change the print size setting, change the print size selection to factory default settings 1 From the control panel, press or repeatedly until Setup appears. 2 Press . 3 Press ...number of the printer beside the serial number. 5 If USB is located at 8.5 x 11 in. Resetting an internal wireless print server to 4 x 6 in. (10 x 15 cm) on the PictBridge-...
... printer port is selected. 1 Click Start ΠControl Panel ΠPrinters. 2 Right-click Lexmark XXXX, where XXXX is the model series number of your printer. 3 Click Properties ΠPorts....Press to print from step 4. Are you change the print size setting, change the print size selection to factory default settings 1 From the control panel, press or repeatedly until Setup appears. 2 Press . 3 Press ...number of the printer beside the serial number. 5 If USB is located at 8.5 x 11 in. Resetting an internal wireless print server to 4 x 6 in. (10 x 15 cm) on the PictBridge-...
User's Guide
Page 169
... custom-size paper, loading 43 custom-size paper, printing 52 D default settings saving 28 shown with asterisk 28 using 28 defaults resetting printer software to factory defaults 56 resetting printer to factory defaults 57 Scan menu 88 defaults, change Photo Card Mode menu 58 Print Files Mode menu 48 descreening 70 Despeckle change setting...
... custom-size paper, loading 43 custom-size paper, printing 52 D default settings saving 28 shown with asterisk 28 using 28 defaults resetting printer software to factory defaults 56 resetting printer to factory defaults 57 Scan menu 88 defaults, change Photo Card Mode menu 58 Print Files Mode menu 48 descreening 70 Despeckle change setting...

User's Guide
Page 170
... attaching files 91 E-mail button 23 e-mail screen preferences changing 92 e-mailing an image 92 F factory default settings resetting internal wireless print server 117 resetting printer software 56 resetting printer to 57 faded colors 123 fax receiving automatically 93 Fax button 23 faxing using the software 93... loading 42 language changing 101 last page first 47 left cartridge error 149 left cartridge incorrect 149 left cartridge missing 149 Lexmark Productivity Studio creating and viewing slideshow 75 library preferences changing 66 loading banner paper 43 custom-size paper 43 documents on ...
... attaching files 91 E-mail button 23 e-mail screen preferences changing 92 e-mailing an image 92 F factory default settings resetting internal wireless print server 117 resetting printer software 56 resetting printer to 57 faded colors 123 fax receiving automatically 93 Fax button 23 faxing using the software 93... loading 42 language changing 101 last page first 47 left cartridge error 149 left cartridge incorrect 149 left cartridge missing 149 Lexmark Productivity Studio creating and viewing slideshow 75 library preferences changing 66 loading banner paper 43 custom-size paper 43 documents on ...

User's Guide
Page 173
... smudging, preventing in photos 121 software Productivity Studio 23 removing and reinstalling 105 Solution Center 25 software does not install 102 software settings, printer resetting to factory defaults 56 Solution Center understanding 25 Solution Center buttons Advanced 25 How To 25 Maintenance 25 Troubleshooting 25 understanding 25 solving printer communication problems 106...
... smudging, preventing in photos 121 software Productivity Studio 23 removing and reinstalling 105 Solution Center 25 software does not install 102 software settings, printer resetting to factory defaults 56 Solution Center understanding 25 Solution Center buttons Advanced 25 How To 25 Maintenance 25 Troubleshooting 25 understanding 25 solving printer communication problems 106...

User's Guide (Mac)
Page 44
...Scan Settings drawer. The effect created is set off against a light or dark background. Reset the Adjustment controls to that of ink on page 90 Cropping photos using the software You ...can readily view the changes on the image as it is similar to the factory default settings. Note: Selecting Auto-crop sensitivity automatically selects the area to activate or deactivate...and darkness of an image. 1 From the Finder desktop, double-click the Lexmark 4800 Series folder. 2 Double-click the Lexmark 4800 Series Center icon. 3 From the All-in the dialog are at the...
...Scan Settings drawer. The effect created is set off against a light or dark background. Reset the Adjustment controls to that of ink on page 90 Cropping photos using the software You ...can readily view the changes on the image as it is similar to the factory default settings. Note: Selecting Auto-crop sensitivity automatically selects the area to activate or deactivate...and darkness of an image. 1 From the Finder desktop, double-click the Lexmark 4800 Series folder. 2 Double-click the Lexmark 4800 Series Center icon. 3 From the All-in the dialog are at the...

User's Guide (Mac)
Page 116
..., however, that allows devices to these devices. Ping the wireless access point Ping the wireless access point (wireless router) to factory defaults. Some reasons your settings may be temporary interference from other devices such as microwaves or other network settings, or the wireless...see "Printing a network setup page" in the "Wireless troubleshooting" section. Try one or more information, see "Checking your having been reset to make sure it is no longer working . Make sure your wireless settings have changed , you experiment with different angles for optimal ...
..., however, that allows devices to these devices. Ping the wireless access point Ping the wireless access point (wireless router) to factory defaults. Some reasons your settings may be temporary interference from other devices such as microwaves or other network settings, or the wireless...see "Printing a network setup page" in the "Wireless troubleshooting" section. Try one or more information, see "Checking your having been reset to make sure it is no longer working . Make sure your wireless settings have changed , you experiment with different angles for optimal ...
User's Guide (Mac)
Page 120
... or other network devices before changing them on the network. 1 From the Finder desktop, double-click the Lexmark 4800 Series folder. 2 Double-click Wireless Setup Assistant. 3 Follow the instructions on . d From the Show... for the wireless access point (wireless router). • If you can use Network Diagnostics to factory defaults. Run the Wireless Setup Assistant again If your computer is connected to the wireless access point...settings have changed your having been reset to help resolve the problem. Green means the port is on the computer screen. Troubleshooting ...
... or other network devices before changing them on the network. 1 From the Finder desktop, double-click the Lexmark 4800 Series folder. 2 Double-click Wireless Setup Assistant. 3 Follow the instructions on . d From the Show... for the wireless access point (wireless router). • If you can use Network Diagnostics to factory defaults. Run the Wireless Setup Assistant again If your computer is connected to the wireless access point...settings have changed your having been reset to help resolve the problem. Green means the port is on the computer screen. Troubleshooting ...

User's Guide (Mac)
Page 122
... printer. Run the Wireless Setup Assistant 1 From the Finder desktop, double-click the Lexmark 4800 Series folder. 2 Double-click Wireless Setup Assistant. 3 Follow the instructions on ... Applications. This ensures that display the number of bytes received from the printer. Resetting an internal wireless print server to the wireless access point (wireless router). 4 If...wireless access point (wireless router) responds, you will see several lines that your computer is connected to factory default settings 1 From the control panel, press or repeatedly until Setup appears. 2 Press . 3 ...
... printer. Run the Wireless Setup Assistant 1 From the Finder desktop, double-click the Lexmark 4800 Series folder. 2 Double-click Wireless Setup Assistant. 3 Follow the instructions on ... Applications. This ensures that display the number of bytes received from the printer. Resetting an internal wireless print server to the wireless access point (wireless router). 4 If...wireless access point (wireless router) responds, you will see several lines that your computer is connected to factory default settings 1 From the control panel, press or repeatedly until Setup appears. 2 Press . 3 ...


